Home Blog Page 3

Markdown Italics: Instructions, Pitfalls, and Solutions

markdown italics

guide to markdown italicsThere are plenty of markup languages available. This page is written on HTML, a markup language. One of them is Markdown, a lightweight markup language that lets writers, developers, and website administrators to format text easily. In Markdown, one of the most used formatting features is italics. In Markdown italics is used to emphasize text, one of the reasons why HTML uses “em” in tag to indicate emphasis.

It is also used to highlight key points and improve the readability of the overall content. In this article, let us take you through the different ways to use Markdown italics, the best practices, its use cases in documentation, blogs, and programming.

How to Use Italics in Markdown

In Markdown, you can format text in italics using either of these two methods:

  • Asterisks: *
  • Underscores: _

Using this is very easy. Here is the syntax:

Let's put this text in italics: *unixmen is the best*

The output will be:

Let's put this text in italics: unixmen is the best

Let’s try the second option:

Now for the second option, the underscore: _unixmen rocks_

The output will be:

Now for the second option, the underscore: unixmen rocks

While both the methods produce the same output, the preference comes down to your personal preference or project guidelines.

Best Practices to Follow While Using Markdown Italics

Always Maintain Consistency

While asterisk and underscore work in the same way and produce the same result, it is always good to prefer the same option throughout your document. This helps you to maintain the readability and uniformity.

Avoid Nested Formatting Issues

Markdown allows multiple formatting options like bold and italics. Combining them can sometimes leads to issues. In case you need to combine both the bold and italics formatting, you can use either three asterisks or three underscores. Here are some examples:

This text will be in both ***bold and italics***

The output will be:

This text will be in both bold and italics.

Let us see the other option now.

This is another way to combine both formats: ___bold and italics___

The output will render as:

This is another way to combine both formats: bold and italics

Italics is for Emphasis and Not Decoration

As we explained in the introduction itself, italics formatting is for emphasizing a part of the text and it is not for decorative purposes. When you want to emphasize a piece of content like important words, technical jargons, or book titles, you can use italics.

Where Will You Need Markdown Italics

Here are some common areas where you will need Markdown italics:

Technical Documentation

In a lot of unix-based products, SaaS applications, and Git based projects, the documentation often uses Markdown for their README files, wiki documentation, and project descriptions. If you are working in any of the related fields, here is how you can use Markdown italics:

To learn more, refer to our _Shell Scripting guide_ series.

Blogs and Content Writing

Markdown is preferred by bloggers and content writers who use platforms like Jekyll, Hugo, and Ghost. This is because the markdown syntax is easier to use than HTML. Italics help in highlighting key points and enhance the readability score.

Remember: Italics is not for *decorative* purposes

Code and GitHub Repositories

Many CI/CD platforms like GitHub, Git, GitLab, and Bitbucket use Markdown for their README files and documentation.

The default option is _Yes_

Common Errors and How to Fix Them

Now that we know how to use Markdown italics and their applications, let us see some common errors and how to fix them.

Unclosed Syntax

Always remember to enclose the piece of content with asterisk or underscore. Using just one will throw errors. Here is an example:

The author has missed to add the *closing asterisk

Combining Asterisks and Underscores

While they both perform the same function, using a mix of both is not recommended.

Do not mix *asterisk and underscore_

Key Takeaways

Markdown italics is a simple but powerful formatting feature. It enhances the text presentation, readability quotient of blogs, documentation, and other coding projects. Follow the best practices listed in this article to avoid the common pitfalls. Use this guide to ensure your Markdown content is well-structured, properly formatted, and aesthetically pleasing.

An Interesting Read You Might Be Interested In

Open-source Markdown guide

How to Install Arch Linux | Unixmen

MBR vs GPT SSD: Which Partition Style is Better?

mbr vs gpt ssd differencesWhen you are setting up an SSD, one of the most important questions that you face is: which is the right partition style for me? There is a decision to make: MBR vs GPT SSD. MBR stands for Master Boot Record while GPT stands for GUID Partition table. This choice is important because the choice you make will determine the compatibility, performance, and future expansion options.

In this article, let us explain each partition style’s advantages, limitations, use cases and most importantly the answer to the battle: MBR vs GPT SSD.

Understanding the MBR and GPT Partition Styles

What is MBR (Master Boot Record)?

MBR is the forerunner here. It is the older partitioning scheme introduced in 1983. It stores the partition information and the bootloader in the first sector of the storage device.

Salient Features of MBR

The MBR style of partition supports 4 primary partitions: 3 primary and 1 extended partition. This works only in drives up to 2TB in capacity. This uses BIOS-based boot made. The chance of corruption is higher because this style of partition is less resilient since partition data is stored in a single location.

What is GPT (GUID Partition Table)?

GPT is the modern partitioning style, and it is part of the UEFI (Unified Extensible Firmware Interface) standard.

Salient Features of GPT

When compared to the 4 partitions in the MBR, the SSD style supports up to 128 partitions. And this partition limit is enforced only in Windows whereas in Linux, there is no upper limit of partitions. The GPT partition can work on drives larger than 2TB as well. This uses the UEFI based boot mode compared to the legacy BIOS mode used by MBR. This style stores multiple copies of partition data across the disk so the chance of corruption is minimized. This supports some advanced features like secure boot mode and also comes with better partition error detection.

MBR vs GPT SSD: Differences Explained

Here is a comparison in table format to make your decision making easier.

Description MBR GPT
Drive size Maximum 2TB Maximum 9.4ZB (Zeta byte)
Partition limit 4 primary partitions 128 primary partitions
Boot mode BIOS (legacy) UEFI
Data redundancy No Yes (multiple copies)
Compatibility Works with older versions Requires modern versions


When to Use MBR vs GPT SSD

When Should You Use MBR

Prefer MBR if:

  • You are using older operating systems that does not support UEFI
  • The SSD capacity is less than 2TB
  • You need legacy BIOS boot support

When Should You Use GPT

Your choice should be GPT if:

  • Your operating systems are modern like Windows 11 or Ubuntu latest LTS versions
  • Your SSD has capacity more than 2TB
  • You want better redundancy and data protection
  • You need an SSD type that supports more than 4 partitions

How can You Convert MBR to GPT SSD

Follow these instructions in the same sequence listed here.

How to Check Partition Type in Windows

  • Open the Disk Management window. To do this, open the Run terminal and execute “diskmgmt.msc”
  • Right-click your SSD and then select “Properties”.
  • Under the “Volumes” tab, check the “Partition Style” field. The value will be either MBR or GPT.

Convert MBR to GPT in Windows

  1. Get backups of all your data.
  2. Open “Disk Management” window.
  3. Right-click the SSD and then click “Delete Volume”. Double check if your backups are reliable since this step deletes all your data”.
  4. Right-click the SSD and then select “Convert to GPT Disk”.

If you are interested, learn more from Microsoft’s own documentation here.

How to Convert MBR to GPT using Command Prompt

Be very careful with this method as there are chances of data loss.

  1. Open Command Prompt as Administrator.
  2. Type “diskpart” and press the Enter key.
  3. Type “list disk” and press the Enter key to see the list of all available drives.
  4. Type “select disk ssdnumber” and press the Enter key (replace “ssdnumber” with the SSD drive’s number).
  5. Execute the “clean” command. This deletes all the partitions.
  6. Execute the command “convert gpt”.

Convert MBR to GPT using MBR2GPT

This method involves no threat of data loss, but we tried it only on Microsoft Windows 10 and 11 OS versions only.

  1. Open Command Prompt as Administrator.
  2. Run the command: mbr2gpt /validate /disk:ssdnumber (replace ssdnumber with the SSD Number).
  3. Once the validation passes, run the command: mbr2gpt /convert /disk:ssdnumber

Key Takeaways

For modern SSDs, the obvious winner in the MBR vs GPT SSD battle is the GPT. GPT is the better choice when it comes to improved partition support, data redundancy, compatibility with most UEFI based systems. That being said, we cannot sideline MBR. It is still useful for legacy systems running on BIOS environments and smaller than 2TB SSDs. So, the comparison of MBR vs GPT SSD comes down to your environment and requirements. Here is a summarized version of what we learnt today:

  • MBR is for older systems and BIOS based bootloaders
  • GPT is for modern SSD, large capacity drives, and UEFI bootloaders.

We hope we have covered all topics so that you can make an informed decision to optimize SSD performance and compatibility.

You Might Also Like

Secure Erase your SSD | Unixmen

JSON Checker: Validate and Debug JSON Files

json checker article

json checker tutorialWhat is JSON Checker?

It is a tool (most of the cases), or a script (the backend) used to validate and verify JSON (JavaScript object notation) data. JSON is mostly used to exchange data between APIs, applications, and databases. To know if the JSON file is properly formatted and adheres to the proper syntax, a JSON Checker becomes important. This ensures there are no errors in data processing.

In this article, let us learn how to check JSON, validate a JSON file, and debug JSON data using Python and online tools. Let’s get started.

What is JSON

JSON, a commonly used data format these days, is a lightweight data-interchange format. The reason it is popular among both beginner and veteran programmers is that it is human readable and also easy to parse. JSON contains elements like:

  • Key-value pairs
  • Supports
  • Arrays
  • Objects
  • Strings
  • Numbers
  • Booleans and
  • Number values

Example of a Valid JSON Data

Here is a properly structured JSON format:

{
"name": "Unix Man",
"age": 29,
"email": "hello@unixmen.com",
"is_active": true,
"skills": ["administration", "Scripting", "PowerBI"]
}

If you are familiar with other data formats, you will love JSON because of its ease to read.

Why Should You Use a JSON Checker?

Even if you are a seasoned programmer who has been working with JSON files for years now, a JSON checker can help you with:

  • Validating JSON syntax to ensure the structure is perfect
  • Finding an extra or missing comma, bracket, or quote
  • Highlighting incorrect data type or format issues
  • Pointing the deviation with API requirements

How Does a JSON Checker Work?

Here is how most of the online JSON Checkers work:

  1. Parse the uploaded JSON text.
  2. Check for syntax errors like missing or extra comma or brackets.
  3. Ensure objects and arrays are properly nested.
  4. Validate key-value pair based on expected data type.
  5. Suggest bug fixes and error messages.

Top Online JSON Checker Tools

If you are running short of time and want a JSON checker tool immediately, we recommend these top three online JSON checker tools:

Site24x7 JSON Formatter
JSONLint online JSON validator
JSONSchemaValidator online JSON schema validator

JSON Check with Command-Line

For programmers working with Linux or Unix environments, use these CLI tools.

The jq command-line processor:

jq . FileName.json

Perl-based JSON pretty printer:

cat FileName.json | json_pp

Text Editor and IDE Plugins

There are a few IDEs that provide built-in JSON validation. Here are some of them:

  • VS Code: This comes with JSON linting and auto-formatting
  • Sublime Text: Supports JSON validation with the help of extensions
  • JetBrains IntelliJ IDEA: Real-time JSON Syntax checking.

Debugging Common JSON Errors

Here are some of the incorrect JSON formats and their correct versions:

Incorrect:

{ "name": "Alice", "age": 25, }
{ name: "Bob", "age": 30 }
{ "data": [1, 2, 3 }

The errors are missing or extra commas, incorrect quotation marks, and unmatched brackets. Here is the corrected version:

{ "name": "Alice", "age": 25 }
{ "name": "Bob", "age": 30 }
{ "data": [1, 2, 3] }

Key Takeaways

A JSON Checker makes sure your JSON data is valid, formatted correctly, and error free. With Python, online free JSON validators, and JSON Schemas, you can efficiently pin-point errors in JSON files and validate them. Using advanced techniques like handling large JSON files and compressing JSON, your JSON Checker strategy will be unbeatable.

To Learn More about Files and Their Types


Why Every Linux/Unix User Should Try Creative Fabrica’s Font Generator

font generatorTypography isn’t just for designers—it plays a vital role in programming, terminal applications, system interfaces, and documentation readability. Whether you’re customizing your Linux desktop, developing a CLI tool, or enhancing your terminal experience, the right font can make all the difference.

While pre-installed system fonts work, they don’t always provide the best readability, customization, or aesthetic appeal for specific workflows. That’s where Creative Fabrica’s Font Generator comes in—an AI-powered tool that allows Linux and Unix users to generate fully customized fonts for coding, UI design, and system customization. Instead of searching for a typeface that fits your workflow, you can create your own, ensuring optimal clarity, efficiency, and personal style. Check more information about it here.

https://prnt.sc/-xM4p3ZDo0ts

What Is Creative Fabrica’s Font Generator?

Creative Fabrica’s Font Generator is an AI-powered web tool designed for fast, easy font creation. Unlike complex font-editing software like FontForge, this tool allows users to quickly generate, refine, and download fonts in TTF format, ready to install on Linux-based systems.

Why Linux/Unix Users Will Find It Useful:

  • Developers can create optimized coding fonts for their terminal or IDE.
  • Sysadmins can customize terminal fonts for better visibility in logs and shell scripts.
  • Open-source enthusiasts can design unique typefaces for their Linux desktop themes.
  • Security professionals can craft fonts to improve readability in cybersecurity tools.
  • Technical writers can enhance their documentation with distinct fonts for CLI commands.

Since the tool is web-based, it works seamlessly on Linux without requiring additional software installation. Simply use a browser, generate your font, and install it on your system.

Why It’s a Game-Changer for Linux Systems

Linux users often prefer customization and control, and fonts are no exception. While existing fonts like Hack, Fira Code, and JetBrains Mono work well for coding, a fully customized font gives you an edge in readability and workflow efficiency.

Optimized for Coding & Terminal Use

A well-designed monospaced font enhances code clarity and reduces eye strain. With Creative Fabrica’s AI-powered glyph adjustments, users can:

  • Ensure clear character distinction between symbols like O (capital O) and 0 (zero).
  • Adjust font weight for better contrast in terminal applications.
  • Customize spacing for more readable shell outputs.

Faster Prototyping for UI/UX & System Customization

Linux users who design window managers, tiling desktops, or lightweight interfaces can generate fonts that:

  • Blend perfectly with minimalist or high-contrast themes.
  • Offer pixel-perfect legibility in small sizes for taskbars, notifications, and HUDs.
  • Maintain uniform letter proportions for a clean and structured interface.

AI-Enhanced Font Consistency

Traditional font customization in Linux requires manual tweaking through tools like FontForge—a time-consuming process. With Creative Fabrica’s AI-driven approach, each glyph maintains:

  • Balanced stroke thickness for smooth text rendering.
  • Uniform proportions to match monospaced and proportional layouts.
  • Consistent spacing and kerning, improving legibility in config files, scripts, and logs.

The Growing Demand for Custom Fonts

Fonts aren’t just for aesthetics—they directly impact productivity. Whether using the command line, writing scripts, or debugging, a well-designed font reduces strain and increases efficiency.

Where Custom Fonts Are Essential

  • Terminal & Shell Interfaces – Improve clarity when reading logs or executing commands.
  • Code Editors (Vim, Emacs, VS Code, JetBrains) – Enhance syntax visibility for better programming focus.
  • Linux Window Managers & UI Customization – Create a personalized aesthetic for your i3, Sway, KDE, or GNOME setup.
  • CLI-Based Dashboards & Monitoring Tools – Ensure easy-to-read stats in htop, neofetch, and system monitors.

For users who prefer lightweight, bloat-free solutions, Creative Fabrica’s Font Generator is ideal—it requires no additional packages and works entirely in the browser.

How the Font Generator Enhances the Experience

  1. Creating Readable Coding Fonts for the Terminal

Whether writing shell scripts, managing logs, or working in a headless server environment, a clear, well-spaced font improves the overall experience. With the Font Generator, you can:

  • Increase glyph distinction between brackets, pipes, and special characters.
  • Optimize letter spacing for log readability.
  • Reduce eye strain with balanced contrast settings.

2. Designing Custom UI Fonts for Desktop Environments

Many Linux users customize their DE with polybar, rofi, dmenu, or conky. Instead of relying on generic system fonts, you can:

  • Generate fonts that match your desktop theme.
  • Create minimalist or bold fonts for notifications and overlays.
  • Optimize spacing for compact UI elements.

3. Enhancing Documentation & Markdown Readability

For Linux users writing technical guides, man pages, or documentation, typography matters. The Font Generator lets you create fonts that improve:

  • Code block legibility in Markdown and LaTeX.
  • Command-line formatting in terminal-based text editors.
  • Blog readability for tech-focused content.

Why Linux Users Should Choose This Tool Over Pre-Made Fonts

Most Linux users spend time tweaking their system to perfection, yet fonts are often overlooked. Instead of settling for pre-made fonts that don’t quite fit your needs, Creative Fabrica’s Font Generator allows you to:

  • Build exactly what you need instead of modifying existing fonts.
  • Avoid licensing issues—you own the fonts you generate.
  • Customize glyphs on the fly to match your UI, terminal, or workflow.

For those who value automation, efficiency, and flexibility, an AI-driven font generator is the ultimate typography tool.

How to Get Started with Creative Fabrica’s Font Generator

  1. Visit the Font Generator using any Linux-compatible browser.
  2. Enter your text to preview different styles.
  3. Adjust or regenerate glyphs for precise tuning.
  4. Preview in real time using different sizes and background colors.
  5. Export in TTF format and install it using:
    sudo mv customfont.ttf /usr/share/fonts/
    fc-cache -fv
  6. Use your font in the terminal, code editor, or desktop environment.

Conclusion

For Linux/Unix users who value customization, performance, and efficiency, Creative Fabrica’s Font Generator is an essential tool. Whether you need a custom programming font, an optimized UI typeface, or a unique style for your Linux desktop, AI-driven font generation allows you to create, refine, and install the perfect typeface in just a few clicks.

The Essential Guide to CNAPP on Linux for Cloud Security

Essential Guide to CNAPPSource

You probably don’t need anyone to tell you that securing cloud environments can be complex, especially when dealing with diverse architectures that include VMs, containers, serverless functions, and bare metal servers. The challenge becomes even more significant as organizations adopt cloud-native technologies like Docker containers and Kubernetes to build and run applications.

Many security tools address various aspects of cloud-native security, but issues can fall through the cracks between siloed solutions. This leaves dangerous gaps that attackers actively exploit. Just ask any of the high-profile companies that have had their Linux containers popped!

Cloud-native application protection platforms (CNAPP) aim to solve this problem by providing an integrated set of capabilities for securing Linux and cloud environments. CNAPP consolidates visibility, threat detection, compliance assurance, and more into a single management plane. This unified approach dramatically simplifies Linux security in the cloud.

With Linux serving as the foundation for over 90% of the public cloud workload, getting Linux security right is mandatory. This post focuses on how a CNAPP helps you enhance and streamline security for your Linux workloads, whether they run directly on VMs or inside containers orchestrated by Kubernetes.

Core CNAPP Capabilities for Linux

A CNAPP tailored to Linux delivers a set of security superpowers to help you protect dynamic cloud environments. Here are some of the most valuable capabilities:

Unified Visibility

Obtaining visibility into security issues across distributed Linux environments is difficult when using multiple, disconnected tools. This leaves observational gaps attackers exploit.

A CNAPP provides a “central view” for continuously monitoring the security state of your entire Linux footprint – whether those workloads run directly on VMs, inside containers, or within serverless functions.

Think of this centralized visibility capability as a giant security camera monitoring nerve center for your Linux world, ingesting and correlating telemetry feeds from diverse hosting platforms, workloads, and ancillary solutions.

This unified perspective, presented through integrated dashboards, enables security teams to quickly identify misconfigurations, detect threats, spot vulnerable software, assess compliance risks, and respond to incidents no matter where they originate within the Linux infrastructure.

The complete, correlated picture eliminates the need for manually piecing together data from siloed consoles and workflows. Threats that individual tools would miss now become clearly visible to the all-seeing eye of the CNAPP.

Automated Misconfiguration Detection

Human error is the culprit behind many cloud security incidents. A CNAPP helps catch oversights by automatically surfacing Linux configurations that violate best practices or introduce risk, such as:

  • Overly permissive SSH daemon settings
  • Unprotected kernel parameter exposures
  • Insecure container runtime configurations

The system flags these issues for remediation by comparing observed settings against benchmarks like CIS Linux. This prevents attackers from exploiting common Linux footholds.

To make this manageable, you’ll want to risk-rank the findings based on severity and fix the risky ones first. An effective CNAPP will provide context and prioritization guidance here.

Runtime Threat Protection

Even tightly configured Linux systems can come under attack at runtime. A CNAPP adds behavioral monitoring and analytics to spot anomalous activity that signals malware, insider threats, or focused attacker activity across Linux workloads.

Capabilities like machine learning-powered anomaly detection, exploit prevention, and event correlation give your Linux servers, containers, and functions a 24/7 security detail monitoring for signs of foul play.

Integration with endpoint detection tools like Falco provides additional visibility into Linux process activity and kernel changes. The more telemetry fed into the CNAPP, the earlier threats can be detected.

Some CNAPP solutions take an agent-based approach to runtime security, installing software agents onto Linux hosts to monitor events. Others are agentless, analyzing activity purely from exported telemetry. The right method depends on your environment – agents provide richer data but consume host resources.

Vulnerability Management

CNAPP also serves as a command center for finding and patching vulnerabilities across Linux infrastructure, containers, and code dependencies.

Running frequent vulnerability scans against Linux systems coupled with image scanning for container registries helps you continually identify software packages and OS components in need of updates.

The CNAPP becomes a single pane of glass for prioritizing vulnerabilities based on exploitability and blast radius, then orchestrating the patching process across Linux machines for risk reduction. This prevents neglected vulnerabilities that are secretly stockpiling risk throughout your Linux fleet.

Access Controls & Least Privilege

Overly permissive account permissions open severe exposure on Linux systems. CNAPP can dynamically map Linux users to roles and enforce fine-grained access controls aligning with least privilege principles.

Maintaining rigidity around which users, services, containers, and functions can access what resources minimizes lateral movement after a breach.

Integrating these permissions into the CNAPP provides a unified control point for both on-instance and cloud resource access for organizations using cloud IAM services like AWS IAM or GCP IAM.

Creating customized security policies within your CNAPP that are used to your particular Linux environment and compliance requirements provides precision access controls.

Linux-Specific CNAPP Use Case: Securing Containerized Applications

Let’s move from abstract capabilities to a concrete example: using a CNAPP to secure containerized applications running on Linux.

Kubernetes has become the orchestrator of choice for running containerized workloads. Securing the components in this ecosystem remains critically important and highly challenging.

A CNAPP helps by providing continuous visibility and security automation across the entire pipeline – from container image creation to runtime protection.

Integrating image scanning into CI/CD pipelines ensures every container image that gets built contains no known vulnerabilities or malware before it ever launches into your Kubernetes clusters running on Linux hosts.

This prevents compromised images from being deployed onto hosts that are nearly impossible to detect once running among thousands of other containers.

At runtime, the CNAPP employs behavioral analytics to baseline regular container activity on Linux hosts and detect attacks attempting to infiltrate containers or abuse Kubernetes APIs for malicious ends.

Detecting and automatically blocking anomalous process executions, network communications, mounting sensitive volumes, lateral pod movements, and excessive resource utilization helps thwart external and insider-initiated attacks.

You can also define network segmentation policies and apply them across Linux container hosts to limit the lateral blast radius. This contains malicious containers.

Final Word

Like a giant octopus attempting to strangle your entire Linux environment, the current threat landscape necessitates a unified security approach. CNAPP delivers this through continuous visibility, baked-in compliance, centralized policy controls, and attack disruption across your cloud-native Linux footprint.

Assess where Linux shows up across your server, container, and function fleets, along with your current security tooling in these areas. Research CNAPP solutions that can integrate into existing workflows and provide consolidation.

Start small by piloting capabilities on a limited Linux environment, like focusing a CNAPP on container vulnerability management or runtime threat detection for a portion of your Kubernetes footprint. Once proven, scale it out from there!

Game Development on Linux

If you’ve ever thought about making games but assumed Linux wasn’t the right platform for it, think again! While Windows and macOS might dominate the game development scene, Linux has quietly built up an impressive toolkit for developers. Whether you’re an indie creator looking for open-source flexibility or a studio considering Linux support, the ecosystem has come a long way. From powerful game engines to robust development tools, Linux offers everything you need to build and test games. In this article, we’ll break down why Linux is worth considering, the best tools available, and how you can get started.
Game Development

Why Choose Linux for Game Development?

If you’re wondering why anyone would develop games on Linux instead of Windows or macOS, the answer is simple: freedom, flexibility, and performance.
First off, Linux is open-source, which means you aren’t locked into a specific ecosystem. You can customize your entire development environment, from the desktop interface to the compiler settings. No forced updates, no bloated background processes eating up resources — just an efficient workspace built exactly how you like it.
Then there’s the stability and performance factor. Unlike Windows, which can sometimes feel sluggish with unnecessary background tasks, Linux runs lean. This is especially useful when you’re working with heavy game engines or compiling large projects. It’s why so many servers and supercomputers use Linux — it just works.
Another big plus? Cost savings. Everything you need — IDEs, compilers, game engines, and creative tools — can be found for free. Instead of shelling out for expensive software licenses, you can reinvest that money into your project.
And let’s not forget about growing industry support. Unity, Unreal Engine, and Godot all support Linux, and with platforms like Steam Deck running Linux-based SteamOS, game development for Linux is more relevant than ever. Sure, it’s not as mainstream as Windows, but if you’re looking for a powerful, flexible, and budget-friendly development setup, Linux is definitely worth considering.

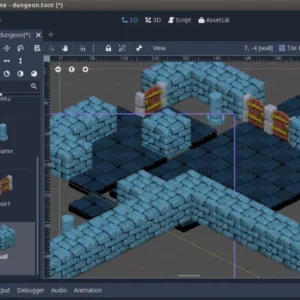
Best Game Engines for Linux

If you’re developing games on Linux, you’ll be happy to know that several powerful game engines fully support it. Here are some of the best options:
1. Unity – The Industry Standard
Unity is one of the most popular game engines out there, and yes, it supports Linux. The Unity Editor runs on Linux, though it’s still considered in “preview” mode. However, many game development companies like RetroStyle Games successfully use it for 2D and 3D game development. Plus, you can build games for multiple platforms, including Windows, macOS, mobile, and even consoles — all from Linux.
2. Unreal Engine –  AAA-Quality Development
If you’re aiming for high-end graphics, Unreal Engine is a great choice. It officially supports Linux, and while the Linux version of the editor might not be as polished as the Windows one, it still gets the job done. Unreal’s powerful rendering and blueprint system make it a top pick for ambitious projects.
3. Godot – The Open-Source Powerhouse
If you love open-source software, Godot is a dream come true. It’s completely free, lightweight, and optimized for Linux. The engine supports both 2D and 3D game development and has its scripting language (GDScript) that’s easy to learn. Plus, since Godot itself is open-source, you can tweak the engine however you like.
4. Other Notable Mentions
Defold – A lightweight engine with strong 2D capabilities.
Love2D – Perfect for simple 2D games using Lua scripting.
Stride – A promising C#-based open-source engine.
C#-based open-source engine

Essential Tools for Linux Game Development

Once you’ve picked your game engine, you’ll need the right tools to bring your game to life. Luckily, Linux has everything you need, from coding and design to audio and version control.
1. Code Editors & IDEs
If you’re writing code, you need a solid editor. VS Code is a favorite among game developers, with great support for C#, Python, and other languages. If you prefer something more powerful, JetBrains Rider is a top-tier choice for Unity developers. For those who like minimalism, Vim or Neovim can be customized to perfection.
2. Graphics & Animation Tools
Linux has some fantastic tools for art and animation. Blender is the go-to for 3D modeling and animation, while Krita and GIMP are excellent for 2D art and textures. If you’re working with pixel art, Aseprite (open-source version) is a fantastic option.
3. Audio Tools
For sound effects and music, LMMS (like FL Studio but free) and Ardour (a powerful DAW) are solid choices. If you just need basic sound editing, Audacity is a lightweight but effective tool.
4. Version Control
You don’t want to lose hours of work due to a crash. That’s where Git comes in. You can use GitHub, GitLab, or Bitbucket to store your project, collaborate with teammates, and roll back to previous versions when needed.
With these tools, you’ll have everything you need to code, design, animate, and refine your game — all within Linux. And the best part? Most of them are free and open-source!

Setting Up a Linux Development Environment

Getting your Linux system ready for game development isn’t as complicated as it sounds. In fact, once you’ve set it up, you’ll have a lightweight, stable, and efficient workspace that’s perfect for coding, designing, and testing your game.
First step: Pick the Right Linux Distro: Not all Linux distributions (distros) are built the same, so choosing the right one can save you a lot of headaches. If you want ease of use, go with Ubuntu or Pop!_OS — both have great driver support and a massive community for troubleshooting. If you prefer cutting-edge software, Manjaro or Fedora are solid picks.
Second step: Install Essential Libraries & Dependencies: Depending on your game engine, you may need to install extra libraries. For example, if you’re using Unity, you’ll want Mono and .NET SDK. Unreal Engine requires Clang and some development packages. Most of these can be installed easily via the package manager:
sudo apt install build-essential git cmake
For Arch-based distros, you’d use:
sudo pacman -S base-devel git cmake
Third step: Set Up Your Game Engine: Most popular engines work on Linux, but the setup varies:
Unity: Download the Unity Hub (Linux version) and install the editor.
Unreal Engine: Requires compiling from source via GitHub.
Godot: Just download the binary, and you’re ready to go.
Fourth step: Configure Development Tools:
Install VS Code or JetBrains Rider for coding.
Get Blender, Krita, or GIMP for custom 3D game art solutions.
Set up Git for version control.
Configure Development Tools

Building & Testing Games on Linux

Once you’ve got your game up and running in the engine, it’s time to build and test it. The good news? Linux makes this process smooth — especially if you’re targeting multiple platforms.

1. Compiling Your Game

Most game engines handle the build process automatically, but if you're using a custom engine or working with compiled languages like C++, you’ll need a good build system. CMake and Make are commonly used for managing builds, while GCC and Clang are solid compilers for performance-heavy games. To compile, you’d typically run:
cmake .
make
./yourgame
If you're working with Unity or Unreal, the built-in export tools will package your game for Linux, Windows, and more.

2. Performance Optimization

Linux is great for debugging because it doesn’t have as many background processes eating up resources. To monitor performance, you can use:
htop – For checking CPU and memory usage.
glxinfo | grep "OpenGL version" – To verify your GPU drivers.
Vulkan tools – If your game uses Vulkan for rendering.

3. Testing Across Different Hardware & Distros

Not all Linux systems are the same, so it’s a good idea to test your game on multiple distros. Tools like Flatpak and AppImage help create portable builds that work across different Linux versions. If you're planning to distribute on Steam its Proton compatibility layer can help test how well your game runs.

Challenges & Limitations

While Linux is a great platform for game development, it isn’t without its challenges. If you’re coming from Windows or macOS, you might run into a few roadblocks — but nothing that can’t be worked around.
Some industry-standard tools, like Adobe Photoshop, Autodesk Maya, and certain middleware, don’t have native Linux versions. Luckily, there are solid alternatives like GIMP, Krita, and Blender, but if you absolutely need a Windows-only tool, Wine or a virtual machine might be your best bet.
While Linux has come a long way with hardware support, GPU drivers can still be tricky. NVIDIA’s proprietary drivers work well but sometimes require extra setup, while AMD’s open-source drivers are generally more stable but may lag in some optimizations. If you’re using Vulkan, make sure your drivers are up to date for the best performance.
Linux gaming has grown, especially with Steam Deck and Proton, but it’s still a niche market. If you’re planning to sell a game, Windows and consoles should be your priority — Linux can be a nice bonus, but not the main target unless you’re making something for the open-source community.
Despite these challenges, many developers like RetroStyle Games successfully create games on Linux. The key is finding the right workflow and tools that work for you. And with the growing support from game engines and platforms, Linux game development is only getting better!

Linux game developmentConclusion

So, is Linux a good choice for game development? Absolutely — but with some caveats. If you value customization, performance, and open-source tools, Linux gives you everything you need to build amazing games. Plus, with engines like Unity, Unreal, and Godot supporting Linux, developing on this platform is more viable than ever.
That said, it isn’t all smooth sailing. You might have to tweak drivers, find alternatives to proprietary software, and troubleshoot compatibility issues. But if you’re willing to put in the effort, Linux rewards you with a fast, stable, and distraction-free development environment.
At the end of the day, whether Linux is right for you depends on your workflow and project needs. If you’re curious, why not set up a test environment and give it a shot? You might be surprised at how much you like it!

Content Marketing for Linux/Unix Businesses: Why Outsourcing Makes Sense

Content Marketing for Linux/UnixIn today’s competitive digital landscape, small businesses need to leverage every tool and strategy available to stay relevant and grow. One such strategy is content marketing, which has proven to be an effective way to reach, engage, and convert potential customers. However, for many small business owners, managing content creation and distribution can be time-consuming and resource-intensive. This is where outsourcing content marketing services comes into play. Let’s explore why this approach is not only smart but also essential for the long-term success of small businesses.

1. Expertise and Professional Quality

Outsourcing content marketing services allows small businesses to tap into the expertise of professionals who specialize in content creation and marketing strategies. These experts are equipped with the skills, tools, and experience necessary to craft high-quality content that resonates with target audiences. Whether it’s blog posts, social media updates, or email newsletters, professional content marketers understand how to write compelling copy that engages readers and drives results. For Linux/Unix focused content, this might include experts who understand shell scripting for automation or using tools like grep for SEO analysis.

In addition, they are well-versed in SEO best practices, which means they can optimize content to rank higher in search engines, ultimately driving more traffic to your website. This level of expertise is difficult to replicate in-house, especially for small businesses with limited resources.

2. Cost Efficiency

For many small businesses, hiring a full-time in-house marketing team may not be financially feasible. Content creation involves a range of tasks, from writing and editing to publishing and promoting. This can be a significant investment in terms of both time and money. By outsourcing content marketing services, small businesses can access the same level of expertise without the overhead costs associated with hiring additional employees. This can be especially true in the Linux/Unix world, where open-source tools can significantly reduce software costs.

Outsourcing allows businesses to pay only for the services they need, whether it’s a one-off blog post or an ongoing content strategy. This flexibility can help businesses manage their budgets effectively while still benefiting from high-quality content marketing efforts.

3. Focus on Core Business Functions

Outsourcing content marketing services frees up time for small business owners and their teams to focus on core business functions. Small businesses often operate with limited personnel, and each member of the team is usually responsible for multiple tasks. When content marketing is outsourced, the business can concentrate on what it does best—whether that’s customer service, product development, or sales—without getting bogged down in the complexities of content creation. For example, a Linux system administrator can focus on server maintenance instead of writing blog posts.

This improved focus on core operations can lead to better productivity and business growth, while the outsourced content team handles the strategy and execution of the marketing efforts.

4. Consistency and Reliability

One of the key challenges of content marketing is maintaining consistency. Inconsistent content delivery can confuse your audience and hurt your brand’s credibility. Outsourcing content marketing services ensures that content is consistently produced, published, and promoted according to a set schedule. Whether it’s weekly blog posts or daily social media updates, a professional team will adhere to a content calendar, ensuring that your business maintains a strong online presence. This can be further enhanced by using automation scripts (common in Linux/Unix environments) to schedule and distribute content.

Consistency is crucial for building a loyal audience, and a reliable content marketing team will ensure that your business stays top-of-mind for potential customers.

5. Access to Advanced Tools and Technologies

Effective content marketing requires the use of various tools and technologies, from SEO and analytics platforms to content management systems and social media schedulers. Small businesses may not have the budget to invest in these tools or the time to learn how to use them effectively. Outsourcing content marketing services allows businesses to benefit from these advanced tools without having to make a significant investment. This could include access to specialized Linux-based SEO tools or experience with open-source CMS platforms like Drupal or WordPress.

Professional content marketers have access to premium tools that can help with keyword research, content optimization, performance tracking, and more. These tools provide valuable insights that can inform future content strategies and improve the overall effectiveness of your marketing efforts.

6. Scalability

As small businesses grow, their content marketing needs will evolve. Outsourcing content marketing services provides the flexibility to scale efforts as necessary. Whether you’re launching a new product, expanding into new markets, or simply need more content to engage your growing audience, a content marketing agency can quickly adjust to your changing needs. This is especially relevant for Linux-based businesses that might experience rapid growth due to the open-source nature of their offerings.

This scalability ensures that small businesses can maintain an effective content marketing strategy throughout their growth journey, without the need to continually hire or train new employees.

Conclusion

Outsourcing content marketing services is a smart move for small businesses looking to improve their online presence, engage with their target audience, and drive growth. By leveraging the expertise, cost efficiency, and scalability that outsourcing offers, small businesses can focus on what matters most—running their business—while leaving the content marketing to the professionals. Especially for businesses in the Linux/Unix ecosystem, this allows them to concentrate on technical development while expert marketers reach their specific audience. In a digital world where content is king, investing in high-quality content marketing services can make all the difference.

White-Label Link Building for Linux-Based Websites: Saving Time and Resources

White-Label Link Building for Linux-Based WebsitesAs a digital marketing agency, your focus is to provide high-quality services to your clients while ensuring that operations run smoothly. However, managing the various components of SEO, such as link-building, can be time-consuming and resource-draining. This is where white-label link-building services come into play. By outsourcing your link-building efforts, you can save time and resources, allowing your agency to focus on more strategic tasks that directly contribute to your clients’ success. Below, we’ll explore how these services can benefit your agency in terms of time and resource management.

  1. Focus on Core Competencies

    When you choose to outsource your link-building efforts to a white-label service, it allows your agency to focus on your core competencies. As an agency, you may excel in content strategy, social media marketing, or paid advertising. However, link-building requires specialized knowledge, experience, and resources. A white-label link-building service can handle this aspect of SEO for you, freeing up time for your team to focus on what they do best. This way, you can maintain a high level of performance in other areas without spreading your team too thin.

  2. Eliminate the Need for Specialized Staff

    Building a successful link-building strategy requires expertise, which may not be available within your existing team. Hiring specialized staff to manage outreach campaigns, content creation, and link placements can be expensive and time-consuming. However, white-label link-building services already have the necessary expertise and resources in place. You won’t need to hire or train new employees to handle this aspect of SEO. The service provider’s team can execute campaigns quickly and effectively, allowing your agency to scale without expanding its internal workforce.

  3. Access to Established Relationships and Networks

    Link-building is not just about placing links on any website; it’s about building relationships with authoritative websites in your client’s industry, especially within relevant open-source projects and Linux communities. This process takes time to establish and requires continuous effort. A white-label link-building service typically has established relationships with high-authority websites, bloggers, and influencers across various industries. By leveraging these networks, they can secure quality backlinks faster and more efficiently than your agency could on its own. This reduces the time spent on outreach and relationship-building, ensuring that your client’s SEO efforts are moving forward without delays. For Linux-focused sites, this can include participation in relevant forums and contributing to open-source projects.

  4. Efficient Campaign Execution

    White-label link-building services are designed to execute campaigns efficiently. These agencies have streamlined processes and advanced tools that allow them to scale campaigns while maintaining quality. They can manage multiple campaigns at once, ensuring that your clients’ link-building needs are met in a timely manner. By outsourcing to a provider with a proven workflow, you can avoid the inefficiencies associated with trying to build an in-house link-building team. This leads to faster execution, better results, and more satisfied clients.

  5. Cost-Effectiveness

    Managing link-building in-house can be costly. Aside from the salaries and benefits of hiring staff, you’ll also need to invest in tools, software, and outreach efforts. White-label link-building services, on the other hand, offer more cost-effective solutions. These providers typically offer packages that include all necessary tools, such as backlink analysis software, outreach platforms, and reporting tools, which can be expensive to purchase and maintain on your own. By outsourcing, you save money on infrastructure and overhead costs, all while getting access to the best tools available.

  6. Reduce Time Spent on Reporting and Analysis

    Effective link-building campaigns require consistent monitoring, analysis, and reporting. Generating reports, tracking backlink quality, and assessing the impact of links on search rankings can be time-consuming tasks. When you outsource this responsibility to a white-label link-building service, they will handle reporting on your behalf. The provider will deliver customized reports that highlight key metrics like the number of backlinks acquired, domain authority, traffic increases, and overall SEO performance. This allows you to deliver the necessary information to your clients while saving time on report generation and analysis. For Linux-based servers, this can also involve analyzing server logs for SEO-related issues.

  7. Scalability and Flexibility

    As your agency grows, so does the demand for SEO services. One of the challenges agencies face is scaling their link-building efforts to accommodate more clients or larger campaigns. A white-label link-building service offers scalability and flexibility, meaning that as your client base grows, the provider can handle an increased volume of link-building efforts without compromising on quality. Whether you’re managing a single campaign or hundreds of clients, a reliable white-label service can adjust to your needs and ensure that every client receives the attention their SEO efforts deserve.

  8. Mitigate Risks Associated with Link-Building

    Link-building, if not done properly, can result in penalties from search engines, harming your client’s SEO performance. Managing link-building campaigns in-house without proper knowledge of SEO best practices can lead to mistakes, such as acquiring low-quality or irrelevant backlinks. White-label link-building services are experts in following search engine guidelines and using ethical link-building practices. By outsourcing, you reduce the risk of penalties, ensuring that your clients’ SEO efforts are safe and aligned with best practices.

  9. Stay Up-to-Date with SEO Trends

SEO is an ever-evolving field, and staying up-to-date with the latest trends and algorithm updates can be a full-time job. White-label link-building services are dedicated to staying current with industry changes. By outsourcing your link-building efforts, you can be sure that the provider is implementing the latest techniques and best practices in their campaigns. This ensures that your client’s link-building strategies are always aligned with search engine updates, maximizing their chances of success. This includes familiarity with SEO tools that run on Linux, such as command-line tools and open-source crawlers, and understanding the nuances of optimizing websites hosted on Linux servers.

Conclusion

White-label link-building services offer significant time and resource savings for digital marketing agencies. By outsourcing link-building efforts, your agency can focus on core business areas, eliminate the need for specialized in-house staff, and streamline campaign execution. The cost-effectiveness and scalability of these services also make them an attractive option for agencies looking to grow their SEO offerings without overextending their resources. Especially for clients using Linux-based infrastructure, leveraging a white-label service with expertise in this area can be a significant advantage. With a trusted white-label link-building partner, you can deliver high-quality backlinks to your clients, improve their SEO rankings, and drive long-term success.

How to Update Kali Linux?

Update Kali LinuxKali Linux is a Debian-based, open-source operating system that’s ideal for penetration testing, reverse engineering, security auditing, and computer forensics. It’s a rolling release model, as multiple updates of the OS are available in a year, offering you access to a pool of advanced tools that keep your software secure. But how to update Kali Linux to the latest version to avoid risks and compatibility issues? 

To help you in this regard, we are going to discuss the step-by-step process of updating Kali Linux and its benefits. Let’s begin! 

How to Update Kali Linux: Step-by-Step Guide 

Being hired to build smart solutions, a lot of custom IoT development professionals use Kali Linux for advanced penetration testing and even reverse engineering. However, it is important to keep it updated to avoid vulnerabilities. 

Before starting with how to update the Kali Linux process, you must have a stable internet connection and administrative rights. 

Here are the steps you can follow for this: 

Step 1: Check Resources List File 

The Linux Kali package manager fetches updates from the repository, so you first need to make sure that the system’s repository list is properly configured and aligned. Here’s how to check it: 

  1. Open the terminal and run the following command to access the resources list file:

http://kali.download/kali

  1. The output will display this list if your system is using the Kali Linux rolling release repository:

deb http://kali.download/kali kali-rolling main contrib non-free non-free-firmware

  1. If the file is empty or has incorrect entries, you can edit it using editors like Nano or vim. 
  2. Once you are sure that the list has only official and correct Kali Linux entries, save and close the editor. 

Step 2: Update the Package Information 

The next step is to update the package information using the repository list so the Kali Linux system knows about all the latest versions and updates available. The steps for that are:

  1. In the terminal, run this given command:

sudo apt update

  1. This command updates the system’s package index to the latest repository information. You also see a list of packages being checked and their status (available for upgrade or not).

Note: It only extracts the list of new packages and doesn’t install or update them! 

Step 3: Do a System Upgrade

In how to update Kali Linux, the third step involves performing a system upgrade to install the latest versions and updates. 

  1. Run the apt upgrade command to update all the installed packages to their latest version. However, unlike a full system upgrade, this command doesn’t remove or install any package from the system. 
  2. You can then use the apt full-upgrade that upgrades all the packages and even add or remove some to keep your system running smoothly.
  3. The apt dist-upgrade is given when you want to handle package dependency changes, remove obsolete packages, and add new ones. Review all the changes that the commands have made and confirm the upgrade. 

Step 4: Get Rid of Unnecessary Packages

Over time, useless files can accumulate in your system, taking up valuable disc space. You should get rid of them to declutter the system and also enhance the overall storage. Here are the steps for that:

  1. To remove the leftover packages, run the command:

sudo apt autoremove -y

  1. Cached files also take up a lot of disc space, and you can remove them via the following command: 

sudo apt autoclean

Step 5: Double-Check the Update 

Once you are all done installing the latest software, you should double-check to see if the system is actually running the upgrade. For this, give the command: 

cat /etc/os-release

You can then see operating system information like version details and release date. 

Step 6: It’s Time to Reboot the System 

Well, this step is optional, but we suggest rebooting Kali Linux to ensure that the system is running the latest version and that all changes are fully applied. You can then perform tasks like security testing of custom IoT development processes. The command for this is: 

sudo reboot

Why Update Kali Linux to the Latest Version? 

Software development and deployment trends are changing quickly. Now that you know how to update and upgrade Kali Linux, you must be wondering why you should update the system and what its impacts are. If so, here are some compelling reasons: 

Security Fixes and Patches

Cybercrimes are quickly increasing, and statistics show that 43% of organizations lose existing customers because of cyber attacks. Additionally, individuals lose around $318 billion to cybercrime. 

However, when you update to the latest version of Kali Linux, there are advanced security fixes and patches. They remove all system vulnerabilities and make sure that professionals don’t fall victim to such malicious attempts. 

Access to New Tools and Features 

Kali Linux offers many features and tools like Metasploit, Nmap, and others, and they receive consistent updates from their developers. 

So, upgrading the OS assures that you are using the latest version of all pre-installed tools. You enjoy better functionality and improved system performance that make your daily tasks more efficient.

For instance, the updated version of Nmap has fast scanning capabilities that pave the way for quick security auditing and troubleshooting.

Compatibility with New Technologies 

Technology is evolving, and new protocols and software are introduced every day. The developers behind Kali Linux are well aware of these shifts. They are pushing regular updates that support these newer technologies for better system compatibility

Conclusion 

The process of how to update Kali Linux becomes easy if you are aware of the correct commands and understand the difference between upgrade options. Most importantly, don’t forget to reboot your system after a major update like Kernel to make sure that changes are configured properly. 

FAQs 

How often should I update Kali Linux? 

It’s advisable to update Kali Linux at least once a week or whenever there are new system updates. The purpose is to make sure that the system is secure and has all the latest features by receiving security patches and addressing all vulnerabilities. 

Can I update Kali Linux without using the terminal?

No, you cannot update Kali Linux without using the terminal. To update the system, you can use the apt and apt-get commands. The steps involved in this process include checking the source file, updating the package repository, and upgrading the system. 

Is Kali Linux good for learning cyber security? 

Yes, Kali Linux is a good tool for learning cyber security. It has a range of tools for penetration testing, network security, analysis, and vulnerability scanning.

How AI is Revolutionizing Linux System Administration: Tools and Techniques for Automation

AI-powered tools are changing the software development scene as we speak. AI assistants can not only help with coding, using advanced machine learning algorithms to improve their service, but they can also help with code refactoring, testing, and bug detection. Tools like GitHub, Tanbine, and Copilot aim to automate various processes, allowing developers more free time for other, more creative tasks. Of course, implementing AI tools takes time and careful risk assessment because various factors need to be taken into consideration. Let’s review some of the most popular automation tools available for Linux.

Why Use AI-Powered Software Tools in Linux?

AI is being widely used across various spheres of our lives with businesses utilizing the power of Artificial Intelligence to create new services and products. Even sites like Depositphotos have started offering AI services to create exclusive licensed photos that can be used anywhere – on websites, in advertising, design, and print media. Naturally, software development teams and Linux users have also started implementing AI-powered tools to improve their workflow. Here are some of the benefits of using such tools:

  • An improved user experience.
  • Fewer human errors in various processes.
  • Automation of repetitive tasks boosts overall productivity.
  • New features become available. 
  • Innovative problem-solving.

Top AI Automation Tools for Linux

Streamlining processes can greatly increase productivity, allowing developers and Linux users to delegate repetitive tasks to AI-powered software. They offer innovative solutions while optimizing different parts of the development process. Let’s review some of them.

1. GitHub Copilot

Just a few years ago no one could’ve imagined that coding could be done by an AI algorithm. This AI-powered software can predict the completion of the code that’s being created, offering different functions and snippets on the go. GitHub Copilot can become an invaluable tool for both expert and novice coders. The algorithms can understand the code that’s being written using OpenAI’s Codex model. It supports various programming languages and can be easily integrated with the majority of IDEs. One of its key benefits is code suggestion based on the context of what’s being created.

GitHub Copilot2. DeepCode

One of the biggest issues all developers face when writing code is potential bugs. This is where an AI-powered code review tool can come in handy. While it won’t help you create the code, it will look for vulnerabilities inside your project, giving context-based feedback and a variety of suggestions to fix the bugs found by the program. Thus, it can help developers improve the quality of their work. DeepCode uses machine learning to become a better help over time, offering improved suggestions as it learns more about the type of work done by the developer. This tool can easily integrate with GitLab, GitHub, and Bitbucket.

3. Tabnine

Do you want an AI-powered tool that can actually learn from your coding style and offer suggestions based on it? Tabnine can do exactly that, predicting functions and offering snippets of code based on what you’re writing. It can be customized for a variety of needs and operations while supporting 30 programming languages. You can use this tool offline for improved security.

4. CircleCl

This is a powerful continuous integration and continuous delivery platform that helps automate software development operations. It helps engineering teams build code easily, offering automatic tests at each stage of the process, whenever a change is implemented in the system. You can develop your app fast and easily with CirlceCL’s automated testing that involves mobile, serverless, API, web, and AI frameworks. This is the CI/CD expert who will help you significantly reduce testing time and build simple and stable systems.

5. Selenium

This is one of the most popular testing tools used by developers all over the world. It’s compatible across various platforms, including Linux, due to the open-source nature of this framework. It offers a seamless process of generating and managing test cases, as well as compiling project reports. It can collaborate with continuous automated testing tools for better results.

6. Code Intelligence

This is yet another tool capable of analyzing the source code to detect bugs and vulnerabilities without human supervision. It can find inconsistencies that are often missed by other testing methods, allowing the developing teams to resolve issues before the software is released. This tool works autonomously and simplifies root cause analysis. It utilizes self-learning AI capabilities to boost the testing process and swiftly pinpoints the line of code that contains the bug.

7. ONLYOFFICE Docs

This open-source office suite allows real-time collaboration and offers a few interesting options when it comes to AI. You can install a plugin and get access to ChatGPT for free and use its features while creating a document. Some of the most handy ones include translation, spellcheck, grammar correction, word analysis, and text generation. You can also generate images for your documents and have a chat with ChatGPT while working on your project.

Conclusion

When it comes to the Linux operating system, there are numerous AI-powered automation tools you can try. A lot of them are used in software development to improve the code-writing process and allow developers to have more free time for other tasks. AI tools can utilize machine learning to provide you with better services while offering a variety of ways to streamline your workflow. Tools such as DeepCode, Tabnine, GitHub Copilot, and Selenium can look for solutions whenever you’re facing issues with your software. These programs will also offer snippets of code on the go while checking your project for bugs.

Mastering email encryption on Linux

email encryptionIn today’s digital age, safeguarding your communication is paramount. Email encryption serves as a crucial tool to protect sensitive data from unauthorized access. Linux users, known for their preference for open-source solutions, must embrace encryption to ensure privacy and security.

With increasing cyber threats, the need for secure email communications has never been more critical. Email encryption acts as a protective shield, ensuring that only intended recipients can read the content of your emails. For Linux users, employing encryption techniques not only enhances personal data protection but also aligns with the ethos of secure and open-source computing. This guide will walk you through the essentials of setting up email encryption on Linux and how you can integrate advanced solutions to bolster your security.

Setting up email encryption on Linux

Implementing email encryption on Linux can be straightforward with the right tools. Popular email clients like Thunderbird and Evolution support OpenPGP and S/MIME protocols for encrypting emails. Begin by installing GnuPG, an open-source software that provides cryptographic privacy and authentication.

Once installed, generate a pair of keys—a public key to share with those you communicate with and a private key that remains confidential to you. Configure your chosen email client to use these keys for encrypting and decrypting emails. The interface typically offers user-friendly options to enable encryption settings directly within the email composition window.

To further assist in this setup, many online tutorials offer detailed guides complete with screenshots to ease the process for beginners. Additionally, staying updated with the latest software versions is recommended to ensure optimal security features are in place.

How email encryption works

Email encryption is a process that transforms readable text into a scrambled format that can only be decoded by the intended recipient. It is essential for maintaining privacy and security in digital communications. As technology advances, so do the methods used by cybercriminals to intercept sensitive information. Thus, understanding the principles of email encryption becomes crucial.

The basic principle of encryption involves using keys—a public key for encrypting emails and a private key for decrypting them. This ensures that even if emails are intercepted during transmission, they remain unreadable without the correct decryption key. Whether you’re using email services like Gmail or Outlook, integrating encryption can significantly reduce the risk of data breaches.

Many email providers offer built-in encryption features, but for Linux users seeking more control, there are numerous open-source tools available. Email encryption from Trustifi provides an additional layer of security by incorporating advanced AI-powered solutions into your existing setup.

Integrating advanced encryption solutions

For those seeking enhanced security measures beyond standard practices, integrating solutions like Trustifi into your Linux-based email clients can be highly beneficial. Trustifi offers services such as inbound threat protection and outbound email encryption powered by AI technology.

The integration process involves installing Trustifi’s plugin or API into your existing email infrastructure. This enables comprehensive protection against potential threats while ensuring that encrypted communications are seamless and efficient. With Trustifi’s advanced algorithms, businesses can rest assured that their communications are safeguarded against both current and emerging cyber threats.

This approach not only protects sensitive data but also simplifies compliance with regulatory standards regarding data protection and privacy. Businesses leveraging such tools position themselves better in preventing data breaches and maintaining customer trust.

Best practices for secure email communication

Beyond technical setups, maintaining secure email practices is equally important. Start by using strong passwords that combine letters, numbers, and symbols; avoid easily guessed phrases or patterns. Enabling two-factor authentication adds another layer of security by requiring additional verification steps before accessing accounts.

Regularly updating software helps protect against vulnerabilities that hackers might exploit. Many systems offer automatic updates; however, manually checking for updates can ensure no critical patches are missed. Staying informed about the latest security threats allows users to adapt their strategies accordingly.

Ultimately, being proactive about security measures cultivates a safer digital environment for both personal and professional communications. Adopting these practices alongside robust encryption technologies ensures comprehensive protection against unauthorized access.

How is Linux Used in Retail?

Linux in RetailE-commerce sites are competing with countless competitors, so they must operate with speed, efficiency, and scalability to meet customer demands. Behind the scenes, many of these sites rely on Linux to keep their platforms running smoothly. From hosting to video adverts, Linux plays an important role in ensuring retail sites perform seamlessly.

Linux in retail website infrastructure

Linux is a popular choice for hosting retail websites because of its flexibility, reliability, and cost-effectiveness. As an open-source system, it allows retailers to customize their servers according to their needs for a tailored solution that proprietary operating systems can’t always match

Retail sites often experience fluctuating traffic, especially during sales and holiday seasons. Linux supports horizontal scaling, allowing businesses to add more servers to handle more traffic without overhauling their entire infrastructure.

Linux is designed for high performance and scalability. Its lightweight architecture minimizes resource usage so websites can load quickly even during high usage

Retail sites deal with sensitive customer data, including payment information. Linux’s security features, including regular updates and strong community support, make it a common choice for protecting this data.

Real-time video in retai

Linux’s robust server performance, high uptime, and seamless integration with tools and APIs makes it a good platform for video. Leveraging Linux containers like Docker allow video solutions for retail websites to perform consistently and reliably

Linux is home to many open-source tools that complement retailers. Technologies like FFmpeg, GStreamer, and VLC, which are often built and optimized on Linux, provide a backbone for encoding, streaming, and processing video content

Other applications of Linux in retail

Many retail websites are hosted on Linux servers, taking advantage of its compatibility with web hosting tools like Apache, Nginx, and Lighttpd. These serves allow for fast load times – critical for retaining customer attention and reducing bounce rate

Linux also supports content management systems (CMS) and e-commerce platforms like WordPress, WooCommerce, and Magento. This flexibility allows businesses to choose the platform that best fits their needs while ensuring strong performance.

Linux also supports robust database systems like MySQL and MongoDB, providing reliable and efficient data management. Retailers rely heavily on databases to manage customer information, product catalogs, and inventory.

Many modern point-of-sale (POS) systems run on Linux. These systems handle transactions, track sales data, and manage customer loyalty programs. By using Linux-based POS solutions, retailers benefit from lower costs and greater control over their hardware and software configurations.

Linux also plays an important role in processing and analyzing data. Tools like Apache Hadoop, Spark, and Elasticsearch (which are optimized for Linux) allow retailers to extract valuable insights from large datasets. These insights can inform decisions on pricing, product offerings, and marketing.

As AI becomes more prevalent, Linux will continue to support retailers, offering compatibility with frameworks like TensorFlow and PyTorch. From chatbots that assist customers to automated systems that handle pricing and inventory, Linux and AI are helping to shape modern retail.

Takeaway

The flexibility, reliability, and cost-effectiveness of Linux makes it a valuable tool for modern retailers. Whether powering e-commerce sites or enabling advanced analytics, Linux provides a foundation for a successful operation.

Fixin AttributeError: module ‘pkgutil’ has no attribute ‘ImpImporter’

AttributeError: module 'pkgutil'

AttributeError: module 'pkgutil' Understanding the Error

The error “AttributeError: module ‘pkgutil’ has no attribute ‘ImpImporter'” typically occurs when running Python code that uses the

pkgutil

module, specifically when trying to access

ImpImporter

. The error appears because

ImpImporter

was removed in Python 3.12 as part of the deprecation of the old import system.

Root Cause

The removal of

ImpImporter

is related to:

  1. The deprecation of the
    imp

    module in favor of

    importlib
  2. The modernization of Python’s import system
  3. Changes introduced in Python 3.12 to remove legacy import mechanisms

Solving the AttributeError: module ‘pkgutil’ has no attribute ‘ImpImporter’

There are several solutions to solve this error

Solution 1: Update Your Code to Use importlib

Replace

pkgutil.ImpImporter

with the modern

importlib

equivalent:

 
<span class="token"># Old code</span>
<span class="token">from</span> pkgutil <span class="token">import</span> ImpImporter
 
<span class="token"># New code</span>
<span class="token">from</span> importlib <span class="token">import</span> machinery
importer <span class="token">=</span> machinery<span class="token">.</span>FileFinder<span class="token">(</span>path<span class="token">,</span> <span class="token">*</span>machinery<span class="token">.</span>FileFinder<span class="token">.</span>path_hook_for_FileFinder<span class="token">(</span><span class="token">)</span><span class="token">)</span>

Solution 2: Use ZipImporter Instead

If you’re working with ZIP archives:

 
<span class="token"># Old code</span>
<span class="token">from</span> pkgutil <span class="token">import</span> ImpImporter

# New code

<span class="token">from</span> pkgutil <span class="token">import</span> ZipImporter
importer <span class="token">=</span> ZipImporter<span class="token">(</span><span class="token">'/path/to/your/zipfile.zip'</span><span class="token">)</span>

Solution 3: Downgrade Python Version

If updating the code isn’t possible:

  1. Create a new virtual environment with Python 3.11:
python3.11 -m venv <span class="token">env</span>
<span class="token">source</span> env/bin/activate  <span class="token"># On Unix</span>
env<span class="token">\</span>Scripts<span class="token">\</span>activate     <span class="token"># On Windows</span>
  1. Install your dependencies:
pip <span class="token">install</span> -r requirements.txt

Code Examples for Common Use Cases

Example 1: Module Discovery

 
<span class="token"># Modern approach using importlib</span>
<span class="token">from</span> importlib <span class="token">import</span> util<span class="token">,</span> machinery
 
<span class="token">def</span> <span class="token">find_module</span><span class="token">(</span>name<span class="token">,</span> path<span class="token">=</span><span class="token">None</span><span class="token">)</span><span class="token">:</span>
spec <span class="token">=</span> util<span class="token">.</span>find_spec<span class="token">(</span>name<span class="token">,</span> path<span class="token">)</span>
<span class="token">if</span> spec <span class="token">is</span> <span class="token">None</span><span class="token">:</span>
<span class="token">return</span> <span class="token">None</span>
<span class="token">return</span> spec<span class="token">.</span>loader

Example 2: Package Resource Access

<span class="token"># Modern approach using importlib.resources</span>
<span class="token">from</span> importlib <span class="token">import</span> resources
<span class="token">def</span> <span class="token">get_package_data</span><span class="token">(</span>package<span class="token">,</span> resource<span class="token">)</span><span class="token">:</span>
<span class="token">  with</span> resources<span class="token">.</span>path<span class="token">(</span>package<span class="token">,</span> resource<span class="token">)</span> <span class="token">as</span> path<span class="token">:</span>
<span class="token">  return</span> path

Prevention Tips

  1. Always check Python version compatibility when using import-related functionality
  2. Use
    importlib

    instead of

    pkgutil

    for new code

  3. Keep dependencies updated
  4. Test code against new Python versions before upgrading

Common Pitfalls

  1. Mixed Python versions in different environments
  2. Old dependencies that haven’t been updated
  3. Copying legacy code without checking compatibility

Long-term Solutions

  1. Migrate to
    importlib

    completely

  2. Update all package loading code to use modern patterns
  3. Implement proper version checking in your application

Checking Your Environment

Run this diagnostic code to check your setup:

 
<span class="token">import</span> sys
<span class="token"> import</span> importlib
 
<span class="token">def</span> <span class="token">check_import_system</span><span class="token">(</span><span class="token">)</span><span class="token">:</span>
<span class="token">   print</span><span class="token">(</span><span class="token string-interpolation">f"Python version: </span><span class="token string-interpolation interpolation">{</span><span class="token string-interpolation interpolation">sys</span><span class="token string-interpolation interpolation">.</span><span class="token string-interpolation interpolation">version</span><span class="token string-interpolation interpolation">}</span><span class="token string-interpolation">"</span><span class="token">)</span>
<span class="token">   print</span><span class="token">(</span><span class="token string-interpolation">f"Importlib version: </span><span class="token string-interpolation interpolation">{</span><span class="token string-interpolation interpolation">importlib</span><span class="token string-interpolation interpolation">.</span><span class="token string-interpolation interpolation">__version__</span><span class="token string-interpolation interpolation">}</span><span class="token string-interpolation">"</span><span class="token">)</span>
 
<span class="token"># Check available import mechanisms</span>
<span class="token">print</span><span class="token">(</span><span class="token">"\nAvailable import mechanisms:"</span><span class="token">)</span>
<span class="token">for</span> attr <span class="token">in</span> <span class="token">dir</span><span class="token">(</span>importlib<span class="token">.</span>machinery<span class="token">)</span><span class="token">:</span>
<span class="token">if</span> attr<span class="token">.</span>endswith<span class="token">(</span><span class="token">'Loader'</span><span class="token">)</span> <span class="token">or</span> attr<span class="token">.</span>endswith<span class="token">(</span><span class="token">'Finder'</span><span class="token">)</span><span class="token">:</span>
<span class="token">print</span><span class="token">(</span><span class="token string-interpolation">f"- </span><span class="token string-interpolation interpolation">{</span><span class="token string-interpolation interpolation">attr</span><span class="token string-interpolation interpolation">}</span><span class="token string-interpolation">"</span><span class="token">)</span>
 
 
<span class="token">if</span> __name__ <span class="token">==</span> <span class="token">"__main__"</span><span class="token">:</span>
check_import_system<span class="token">(</span><span class="token">)</span>
More Articles from Unixmen
https://www.unixmen.com/openldap-error-ldapadd-undefined-attribute-type-17/
https://www.unixmen.com/using-the-cp-command-to-copy-a-directory-on-linux/

How to Install Arch Linux

install arch linux

install arch linux

Arch Linux is a popular Linux distribution for experienced users. It’s known for its rolling release model, which means you’re always using the latest software. However, Arch Linux can be more challenging to install and maintain than other distributions. This article will walk you through the process of installing Arch Linux, from preparation to first boot. Follow each section carefully to ensure a successful installation.

Prerequisites

Before beginning the installation, it is crucial to ensure that you have:

  • A USB drive (minimum 4GB)
  • Internet connection
  • Basic knowledge of command line operations
  • At least 512MB RAM (2GB recommended)
  • 20GB+ free disk space
  • Backed up important data

Creating Installation Media

  1. Download the latest ISO from archlinux.org
  2. Verify the ISO signature for security
  3. Create bootable USB using dd command:
<span class="token">sudo</span> <span class="token">dd</span> <span class="token assign-left">bs</span><span class="token">=</span>4M <span class="token assign-left">if</span><span class="token">=</span>/path/to/archlinux.iso <span class="token assign-left">of</span><span class="token">=</span>/dev/sdx <span class="token assign-left">status</span><span class="token">=</span>progress <span class="token assign-left">oflag</span><span class="token">=</span>sync

Boot Preparation

  1. Enter BIOS/UEFI settings
  2. Disable Secure Boot
  3. Set boot priority to USB
  4. Save and exit

What are the Initial Boot Steps?

  1. Boot from USB and select “Arch Linux install medium”
  2. Verify boot mode:
<span class="token">ls</span> /sys/firmware/efi/efivars

Internet Connection

For wired connection:

<span class="token">ip</span> <span class="token">link</span>
dhcpcd

For wireless:

iwctl
station wlan0 scan
station wlan0 connect SSID

Verify connection:

<span class="token">ping</span> archlinux.org

System Clock

Update the system clock:

timedatectl set-ntp <span class="token">true</span>

Disk Partitioning

  1. List available disks:
lsblk
  1. Create partitions (example using fdisk):
<span class="token">fdisk</span> /dev/sda

For UEFI systems:

  • EFI System Partition (ESP): 512MB
  • Root partition: Remaining space
  • Swap partition (optional): Equal to RAM size

For Legacy BIOS:

  • Root partition: Most of the disk
  • Swap partition (optional)
  1. Format partitions:
 
<span class="token"># For EFI partition</span>
mkfs.fat -F32 /dev/sda1

# For root partition
mkfs.ext4 /dev/sda2


# For swap
mkswap /dev/sda3
swapon /dev/sda3

Mounting Partitions

Mount root partition:

<span class="token">mount</span> /dev/sda2 /mnt

For UEFI systems, mount ESP:

<span class="token">mkdir</span> /mnt/boot
<span class="token">mount</span> /dev/sda1 /mnt/boot

Base System Installation

Install essential packages:

pacstrap /mnt base linux linux-firmware base-devel

System Configuration

  1. Generate fstab:
genfstab -U /mnt <span class="token">&gt;&gt;</span> /mnt/etc/fstab
  1. Change root into the new system:
arch-chroot /mnt
  1. Set timezone:
<span class="token">ln</span> -sf /usr/share/zoneinfo/Region/City /etc/localtime
hwclock --systohc
  1. Configure locale:
<span class="token">nano</span> /etc/locale.gen
<span class="token"># Uncomment en_US.UTF-8 UTF-8</span>
locale-gen
<span class="token">echo</span> <span class="token">"LANG=en_US.UTF-8"</span> <span class="token">&gt;</span> /etc/locale.conf
  1. Set hostname:
<span class="token">echo</span> <span class="token">"myhostname"</span> <span class="token">&gt;</span> /etc/hostname
  1. Configure hosts file:
<span class="token">nano</span> /etc/hosts
<span class="token"># Add:</span>
<span class="token"># 127.0.0.1    localhost</span>
<span class="token"># ::1          localhost</span>
<span class="token"># 127.0.1.1    myhostname.localdomain    myhostname</span>

Boot Loader Installation

For GRUB on UEFI systems:

pacman -S grub efibootmgr
grub-install --target<span class="token">=</span>x86_64-efi --efi-directory<span class="token">=</span>/boot --bootloader-id<span class="token">=</span>GRUB
<span class="token">grub-mkconfig</span> -o /boot/grub/grub.cfg

For GRUB on Legacy BIOS:

pacman -S grub
grub-install --target<span class="token">=</span>i386-pc /dev/sda
<span class="token">grub-mkconfig</span> -o /boot/grub/grub.cfg

Network Configuration

  1. Install network manager:
pacman -S networkmanager
systemctl <span class="token">enable</span> NetworkManager

User Management

  1. Set root password:
<span class="token">passwd</span>
  1. Create user account:
<span class="token">useradd</span> -m -G wheel username
<span class="token">passwd</span> username
  1. Configure sudo:
<span class="token assign-left">EDITOR</span><span class="token">=</span>nano visudo
<span class="token"># Uncomment %wheel ALL=(ALL) ALL</span>

Final Steps

  1. Exit chroot:
<span class="token">exit</span>
  1. Unmount partitions:
<span class="token">umount</span> -R /mnt
  1. Reboot:
<span class="token">reboot</span>

Post-Installation

After first boot:

  1. Install graphics drivers:
pacman -S xf86-video-amdgpu  <span class="token"># For AMD</span>
<span class="token"># or</span>
pacman -S nvidia nvidia-utils  <span class="token"># For NVIDIA</span>
  1. Install desktop environment (example with GNOME):
pacman -S xorg gnome
systemctl <span class="token">enable</span> gdm
  1. Install common applications:
pacman -S firefox terminal-emulator file-manager

Troubleshooting Tips

  • If bootloader fails to install, verify EFI variables are available
  • For wireless issues, ensure firmware is installed
  • Check logs with
    journalctl

    for error messages

  • Verify partition mounts with
    lsblk

Maintenance Recommendations

  1. Regular system updates:
pacman -Syu
  1. Clean package cache periodically:
pacman -Sc
  1. Check system logs regularly:
journalctl -p <span class="token">3</span> -xb
More Articles from Unixmen
https://www.unixmen.com/minimal-tools-on-arch-linux/
https://www.unixmen.com/top-things-installing-arch-linux/

ZHS Autosuggestion

zsh autosuggestions

zsh autosuggestions

Working in the terminal can be significantly more efficient with the right tools, and zsh-autosuggestions is one of the most powerful plugins available for the Z shell (zsh). This comprehensive guide will walk you through everything you need to know about this productivity-enhancing tool.

What is zsh-autosuggestions?

zsh-autosuggestions is a plugin for zsh that suggests commands as you type, based on your command history and completions. These suggestions appear in a light gray color and can be accepted using the right arrow key or other configured keybindings, making command-line navigation faster and more intuitive.

What Are Some of the Benefits?

The plugin offers several advantages that make it an essential tool for developers and system administrators:

  • Reduces typing errors by suggesting previously used commands
  • Speeds up command-line navigation by requiring fewer keystrokes
  • Helps recall complex commands you’ve used before
  • Provides instant feedback as you type
  • Works seamlessly with other zsh plugins and frameworks

Installation Guide

There are several ways to install zsh-autosuggestions, depending on your preferred setup method.

Using Oh My Zsh

If you’re using Oh My Zsh, follow these steps:

  1. Clone the repository into your Oh My Zsh plugins directory:
<span class="token">git</span> clone https://github.com/zsh-users/zsh-autosuggestions <span class="token">${ZSH_CUSTOM</span><span class="token">:-</span><span class="token">~</span><span class="token">/</span><span class="token">.oh-my-zsh</span><span class="token">/</span><span class="token">custom}</span>/plugins/zsh-autosuggestions
  1. Add the plugin to your
    .zshrc

    file:

<span class="token assign-left">plugins</span><span class="token">=</span><span class="token">(</span><span class="token">..</span>. zsh-autosuggestions<span class="token">)</span>

Manual Installation

For a manual installation:

  1. Clone the repository:
<span class="token">git</span> clone https://github.com/zsh-users/zsh-autosuggestions ~/.zsh/zsh-autosuggestions
  1. Add to your
    .zshrc

    :

<span class="token">source</span> ~/.zsh/zsh-autosuggestions/zsh-autosuggestions.zsh

Configuration Options

zsh-autosuggestions is highly customizable. Here are some essential configuration options:

Changing Suggestion Strategy

You can modify how suggestions are generated:

<span class="token assign-left">ZSH_AUTOSUGGEST_STRATEGY</span><span class="token">=</span><span class="token">(</span>history completion<span class="token">)</span>

Customizing Appearance

Change the suggestion color:

<span class="token assign-left">ZSH_AUTOSUGGEST_HIGHLIGHT_STYLE</span><span class="token">=</span><span class="token">'fg=8'</span>

Modifying Key Bindings

Configure different keys for accepting suggestions:

bindkey <span class="token">'^['</span> autosuggest-accept  <span class="token"># Alt + Enter</span>

Tips for Maximum Productivity

To get the most out of zsh-autosuggestions:

  1. Use partial suggestions: Type the first few characters of a command and watch for suggestions.
  2. Combine with fuzzy finding: Install fzf alongside autosuggestions for powerful command-line search capabilities.
  3. Customize the suggestion strategy based on your workflow preferences.
  4. Learn the keyboard shortcuts to quickly accept full or partial suggestions.

Troubleshooting Common Issues

Slow Performance

If you notice slow performance:

  • Clean your command history regularly
  • Adjust the suggestion strategy
  • Update to the latest version of the plugin

Suggestion Not Appearing

If suggestions aren’t showing:

  • Check if the plugin is properly sourced in your
    .zshrc
  • Verify terminal color support
  • Ensure there are no conflicts with other plugins

Advanced Features

Custom Suggestion Strategies

Create your own suggestion strategy:

<span class="token assign-left">ZSH_AUTOSUGGEST_STRATEGY</span><span class="token">=</span>custom_strategy

function custom_strategy($words)

<span class="token">{</span>
<span class="token"># Your custom suggestion logic here</span>
<span class="token">}</span>

Integration with Other Tools

zsh-autosuggestions works well with:

  • fzf (fuzzy finder)
  • zsh-syntax-highlighting
  • zsh-completions

zsh-autosuggestions is a powerful tool that can significantly improve your command-line productivity. With proper configuration and usage, it becomes an indispensable part of your terminal workflow. Take time to customize it to your needs, and you’ll find yourself working faster and more efficiently in the terminal.

More Articles from the Unixmen 


SSH Max Limits and Optimization

SSH Maximum Limits and Optimization

SSH Maximum Limits and Optimization

SSH (Secure Shell) is a powerful tool for remote administration and secure data transfer. However, it’s crucial to understand and configure its limits effectively to ensure optimal performance and security. This article will help you understand and configure SSH max limits for optimal performance and security.

Connection Limits

Connection limits in SSH, primarily controlled by settings like

MaxStartups

and

MaxSessions

, are crucial security measures.

MaxStartups

restricts the number of unauthenticated connection attempts, mitigating brute-force attacks.

MaxSessions

limits the number of active sessions per connection, preventing resource exhaustion and potential DoS attacks. These limits, along with other security measures like key-based authentication and firewall rules, contribute to a robust and secure SSH environment.

SSH Max Sessions

  • Default: 10
  • Location:
    /etc/ssh/sshd_config
  • Controls maximum number of simultaneous SSH sessions per connection
MaxSessions <span class="token">10</span>

SSH Max Startups

  • Format:
    start:rate:full
  • Default: 10:30:100
  • Controls unauthenticated connection attempts
MaxStartups <span class="token">10</span>:30:100
<span class="token"># Allows 10 unauthenticated connections</span>
<span class="token"># 30% probability of dropping connections when limit reached</span>
<span class="token"># Full blocking at 100 connections</span>

Client Alive Interval

  • Default: 0 (disabled)
  • Maximum: System dependent
  • Checks client connectivity every X seconds
ClientAliveInterval <span class="token">300</span>

Client Alive Count Max

  • Default: 3
  • Maximum connection check attempts before disconnecting
ClientAliveCountMax <span class="token">3</span>

Authentication Limits

Authentication limits in SSH primarily focus on restricting the number of failed login attempts. This helps prevent brute-force attacks where attackers systematically try various combinations of usernames and passwords to gain unauthorized access. By setting limits on the number of authentication attempts allowed per connection, you can significantly increase the difficulty for attackers to successfully compromise your system.

MaxAuthTries

  • Default: 6
  • Maximum authentication attempts before disconnecting
MaxAuthTries <span class="token">6</span>

LoginGraceTime

  • Default: 120 seconds
  • Time allowed for successful authentication
LoginGraceTime <span class="token">120</span>

System Resource Limits

System-wide Limits

Edit

/etc/security/limits.conf

:

* soft nofile <span class="token">65535</span>
* hard nofile <span class="token">65535</span>

Process Limits

 
<span class="token"># Check current limits</span>
<span class="token">ulimit</span> -n

# Set new limit
ulimit -n 65535

Bandwidth Limits

Bandwidth limits in SSH, while not directly configurable within the SSH protocol itself, are an important consideration for overall system performance. Excessive SSH traffic can consume significant network resources, potentially impacting other applications and services.

Individual User Limits

<span class="token"># In sshd_config</span>
Match User username
RateLimit 5M

Global Rate Limiting

Using iptables:

iptables -A INPUT -p tcp --dport <span class="token">22</span> -m state --state NEW -m limit --limit <span class="token">10</span>/minute -j ACCEPT

Performance Optimization

Compression Settings

<span class="token"># In sshd_config</span>
Compression delayed

Cipher Selection

<span class="token"># Faster ciphers first</span>
Ciphers chacha20-poly1305@openssh.com,aes256-gcm@openssh.com,aes128-gcm@openssh.com

Keep Alive Settings

Client-side (

~/.ssh/config

):

Host *
ServerAliveInterval <span class="token">60</span>
ServerAliveCountMax <span class="token">3</span>

File Transfer Limits

SFTP Limits

In

sshd_config

:

Subsystem <span class="token">sftp</span> /usr/lib/openssh/sftp-server -l INFO -f LOCAL6
Match Group sftpusers
ChrootDirectory /sftp/%u
ForceCommand internal-sftp
AllowTcpForwarding no

SCP Limits

<span class="token"># Limit SCP bandwidth</span>
<span class="token">scp</span> -l <span class="token">1000</span> <span class="token"># Limits bandwidth to 1000 Kbit/s</span>

Security Maximums

SSH security maximums encompass various settings designed to thwart malicious attacks.

Key Size Limits

  • RSA: 16384 bits (practical max)
  • ECDSA: 521 bits
  • Ed25519: 256 bits (fixed)

Authentication Timeout

<span class="token"># In sshd_config</span>
AuthenticationMethods publickey,keyboard-interactive
MaxAuthTries <span class="token">3</span>
LoginGraceTime <span class="token">60</span>

Monitoring and Logging

Logging Levels

<span class="token"># In sshd_config</span>
LogLevel VERBOSE
SyslogFacility AUTH

Connection Monitoring

<span class="token"># Active connections</span>
<span class="token">who</span> <span class="token">|</span> <span class="token">grep</span> pts
<span class="token"># SSH processes</span>
<span class="token">ps</span> aux <span class="token">|</span> <span class="token">grep</span> <span class="token">ssh</span>
<span class="token"># Connection attempts</span>
<span class="token">tail</span> -f /var/log/auth.log

Troubleshooting

Check Current Limits

 
<span class="token"># System limits</span>
sysctl -a <span class="token">|</span> <span class="token">grep</span> max

# SSH daemon limits
sshd -T | grep max


# Process limits
cat /proc/sys/fs/file-max

Common Issues and Solutions

  1. Too Many Open Files
<span class="token"># Check current open files</span>
<span class="token">lsof</span> <span class="token">|</span> <span class="token">grep</span> sshd <span class="token">|</span> <span class="token">wc</span> -l
<span class="token"># Increase system limit</span>
<span class="token">echo</span> <span class="token">"fs.file-max = 100000"</span> <span class="token">&gt;&gt;</span> /etc/sysctl.conf
sysctl -p
  1. Connection Drops
<span class="token"># Add to sshd_config</span>
TCPKeepAlive <span class="token">yes</span>
ClientAliveInterval <span class="token">60</span>
ClientAliveCountMax <span class="token">3</span>

Best Practices

  1. Regular Monitoring
<span class="token"># Create monitoring script</span>
<span class="token">#!/bin/bash</span>
<span class="token">echo</span> <span class="token">"Active SSH connections: </span><span class="token">$(</span><span class="token">netstat</span><span class="token"> -tnpa </span><span class="token">|</span> <span class="token">grep</span> <span class="token">'ESTABLISHED.*sshd'</span> <span class="token">|</span> <span class="token">wc</span><span class="token"> -l</span><span class="token">)</span><span class="token">"</span>
<span class="token">echo</span> <span class="token">"Failed attempts: </span><span class="token">$(</span><span class="token">grep</span> <span class="token">"Failed password"</span><span class="token"> /var/log/auth.log </span><span class="token">|</span> <span class="token">wc</span><span class="token"> -l</span><span class="token">)</span><span class="token">"</span>
  1. Automated Cleanup
<span class="token"># Add to crontab</span>
<span class="token">0</span> * * * * <span class="token">pkill</span> -o sshd

Remember to always backup configuration files before making changes and test in a non-production environment first.


Similar Articles from Unixmen

How to Add Guests in VirtualBox

virtual box guest addition

virtual box guest addition
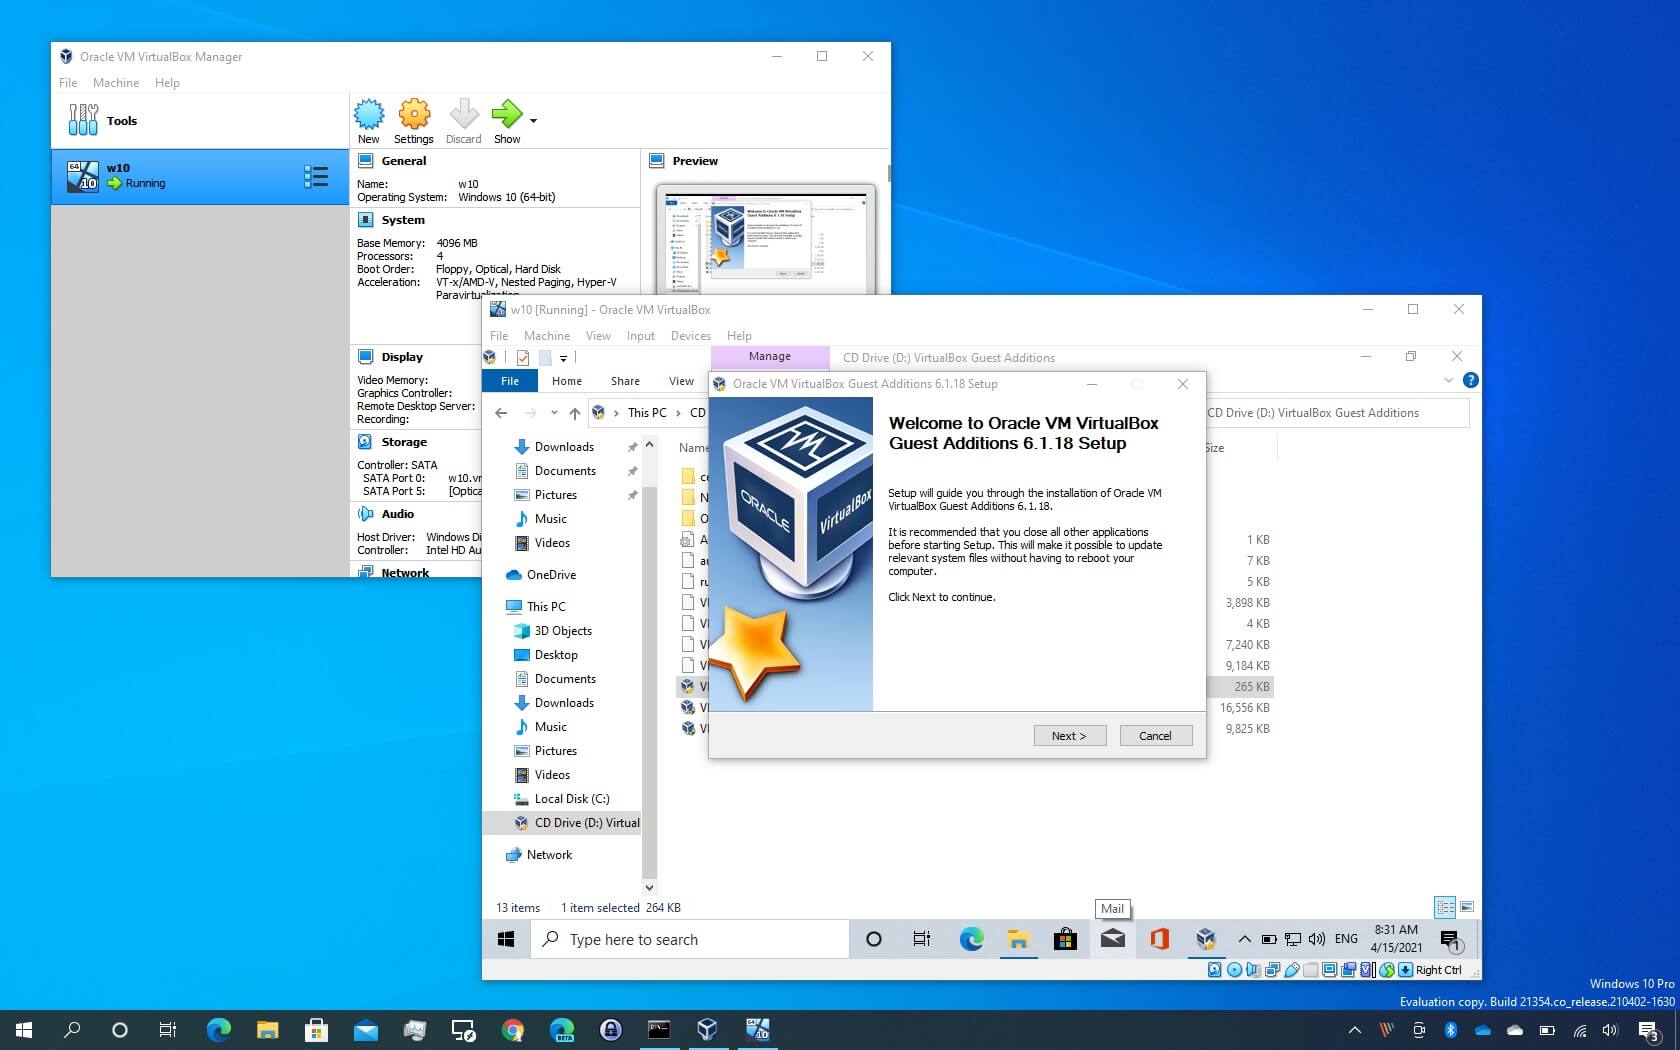
What are VirtualBox Guest Additions?

VirtualBox Guest Additions is a software package that enhances the functionality of virtual machines running in Oracle VM VirtualBox. It consists of device drivers and system applications that optimize the guest operating system for better performance and usability.

Benefits of Installing Guest Additions

Installing Guest Additions provides several key benefits:

  1. Enhanced Display Integration
    • Automatic screen resolution adjustment
    • Support for higher display resolutions
    • Seamless window integration
  2. Improved Performance
    • Hardware-accelerated graphics
    • Mouse pointer integration
    • Shared clipboard functionality
  3. Additional Features
    • Shared folders between host and guest
    • Seamless windows mode
    • Time synchronization
    • Better audio support

Prerequisites for Installation

Before installing Guest Additions, ensure you have:

  1. VirtualBox installed and updated to the latest version
  2. A running virtual machine
  3. Administrative privileges in the guest OS
  4. Sufficient disk space (approximately 200MB)
  5. Development tools or build essentials (for Linux guests)

Installing Guest Additions on Windows

  1. Start your Windows virtual machine
  2. From the VirtualBox menu, select “Devices” → “Insert Guest Additions CD image”
  3. When AutoRun appears, click “Run VBoxWindowsAdditions.exe”
  4. Follow the installation wizard:
    • Accept the default options
    • Allow the installation of drivers when prompted
    • Restart the virtual machine when finished

Installing Guest Additions on Linux

  1. Install required packages:
    <span class="token"># For Ubuntu/Debian</span>
    <span class="token">sudo</span> <span class="token">apt-get</span> update
    <span class="token">sudo</span> <span class="token">apt-get</span> <span class="token">install</span> build-essential dkms linux-headers-<span class="token">$(</span><span class="token">uname</span><span class="token"> -r</span><span class="token">)</span>
    <span class="token"># For Fedora/RHEL</span>
    <span class="token">sudo</span> dnf <span class="token">install</span> gcc kernel-devel kernel-headers dkms <span class="token">make</span> <span class="token">bzip2</span>
  2. Insert Guest Additions CD:
    • Click “Devices” → “Insert Guest Additions CD image”
  3. Mount and install:
    <span class="token">sudo</span> <span class="token">mount</span> /dev/cdrom /mnt
    <span class="token">cd</span> /mnt
    <span class="token">sudo</span> ./VBoxLinuxAdditions.run
  4. Restart the virtual machine

Installing Guest Additions on macOS

  1. Start your macOS virtual machine
  2. Select “Devices” → “Insert Guest Additions CD image”
  3. Mount the Guest Additions ISO if not automatically mounted
  4. Double-click the VBoxDarwinAdditions.pkg
  5. Follow the installation wizard
  6. Restart the virtual machine

Common Features and How to Use Them

Shared Folders

  1. Power off the virtual machine
  2. In VirtualBox Manager:
    • Select your VM
    • Click “Settings” → “Shared Folders”
    • Add a new shared folder

Drag and Drop

  1. In VM Settings:
    • Go to “General” → “Advanced”
    • Set “Drag’n’Drop” to Bidirectional

Clipboard Sharing

  1. In VM Settings:
    • Go to “General” → “Advanced”
    • Set “Shared Clipboard” to Bidirectional

Seamless Mode

  1. Press Host Key (usually Right Ctrl) + L
  2. Or select “View” → “Seamless Mode.”

Troubleshooting Installation Issues

What are Some of the Common Problems And Solutions?

  1. Installation Fails
    • Verify system requirements
    • Update VirtualBox to the latest version
    • Install required development tools
  2. Screen Resolution Issues
    • Restart the virtual machine
    • Reinstall Guest Additions
    • Check display adapter settings
  3. Shared Folders Not Working
    • Add user to vboxsf group (Linux):
      <span class="token">sudo</span> <span class="token">usermod</span> -aG vboxsf <span class="token">$(</span><span class="token">whoami</span><span class="token">)</span>
    • Verify mount points and permissions
  4. Building Kernel Modules Fails
    • Install correct kernel headers
    • Update the system
    • Check system logs for specific errors

Updating Guest Additions

  1. Check Current Version
    bash
    <span class="token"># On Linux</span>
    modinfo vboxguest <span class="token">|</span> <span class="token">grep</span> ^version
    <span class="token"># On Windows</span>
    Check Programs and Features
  2. Update Process
    • Download latest VirtualBox version
    • Update Guest Additions through “Devices” menu
    • Reinstall following the same process as initial installation

Best Practices

  1. Before Installation
    • Take a snapshot of your VM
    • Back up important data
    • Update the guest OS
  2. After Installation
    • Test all required features
    • Configure shared folders and clipboard as needed
    • Document any custom settings
  3. Maintenance
    • Keep Guest Additions version matched with VirtualBox
    • Regularly update both VirtualBox and Guest Additions
    • Monitor system performance

More Articles from Unixmen

QR Codes and Linux: Bridging Open-Source Technology with Seamless Connectivity

QR Codes and LinuxQR codes have revolutionized how we share information, offering a fast and efficient way to connect physical and digital worlds. In the Linux ecosystem, the adaptability of QR codes aligns seamlessly with the open-source philosophy, enabling developers, administrators, and users to integrate QR code functionality into various workflows. Leveraging a qr code generator free can simplify this process, making it accessible even for those new to the technology.

From system administration to enhancing user interfaces, using QR codes in Linux environments is both practical and innovative.

QR Codes on Linux: Where and How They Are Used

QR codes serve diverse purposes in Linux systems, providing solutions that enhance functionality and user experience. For instance, Linux administrators can generate QR codes to link to system logs or troubleshooting guides, offering easy access during remote sessions. In secure file sharing, QR codes can embed links to files, enabling safe resource sharing without exposing the system to vulnerabilities.

Additionally, Linux’s prevalence in IoT device management is complemented by QR codes, which simplify pairing and configuring devices. Teachers and learners attach QR codes to scripts, tutorials, or resources in education, ensuring quick access to valuable materials. These examples demonstrate how QR codes integrate seamlessly into Linux workflows to improve efficiency and usability.

How to Generate QR Codes on Linux

Linux users have several methods to create QR codes, from terminal-based commands to online tools like me-qr.com, which offer user-friendly interfaces. Here’s a list of ways to generate QR codes within Linux environments:

  1. Automate QR code generation with cron jobs for time-sensitive data.
  2. Encode secure access tokens or one-time passwords in QR codes.
  3. Store Linux commands in QR codes for quick scanning and execution.
  4. Use QR codes for encrypted messages using tools.
  5. Create QR codes linking to installation scripts or system resources.

In Linux environments, QR codes are not limited to traditional uses. For instance, remote server management becomes more secure with QR codes containing SSH keys or login credentials, allowing encrypted device connections. Similarly, QR codes can be used in disaster recovery processes to store encryption keys or recovery instructions.

For Linux-based applications, developers embed QR codes into app interfaces to direct users to support pages or additional features, decluttering the UI. Additionally, collaborative workflows benefit from QR codes directly linking to Git repositories, enabling seamless project sharing among teams. These creative applications illustrate the versatility of QR codes in enhancing functionality and security within Linux systems.

The Open-Source Potential of QR Codes on Linux

As Linux continues to power diverse applications, from servers to IoT devices, QR codes add a layer of simplicity and connectivity. Whether you’re looking to generate QR code free for file sharing or embed codes into an application, Linux users have a wealth of options at their fingertips.

Platforms like me-qr.com provide an intuitive and accessible way to create QR codes, while command-line tools offer flexibility for advanced users. With their ability to streamline workflows and enhance user experiences, QR codes are an indispensable asset in the Linux ecosystem.

Let the power of open-source meet the versatility of QR codes, and watch your Linux environment transform into a hub of connectivity and innovation.