
Introduction
Vesta Control panel is an open source, free, easy to install and configure web based control panel for Linux like systems. Using VestaCP anyone, even a novice system administrators can able to manage websites in VPS.
VestaCP is currently supporting the following operating systems.
- RHEL 5 & 6;
- CentOS 5 & 6;
- Debian 7;
- Ubuntu 12.04/12.10/13.04/13.10/14.04.
I tested this tool on my Ubuntu 14.04 server. It worked like a charm.
Features
VestaCP has plenty of useful features listed below.
- Simple and Clean graphical user interface;
- GPL v3 License;
- Powerful CLI & API;
- Secure Platform;
- Auto updates;
- Easy update manager;
- Web, DNS, Database, Mail, FTP Server;
- Nginx out of the box;
- SSL certificates & SNI;
- Wildcard support;
- Configuration Templates;
- DKIM support;
- Fast Backups;
- System Monitoring;
- AntiSpam / Antivirus;
- WHMCS billing support.
For the detailed features, look here.
Installation
As I noted above, VestaCP installation is lot easier than any other hosting control panels. All you need to do is just download the VestaCP installation script, and run it.
To download it, execute the following command on your Terminal with root privileges.
curl -O http://vestacp.com/pub/vst-install.sh
Next, run the script as shown below:
bash vst-install.sh
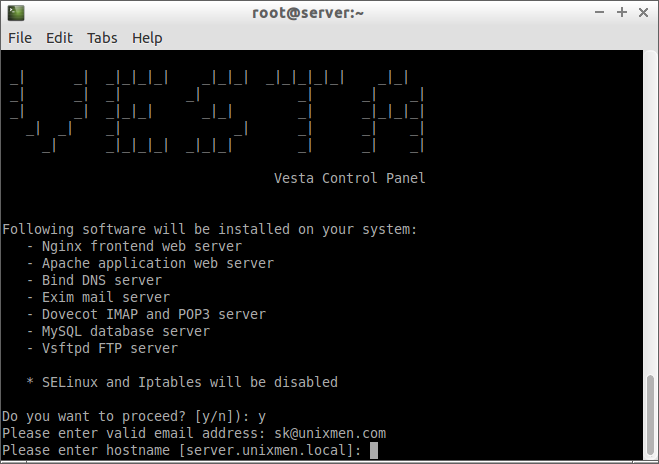
You’ll be asked to answer simple questions in order to install it on your VPS.
First, enter Y to proceed installation. Enter the valid Email address, and Enter your VPS FQDN. The FQDN will be selected by default. If you wish to change it, enter your VPS FQDN manually, else just hit the enter key.
This script will pull all required packages, and install them to install the Vesta control panel on your VPS. This will take a while depending upon your Internet speed.
After VestaCP is installed , you’ll see a screen like below.
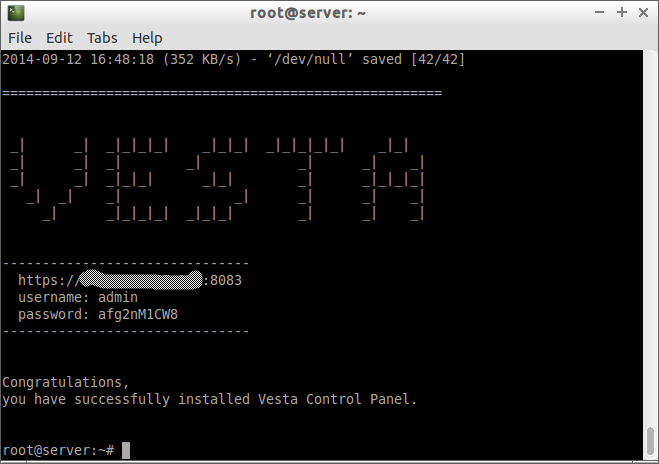
Note down the URL address, user name, and password. You need them to log in to the VestaCP web console.
Access Vesta Control Panel Dashboard
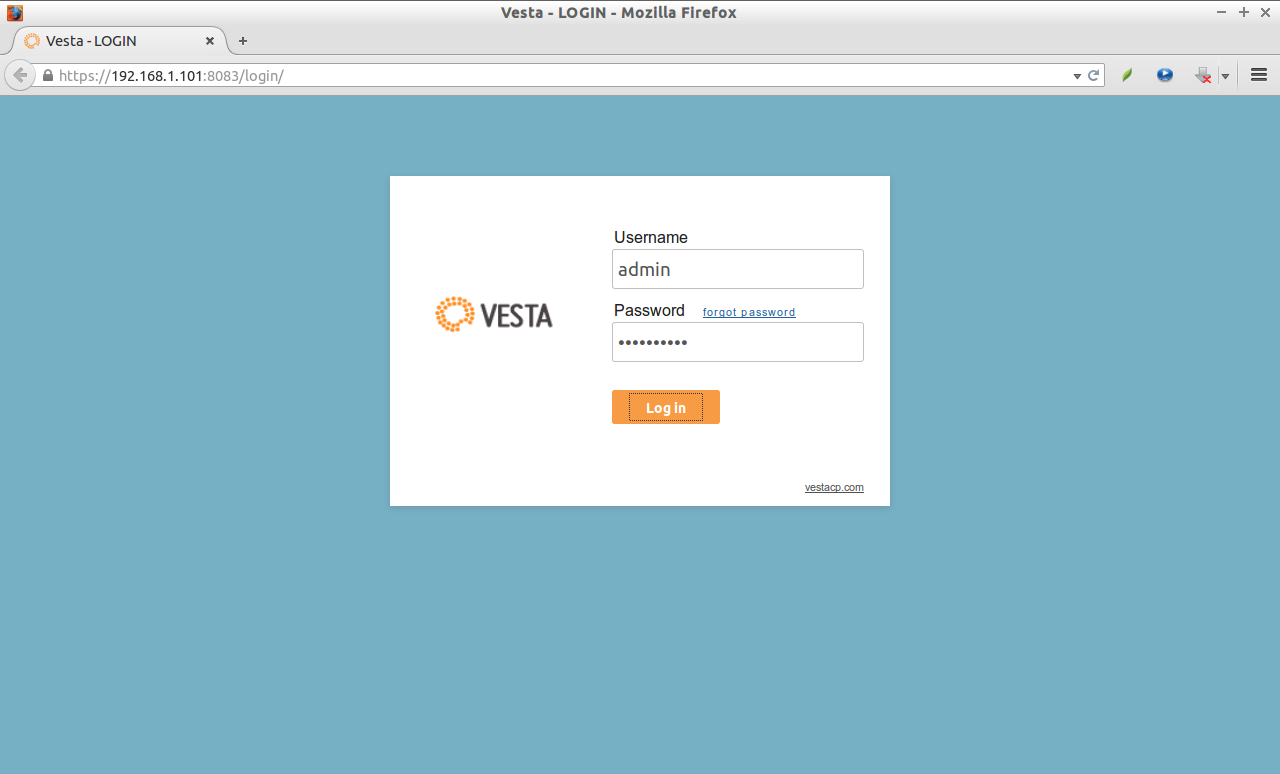
Open up your browser, and type the URL https://ip-address:8083. Don’t forget to use “htttps” in the URL. You’ll be pleased with following screen. Enter the user name and password.
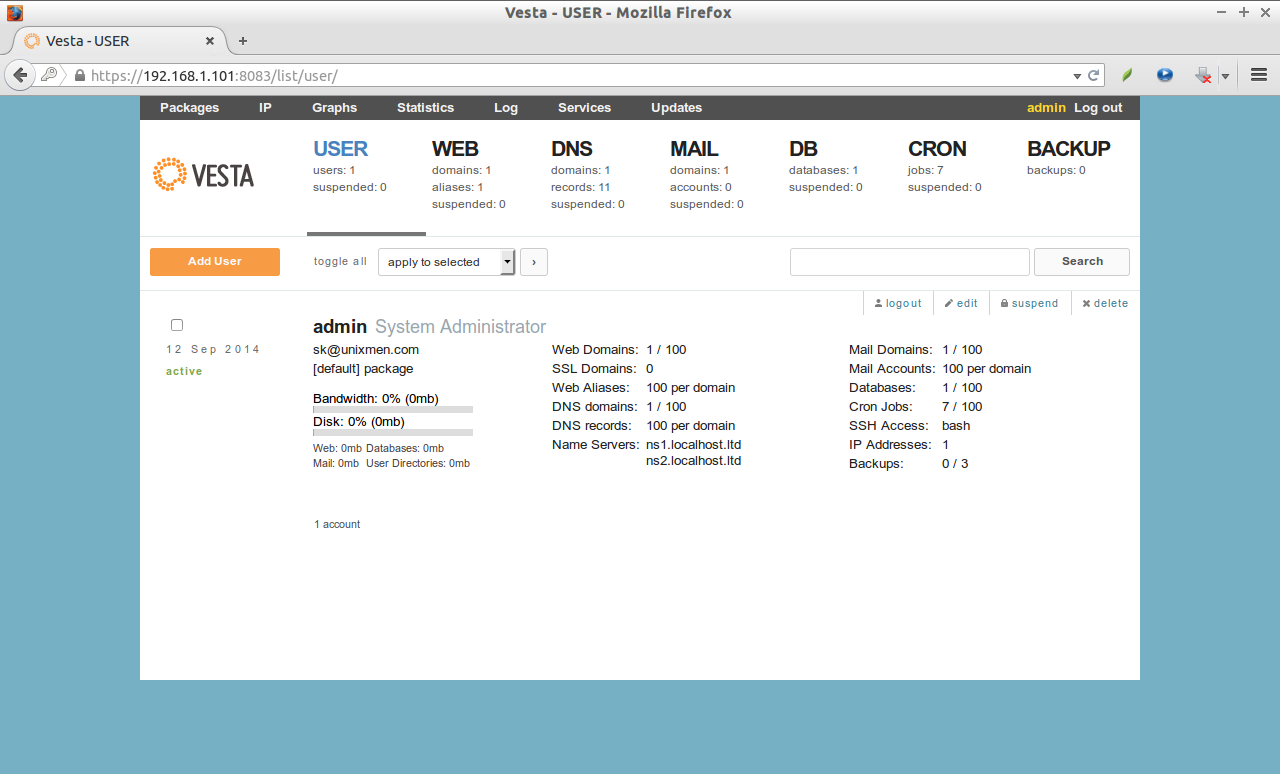
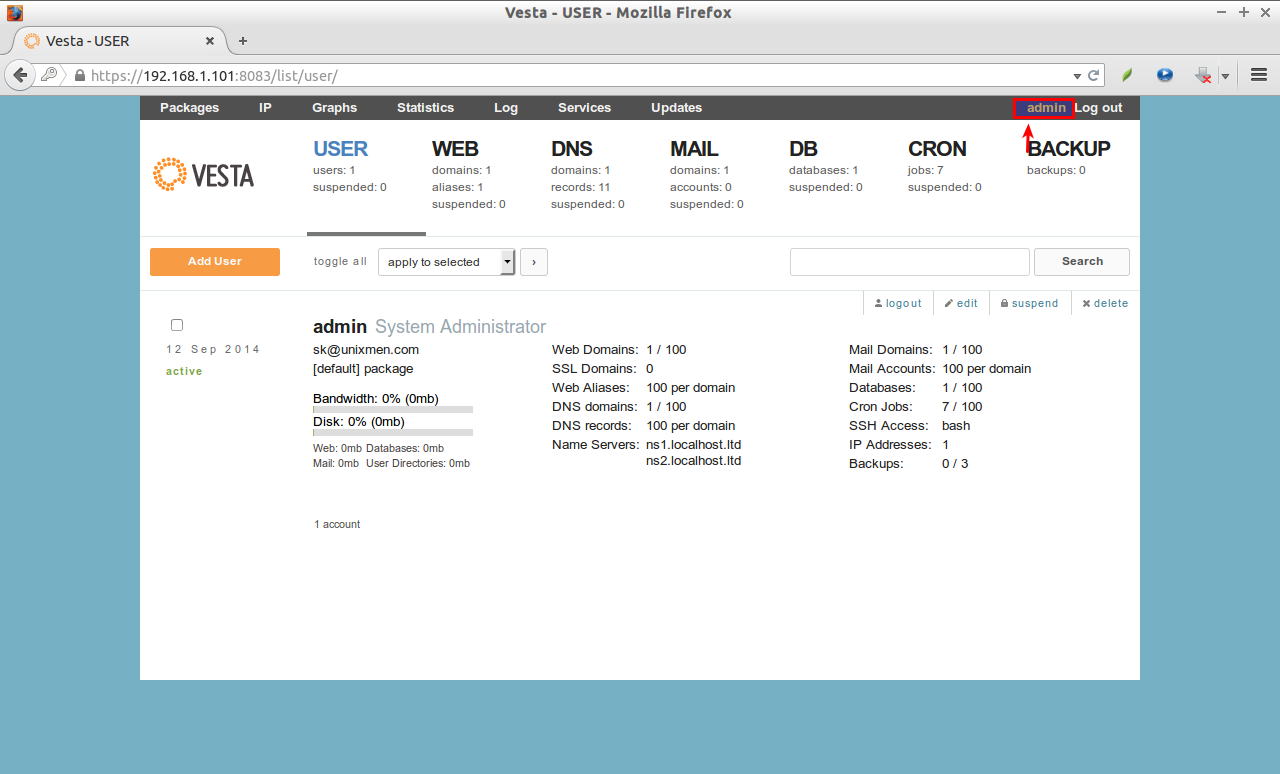
Now you’ll be able to access the dashboard. This is how my dashboard looked at first time.
After logging in to the VestaCp dashboard, the first step you might want to do is to change admin user default password.
To do that, click on the admin user on the top right of the dashboard.
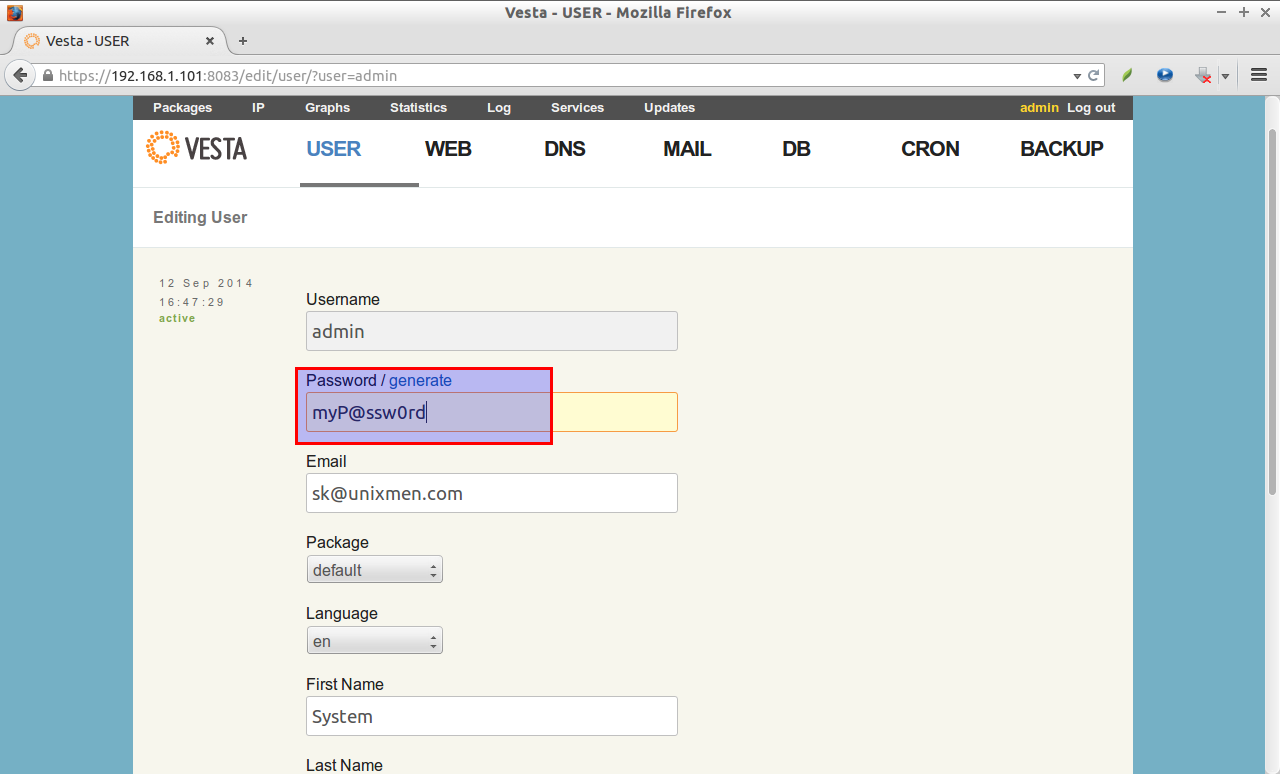
Enter the new password of your choice, and click Save.
Congratulations!! VestaCp has been successfully installed on your VPS. Now, you can start using VestaCp to manage and host websites.
For more detailed information, check out the Official documentation page.
Cheers!!
Source & Reference Link:


