
About Trident
Trident is a full featured, modular, responsive, powerful, and open source software platform that you can use to setup your own Social network website like Facebook. Trident is designed as a completely mobile friendly CMS to setup social networking media platform without having any overly technical knowledge and complicated module installations. Since It is designed as mobile friendly and responsive, It will work without any issues on almost all devices like desktops, Laptops, mobile phones, and tablets etc. Trident is fine-tuned to make your social networks feel modern, sleek and well friendly! The administrators can easily manage their social networks on the go. It is developed and maintained by BoonEx – the makers of the popular Dolphin Smart Community Builder.
Installation
Since Trident is a web-based SCMS (Social Content Management System), it can be installed on any Modern operating systems that has a web server like Apache or Nginx. Before gong to install it, you must setup a working LAMP or LEMP stack in your hosting computer.
In this tutorial, we are going to see how to setup Trident in Ubuntu 15.04 server. The steps are identical to all other distros. All you need to consider is to find the correct web root folder path in the distribution of your choice and install a working LAMP or LEMP stack in the distribution you want to deploy Trident social platform.
Prerequisites
First, setup LAMP or LEMP stack in your Ubuntu server. For the purpose of this tutorial, I am going to setup LAMP (Linux, Apache, MariaDB and PHP) stack in Ubuntu.
To do that, refer the following link.
Also, install the following PHP modules:
sudo apt-get install php5-curl php5-gd
Once you done, Log in to your MariaDB console using command:
mysql -u root -p
Create a new MySQL database for Trident to use and assign a user to it with full permissions as shown below.
For example, I am going to create a database called “tridentdb” and a user called “tridentuser” with password “ubuntu”. I recommend you to use any strong password that make it so difficult to guess.
Welcome to the MariaDB monitor. Commands end with ; or \g.
Your MariaDB connection id is 52
Server version: 10.0.20-MariaDB-0ubuntu0.15.04.1 (Ubuntu)

Copyright (c) 2000, 2015, Oracle, MariaDB Corporation Ab and others.

Type 'help;' or '\h' for help. Type '\c' to clear the current input statement.

MariaDB [(none)]> CREATE DATABASE tridentdb;
Query OK, 1 row affected (0.01 sec)

MariaDB [(none)]> GRANT ALL PRIVILEGES ON tridentdb.* TO 'tridentuser'@'localhost' IDENTIFIED BY 'ubuntu';
Query OK, 0 rows affected (0.00 sec)

MariaDB [(none)]> FLUSH PRIVILEGES;
Query OK, 0 rows affected (0.01 sec)

MariaDB [(none)]> quit
Bye
Download Trident
Download the latest version from Trident download page
At the time of writing this tutorial, the latest version was 8.0 beta version 2.
wget http://ci.boonex.com/builds/Trident-v.8.0.0-B2.zip
Extract the archive using command:
unzip Trident-v.8.0.0-B2.zip
The above command will extract the archive in the current directory. Copy the entire extracted folder to your web root directory.
Note: If you want to install Trident to a subfolder (i.e. example.com/trident), create a subfolder in “/var/www/html/” directory and copy files to it. Don’t just copy the Trident folder. Open it on your computer and copy the entire folder contents – all the files and folders inside of it to your hosting server. Pay attention to .htaccess file, it maybe hidden on *nix systems and in some FTO clients.
I am going to deploy the site in a sub-folder.
sudo mv Trident-v.8.0.0-B2/ /var/www/html/trident
Set the proper permission to the Trident folders and files as shown below.
sudo chown www-data:www-data -R /var/www/html/trident/
sudo chmod 755 /var/www/html/trident/plugins/ffmpeg/ffmpeg.exe
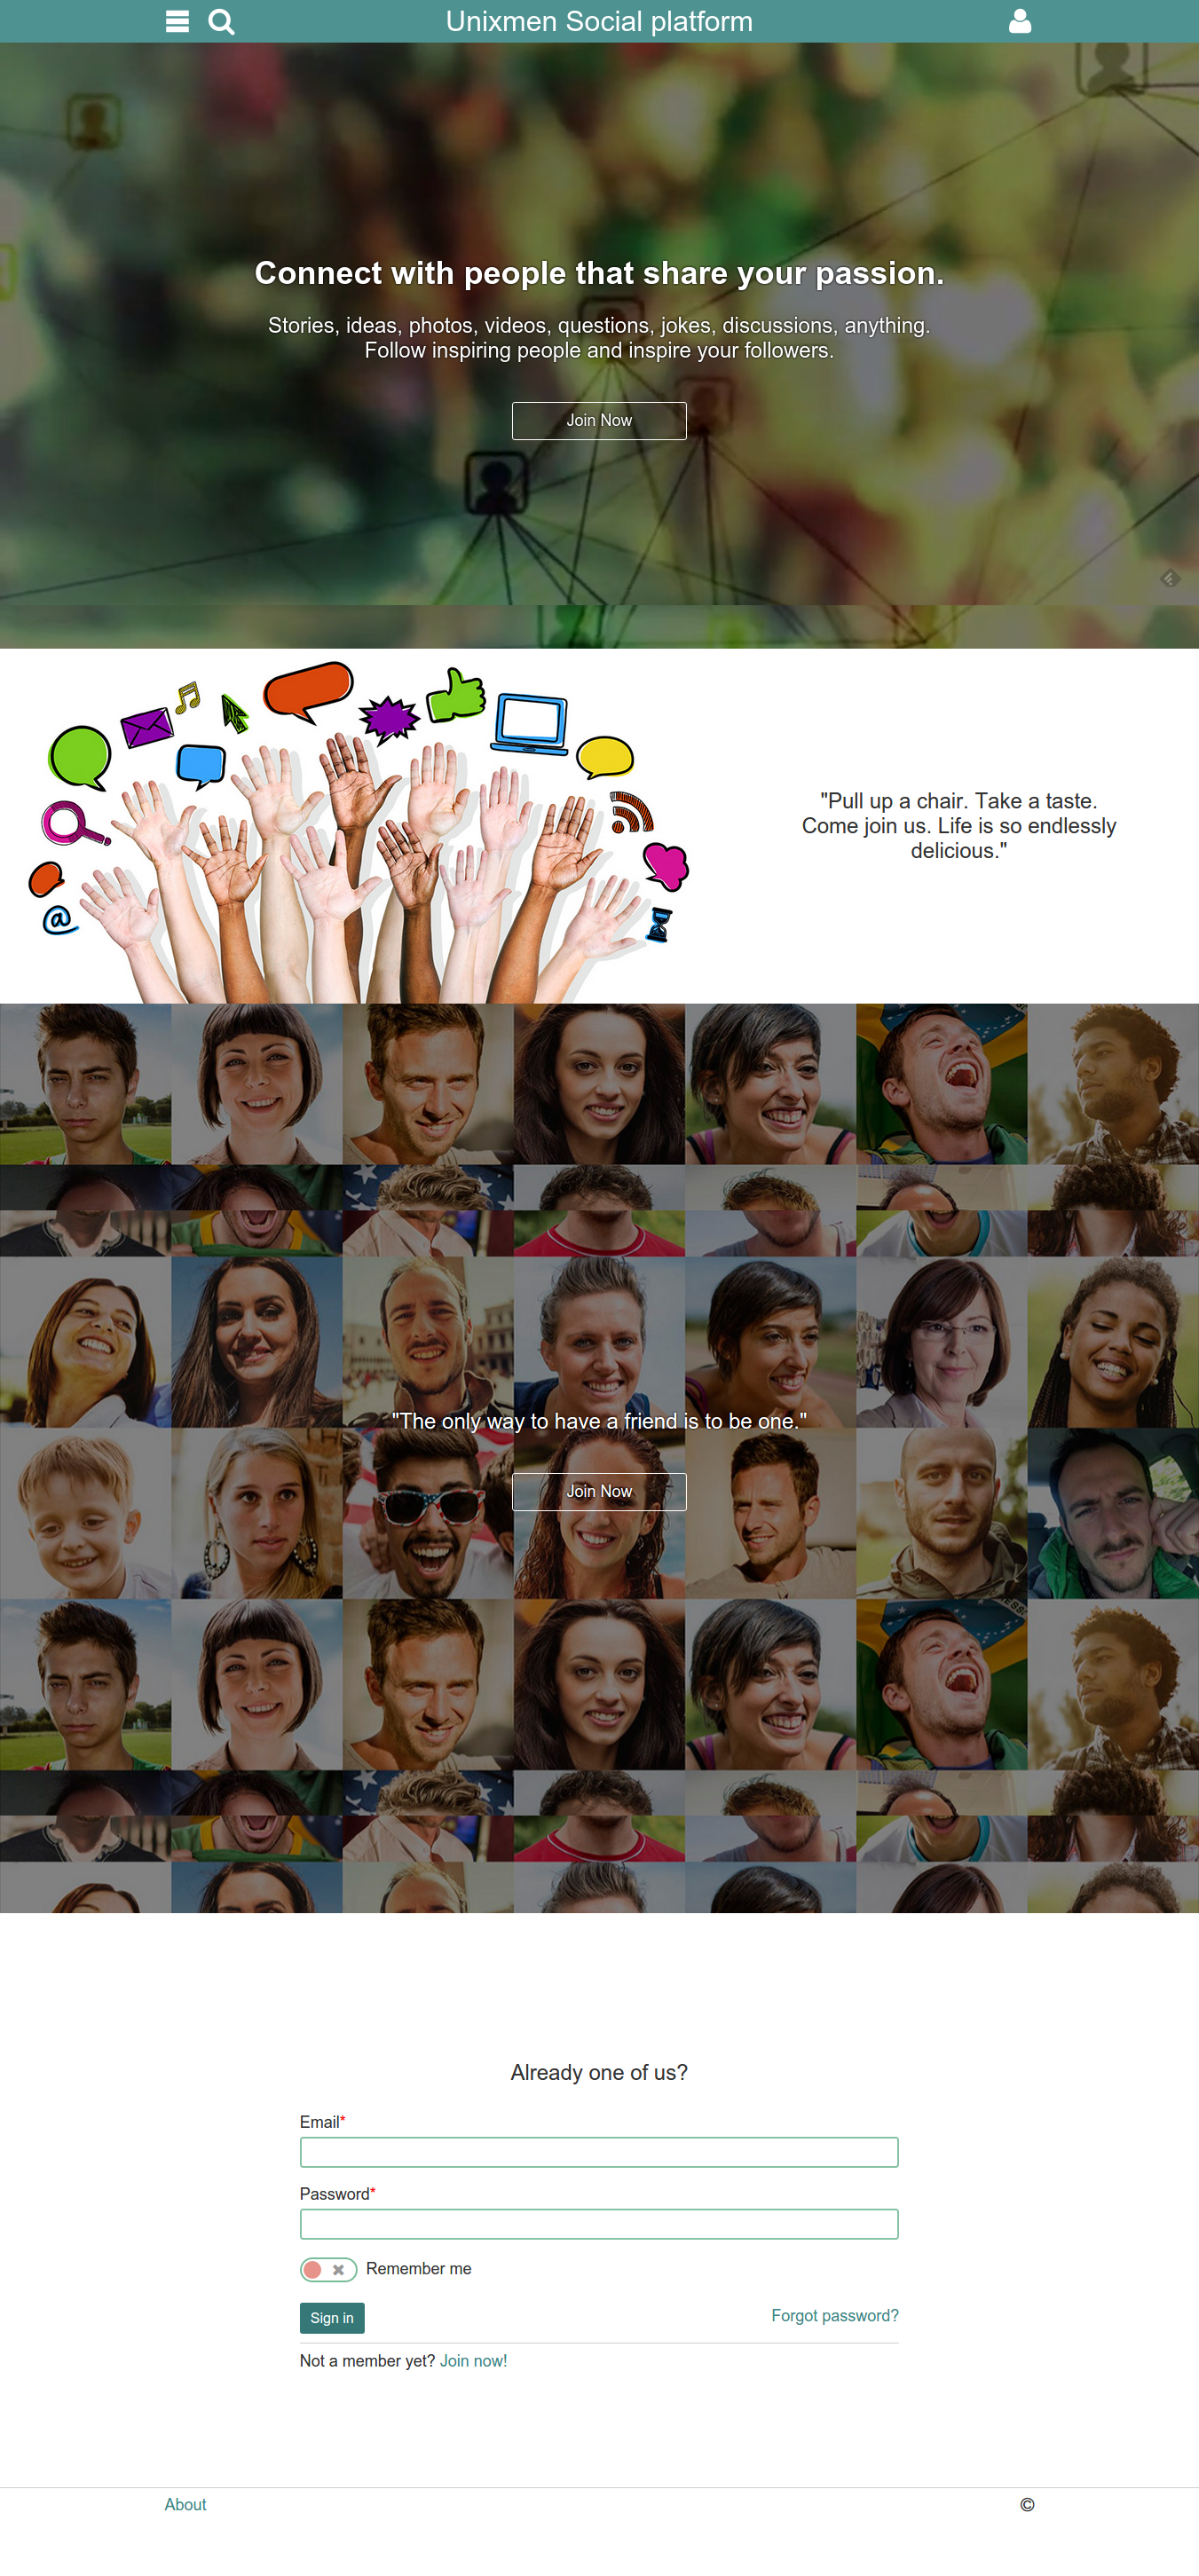
Access web-based Trident installer
Open your favourite web browser and navigate to http://domain-name/trident/ or http://ip-address/trident/. If you copied the Trident folder contents to the main apache root folder, then the URL will be: http://domain-name/.
The following screen should appear.
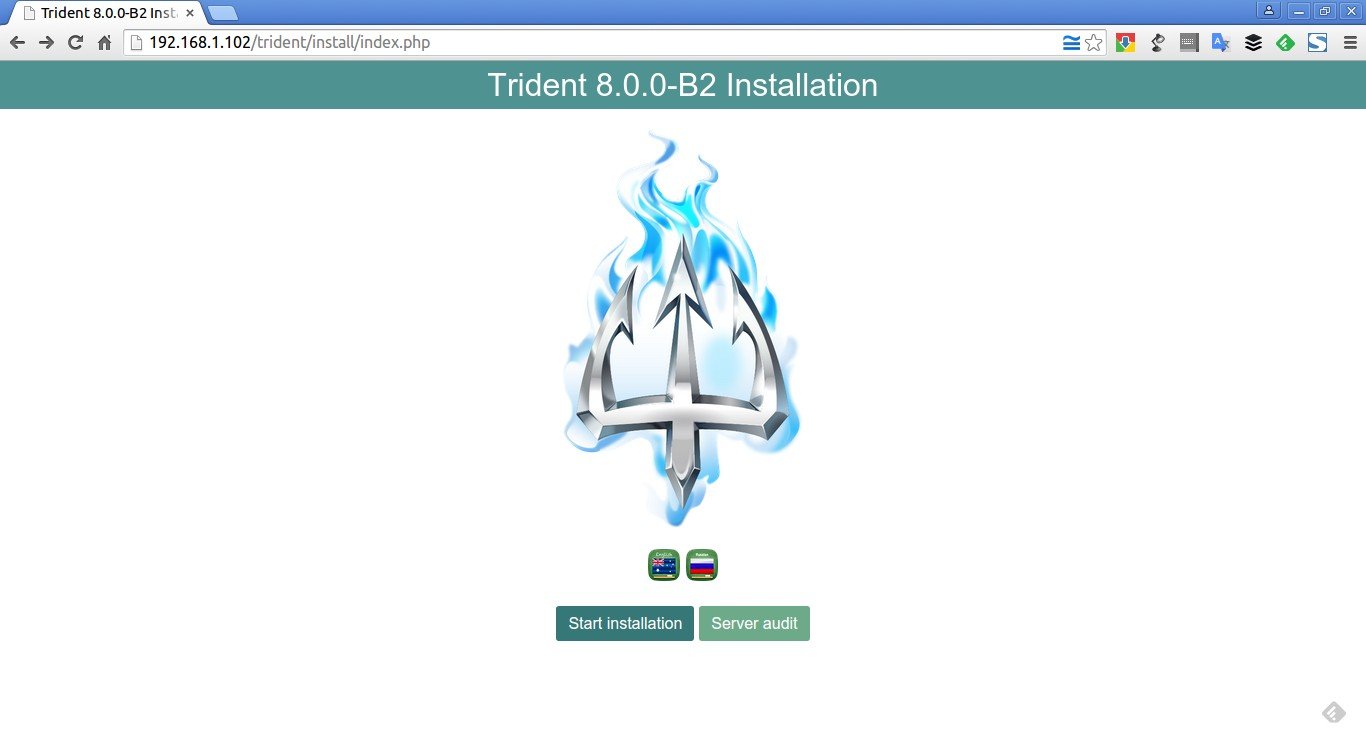
Now, you may start click “Start installation” button to install Trident or click “Server audit” to check for any software incompatibilities or incorrect settings. Hence, I don’t have any issues, i clicked “Server installation”.
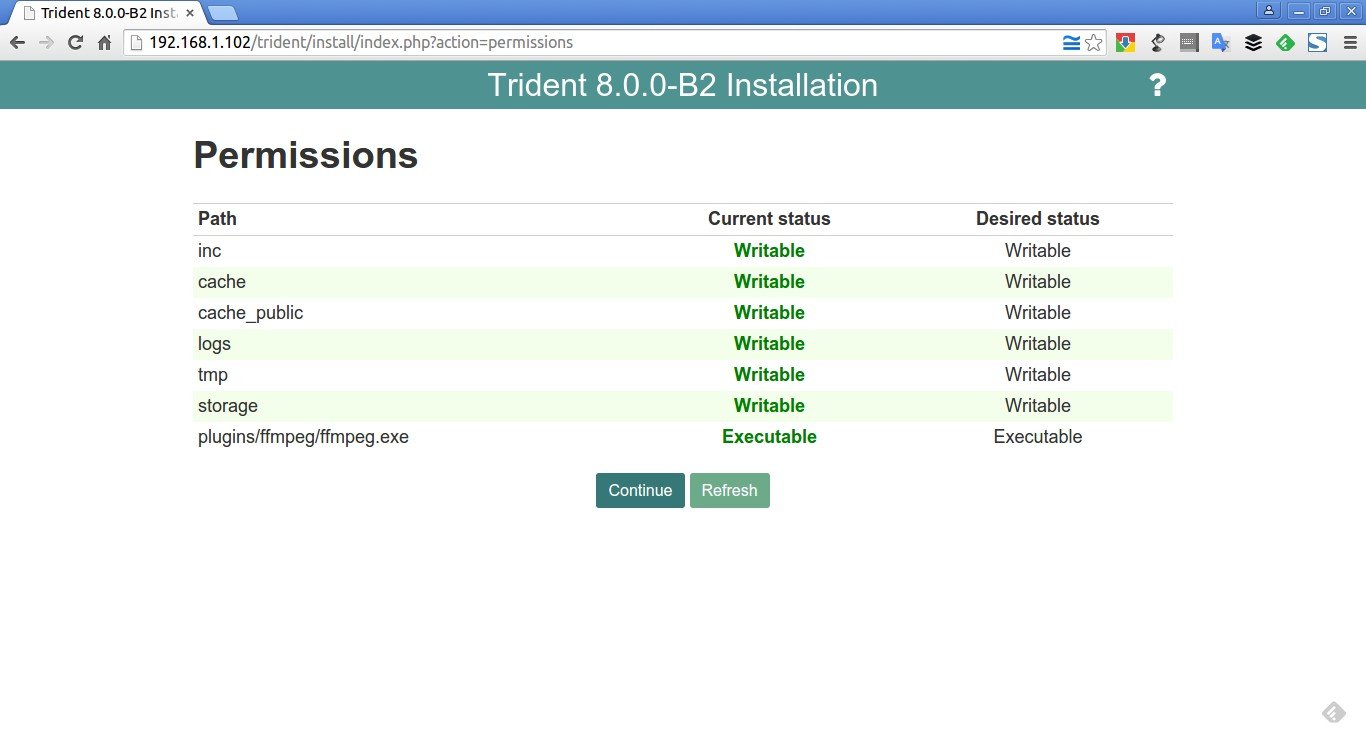
In the Next window, the installer will verify that all permissions have been properly set to the files and folders and display the result. If you don’t have any issues, click Continue button.
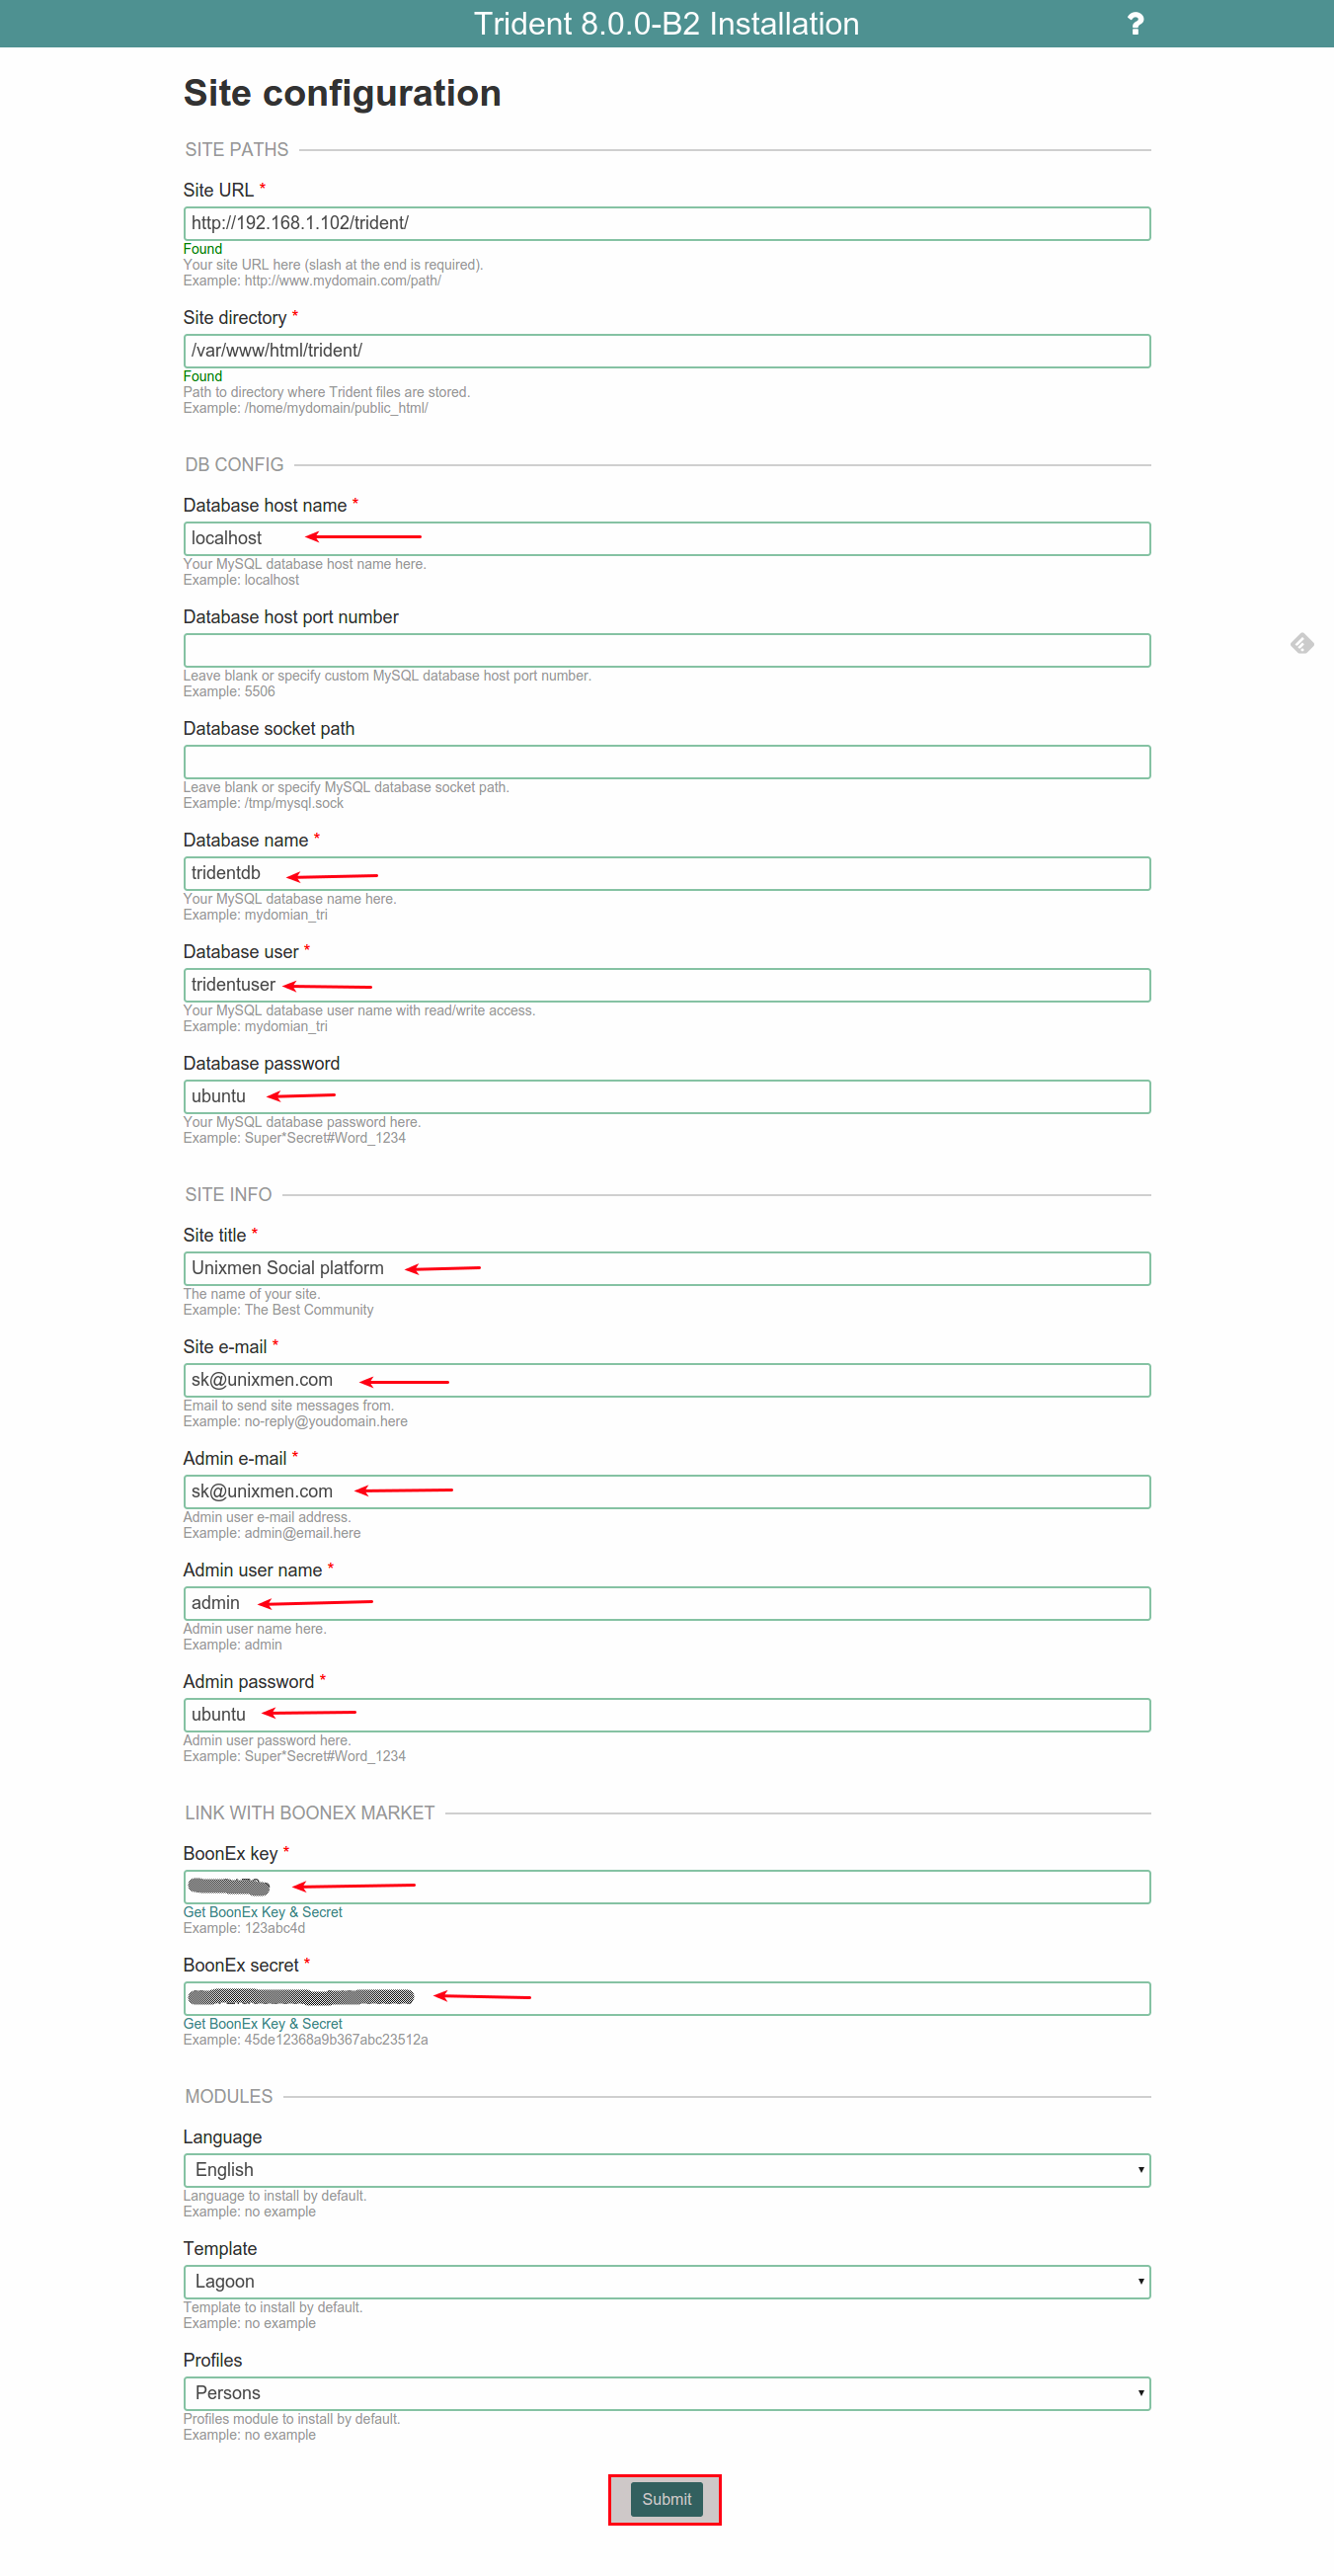
Next, enter your site details such as database name, database user and it’s password, site tittle, site email, admin email, administrative account name and it’s password etc.
Also, you need to enter BoonEx key and BonEx secret values. These numbers are required for Trident to check software version updates, buy and download Extensions and check licenses. Just click “Get BoonEx Key And Secret” link to get the numbers via your registered BoonEx account.
To get your Keys an Secrets, go to the link: http://www.boonex.com/oauth/key_and_secret.
Log in to your account or create a new user account if you don’t have one.

Enter the username and password if you already have or click on the Join button to create a new account. Enter your username, password and a valid email Id to get the secret key.
You’ll be redirected to the your Boonex account dashboard. Click on the link that says: Keys & Secrets.
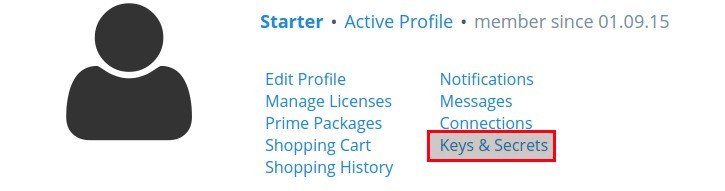
You’ll see your Keys and Secrets.
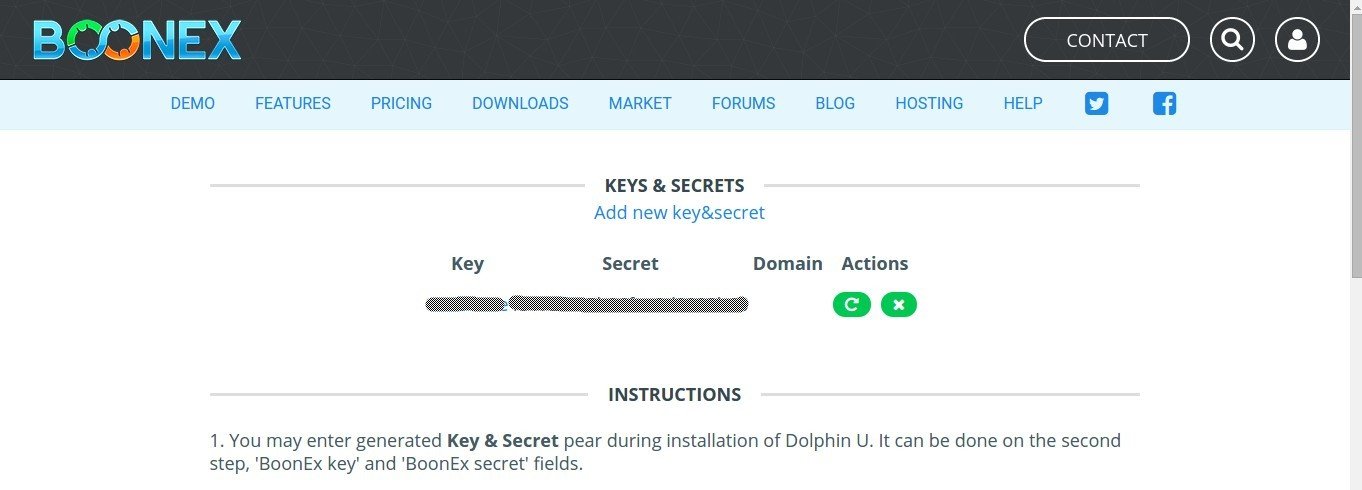
Now, copy the Keys & Secrets and head back to your Trident installer wizard and paste them in the required boxes and click Submit. Refer the following screenshot.
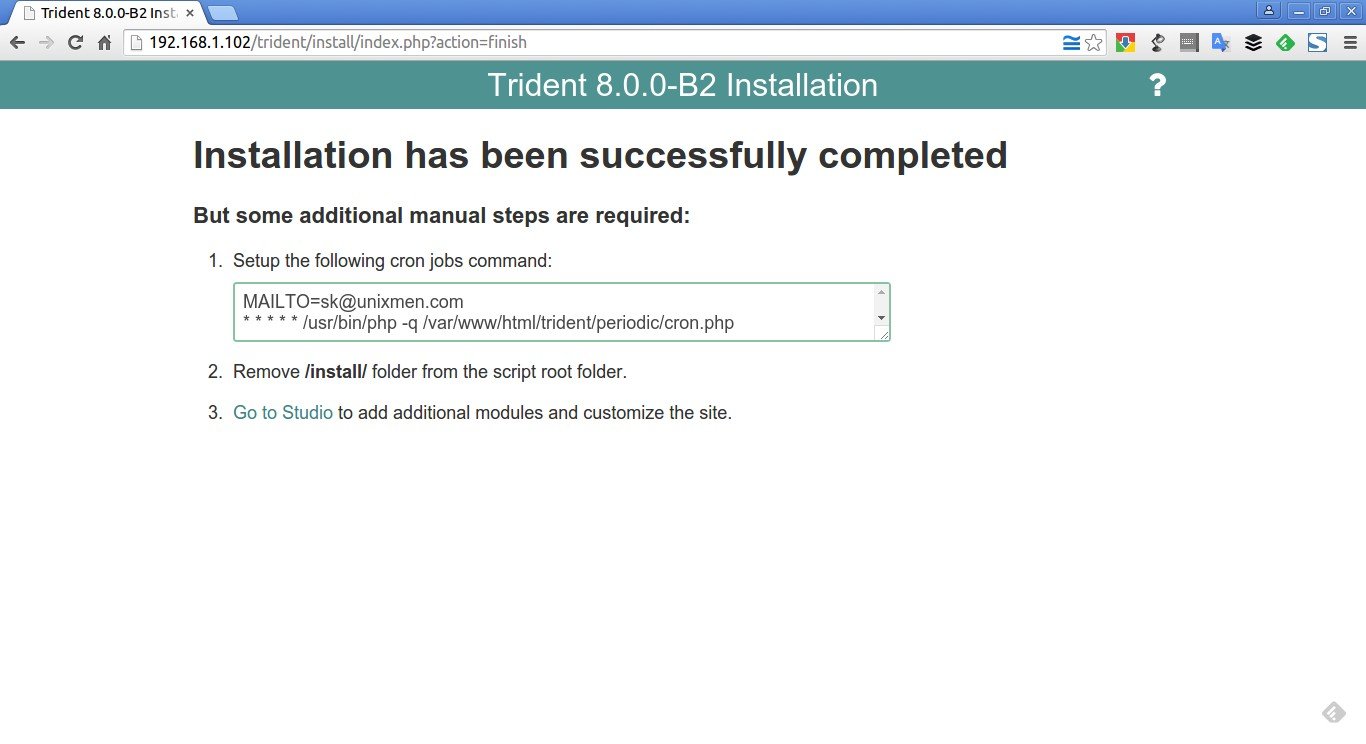
Congratulations! Trident has been successfully installed on your Ubuntu server.
Post installation instructions
1. Setup the following cron jobs command:
crontab -e
Add the following lines:
MAILTO=sk@unixmen.com
* * * * * /usr/bin/php -q /var/www/html/trident/periodic/cron.php
Replace sk@unixmen.com with your own mail id.
Restart cron service.
sudo systemctl restart cron
2. Remove /install/ folder from the script root folder.
sudo rm -rf /var/www/html/trident/install/
Access Trident admin console
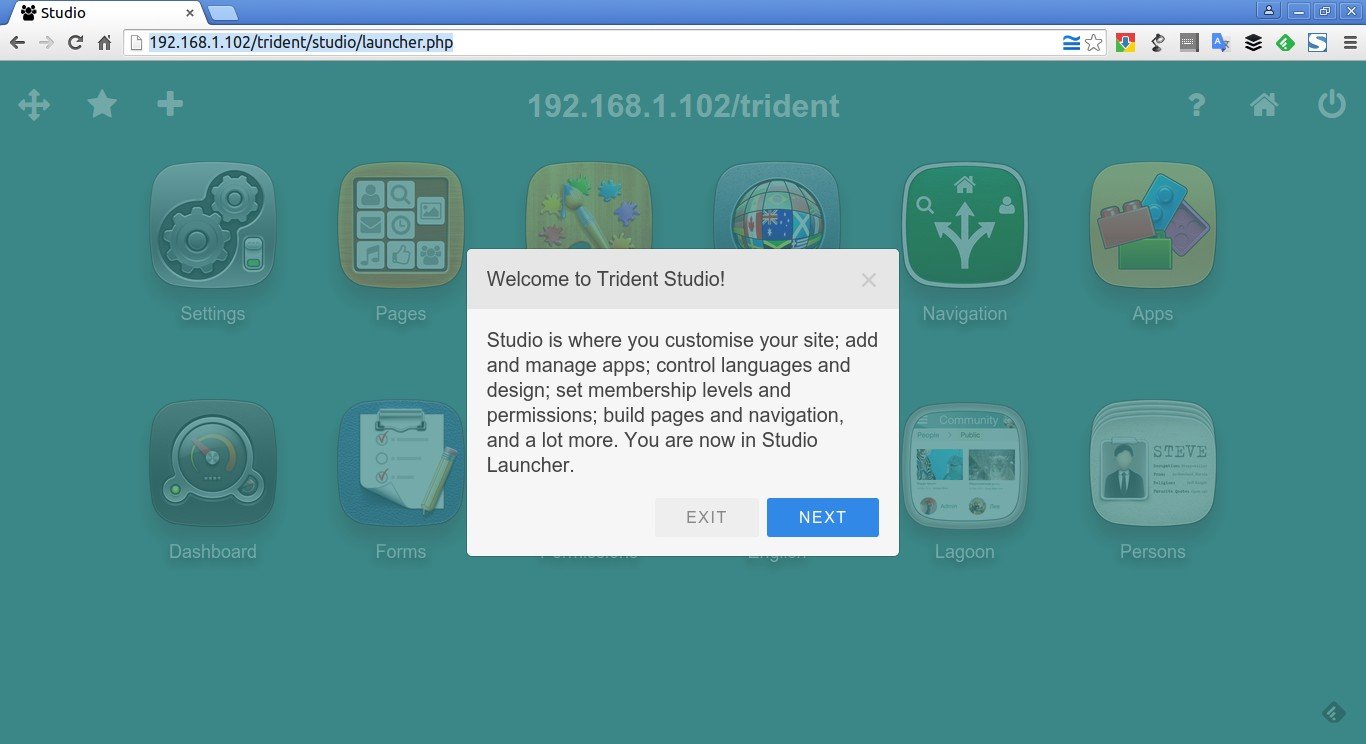
Now, go to Trident Studio for further customization by navigating to the URL: http://IP-address/trident/studio/ or http://domain-name/trident/studio/.
You’ll be pleased with the following screen. It will show a small snippet of each module. If you want to know what each module does, click Next or Click the Close button to go to the Trident Studio dashboard.
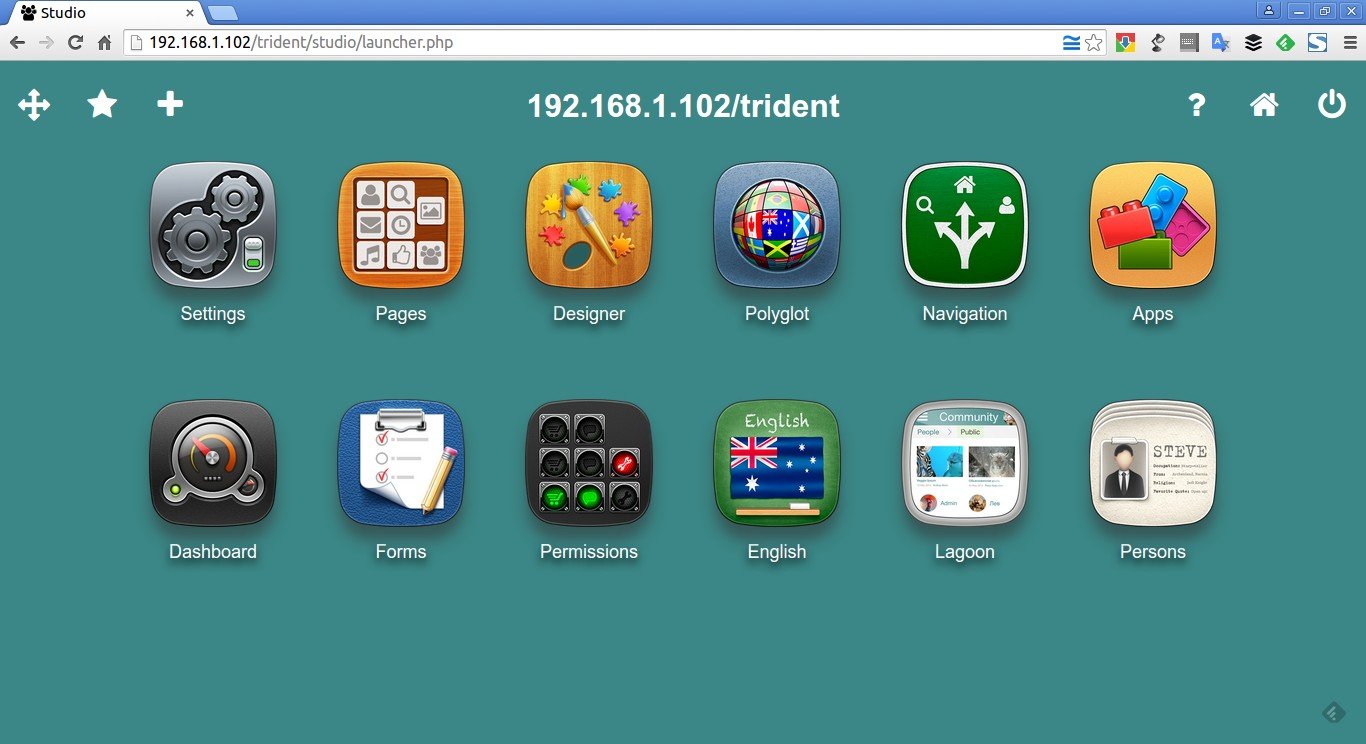
Here it is what Trident Studio dash board looks like.
That’s it. Now, start adding extensions; adjusting site settings; setting membership levels and access permissions; building pages and enjoying your Social network.
Once you done, you can visit the newly created site using URL: http://domain-name/trident.
Congratulations! Now, ask your friends, colleagues to register on your Social network and start sharing your news, status, updates and have fun!
Cheers!
If you want to setup Trident on RPM based systems like CentOS? Then, Refer the following link.
Reference link:


