
In our previous tutorials, we had showed you how to setup PXE environment on Ubuntu 14.04, and CentOS 6.5.
Setting up PXE Server can be very handy while installing large number of systems, and it just enables a System Administrator to install the client systems from a centralized PXE server without the need of CD/DVD or any USB thumb drives.
In this tutorial, let us see how to setup a PXE boot environment using Cobbler, and automate the client system installation from the PXE server. For those who don’t know, Cobbler is a Linux installation server that allows for rapid setup of network installation environments. It glues together and automates many associated Linux tasks so you do not have to hop between many various commands and applications when deploying new systems, and, in some cases, changing existing ones. Cobbler can help with provisioning, managing DNS and DHCP, package updates, power management, configuration management orchestration, and much more.
For the purpose of tutorial, I will be using a testbox running with CentOS 6.5 server for setting up PXE boot server. My testbox IP address is 192.168.1.200/24. Well, now let me walk you through into Cobbler installation and configuration on CentOS server.
Prerequisites
To reduce the complexity, I disabled SELinux. But, If you want keep it enable, refer this link.
To disable it, edit file /etc/sysconfig/selinux file,
vi /etc/sysconfig/selinux
Set SELINUX value to disabled.
[...]
SELINUX=disabled
[...]
Turn off the iptables.
service iptables stop
chkconfig iptables off
Or Allow the following ports, if you want it enabled.
vi /etc/sysconfig/iptables
Allow the http ports(80/443), Cobbler’s ports 69, and 25151.
[...]
-A INPUT -m state --state NEW -m tcp -p tcp --dport 80 -j ACCEPT
-A INPUT -m state --state NEW -m tcp -p tcp --dport 443 -j ACCEPT
-A INPUT -m state --state NEW -m tcp -p tcp --dport 69 -j ACCEPT
-A INPUT -m state --state NEW -m tcp -p tcp --dport 25151 -j ACCEPT
[...]
Save and close the file. Restart iptables service to save the changes.
service iptables restart
Reboot your server to take effect the SELinux and iptables changes. For the sake of easy, and testing purpose, I disabled both iptables and SELinux.
Install Cobbler
Cobbler is not available on CentOS default repositories, so let us add EPEL repository first, and install Cobbler. To add and enable EPEL repository, refer the below link.
Now, install cobbler, cobbler web interface ,and its dependencies as shown below.
yum install cobbler cobbler-web dhcp debmirror pykickstart system-config-kickstart dhcp mod_python tftp cman -y
Enable TFTP and rsync
The following changes should be made before start using Cobbler.
First of all, we should enable TFTP and Rsync in xinetd configuration.
Edit file /etc/xinetd.d/tftp,
vi /etc/xinetd.d/tftp
Change disable = yes to disable = no.
 # default: off
 # description: The tftp server serves files using the trivial file transfer \
 #       protocol.  The tftp protocol is often used to boot diskless \
 #       workstations, download configuration files to network-aware printers, \
 #       and to start the installation process for some operating systems.
 service tftp
 {
 socket_type             = dgram
 protocol                = udp
 wait                    = yes
 user                    = root
 server                  = /usr/sbin/in.tftpd
 server_args             = -s /var/lib/tftpboot
         disable                 = no
 per_source              = 11
 cps                     = 100 2
 flags                   = IPv4
 }
Save and close the file. Then, edit /etc/xinetd.d/rsysnc file,
vi /etc/xinetd.d/rsync
Change disable = yes to disable = no.
 # default: off
 # description: The rsync server is a good addition to an ftp server, as it \
 #       allows crc checksumming etc.
 service rsync
 {
         disable = no
 flags           = IPv6
 socket_type     = stream
 wait            = no
 user            = root
 server          = /usr/bin/rsync
 server_args     = --daemon
 log_on_failure  += USERID
 }
Save and close the file.
Configure DHCP
Copy the sample dhcpd configuration file.
cp /usr/share/doc/dhcp-4.1.1/dhcpd.conf.sample /etc/dhcp/dhcpd.conf
Edit dhcpd.conf file,
vi /etc/dhcp/dhcpd.conf
Find the following directive, and match to suits your configuration. Here is mine.
[...]
# A slightly different configuration for an internal subnet.
subnet 192.168.1.0 netmask 255.255.255.0 {
  range 192.168.1.100 192.168.1.254;
  option domain-name-servers server.unixmen.local;
  option domain-name "unixmen.local";
  option routers 192.168.1.1;
  option broadcast-address 192.168.1.255;
  default-lease-time 600;
  max-lease-time 7200;
}
[...]
Now, start all services.
service httpd start
service dhcpd start
service xinetd start
service cobblerd start
Make all services to start automatically on every reboot.
chkconfig httpd on
chkconfig dhcpd on
chkconfig xinetd on
chkconfig cobblerd on
cobbler has various sample kickstart templates stored in /var/lib/cobbler/kickstarts/. This controls what install (root) password is set up for those systems that reference this variable. The factory default is “cobbler” and cobbler check will warn if this is not changed. To change the default password, run the following command:
openssl passwd -1
Sample output:
Password:
Verifying - Password:
$1$U.Svb2gw$MNHrAmG.axVHYQaQRySR5/
Configure Cobbler
Now, we have to edit cobbler’s settings file, and do some a couple changes.
vi /etc/cobbler/settings
Find the line “default_password_crypted”, and set the new generated password which is created with command “opennssl password” command:
[...]
default_password_crypted: "$1$U.Svb2gw$MNHrAmG.axVHYQaQRySR5/"
[...]
Find the line “manage_dhcp: 0” line, and change it’s value to 1 to enable conbbler’s dhcp management features.
[...]
manage_dhcp: 1
[...]
Set your Cobbler’s IP address in “server” and “next_server” fields.
[...]
next_server: 192.168.1.200
[...]
server: 192.168.1.200
[...]
Once you modified all the above settings, save and close the file.
Now, edit file /etc/cobbler/dhcp.template,
vi /etc/cobbler/dhcp.template
Make the changes as shown below. Replace the IP range with your own range.
 subnet 192.168.1.0 netmask 255.255.255.0 {
 option routers             192.168.1.1;
 option domain-name-servers 192.168.1.1;
 option subnet-mask         255.255.255.0;
 range dynamic-bootp        192.168.1.100 192.168.1.254;
 default-lease-time         21600;
 max-lease-time             43200;
 next-server                192.168.1.200;
 class "pxeclients" {
 match if substring (option vendor-class-identifier, 0, 9) = "PXEClient";
 if option pxe-system-type = 00:02 {
 filename "ia64/elilo.efi";
 } else if option pxe-system-type = 00:06 {
 filename "grub/grub-x86.efi";
 } else if option pxe-system-type = 00:07 {
 filename "grub/grub-x86_64.efi";
 } else {
 filename "pxelinux.0";
 }
 }
Specify your Cobbler server’s Ip address in the next_server field. Once you made all changes, save and close the file.
Next, we should enable Cobbler’s web interface, and set username and password for Cobbler’s web interface.
To enable, Cobbler’s web interface, edit file /etc/cobbler/modules.conf,
vi /etc/cobbler/modules.conf
Change the following settings as shown below.
[...]
[authentication]
module = authn_configfile
[...]
[authorization]
module = authz_allowall
[...]
Next, we have to setup the setup the username and password for the cobbler web interface. To do that, run the following command. Input your preferred password twice.
htdigest /etc/cobbler/users.digest "Cobbler" cobbler
Here, my cobbler web interface user name is “cobbler”, and its password is “centos”.
Download the required network boot loaders using the following command.
cobbler get-loaders
Sample output:
task started: 2014-07-24_130618_get_loaders
task started (id=Download Bootloader Content, time=Thu Jul 24 13:06:18 2014)
path /var/lib/cobbler/loaders/README already exists, not overwriting existing content, use --force if you wish to update
downloading http://www.cobblerd.org/loaders/COPYING.elilo to /var/lib/cobbler/loaders/COPYING.elilo
downloading http://www.cobblerd.org/loaders/COPYING.yaboot to /var/lib/cobbler/loaders/COPYING.yaboot
downloading http://www.cobblerd.org/loaders/COPYING.syslinux to /var/lib/cobbler/loaders/COPYING.syslinux
downloading http://www.cobblerd.org/loaders/elilo-3.8-ia64.efi to /var/lib/cobbler/loaders/elilo-ia64.efi
downloading http://www.cobblerd.org/loaders/yaboot-1.3.14-12 to /var/lib/cobbler/loaders/yaboot
downloading http://www.cobblerd.org/loaders/pxelinux.0-3.86 to /var/lib/cobbler/loaders/pxelinux.0
downloading http://www.cobblerd.org/loaders/menu.c32-3.86 to /var/lib/cobbler/loaders/menu.c32
downloading http://www.cobblerd.org/loaders/grub-0.97-x86.efi to /var/lib/cobbler/loaders/grub-x86.efi
downloading http://www.cobblerd.org/loaders/grub-0.97-x86_64.efi to /var/lib/cobbler/loaders/grub-x86_64.efi
*** TASK COMPLETE ***
Edit /etc/debmirror.conf,
vi /etc/debmirror.conf
comment out ‘dists’, and ‘arches’ lines.
[...]
#@dists="sid";
[...]
#@arches="i386";
[...]
Finally, restart all services once or reboot your server.
service httpd restart
service dhcpd restart
service xinetd restart
service cobblerd restart
Then, run the “cobbler check” command to check if everything is OK on the Cobbler server.
cobbler check
Sample result:
No configuration problems found. All systems go.
If you got the output like above, you’re good to go.
Restart cobblerd service, and then run ‘cobbler sync’ to apply changes.
service cobblerd restart
cobbler sync
Sample output:
task started: 2014-07-24_130807_sync
task started (id=Sync, time=Thu Jul 24 13:08:07 2014)
running pre-sync triggers
cleaning trees
mkdir: /var/lib/tftpboot/pxelinux.cfg
mkdir: /var/lib/tftpboot/grub
mkdir: /var/lib/tftpboot/s390x
mkdir: /var/lib/tftpboot/ppc
mkdir: /var/lib/tftpboot/etc
removing: /var/lib/tftpboot/grub/images
copying bootloaders
trying hardlink /var/lib/cobbler/loaders/pxelinux.0 -> /var/lib/tftpboot/pxelinux.0
trying hardlink /var/lib/cobbler/loaders/menu.c32 -> /var/lib/tftpboot/menu.c32
trying hardlink /var/lib/cobbler/loaders/yaboot -> /var/lib/tftpboot/yaboot
trying hardlink /usr/share/syslinux/memdisk -> /var/lib/tftpboot/memdisk
trying hardlink /var/lib/cobbler/loaders/grub-x86.efi -> /var/lib/tftpboot/grub/grub-x86.efi
trying hardlink /var/lib/cobbler/loaders/grub-x86_64.efi -> /var/lib/tftpboot/grub/grub-x86_64.efi
copying distros to tftpboot
copying images
generating PXE configuration files
generating PXE menu structure
rendering DHCP files
generating /etc/dhcp/dhcpd.conf
rendering TFTPD files
generating /etc/xinetd.d/tftp
cleaning link caches
running post-sync triggers
running python triggers from /var/lib/cobbler/triggers/sync/post/*
running python trigger cobbler.modules.sync_post_restart_services
running: dhcpd -t -q
received on stdout:
received on stderr:
running: service dhcpd restart
received on stdout: Shutting down dhcpd: [  OK  ]
Starting dhcpd: [  OK  ]

received on stderr:
running shell triggers from /var/lib/cobbler/triggers/sync/post/*
running python triggers from /var/lib/cobbler/triggers/change/*
running python trigger cobbler.modules.scm_track
running shell triggers from /var/lib/cobbler/triggers/change/*
*** TASK COMPLETE ***
Importing ISO files to Cobbler server
We have completed all necessary tasks. Now, let us import ISO images of any Linux distribution into Cobbler server.
I already have CentOS 6.5 ISO image on my Cobbler server /root directory. Mount the ISO file to any preferred location. For example, I am going to mount it in /mnt directory.
mount -o loop CentOS-6.5-i386-bin-DVD1.iso /mnt/
Now, let us import the ISO to our cobbler server as shown below.
cobbler import --path=/mnt/ --name=CentOS_6.5
Sample output:
 task started: 2014-07-24_132814_import
 task started (id=Media import, time=Thu Jul 24 13:28:14 2014)
 Found a candidate signature: breed=redhat, version=rhel6
 Found a matching signature: breed=redhat, version=rhel6
 Adding distros from path /var/www/cobbler/ks_mirror/CentOS_6.5:
 creating new distro: CentOS_6.5-i386
 trying symlink: /var/www/cobbler/ks_mirror/CentOS_6.5 -> /var/www/cobbler/links/CentOS_6.5-i386
 creating new profile: CentOS_6.5-i386
 associating repos
 checking for rsync repo(s)
 checking for rhn repo(s)
 checking for yum repo(s)
 starting descent into /var/www/cobbler/ks_mirror/CentOS_6.5 for CentOS_6.5-i386
 processing repo at : /var/www/cobbler/ks_mirror/CentOS_6.5
 need to process repo/comps: /var/www/cobbler/ks_mirror/CentOS_6.5
 looking for /var/www/cobbler/ks_mirror/CentOS_6.5/repodata/*comps*.xml
 Keeping repodata as-is :/var/www/cobbler/ks_mirror/CentOS_6.5/repodata
 *** TASK COMPLETE ***
Start Installing clients Using Cobbler Server
The client may be any system that has network boot enabled option (PXE boot). You can enable this option in your Bios settings.
Due to lack of resources, here I will explain using a Virtual Machine client on my Oracle VirtualBox.
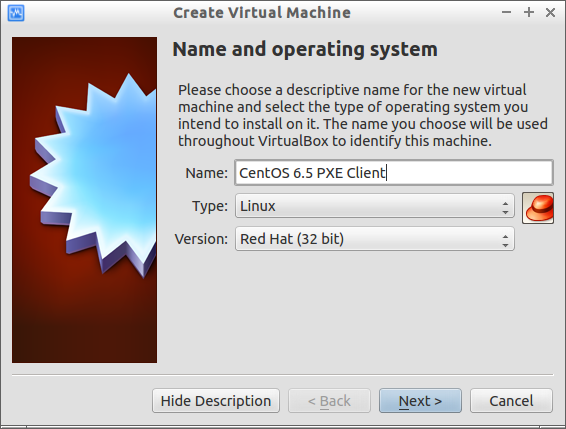
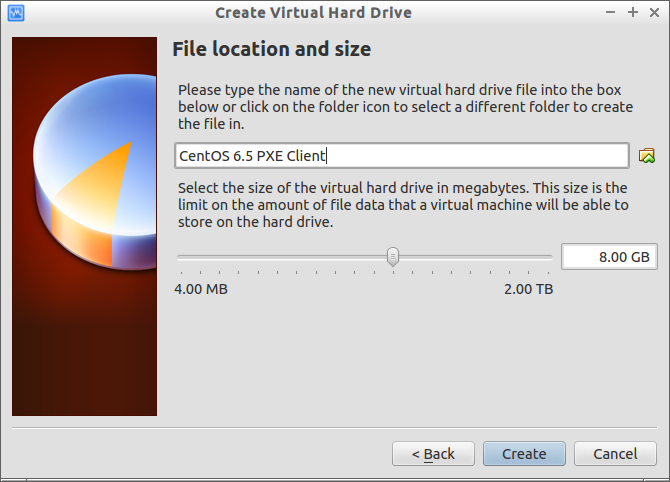
Open up the Oracle VirtualBox. Click on the New button in the menu bar. Enter your Virtual machine name.
Enter the Virtual machine RAM size.

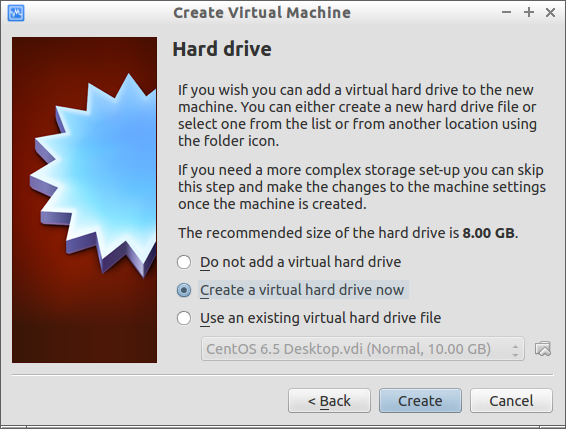
Select “Create a virtual hard drive now” option.
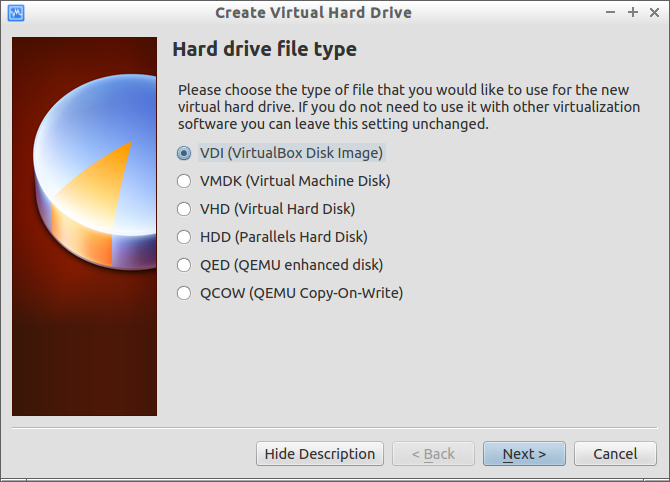
Select the virtual hard drive type.
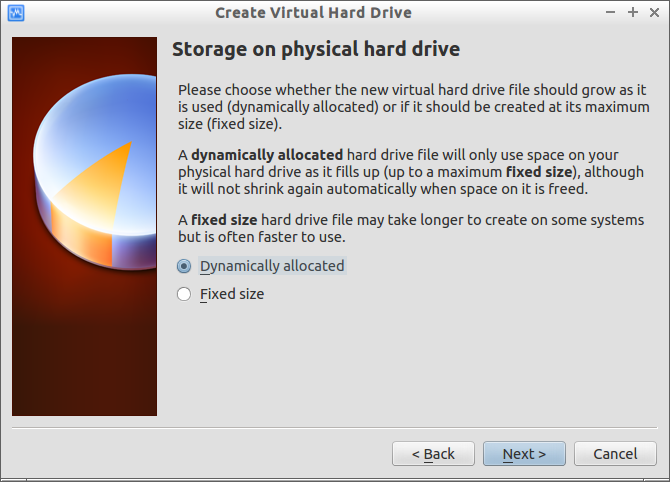
Select whether the new virtual hard drive file should grow as it is used or if it should be created as fixed size.
Enter the virtual hard disk size.
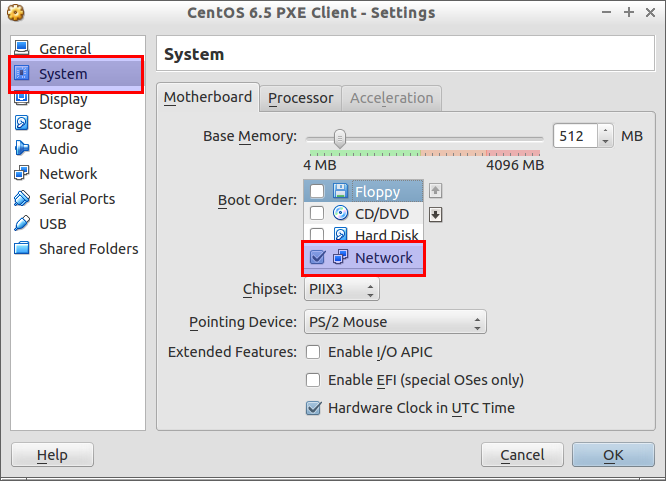
That’s it. A new virtual machine has been created. Now, we should make the client to boot from the network. To do that, go to the Vitual machine Settings option. Select the System tab on the left, and Choose Network from the boot order option on the right side.
Go to the Network tab and select “Bridged Adapter” from the “Attached to” drop down box.
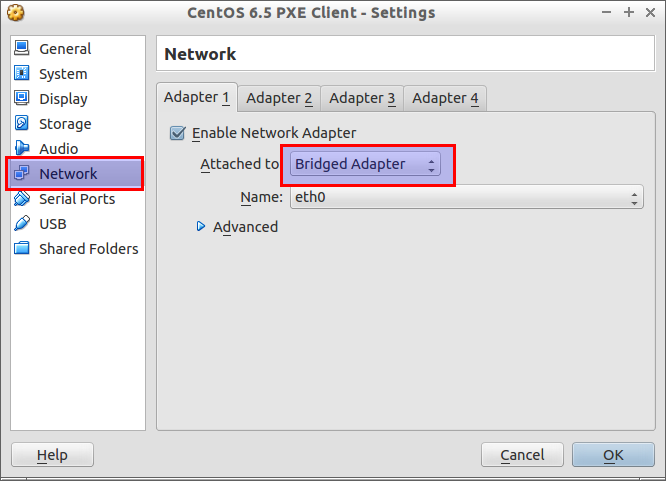
Once you done all the above steps, click OK to save the changes. That’s it. Now power on the Virtual client system. You should see the following screen.
![CentOS 6.5 PXE Client [Running] - Oracle VM VirtualBox_010](http://unixmen.com/wp-content/uploads/2014/07/CentOS-6.5-PXE-Client-Running-Oracle-VM-VirtualBox_010.png)
That’s it. Start installing CentOS 6.5 using your Cobbler server.
Adding Kickstart file to Cobbler server
Copy the default kickstart file to cobbler server.
cp anaconda-ks.cfg /var/lib/cobbler/kickstarts/centos6.ks
Now, edit file centos6.ks,
vi /var/lib/cobbler/kickstarts/centos6.ks
Make the following changes. The changes are marked in bold.
# Kickstart file automatically generated by anaconda.

 #version=DEVEL
 install
 url --url http://192.168.1.200/cobbler/ks_mirror/CentOS_6.5/
 lang en_US.UTF-8
 keyboard us
 network --onboot no --device eth0 --bootproto dhcp --noipv6
 rootpw  --iscrypted $6$vfcAiwECqxbydGwi$FSHgxeM9bBaitrkSuoEhIhrfMZZLZGxW8BMsJoyBu3iAanwJLvYDKkzKxHD6i2vEfPn5fSNfKeJ85kCchBARH0
 firewall --service=ssh
 authconfig --enableshadow --passalgo=sha512
 selinux --enforcing
 timezone --utc Asia/Kolkata
 bootloader --location=mbr --driveorder=sda --append="crashkernel=auto rhgb quiet"
 # The following is the partition information you requested
 # Note that any partitions you deleted are not expressed
 # here so unless you clear all partitions first, this is
 # not guaranteed to work
 #clearpart --all --drives=sda

 #part /boot --fstype=ext4 --size=500
 #part pv.008002 --grow --size=1

 #volgroup vg_server --pesize=4096 pv.008002
 #logvol / --fstype=ext4 --name=lv_root --vgname=vg_server --grow --size=1024 --maxsize=51200
 #logvol swap --name=lv_swap --vgname=vg_server --grow --size=1248 --maxsize=1248

 repo --name="CentOS"  --baseurl=cdrom:sr0 --cost=100

 %packages
 @base
 @console-internet
 @core
 @debugging
 @directory-client
 @hardware-monitoring
 @java-platform
 @large-systems
 @network-file-system-client
 @performance
 @perl-runtime
 @server-platform
 @server-policy
 @workstation-policy
 oddjob
 sgpio
 device-mapper-persistent-data
 pax
 samba-winbind
 certmonger
 pam_krb5
 krb5-workstation
 perl-DBD-SQLite
 %end
Save and close the file. Add the distribution information to the pxe server.
cobbler distro add --name=CentOS_6.5 --kernel=/var/www/cobbler/ks_mirror/CentOS_6.5/isolinux/vmlinuz --initrd=/var/www/cobbler/ks_mirror/CentOS_6.5/isolinux/initrd.img
And then, add the kickstart file(centos6.ks) to the pxe server.
cobbler profile add --name=CentOS_6.5_KS --distro=CentOS_6.5 --kickstart=/var/lib/cobbler/kickstarts/centos6.ks
Restart cobbler once again, and run “cobble sync” command to save the changes.
service cobblerd restart
cobbler sync
Now, boot up the pxe client, and you should see the following screen now. Choose the Kickstart file, and start installing CentOS.
![CentOS 6.5 PXE Client [Running] - Oracle VM VirtualBox_011](http://unixmen.com/wp-content/uploads/2014/07/CentOS-6.5-PXE-Client-Running-Oracle-VM-VirtualBox_011.png)
After installing the PXE clients, login with user name ‘root’, with password that you have created earlier using “openssl password” command.
Adding Multiple Distributions
If you want to add different distros like Ubuntu, its also possible. For example, let me add Ubuntu 14.04 server distribution to Cobbler server. To do that, first mount Ubuntu 14.04 ISO to any preferred location:
mount -o loop ubuntu-14.04-server-i386.iso /mnt/
Then, import the Ubuntu 14.04 ISO image to the cobbler server as shown below.
cobbler import --path=/mnt/ --name=Ubuntu14
Now, boot up your PXE client. This time you’ll find the Ubuntu distro has been added to the PXE server.
![Ubuntu 14 PXE client [Running] - Oracle VM VirtualBox_014](http://unixmen.com/wp-content/uploads/2014/07/Ubuntu-14-PXE-client-Running-Oracle-VM-VirtualBox_014.png)
Like this way, you can add as many as distributions you wanted to the Cobbler server, and start installing different distros from a single PXE server. Sounds awesome? yes It should be.
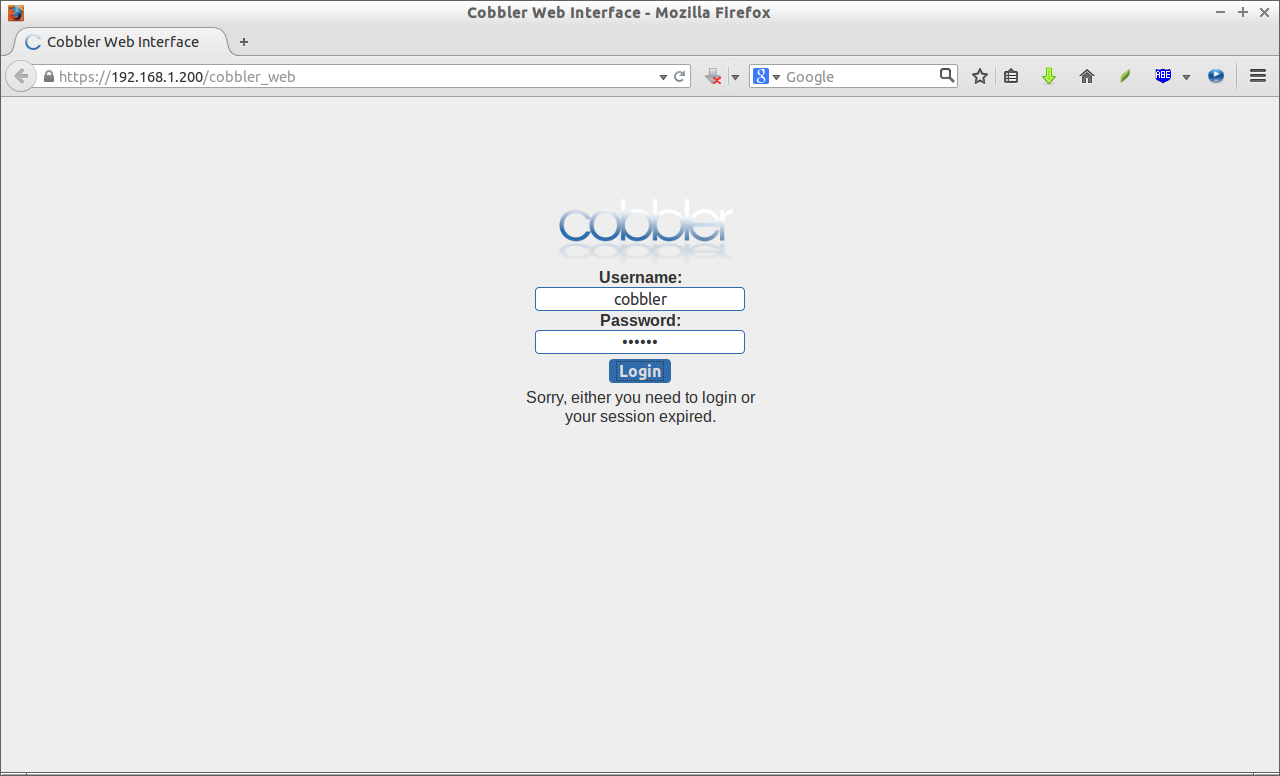
Cobbler Web interface
If you find difficult to work on command line, you can use the simple web interface to configure, and manage pxe clients. To access the Cobbler web interface, open up your browser, and navigate to: https://ip-address-of-cobbler/cobbler_web.
The following screen should appear. Enter the cobbler web interface username and password that you’ve created earlier using “htdigest” command.
Cobbler Dashboard:
This is how my Cobbler dashboard looked.
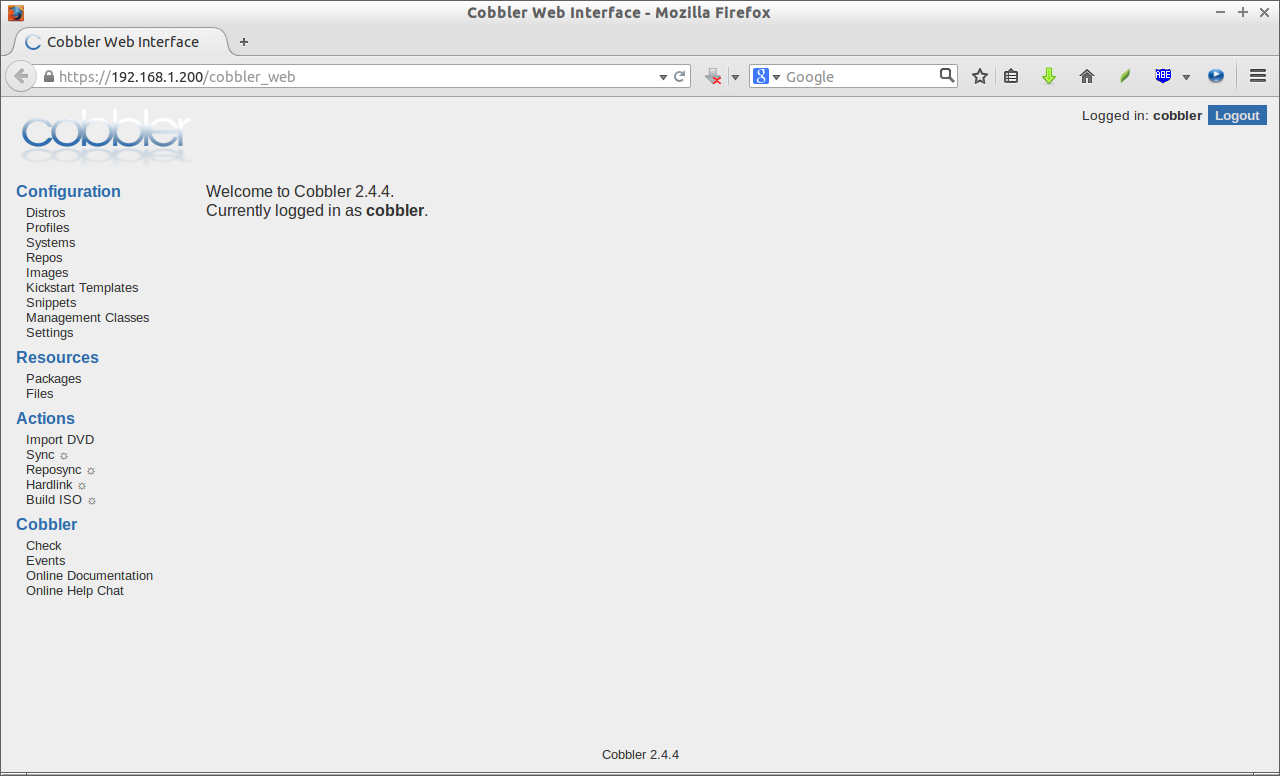
From here, you can create, add and manage new distros, profiles, Systems, and kickstart templates easily.
That’s all for now. Hope this tool will useful to you. Enjoy!
Reference:


