
Today, we are going to know how to install and run osTicket, an open source (commercial version also available) Ticket management tool in Ubuntu 14.04 server edition. Lots of companies doing service level business. They need to give a proper service/support to client. They should give proper support to customer. How to do that ? They need to maintain customer support ticket system/help desk support.
In this article, I’m going to explain how to install and configure FREE self hosted opensource support portal/help desk software osTicket.
What is osTicket ?
osTicket is a widely-used and trusted open source support ticket system. It seamlessly routes inquiries created via email, web-forms and phone calls into a simple, easy-to-use, multi-user, web-based customer support platform.
osTicket Features
- Custom Fields – Customize the data collected from users when submitting a ticket to help get straight to the issue ;
- Rich Text or HTML – Rich text or HTML email, is supported and allows for rich text markup in staff replies and internal notes posted to the ticket thread ;
- Help Topics – Configurable help topics for web tickets. Route inquiries without exposing internal departments or priorities ;
- Agent Collision Avoidance – Ticket locking mechanism to allow staff to lock tickets during response and avoid conflicting or dual responses ;
- Assign and Transfer – Transfer tickets between departments to make sure it’s being handled by the correct staff. Assign tickets to a staff or to a team ;
- Auto-Responder – Configurable automatic reply sent out when a new ticket is opened or a message is received ;
- Internal Notes – Add internal notes to tickets for staff. Activity logs let you see events or actions that have been taken, when they took place, and by whom ;
- Service Level Agreements – SLA Plans allow you to track tickets and due dates without the hassle ;
- Customer Portal – All support requests and responses are archived online. User can login using email and ticket ID. No user account or registration required to submit a ticket ;
- Dashboard Reports – Get system overview and basic historical statistics on tickets count and status per department, staff and help topics.
Install OSTicket On Ubuntu 14.04
Since it is a web based tool, the following prerequisites needs to be installed.
- Apache ;
- MySQL ;
- PHP.
First of all, update all packages using command:
sudo apt-get update && sudo apt-get upgrade
Install all the required prerequisites, including some PHP extensions using command:
sudo apt-get -y install apache2 mysql-server mysql-client php5 php5-mysql php5-imap php5-gd php5enmod imap
During installation, you’ll be asked to enter the MySQL root user password.
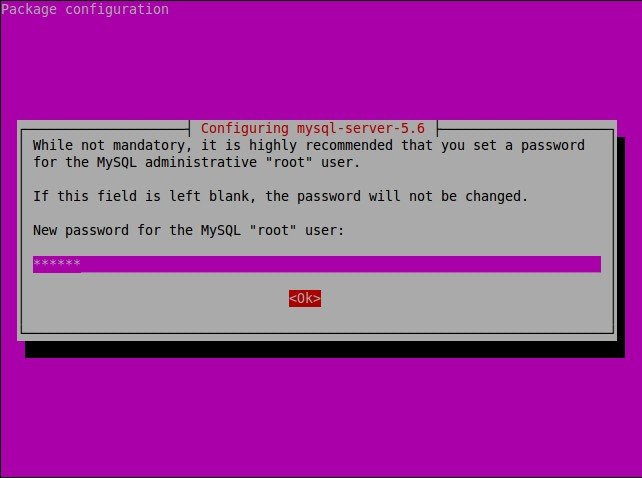
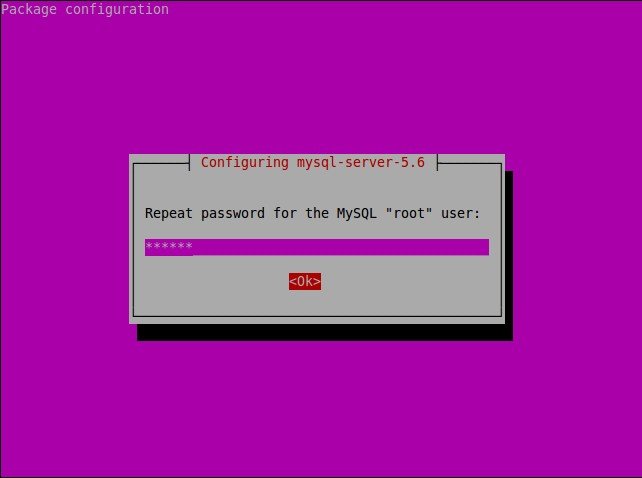
Re-enter the password.
Configuring MySQL for osTicket
Now, log in to the MySQL console and create a database for the osTicket.
mysql -u root -p
This will prompt you for a password, so enter your MySQL root password and hit Enter.
Then, Create the database for osTicket and assign proper permission.
mysql> create database osticketdb;
Query OK, 1 row affected (0.01 sec)

mysql> CREATE USER 'osticketuser'@'localhost' IDENTIFIED BY 'ubuntu';
Query OK, 0 rows affected (0.00 sec)

mysql> GRANT ALL ON osticketdb.* TO 'osticketuser'@'localhost';
Query OK, 0 rows affected (0.00 sec)

mysql> flush privileges;
Query OK, 0 rows affected (0.00 sec)

mysql> exit
Bye
Downloading osTicket installation script
Go to the Apache root directory:
cd /var/www/
Download osTicket latest version from the official download page.
sudo wget http://osticket.com/sites/default/files/download/osTicket-v1.9.8.1.zip
Create a directory called ‘osticket’ and extract the zip in it.
sudo mkdir osticket
sudo unzip osTicket-v1.9.8.1.zip -d osticket
Change html/osticket folder permissions:
chown -R www-data:www-data /var/www/osticket/
Finally, restart the Apache service.
sudo service apache2 restart
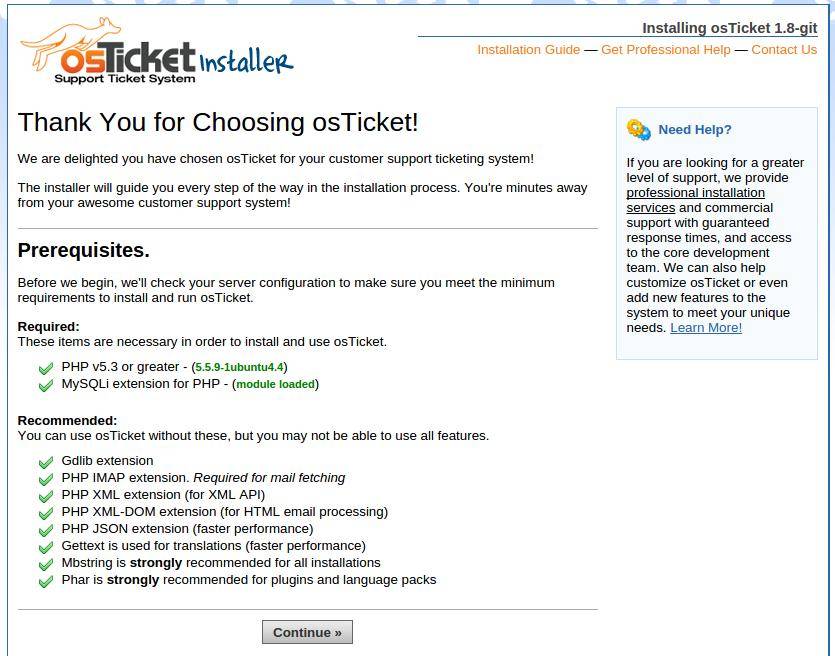
Step 6. Accessing osTicket.. And See the Installation wizard has been started.. Open your favorite browser and navigate to
http://yourdomain.com/osticket or http://server-ip/osticket.
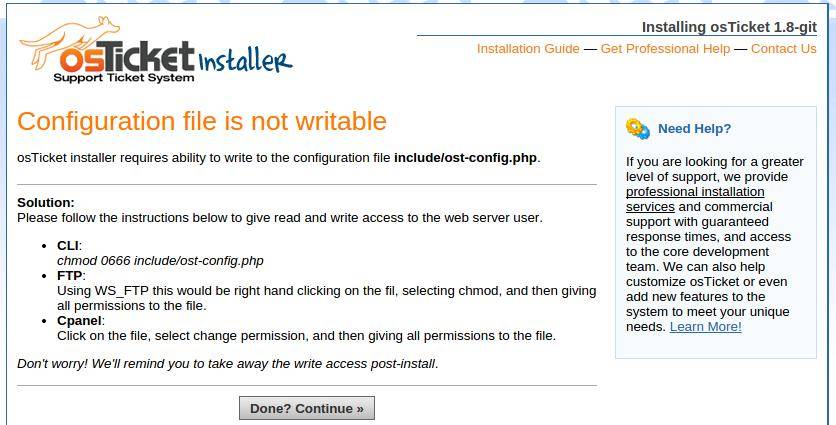
osTicket installer requires ability to write to the configuration file.
To do that, copy file ost-sampleconfig.php and rename to ost-config.php:
sudo cd /var/www/osticket
sudo cp include/ost-sampleconfig.phpinclude/ost-config.php
Now change permission:
As I mentioned above, configuration file is not writable. So change the file permission from 0644 to 0666 then hit Done, Continue button.
sudo cd /var/www/tickets
sudo chmod 0664 include/ost-config.php
Fill required details.
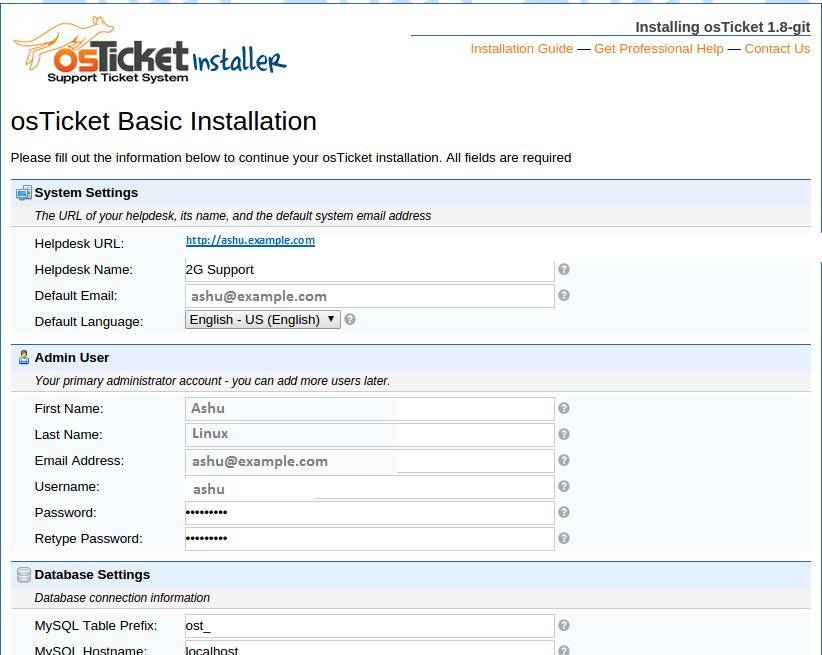
Wait for few seconds. Installation under processing..

Now, you have successfully installed osTicket. Congratulation’s! You have successfully installed osTicket.
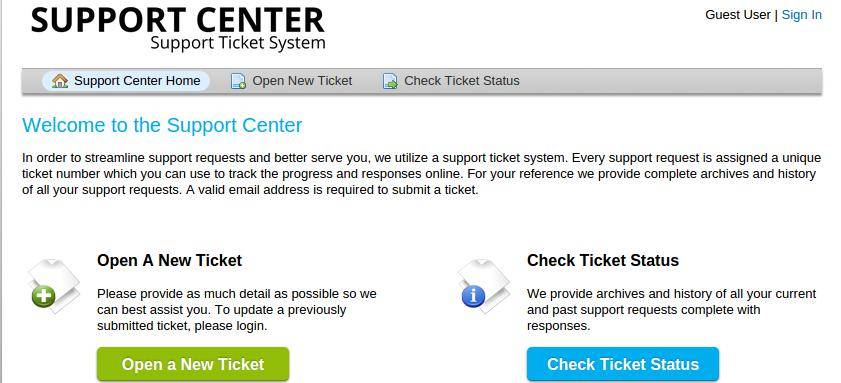
Now Open Support center home page.
Open your favorite browser and navigate to http://yourdomain.com or http://server-ip.
Here is how my osTicket support center looks.
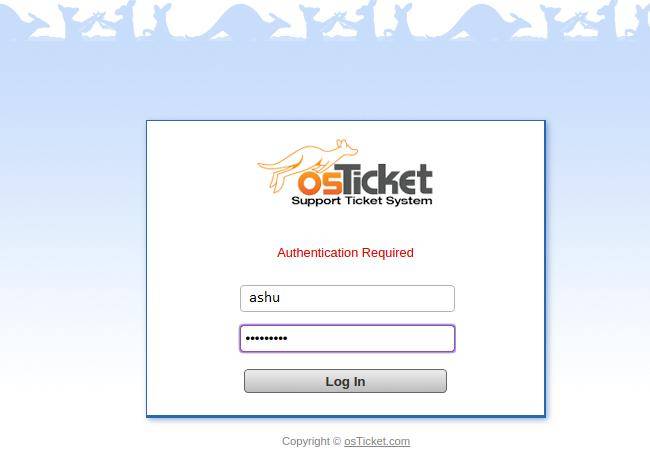
Open Admin/Staff login URL…
Thanks for using this tutorial for installing osTicket (Open source ticketing tool) on Ubuntu 14.04 system. For additional help or useful information, we recommend you to check the official osTicket web site.
Reference:


