Hello everyone.
Today we will go through how we can install Oracle 12c on OpenSuse 42.1. Let’s start then. For this, I will use OpenSuse 42.1 Linux distribution. I am assuming that you have already installed OpenSuse 42.1 on your system.
The following packages ( Updated version or version that matches with openSUSE 42.1 ) must be installed on your system.
binutils-2.25.0-5.2.x86_64
gcc-4.8-8.4.x86_64
gcc-c++-4.8-8.4.x86_64
glibc-2.19-17.4.x86_64
glibc-devel-2.19-17.4.x86_64
ksh-93v-5.5.x86_64
libaio1-0.3.109-19.1.x86_64
libaio-devel-0.3.109-19.1.x86_64
libcap1-1.10-61.2.x86_64
libstdc++-devel-4.8-8.4.x86_64
libstdc++-devel-32bit-4.8-8.4.x86_64
libstdc++48-devel-4.8.5-18.1.x86_64
libstdc++48-devel-32bit-4.8.5-18.1.x86_64
libstdc++6-5.2.1+r226025-4.2.x86_64
libstdc++6-32bit-5.2.1+r226025-4.2.x86_64
libstdc++6-devel-gcc5-5.2.1+r226025-4.2.x86_64
libstdc++6-devel-gcc5-32bit-5.2.1+r226025-4.2.x86_64
libgcc_s1-5.2.1+r226025-4.2.x86_64
libgcc_s1-32bit-5.2.1+r226025-4.2.x86_64
make-4.0-4.4.x86_64
sysstat-11.0.8-75.1.x86_64
xorg-x11-libs-7.6-47.1.noarch
xorg-x11-libX11-ccache-7.6-20.1.noarch
xdpyinfo-1.3.2-1.1.x86_64
xorg-x11-libXau
xorg-x11-libxcb
xorg-x11-libXext
unixODBC-32bit-2.3.1-3.2.x86_64
unixODBC-2.3.1-3.2.x86_64
unixODBC-devel-2.3.1-3.2.x86_64
unixODBC-devel-32bit-2.3.1-3.2.x86_64
Note: You must install all the prerequisite packages in order to install Oracle 12c. if you encounter any problem which is related to a missing package, please install that particular package. Make sure that you have all the necessary packages installed for your OpenSuse 42.1 and all the path variable are OK and all other prerequisites are done before beginning the installation.
Now, open a terminal and issue the following command to create a group. This will create a group called “oinstall”.
sudo groupadd -g 54321 oinstall
And then, we need to create a group called dba. Issue the following command in the terminal.
sudo groupadd -g 54322 dba
We need to create few more groups as well. Open a terminal and issue the following commands one after another to create those required groups.
sudo groupadd -g 54323 oper
sudo groupadd -g 54324 backupdba
sudo groupadd -g 54325 dgdba
sudo groupadd -g 54326 kmdba
sudo groupadd -g 54327 asmdba
sudo groupadd -g 54328 asmoper
sudo groupadd -g 54329 asmadmin
Now, we need to create a user called “oracle”. To create an “oracle” user, enter a command similar to the following in the terminal.
sudo useradd -u 54321 -g oinstall -G dba,asmdba,backupdba,dgdba,kmdba - m oracle
Let’s set the password of the oracle user.
sudo passwd oracle
Change the password of the user oracle accordingly.
We need to create database installation directory and set the proper ownership and permission for that directory. To do so, issue the following commands
 sudo mkdir -p /home/u01/app/oracle/product/12.1.0/dbhome_1
 sudo chown -R oracle:oinstall /home/u01/
 sudo chmod -R 775 /home/u01/
We need to configure the kernel parameters by editing the file /etc/sysctl.conf. Simply copy & paste the following lines in the /etc/sysctl.conf and then save & exit from the file.
 fs.suid_dumpable = 1
 fs.aio-max-nr = 1048576
 fs.file-max = 6815744
 kernel.shmall = 2097152
 kernel.shmmax = 536870912
 kernel.shmmni = 4096
 kernel.sem = 250 32000 100 128
 net.ipv4.ip_local_port_range = 9000 65500
 net.core.rmem_default=4194304
 net.core.rmem_max=4194304
 net.core.wmem_default=262144
 net.core.wmem_max=1048586
Note: These above parameters can be changed or tweaked depending on your server hardware capabilities.
Let’s put those limits value for oracle. By editing /etc/security/limits.conf file, we can do this. Just follow the following lines.
 oracle              soft    nproc   2047
 oracle              hard    nproc   16384
 oracle              soft    nofile  1024
 oracle              hard    nofile  65536
 oracle              soft    stack   10240
Now logout from your current user and login into the system by using the user name “oracle” and the password you set just before.
Set the ORACLE_HOME environment variable to specify the appropriate Oracle home directory for the listener. To do so, open the file “/home/oracle/.bashrc” by using vim or your favourite file editor and copy and paste the below codes.
TMP=/tmp; export TMP
TMPDIR=$TMP; export TMPDIR
ORACLE_BASE=/u01/app/oracle; export ORACLE_BASE
ORACLE_HOME=$ORACLE_BASE/product/12.1.0.1; export ORACLE_HOME
#ORACLE_SID=SNAP12C; export ORACLE_SID
#PATH=/usr/sbin:$PATH; export PATH
PATH=$ORACLE_HOME/bin:$PATH; export PATH
LD_LIBRARY_PATH=$ORACLE_HOME/lib:/lib:/usr/lib; export LD_LIBRARY_PATH
CLASSPATH=$ORACLE_HOME/jlib:$ORACLE_HOME/rdbms/jlib; export CLASSPATH
Save & exit from the file.
Download Oracle
You must download the two (2) zip files from this link. Download and unzip both files to the same directory. The two downloadable files names are linuxamd64_12c_database_1of2.zip & linuxamd64_12c_database_2of2.zip respectively. After extracting or unzipping, It will create a folder called database.
Now, let’s start the installation. Move to the folder location where you extracted the oracle zip files. Issue the following command in the terminal once you have moved to that extracted directory.
sudo ./runInstaller
This will start the Oracle installer to begin the installation.
STEP # 1
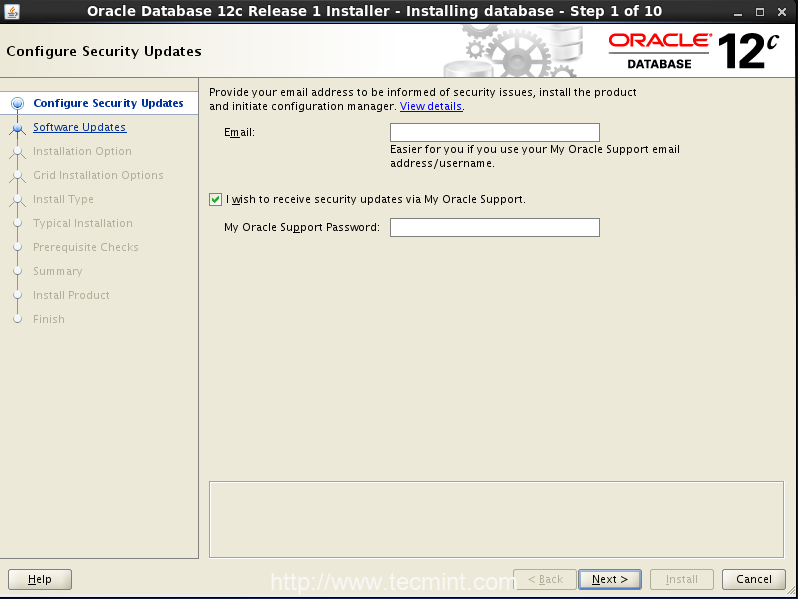
For Step 1, you can enter your email address and check the box to receive security updates from Oracle Support by putting your oracle password. Then click next.
STEP # 2
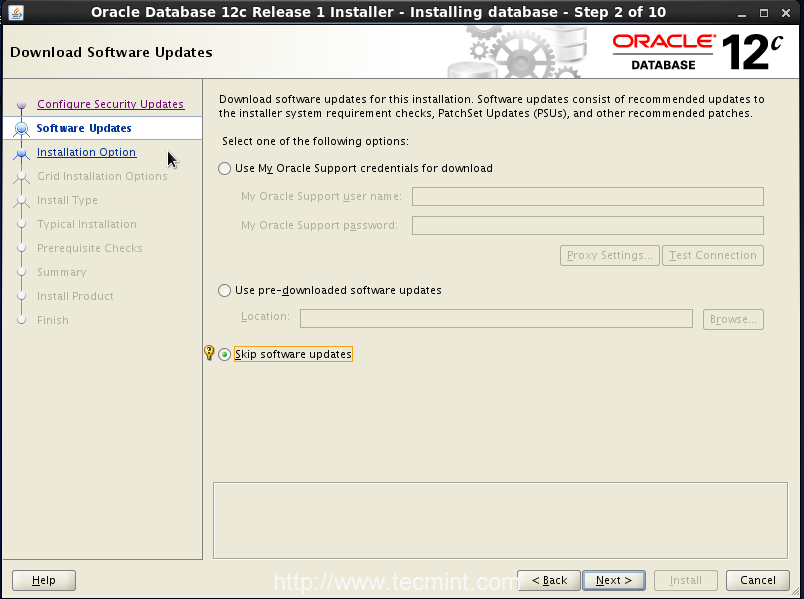
For Step 2, you can skip the software updates and click next to continue.
STEP # 3
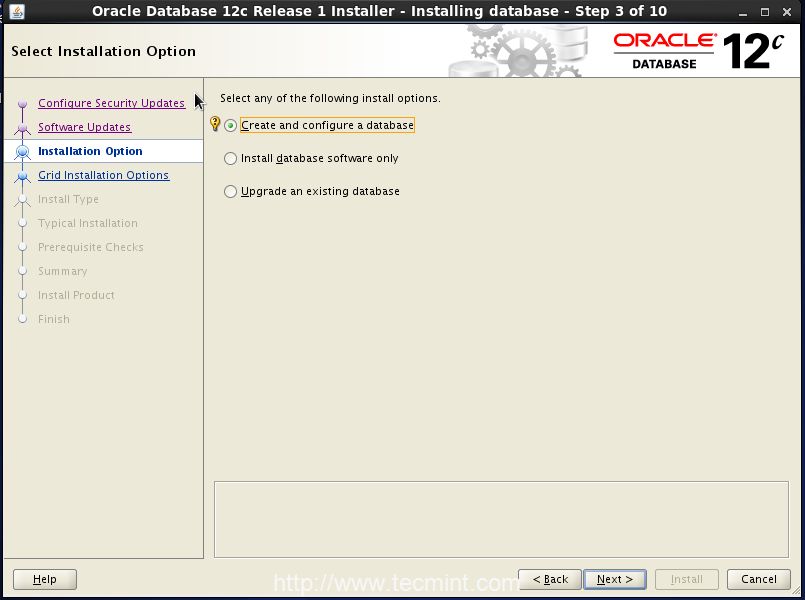
For Step 3, select “Create and configure a database” and click next.
STEP # 4

For Step 4, select Server class and click next to move forward.
STEP # 5
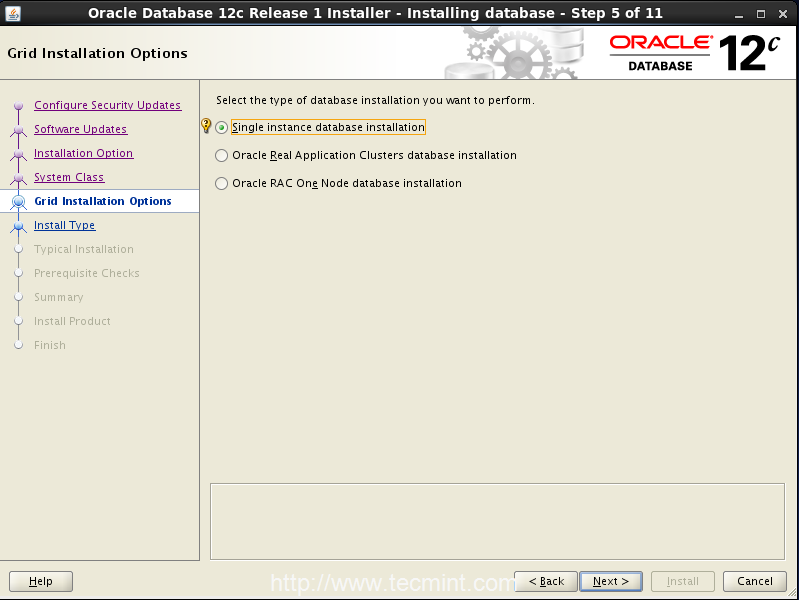
For Step 5 select “Single instance database installation” and click next.
STEP # 6
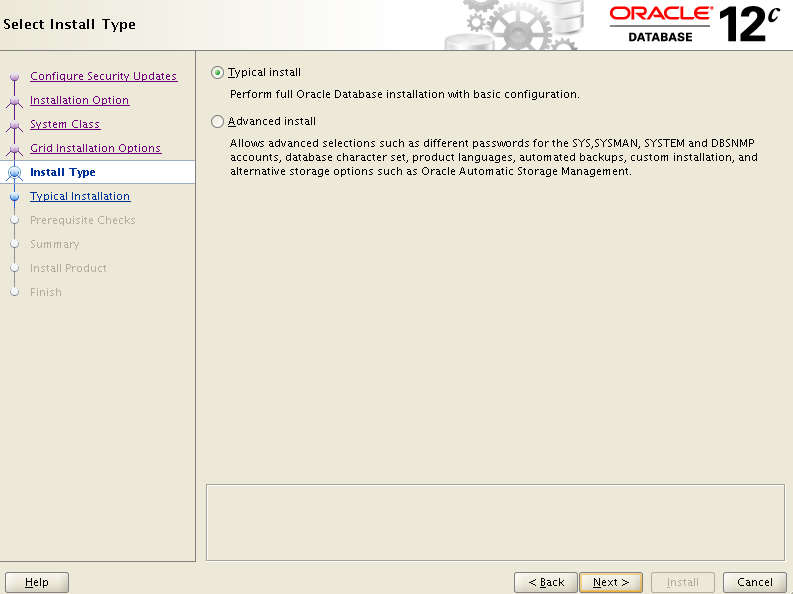
For Step 6, I am selecting Typical install. You can select Adavance install as well. Click next.
STEP # 7
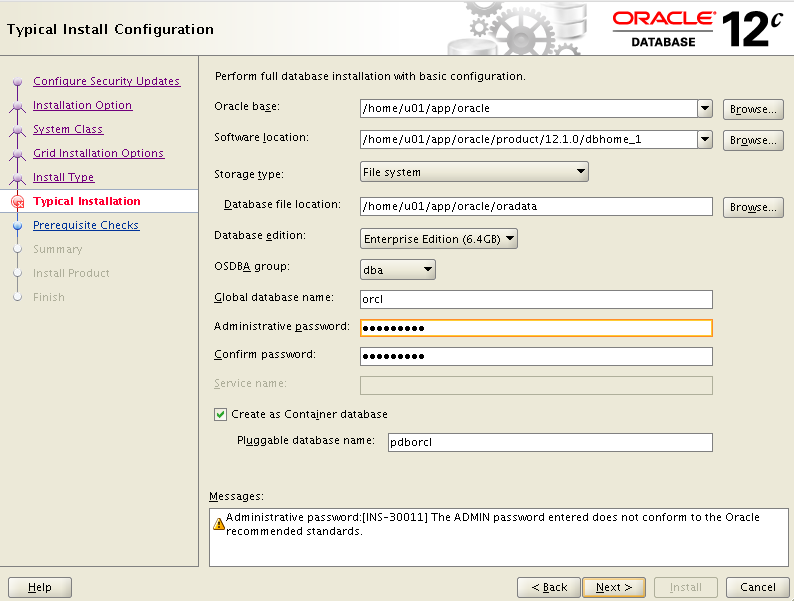
For Step 7, follow the above image and click next.
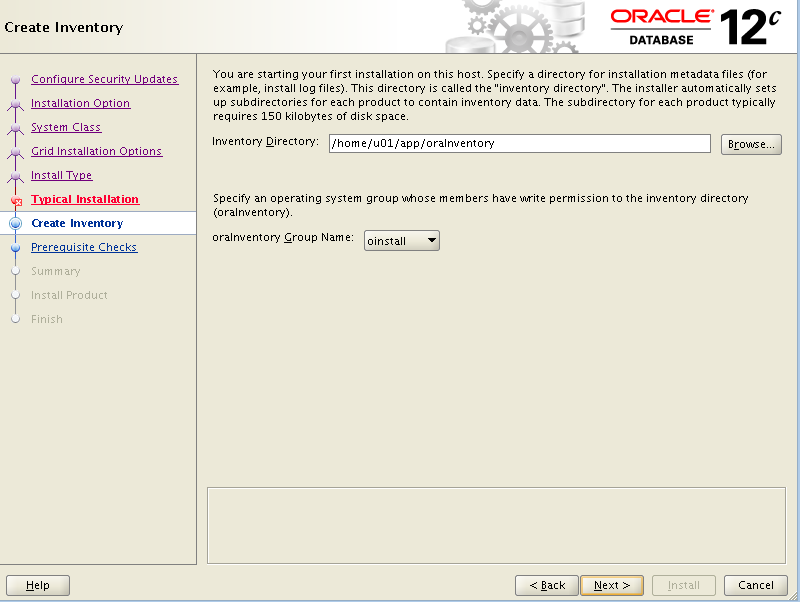
STEP # 8
STEP # 9
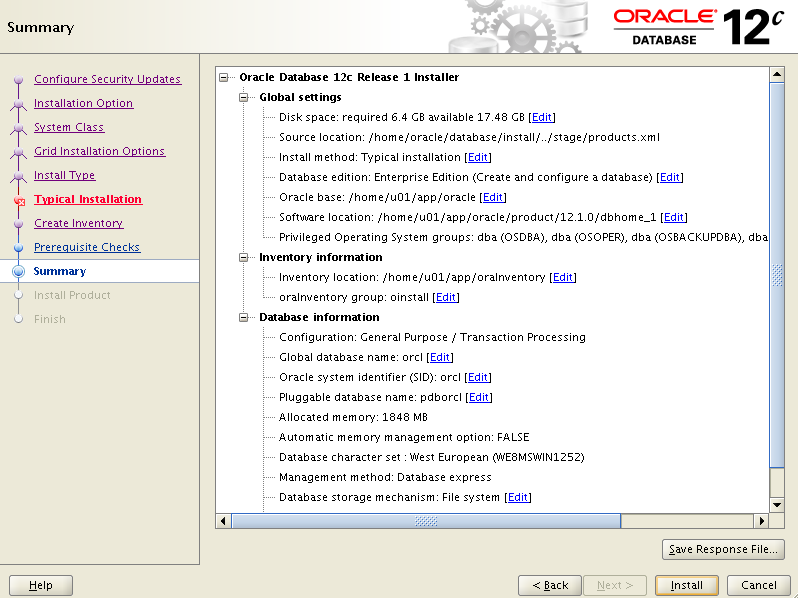
Click Install. Wait till install gets finished. It will ask you to run a script with root privilege.
Note: If you encounter any error(s) during the installation process, please Google for it as you may encounter lot of different issues and it is not possible for me to cover all of those different errors in a single topics.
If you need further more reading and instructions regarding installation guides and general Oracle Database 12c documentation, please visit this page.
Thank you.


