
About Solr
From Solr website,
Solr is the popular, blazing fast and open source NoSQL search platform from the Apache Lucene project. Providing distributed search and index replication, this tool is designed for scalability and Fault tolerance and it is the most popular enterprise search engine. It is highly reliable, scalable and fault tolerant, providing distributed indexing, replication and load-balanced querying, automated failover and recovery, centralized configuration and more. Solr powers the search and navigation features of many of the world’s largest internet sites.
So, in this article we will show you how to install Apache Solr in Ubuntu.
Solr’s features
Solr is characterized by various features while its major ones include powerful full-text search, hit highlighting, faceted search, dynamic clustering, database integration, rich document (like Word and PDF) handling, and geospatial search. From its various features we describe the following ones:
- Advanced Full-Text Search Capabilities: since it is powered by Lucene, Solr enables powerful matching capabilities including phrases, wildcards, joins, grouping and much more across any data type
- Optimized for High Volume Traffic: Solr is proven at extremely large scales the world over
- Comprehensive Administration Interfaces: Solr ships with a built-in, responsive administrative user interface to make it easy to control its instances
- Highly Scalable and Fault Tolerant: Built on the battle-tested Apache Zookeeper, Solr makes it easy to scale up and down. It bakes in replication, distribution, rebalancing and fault tolerance out of the box.
- Flexible and Adaptable with easy configuration: Solr is designed to adapt to the needs all while simplifying configuration
Prerequisites
Before starting this tutorial, there are some prerequisites such:
- At least you need to have 1 GB Ubuntu 14.04 droplet
- And you need also to have a sudo non root user.
Install Apache Solr
Step 1:
We will start by installing java. So you have to use the following command to start by installing python software properties:
sudo apt-get install python-software-properties
Now we will install the 8th version of java instead of using the default-jdk or default-jre packages. Start by using the following command and later press the enter key to accept the act of adding the new repository to your index:
sudo add-apt-repository ppa:webupd8team/java
And use the following command to update the list source :
sudo apt-get update
And to install Java 8 we will use the apt-get command. It is required to accept the Oracle Binary Code License Agreement for the java SE Platform Products and JavaFX.
sudo apt-get install oracle-java8-installer
Now you have installed the 8th version of java we will move to the next step.
Step 2:
We start this section by downloading the Solr distribution. Select the link where you will install your Solr and use the following commands to make the download:
cd ~
wget http://apache.mirror1.spango.com/lucene/solr/5.2.1/solr-5.2.1.tgz
Then use the following command to extract the service installation file:
tar xzf solr-5.2.1.tgz solr-5.2.1/bin/install_solr_service.sh --strip-components=2
And use the following command to install Solr as a service:
sudo bash ./install_solr_service.sh solr-5.2.1.tgz
you can check if the server is working using the following command:
sudo service solr status
You will receive something like this:
Found 1 Solr nodes:

Solr process 2750 running on port 8983

. . .
Step 3:
Now we will create a solr collection. You can have more than one, in this tutorial we need to have just one. To do, you have to use the following commands:
sudo su - solr -c "/opt/solr/bin/solr create -c gettingstarted -n data_driven_schema_configs"
Now you can add the data after creating the collection. In the file: /opt/solr/server/solr/gettingstarted/conf/schema.xml you can find everything you need about the schema’s description.
Step 4:
In the last step, we will check the Solr web interface and try to add some documents to our created collection. Using the following link on your web browser you should see the Solr web interface:
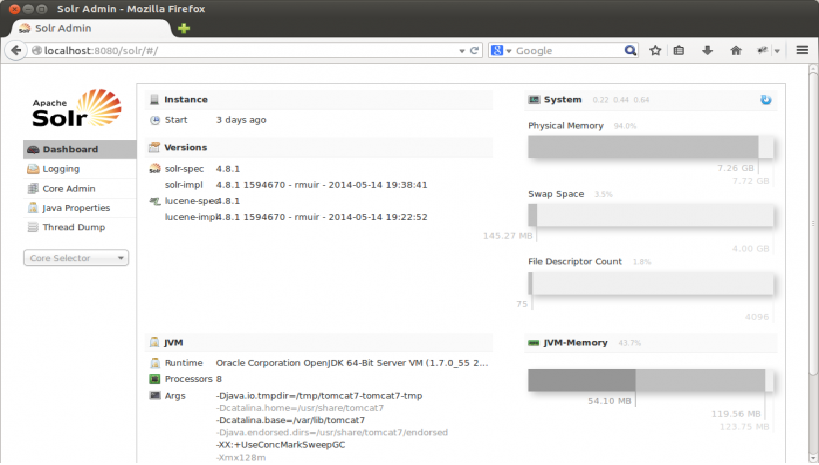
To face any problem while using the web interface, you can find various useful information in this web interface. To see more information about this tool via its web interface, you can use the Core Slector menu on the left side of the interface. In the collection select gettingstarted to see more information. Then select documents to be able to add and find some documents.
{
   your_document
}
Then use the submit button to add your document to the index that’s you will receive something like the following:
Status: success
Response:
{
  "responseHeader": {
    "status": 0,
    "QTime": 512
  }
}
As we said Solr can have multiple document, but in our case we will just show you how you can add one. So now select the Querry on the left side, then click in Execute Querry and you will see something like this:
Query output
{
  "responseHeader": {
    "status": 0,
    "QTime": 60,
    "params": {
      "q": "*:*",
      "indent": "true",
      "wt": "json",
      "_": "1625825899345"
    }
  },
  "response": {
    "numFound": 1,
    "start": 0,
    "docs": [
      {
        Your_document
      }
    ]
  }
}
So now you can successfuly add different document to your index using the previous instrutions.
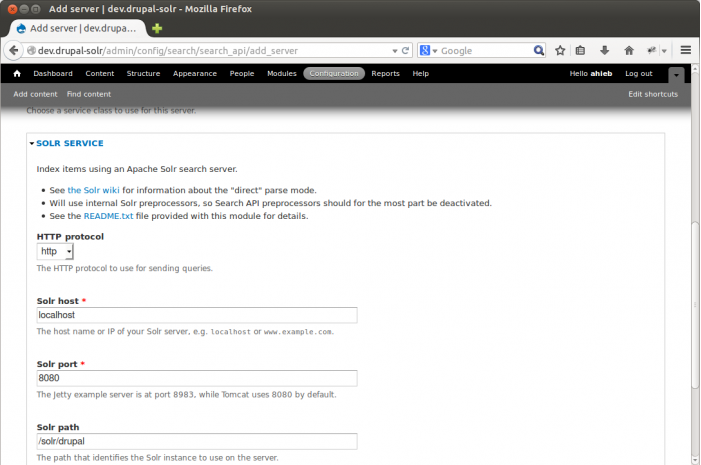
Some optional configuration
This step is optional. So that Solr is up and running, we will add a Solr server within Drupal: use a “Solr Service” class on localhost with port 8080 and a path of: /solr/drupal:
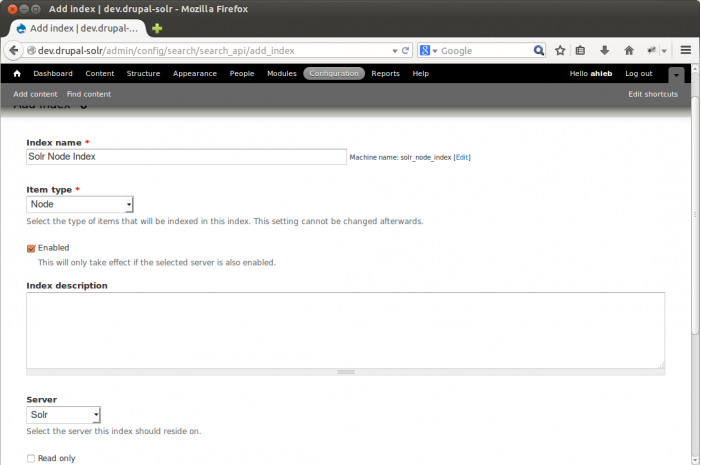
Then you have to add an index, so select the previously created server and other settings of your choice:
Conclusion
That’s all for now. In this article, we discussed how to install, configure and use Solr in your Ubuntu system successfully. You can start using it and add your selected documents as described above.
Reference Links:


