
In our previous tutorial, we discussed about Shinken monitoring framework installation on Ubuntu 14.04. Today, we will discuss how to monitor a Linux client with Shinken. For the purpose of this tutorial, we will monitor Ubuntu client. Although the same method will work for the other Linux distributions.
Step 1: Log in to Shinken server
First, log in to Shinken server as root user.
sudo su
And switch to the shinken user using command:
su shinken
Step 2: Search for Linux packs
Shinken uses predefined templates(packs) to monitor Linux, Windows.
We can see the list of available Linux packs using command:
shinken search linux
Sample output:
glances (david-guenault) [pack,system,linux,glances] : Standard check through checkglances.py and glances server
linux-snmp (naparuba) [pack,linux,snmp] : Linux checks based on SNMP
linux-ssh (naparuba) [pack,linux,ssh] : Linux checks based on SSH without any script on distant server
pack-glances (david-guenault) [pack,system,linux,glances] : Standard check through checkglances.py and glances server
raspberrypi (frescha) [pack,linux,raspberrypi,server,os] : Standard checks
varnish-ssh (kokosny) [pack,linux,varnish,ssh] : varnish checks based on ssh
For windows clients, run:
shinken search windows
Sample output:
windows (naparuba) [pack,microsoft,windows,server,os,wmi] : Standard windows checks, like CPU, RAM and disk space. Checks are done by WMI.
We will test ssh pack. So, install it using command:
shinken install ssh
3. Create host file configuration for Client
Create a new file:
nano /etc/shinken/hosts/client.cfg
Add the following contents.
define host{
   use             linux,ssh
   host_name       sk
   address         192.168.1.200
   _SNMPCOMMUNITY  P@ssw0rd
Save and close the file.
Here,
- use: Client uses the Linux template(linux-snmp);
- hostname: Client system name;
- address: Client system’s IP address;
- SNMPCOMMUNITY: Client system’s password.
Likewise you can edit the localhost.cfg file and add ssh tag on it.
nano /etc/shinken/hosts/localhost.cfg
define host{
        use                     generic-host,ssh
        contact_groups          admins
        host_name               localhost
        address                 localhost
        }
Save and close the file.
Now, switch to root user and restart the shinken service.
exit
service shinken restart
4. Configure Client system
Go to your client system. Here, I will be using Ubuntu 14.04 client.
Install SNMPD package.
sudo apt-get install snmpd
Edit file:
sudo nano /etc/snmp/snmpd.conf
Comment the following line:
#agentAddress udp:127.0.0.1:161
Uncomment the following line:
agentAddress udp:161,udp6:[::1]:161
Find the following line, and set the password for the client system. You should use the same password as defined in the shinken server.
rocommunity P@ssw0rd default -V systemonly
Save and close the file.
Restart snmpd service:
sudo service snmpd restart
That’s it.
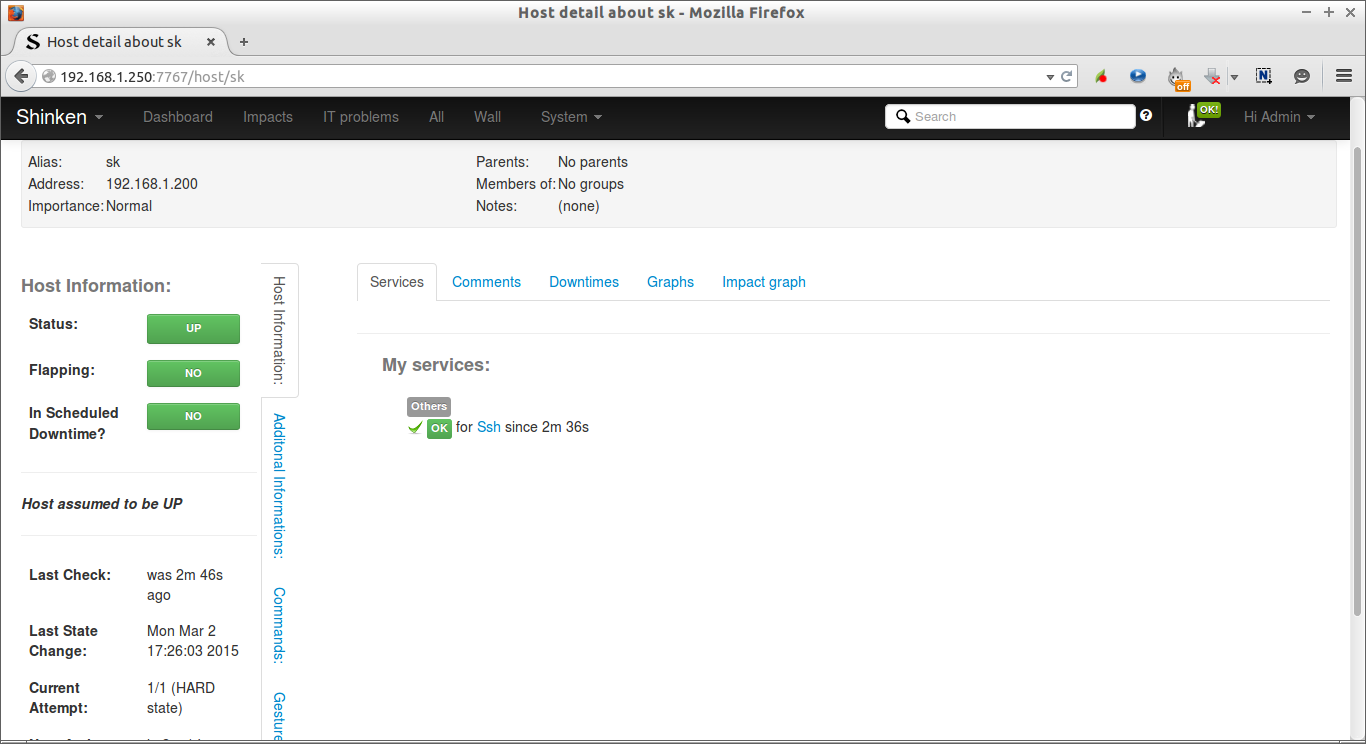
5. Check Shinken web interface
Now, go to the Shinken web interface and check the status of the client.
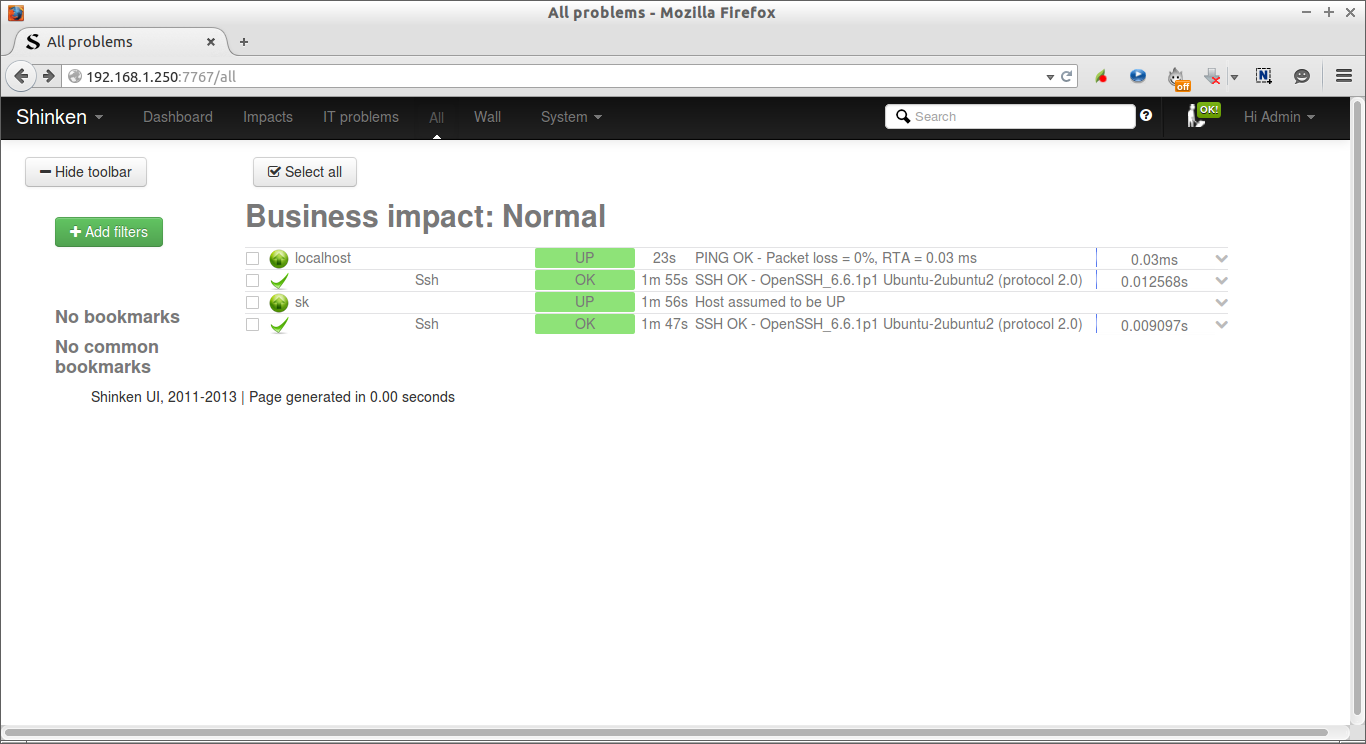
Click on the each host to find out the services.
For detailed configuration, check the Shinken’s official documentation page.
Cheers!


