It doesn’t matter whether you’re a Linux user or a Systems Administrator and no matter how much we try to avoid Windows OS like the plague, somewhere in your tech travels you are going to run in to a Windows OS based system. And you will more than likely be acquainted with Microsoft’s very own filesystem designed for flash media and portable drives, exFAT.
Windows OS users have support built in out of the box, but Linux users don’t get off so easily. Most of the time, we have to get out of out comfort zone and do it ourselves. But that’s ok. Because I wouldn’t have it any other way. Do it your own way and do it right from the beginning.
Today, I’m going to show you how easily we can add full read/write support for exFAT based devices.
The first thing we need to do is add the PPA for the packages. This is simply done by performing the following:
% sudo add-apt-repository ppa:relan/exfat
Once the PPA has been added, you are now ready to install the packages that will pull in exFAT support for your Linux system.
To download and install the packages, simply perform this:
% sudo apt-get install exfat-utils fuse-exfat
Once the packages have been downloaded and installed, your system now has support for reading and writing to exFAT formatted devices.
If you get handed a device which has been formatted to exFAT, you will have to mount the device before being able to read it.
To mount a exFAT formatted device, perform these few simple steps.
Create a new directory for the mount. For this tutorial, we’ll just stay in ~/ and do this:
% mkdir exfat
Now before you mount the device, you need to find where it is hiding. We’ll use fdisk for this:
% sudo fdisk -l

<output... >
In the case above, the output will be different for everyone. With my own system, I know that /dev/sda* is my laptop system drive. Therefore, I can tell which device is my SD card I want to mount because it is the device with only 2GB:
Disk /dev/sdb: 1977 MB, 1977614336 bytes
It might be a little different on your own system or even confusing when you have several different USB devices and flash drives plugged in. But for ease-of-use, I’ve kept this tutorial simple. Effectively you will know your own system device details better than me, so it really shouldn’t be that hard to work out which drive it is that you are targeting.
Now we need to mount the device. You can do this to mount the device in your new exfat directory:
% sudo mount -t exfat /dev/sdb1 exfat
Done. Now we’ll change to the exfat directory and see whether it works:
% cd exfat
% tree
.
|-- file1.txt
|-- file2.pdf
`-- unixmen
     `-- stuff.odt

1 directory, 3 files
It works!
Now, what if you want to format your own device to exFAT? That can be done also.
This can be handy if you are going to give the exFAT formatted drive to a user who runs Windows OS as they are not going to be able to read anything on your Linux native BtrFS formatted drive.
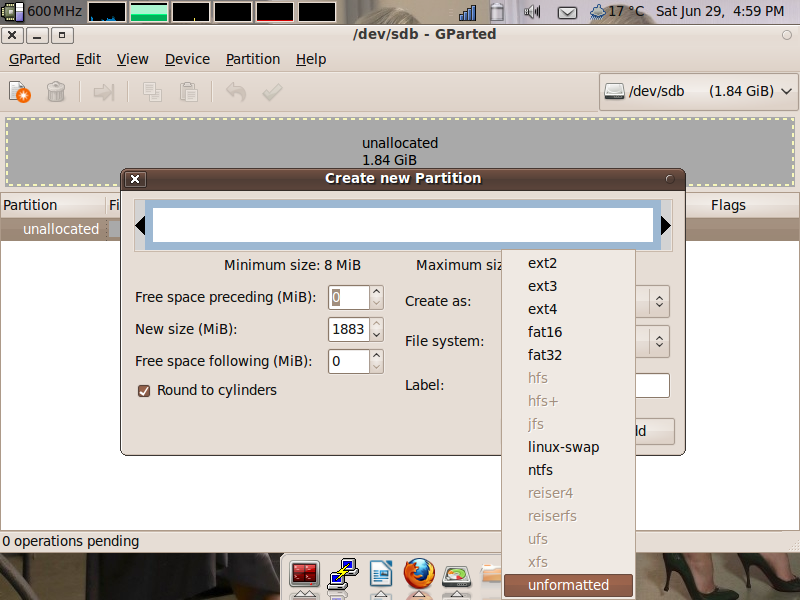
To format your drive to exFAT, the drive must not be formatted to any other filesystem format. You must have an empty partition already. GParted is good for creating new partitions that have no specified filesystem.
See the screenshot below and you’ll see how I created an empty partition with no filesystem specified.
If you don’t already have GParted installed, you can easily install that by quickly performing this:
% sudo apt-get install gparted
Once you are sure your partition is empty, do the following:
% sudo mkfs.exfat /dev/sdb1

mkexfatfs 1.0.1
Creating... done.
Flushing... done.
File system created successfully.
That’s it. Repeat the steps above to mount the device and you will have a read/write supported exFAT partition.


