
SugarCRM is a web based CRM(Customer Relationship Management) Solution written in PHP. It comes with different editions such as :
- Sugar Enterprise
- Sugar Ultimate
- Sugar Corporate
- Sugar Professional and Community(free) editions
For more details about the editions refer the official link.
SugarCRM community edition is freely available to download and use.
In this article we will show you how to install SugarCRM under Centos 6.5.
System Requirements
It’s highly recommends using a freshly installed server to prevent conflicts when you start the installation and you need to update the system to ensure that we have all of the latest software installed.
sudo yum -y update
Also you need to make sure that you server has a hostname.Use the following command to check your current hostname.
hostname -f
And use the following command to change your hostname
hostname server.doamin.com
Install Required Modules and Configuration
We also need to install some specific modules for working properly of SugarCRM. Use following command to install them
yum install mysql mysql-server httpd php php-devel php-gd php-imap php-ldap php-mysql php-odbc php-pear php-xml php-xmlrpc php-magickwand php-mapserver php-mbstring php-mcrypt php-mssql php-shout php-snmp php-soap php-tidy curl curl-devel perl-libwww-perl ImageMagick libxml2 libxml2-devel unzip wget -y
Edit PHP configuration file /etc/php.ini and update following variables.
- 32-bit Systems: Minimum Memory 256M
- 64-bit Systems: Minimum Memory 512M
memory_limit = 512M
upload_max_filesize = 10M
After making above changes restart Apache service to apply changes.
service httpd restart
and make services mysqld and httpd to start automatically on every reboot.
chkconfig httpd on
chkconfig mysqld on
Database and MySQL user creation for SugarCRM
You start the creation of your SugarCRM by setting up the mysql user and database.
You need to have the password of the MySQL root user.
Log into MySQL:
mysql -u root -p
After successful authenticated, you need to create the database for Sugarcrm.
CREATE DATABASE sugarcrm;
The database Name is sugarcrm. You will need this information later.
Now, you should create the database administrator.
CREATE USER sugarcrmadmin@localhost IDENTIFIED BY 'sugarcrmpassword';
Next, you need to give this user permissions to administer the database you created.
GRANT ALL PRIVILEGES ON sugarcrm.* TO sugarcrmadmin@localhost;
You need to flush the privilege information to disk to activate the new MySQL user:
FLUSH PRIVILEGES;
exit
Download and install SugarCRM
Now that our system is ready, we can start the installation of SugarCRM into your web root.
Back on your server, change to your tmp directory and use wget to download the project file using the link you copied:
cd /tmp
wget http://sourceforge.net/projects/sugarcrm/files/latest/download?source=files
Extract the downloaded file.
unzip SugarCE-6.5.20.zip
Now, you need to copy the newly extracted directory structure into the web root directory of your server and it’s recommended to use the rsync utility to safely copy all of the files into the web root directory of your server. We are using the dot in this command to specify the current directory. This is necessary in order to copy some hidden files that we need:
mv SugarCE-6.5.20 sugarcrm
mkdir /var/www/html/sugarcrm
sudo rsync -avz sugarcrm /var/www/html
Now you can check that has been copied, into the web root directory.
cd /var/www/html/
ls -lsa
Make the document root and the sugarcrm files and directories in it writable by the Apache service which is running as user apache and group apache by executing the following command:
chown -R apache:apache sugarcrm
chmod -R 755 sugarcrm
Then you need to enable rewrite functionality for your Apache server.
To enable mod_rewrite modules, type this command:
sudo a2enmod rewrite
This module will be enable the next after reboot of Apache service.
But before restarted the Apache service, you need to make some change in the virtual host file to allow the use of an .htaccess file.
So, open the virtual host file which contain the actual rewrite rules and will include by default in the SugarCRM installation.
sudo nano /etc/apache2/sites-enabled/000-default.conf
In this file, you must add a directory block that redirect into your web root.
Maybe you need also ServerName directive to point to your domain name and change the ServerAdmin directive to reflect a valid email address:
<VirtualHost *:80>
   ServerAdmin admin@your-domain.com
   DocumentRoot /var/www/html/
   ServerName your-domain.com
   ServerAlias www.your-domain.com
      <Directory /var/www/html/suagrcrm>
         Options Indexes FollowSymLinks MultiViews
         AllowOverride All
	 Order allow,deny
         allow from all
      </Directory>
   ErrorLog /var/log/apache2/your-domain.com-error_log
   CustomLog /var/log/apache2/your-domain.com-access_log common
</VirtualHost>
After finished this step, to enable the new configuration you need to restart your Apache server .
sudo service apache2 restart
Start SugarCRM Web Installer
Now that you have your files in place and your software is configured, you can complete the installation through the web interface.
In your web browser, navigate to your server’s domain name or public IP address:
http://server_domain_name_or_IP
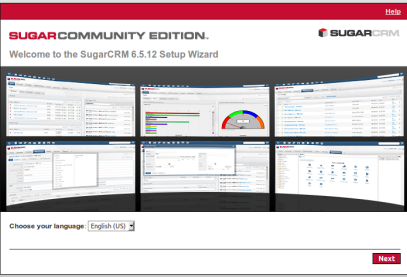
You will see the SugarCRM initial configuration page
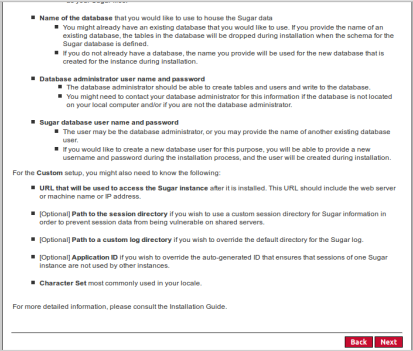
Scroll down on the next screen and click Next.
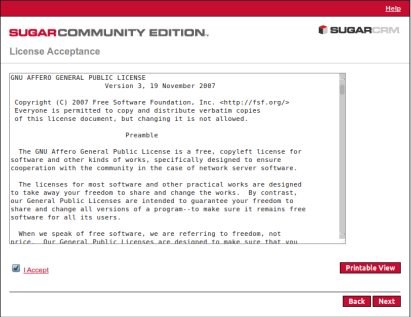
Accept the License agreement and click Next.
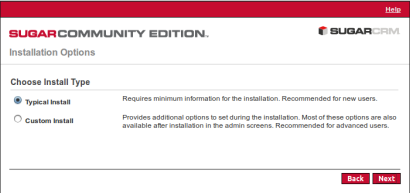
Select the installation type (Typical or Custom) and click Next.
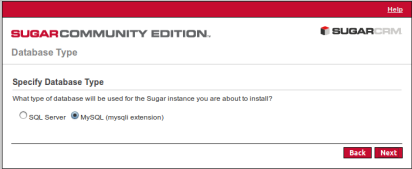
Then select the Database and click Next. In our case we used mysql database.
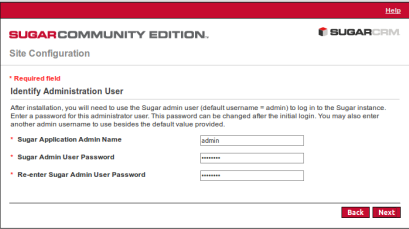
Then after you entered the database information, you need to enter the sugarcrm admin name (default username is admin) and password created in the earlier step.
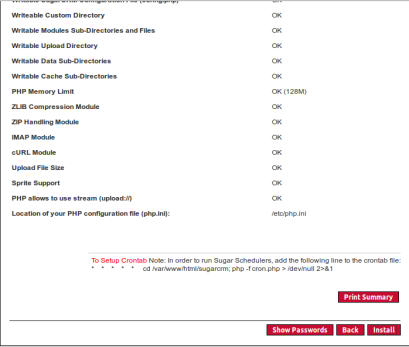
This screen will show you the selection done by you. Also it shows to schedule cron to automate the tasks while using SugarCRM. Now click Install.
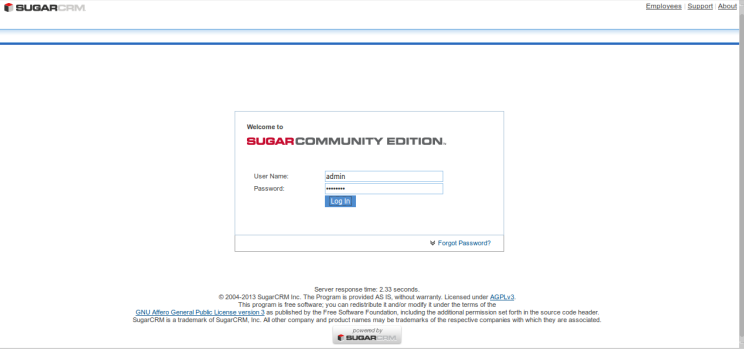
Hit the button Next at the bottom and then fill out your account information.
That all for this article. Hope this help you to install SugarCRM.
The next article will be how to configure SugarCRM, please hold on and don’t forget to share this article.


