
Introduction To Snappy Ubuntu Core
Canonical, the Company behind Ubuntu operating system, introduced a new operating system called “Snappy Ubuntu Core” a few months ago for Cloud and devices. Canonical, actually, introduced the Snappy mechanism for it’s mobile version of Ubuntu. Now, it extended this technology to Cloud too. Snappy Ubuntu Core delivers bullet-proof security, reliable updates and the enormous Ubuntu ecosystem at your fingertips, bringing the developer’s favourite cloud platform to a wide range of internet things, connected devices and autonomous machines. Snappy Ubuntu Core is available on a wide range of 32 and 64-bit ARM and X86 platforms.
Mark Shuttleworth, founder of Ubuntu and Canonical says,
“Ubuntu Core provides transactional updates with rigorous application isolation. This is the smallest, safest Ubuntu ever, on devices and on the cloud. We’re excited to unleash a new wave of developer innovation with snappy Ubuntu Core!”
Please note that Snappy and Ubuntu Core are different. Snappy is a new technology implemented in the Ubuntu Core, whereas Ubuntu Core is a minimal rootfs for use in the creation of custom images for specific needs. Ubuntu Core strives to create a suitable minimal environment for use in Board Support Packages, constrained or integrated environments, as the basis for application demonstration images, or Linux containers such as LXC or Docker.
There is no ‘apt-get’ or ‘aptitude’ or ‘dpkg’
Snappy is entirely new Ubuntu operating system that makes system and application management in a different and easy way. Yes, there is no ‘apt-get’ or ‘aptitude’ or ‘dpkg’ commands for installing, removing, updating and upgrading a application or the system itself. The “snappy'” command will do all things.
In Snappy Ubuntu, you can install applications/packages, with command:
sudo snappy install <package-name>
That’s it. The Snappy command will take care of all required dependencies of the package and install it. Actually, a Snappy application is a compressed archive package that contains all dependencies, and library files that required for a application to run. Since, Snappy applications comprises all required dependencies PPAs are no longer useful for Snappy Ubuntu.
Similarly, to remove a package, run:
sudo snappy remove <package-name>
Automatic update and Roll back features
The Snappy applications and Ubuntu core can be upgraded automatically whenever a new update is available. The Snappy Ubuntu introduces “transactional” image-based updates. The update will either entirely succeed or fail. If something went wrong while upgrading, don’t worry, the packages can also be rolled back to the working state. So, there won’t be any broken system. It is very important and useful feature that Snappy Ubuntu has. The users don’t need to completely purge and re-install any application or the entire system.
Snappy apps and OS are completely isolated
This is yet another cool feature of Snappy core. Like I mentioned above, Snappy is very secure. All Snappy applications are kept separate from one another and they are confined by Canonical’s AppArmor kernel security system. Also, The OS and application files are kept completely separate, as a set of distinct read-only images.
Docker support
Snappy Ubuntu supports Docker, so developers can run and test any container based applications in Snappy core. Anything you run inside the Docker can also run in Snappy core. Dustin Kirkland, Ubuntu Cloud Solutions product manager and strategist says,
“Docker is a fantastic vector into Ubuntu Snappy, and has a very rich library of images. Anything that can run in Docker can run in a Snappy Ubuntu environment and we have built that into it from day one.”
So, what about Snappy desktops?
Many Ubuntu users have raised some questions about future of .deb packages and the relationship with Debian which is the father of many deb based operating systems. The canonical says the system images are still built from debs in the archive, and the relationship with Debian isn’t going away anytime soon. The Ubuntu development team, however, is making Snappy apps for Ubuntu 15.10, they will also provide separate deb-based distribution and snappy based distribution. The Canonical team says,
“We will provide both traditional deb-based as well as snappy-based options at least through 16.04, there is no timeline at this point for dropping the current way of using Ubuntu.”
For more details, read this reddit conversation.
Supported Platforms
Snappy will run on the following Cloud platforms and devices.
- Microsoft Azure ;
- Google Compute Engine ;
- Amazon EC2 ;
- Beaglebone Black ;
- Raspberry Pi 2.
Also, you try an Ubuntu Core locally using:
- KVM Image ;
- OVA image ;
- Vagrant Image.
To import and run your OVA image, you can use any one of the following virtualization tools.
- VMware Fusion
- VMware Desktop
- VMware ESXi/VSphere
- VirtualBox
- Microsoft SCVMM
- Citrix XenServer
Install Snappy Ubuntu Core Environment
Run the following commands one by one to quickly install Snappy core environment in your Ubuntu system.
sudo add-apt-repository ppa:snappy-dev/beta
sudo apt-get update
sudo apt-get upgrade
sudo apt-get install snappy-tools bzr
Alternatively, you can run the Snappy Ubuntu instance locally using any one of the following method.
Run Snappy Ubuntu Core Instance locally using QEMU or KVM
Here, we will see how to run Snappy Ubuntu using QEMU and KVM.
1. Run Snappy Ubuntu locally using KVM
First, Install KVM using command:
sudo apt-get install qemu-kvm
Verify that your hardware can run virtual machines, using command:
kvm-ok
Sample output:
INFO: /dev/kvm exists
KVM acceleration can be used
As you see in the above output, we can run virtual machines in our system using KVM.
Download the Snappy Ubuntu core image using command:
wget http://releases.ubuntu.com/15.04/ubuntu-15.04-snappy-amd64-generic.img.xz
Extract the Snappy archive:
unxz ubuntu-15.04-snappy-amd64-generic.img.xz
That’s it. Now, you can run Snappy Ubuntu using command:
kvm -m 512 -redir :8090::80 -redir :8022::22 ubuntu-15.04-snappy-amd64-generic.img
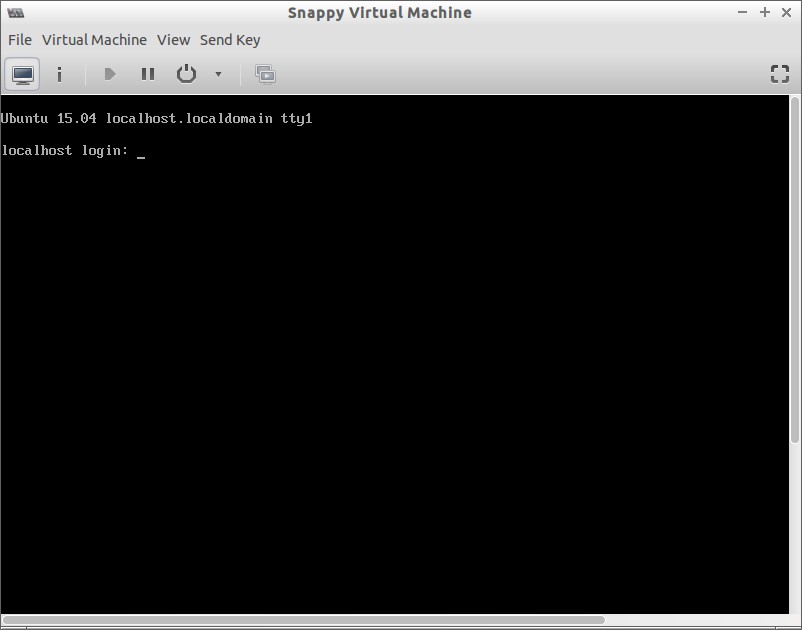
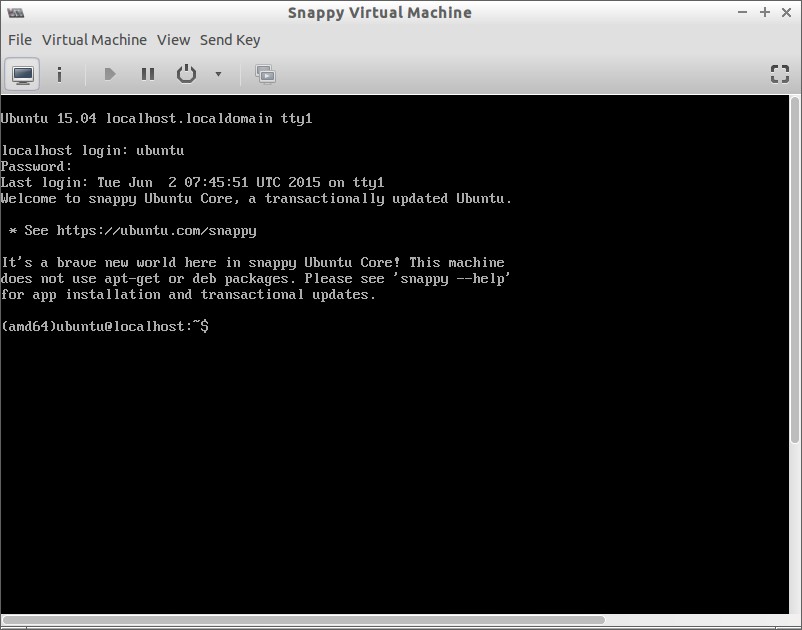
Once it gives you a login prompt you can either log in directly in the window or SSH to the virtual machine at a local, redirected port (we mapped the SSH port of the VM to a different local port on your laptop):
ssh -p 8022 ubuntu@localhost
The default username and password for Snappy Ubuntu Core is ubuntu/ubuntu.
2. Run Snappy Ubuntu locally using QEMU
First, install QEMU as described in the following link.
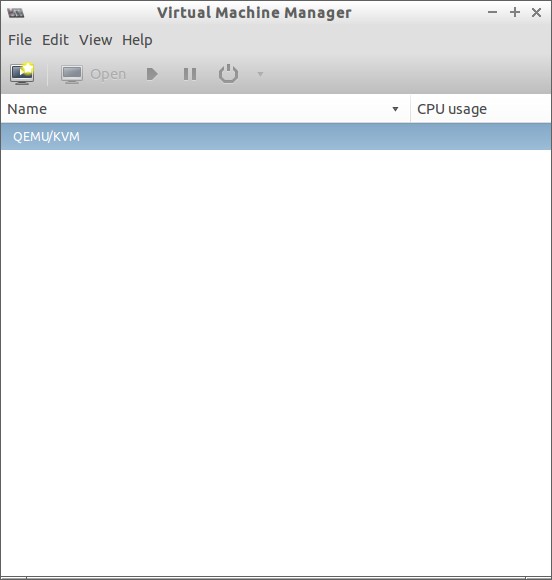
Here, I will be using Virtual Machine Manager, a GUI front end tool for QEMU and KVM, to create and run Snappy Ubuntu core virtual machine.
Launch ‘Virtual Machine Manager’ either from Menu or Unity Dash.
It will look like below.
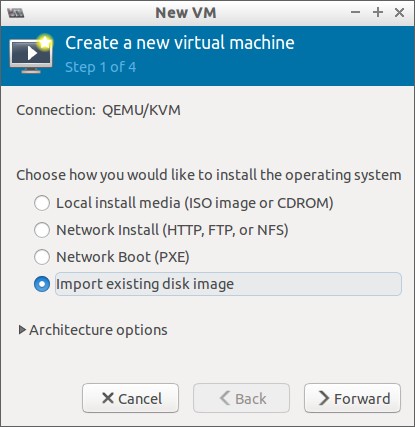
Go to file File -> New Virtual Machine. Select ‘Import existing image’.
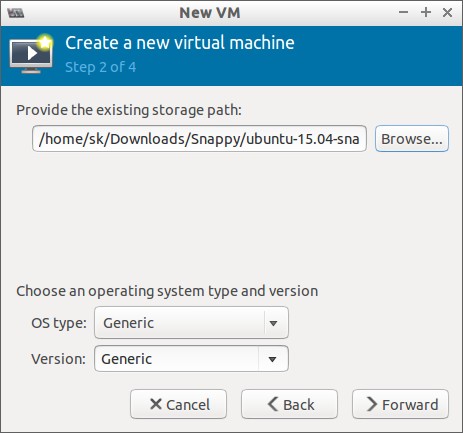
Browse where you have kept the Snappy Ubuntu KVM image.
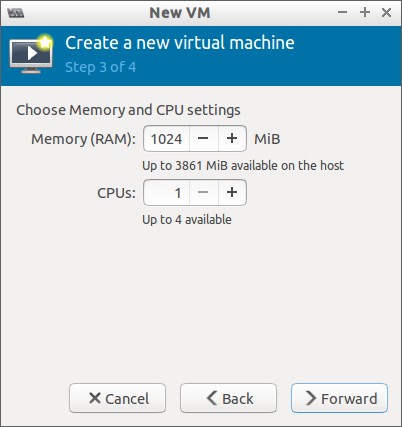
Enter the RAM size and click Forward.
Enter the OS name and click Finish.
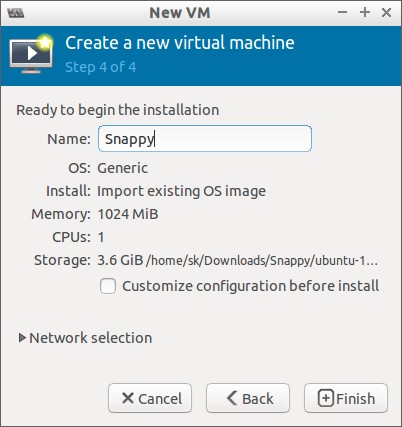
Once you clicked the ‘Finish’ button, the Snappy Ubuntu virtual machine will automatically boot.
The default username and password for Snappy Ubuntu Core is ubuntu/ubuntu.
Run Snappy Ubuntu Core Instance locally using Hypervisors
Download the latest Snappy virtual hard drive image from here and import to VirtualBox or any other hypervisor as mentioned above.
Of course, you can convert the Snappy KVM image to VirtualBox usable format and import it to VirtualBox.
To convert the Snappy KVM image to VirtualBox VDI format, run the following command:
sudo VBoxManage convertfromraw ubuntu-15.04-snappy-amd64-generic.img ubuntu-15.04-snappy-amd64-generic.vdi --format vdi
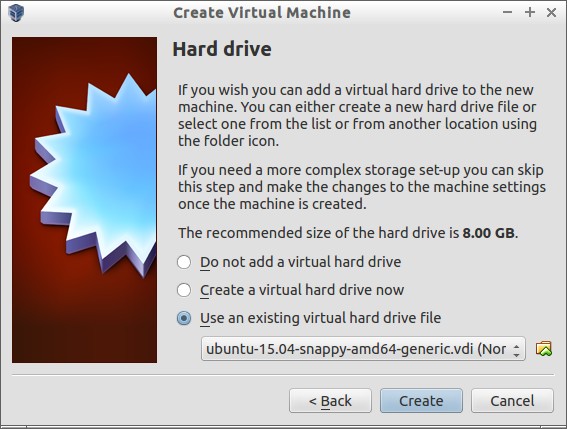
Now, Open VirtualBox. Go to Machine -> New.
Enter the Virtual Machine name.
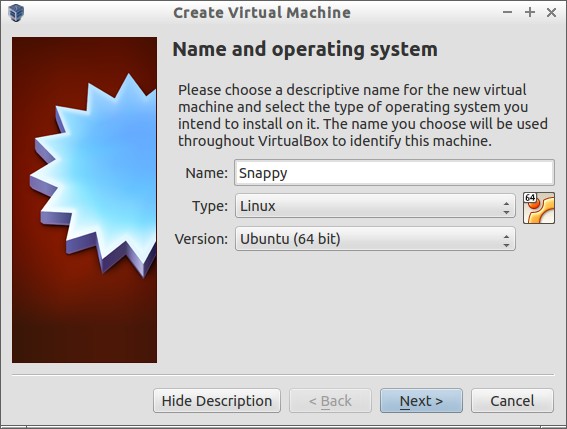
Enter RAM size.

Select “Use an existing virtual hard drive file” and specify the location of the Snappy Ubuntu virtual hard disk file which we have converted from the KVM format.
Finally, start the Snappy Ubuntu Core virtual machine.
![Snappy [Running] - Oracle VM VirtualBox_014](http://unixmen.com/wp-content/uploads/2015/06/Snappy-Running-Oracle-VM-VirtualBox_014.jpg)
Now, login with username ‘ubuntu’ and password ‘ubuntu’.
![Snappy [Running] - Oracle VM VirtualBox_015](http://unixmen.com/wp-content/uploads/2015/06/Snappy-Running-Oracle-VM-VirtualBox_015.jpg)
That’s it. We have setup Snappy Ubuntu Core. In our next tutorial, we will see how to use Snappy Ubuntu Core in more detail.
Cheers!
Reference:


