
Introduction
OpenDocMan is a free, web based, open source document management system written in PHP. It is licensed under GPL, which means you can use it freely and modify the source code any way you wish. It has multi-language support, and features web based access, fine grained control of access to files, and automated install and upgrades. If you’re looking for a centralized and robust document management system (DMS) for your organization, then OpenDocMan is definitely a good choice.

Features
– Add any type of documents to the system.
– No FTP or any special tools required. Upload directly from your browser.
– Meta data fields for each file.
– Assign a department/category to each file.
– Check-out feature to prevent over-writing of edits.
– Revision history.
– Documents are stored physically on the server.
– File expiration.
– Create custom document properties to match your companies needs.
– Automated document review process.
– Automated file expiration process.
– Reviewer can approve or reject a new document or a changed document.
– E-mail notification options prior to and after a review.
– Quick-browse search by author, department, or category.
– Full search by meta-data, author, department, category, file name, comments,etc.
– No external indexing processes required.
Prerequisites
Before installing OpenDocMan, your server should have a working LAMP stack. If you don’t have LAMP server installed on your server, refer any one of the following links to setup LAMP server.
– Install LAMP (Apache, MySQL, PHP) On CentOS / RHEL / Scientific Linux 6
Or
– Install LAMP (Apache, MariaDB, PHP) On CentOS / RHEL / Scientific Linux 6
Create database for OpenDocMan
Log in to mysql as root user:
mysql -u root -p
Create a database and user for OpenDocMan. For example, here I am going to create database called “opendocmandb” and database user called “opendocmanuser” respectively. Change these values as your liking.
Welcome to the MySQL monitor.  Commands end with ; or g.
Your MySQL connection id is 2
Server version: 5.5.35 MySQL Community Server (GPL) by Remi

Copyright (c) 2000, 2013, Oracle and/or its affiliates. All rights reserved.

Oracle is a registered trademark of Oracle Corporation and/or its
affiliates. Other names may be trademarks of their respective
owners.

Type 'help;' or 'h' for help. Type 'c' to clear the current input statement.

mysql> create database opendocmandb;
Query OK, 1 row affected (0.03 sec)

mysql> GRANT ALL ON opendocmandb.* TO opendocmanuser@localhost IDENTIFIED BY 'centos';

mysql> flush privileges;
Query OK, 0 rows affected (0.00 sec)

mysql> exit
Bye
Adjust SELinux to avoid “403 forbidden error” while installing OpenDocMan. To do that, run the following commands from the Terminal:
setsebool -P httpd_enable_homedirs true
chcon -R -t httpd_sys_content_t /var/www/html/opendocman/
Download OpenDocMan
Download the latest version from this link.
wget http://sourceforge.net/projects/opendocman/files/opendocman/1.2.7.2/opendocman-1.2.7.2.zip
Unzip and move the opendocman folder to your apache root folder.
unzip opendocman-1.2.7.2.zip
mv opendocman-1.2.7.2/ /var/www/html/opendocman
Create a folder outside of your public html folder that will contain your data files. This will be your “dataDir” folder in the config.
mkdir /var/www/odm_data/
Make sure the permissions and ownership of the data folder will allow for the web server to write to it.
chown apache:apache /var/www/odm_data/
chmod -R ugo+w /var/www/odm_data/
Make sure there is a templates_c folder, and the templates_c folder is writable. If the folder doesn’t exists, create it.
chmod -R ugo+w /var/www/html/opendocman/templates_c/
Begin Installation
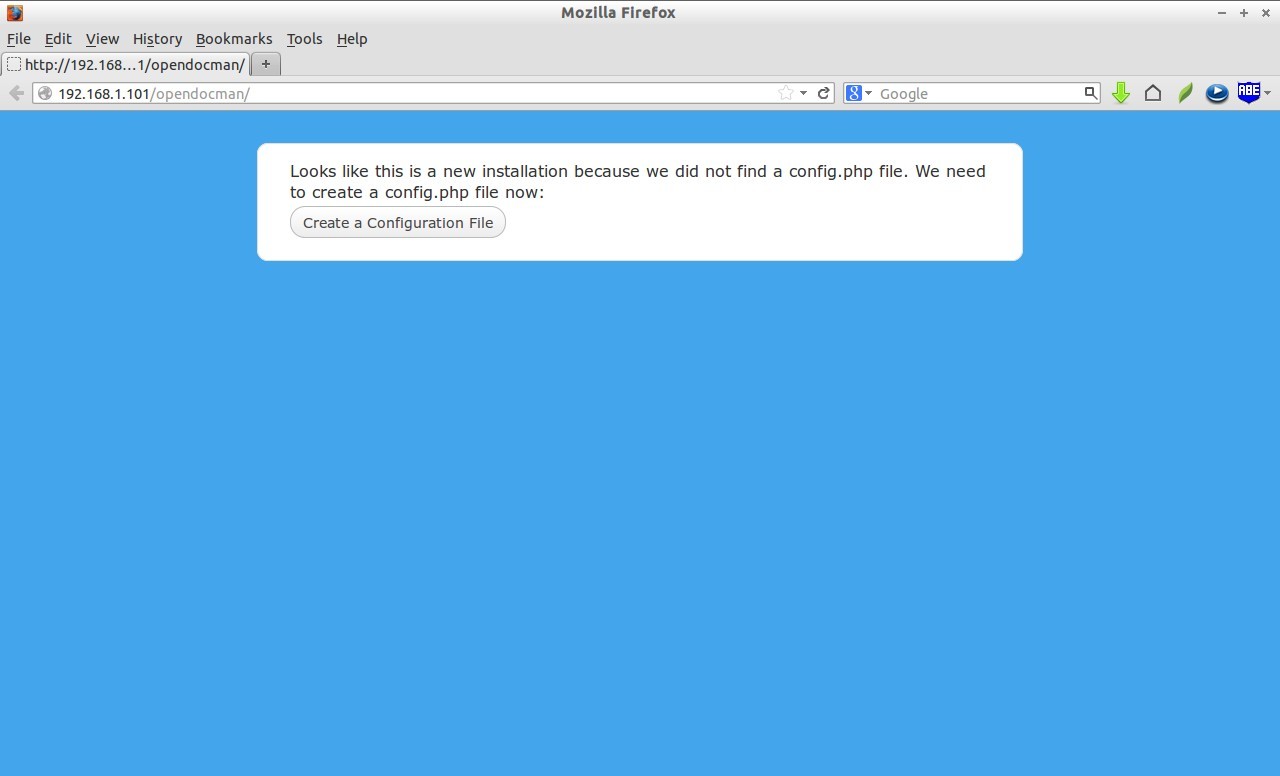
Open up your browser and navigate to URL http://ip-address/opendocman. The following screen should appear.
Click on Create Configuration File link.
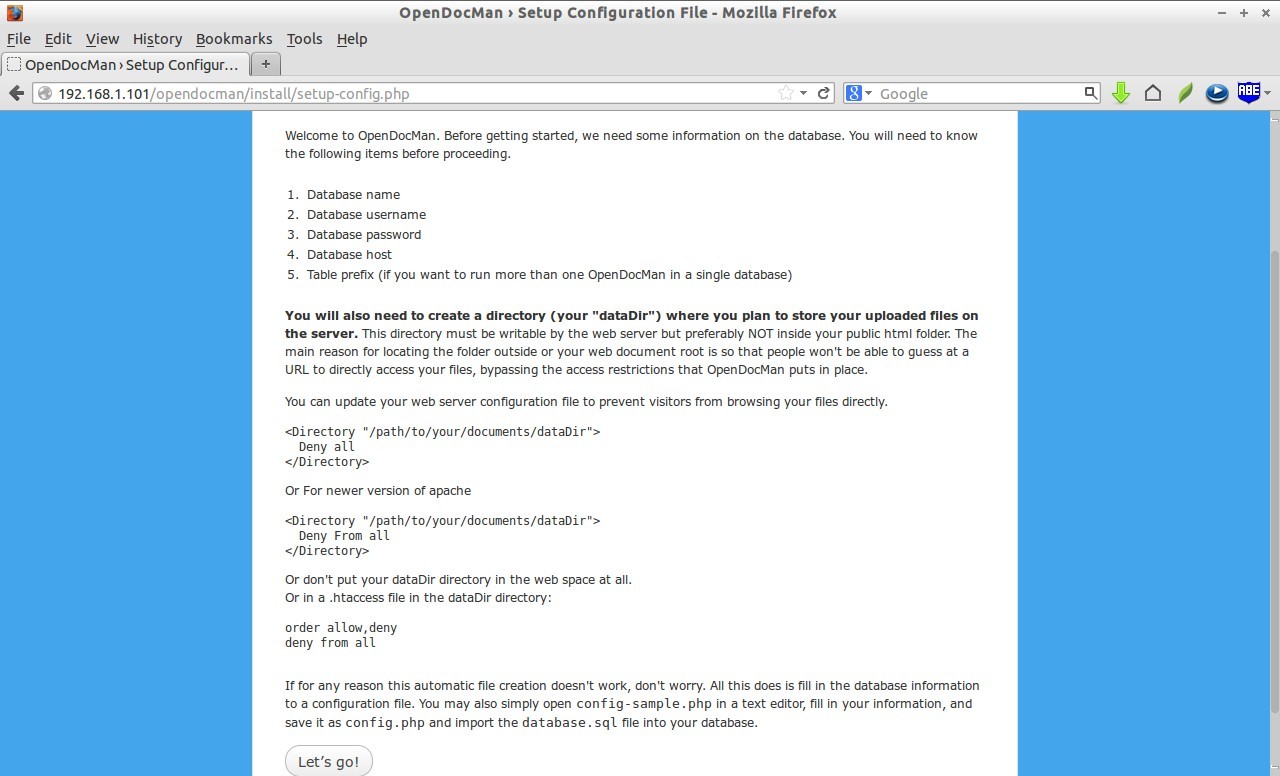
Click on the link that says: Let’s go.
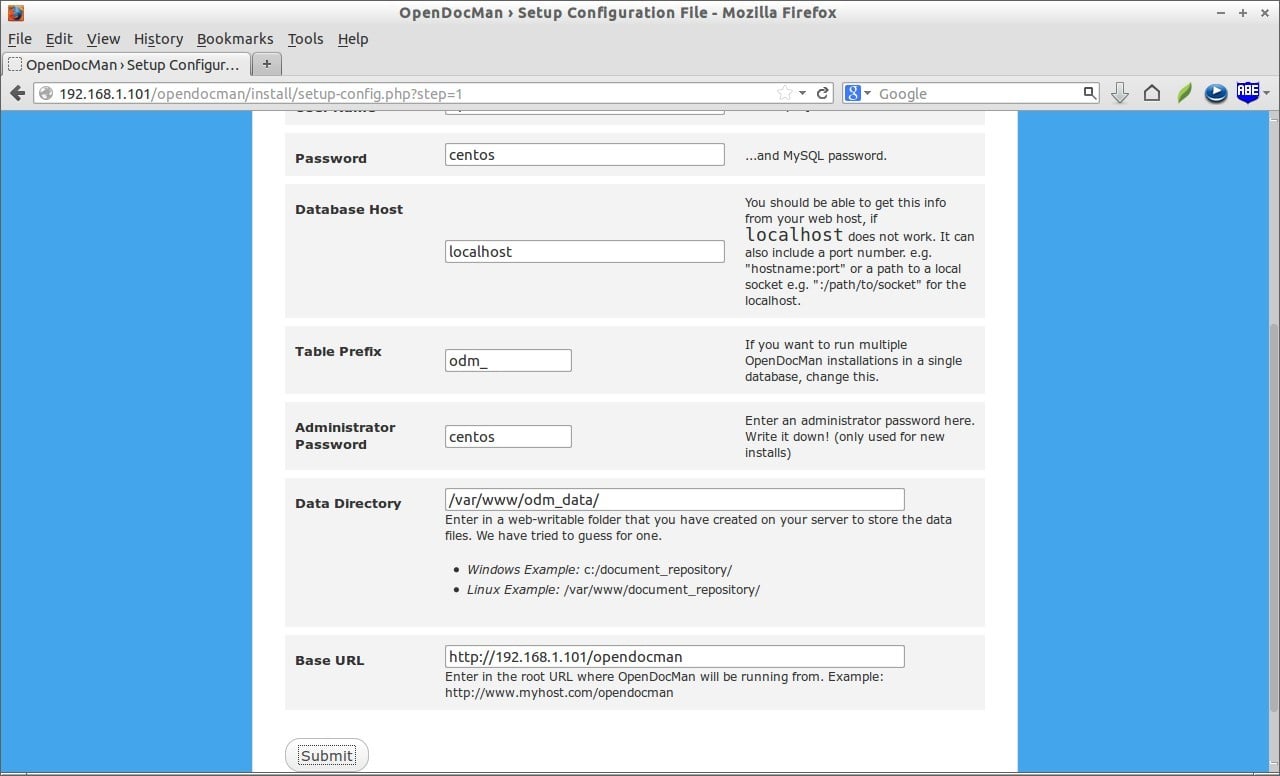
Fill up the database details and administrator password. Also, replace the path of the data folder with correct one. In our example, we use /var/www/odm_data/ as our data directory. And then, click Submit.
If the installer can’t create config.php file itself, it will throw the following warning message.
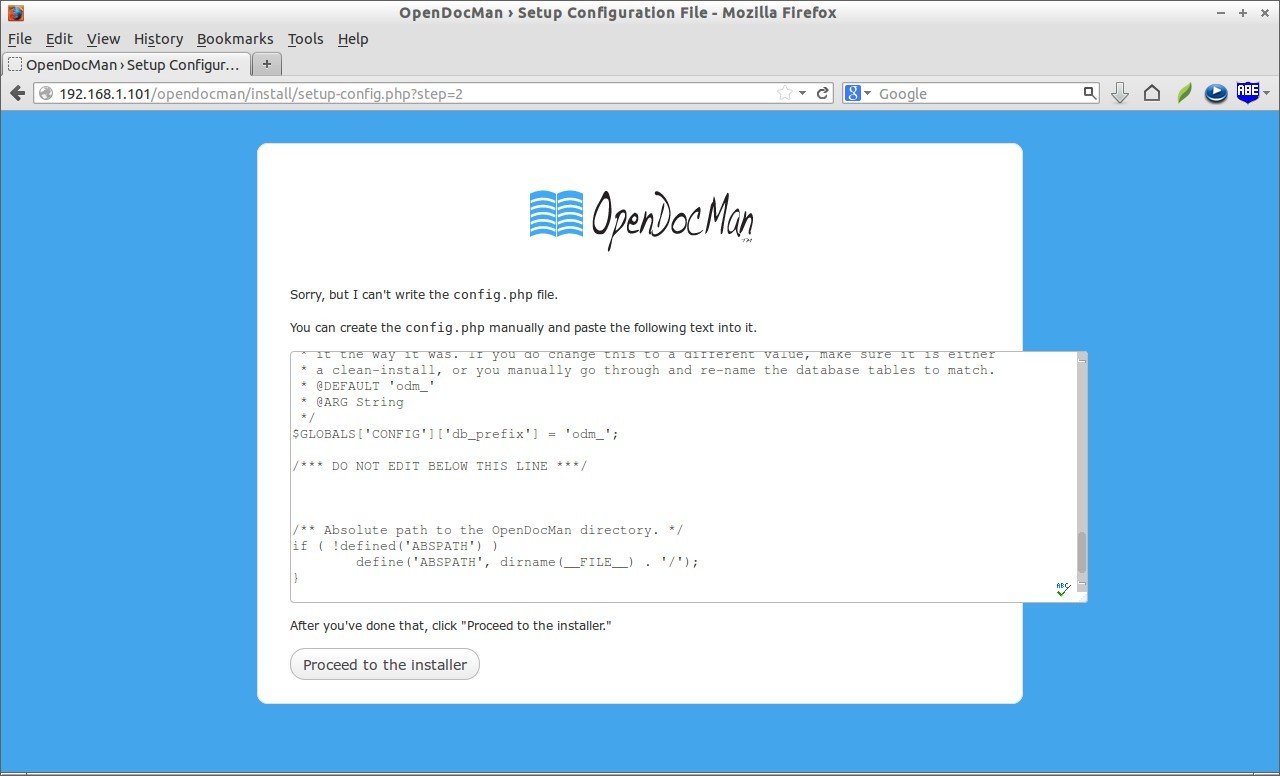
Don’t panic! Create a config.php file with contents as given in the above dialogue box.
vi /var/www/html/opendocman/config.php
Copy the text given in the above dialog box.
<?php
/*
config.php - OpenDocMan database config file
Copyright (C) 2011 Stephen Lawrence Jr.

This program is free software; you can redistribute it and/or
modify it under the terms of the GNU General Public License
as published by the Free Software Foundation; either version 2
of the License, or (at your option) any later version.

This program is distributed in the hope that it will be useful,
but WITHOUT ANY WARRANTY; without even the implied warranty of
MERCHANTABILITY or FITNESS FOR A PARTICULAR PURPOSE.  See the
GNU General Public License for more details.

You should have received a copy of the GNU General Public License
along with this program; if not, write to the Free Software
Foundation, Inc., 59 Temple Place - Suite 330, Boston, MA  02111-1307, USA.
*/

// Eliminate multiple inclusion of config.php
if( !defined('config') )
{
    define('config', 'true', false);

// config.php - useful variables/functions

// ** MySQL settings - You can get this info from your web host ** //
/** The name of the database for [OpenDocMan */
define('DB_NAME', 'opendocmandb');

/** MySQL database username */
define('DB_USER', 'opendocmanuser');

/** MySQL database password */
define('DB_PASS', 'centos');

/** MySQL hostname */
/* The MySQL server. It can also include a port number. e.g. "hostname:port" or a path to a
 * local socket e.g. ":/path/to/socket" for the localhost.  */
define('DB_HOST', 'localhost');

/**
 * Prefix to append to each table name in the database (ex. odm_ would make the tables
 * named "odm_users", "odm_data" etc. Leave this set to the default if you want to keep
 * it the way it was. If you do change this to a different value, make sure it is either
 * a clean-install, or you manually go through and re-name the database tables to match.
 * @DEFAULT 'odm_'
 * @ARG String
 */
$GLOBALS['CONFIG']['db_prefix'] = 'odm_';

/*** DO NOT EDIT BELOW THIS LINE ***/

/** Absolute path to the OpenDocMan directory. */
if ( !defined('ABSPATH') )
    define('ABSPATH', dirname(__FILE__) . '/');
}
Save and close the file. Then click Proceed to the installer button in the previous wizard.
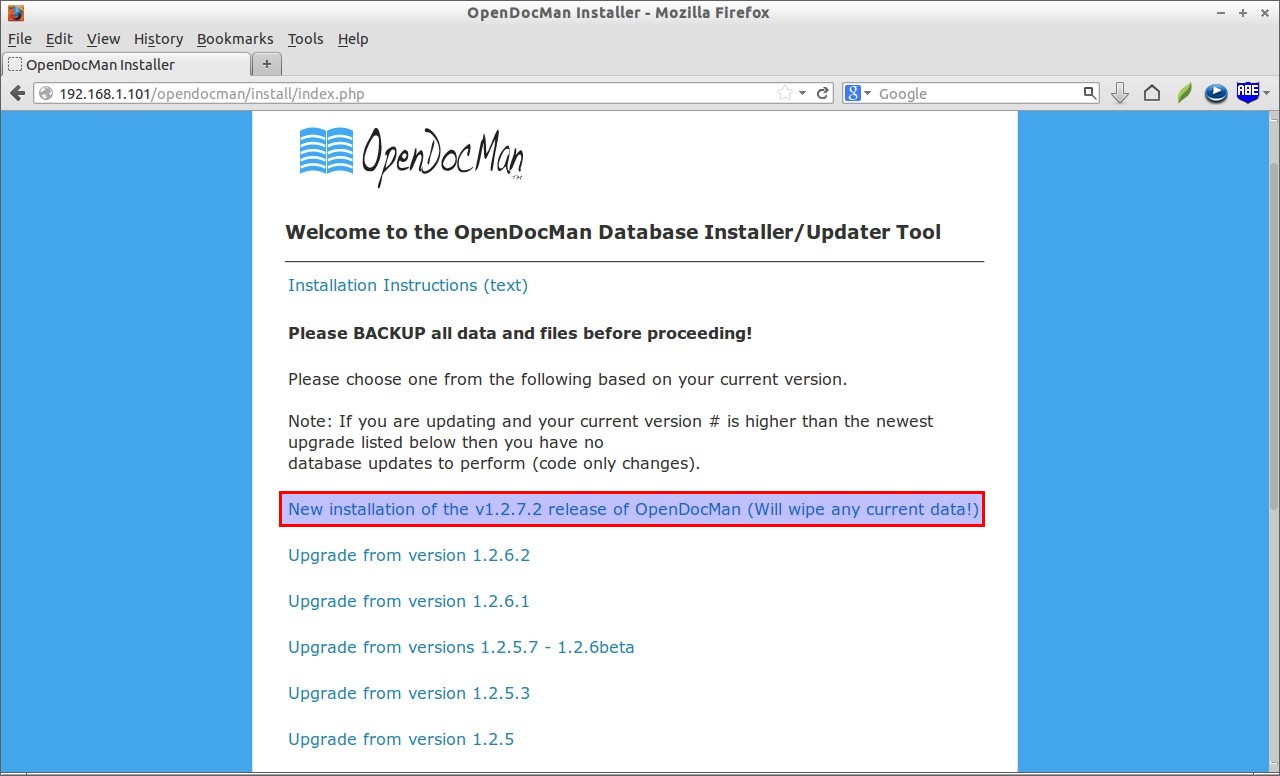
Now you will get the following screen. Click on the link that starts with “New installation….” text. Please be mindful that the new installation will destroy all data’s. If you’re upgrading from older version to newer version, click on the links that starts with texts “Upgrade from….”.
Congratulations! We have successfully installed OpenDocMan.
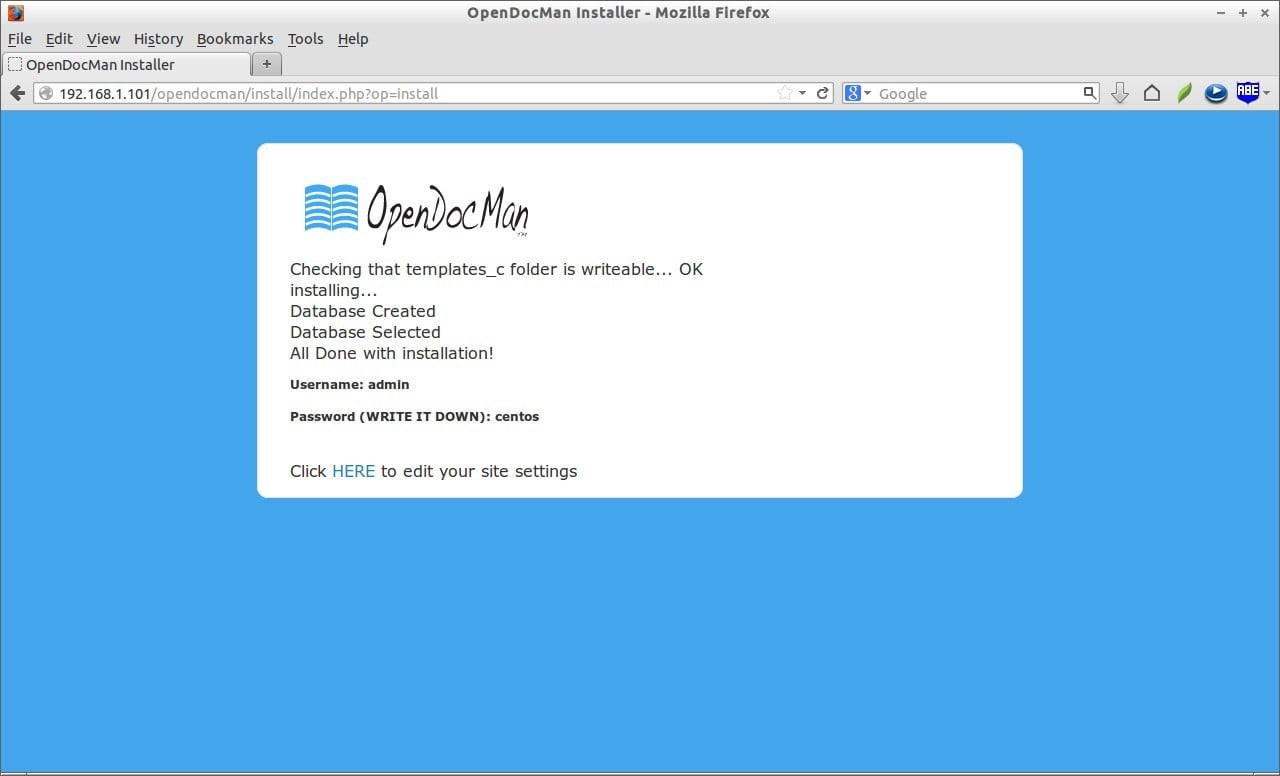
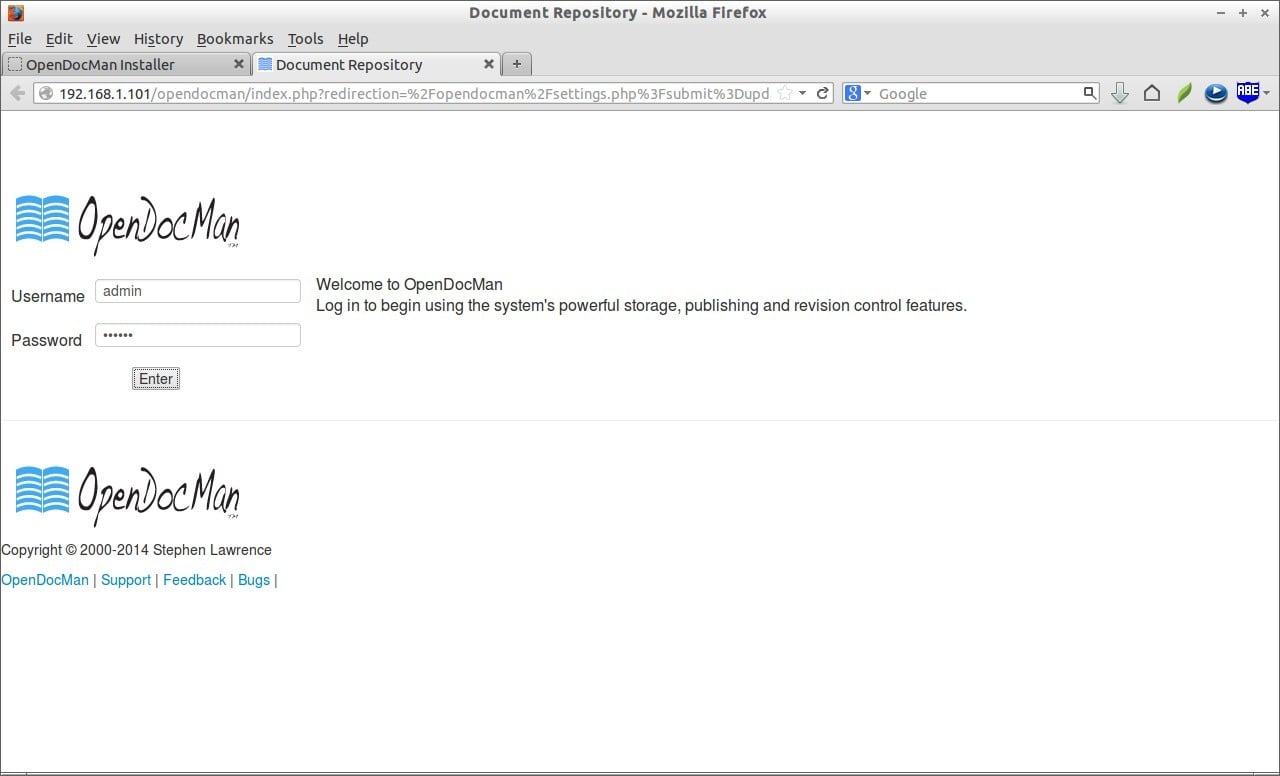
Click on the link that says Click HERE to edit your site settings to log in to the OpenDocMan dashboard. Log in with the default user name admin and the password you created while creating config.php file.
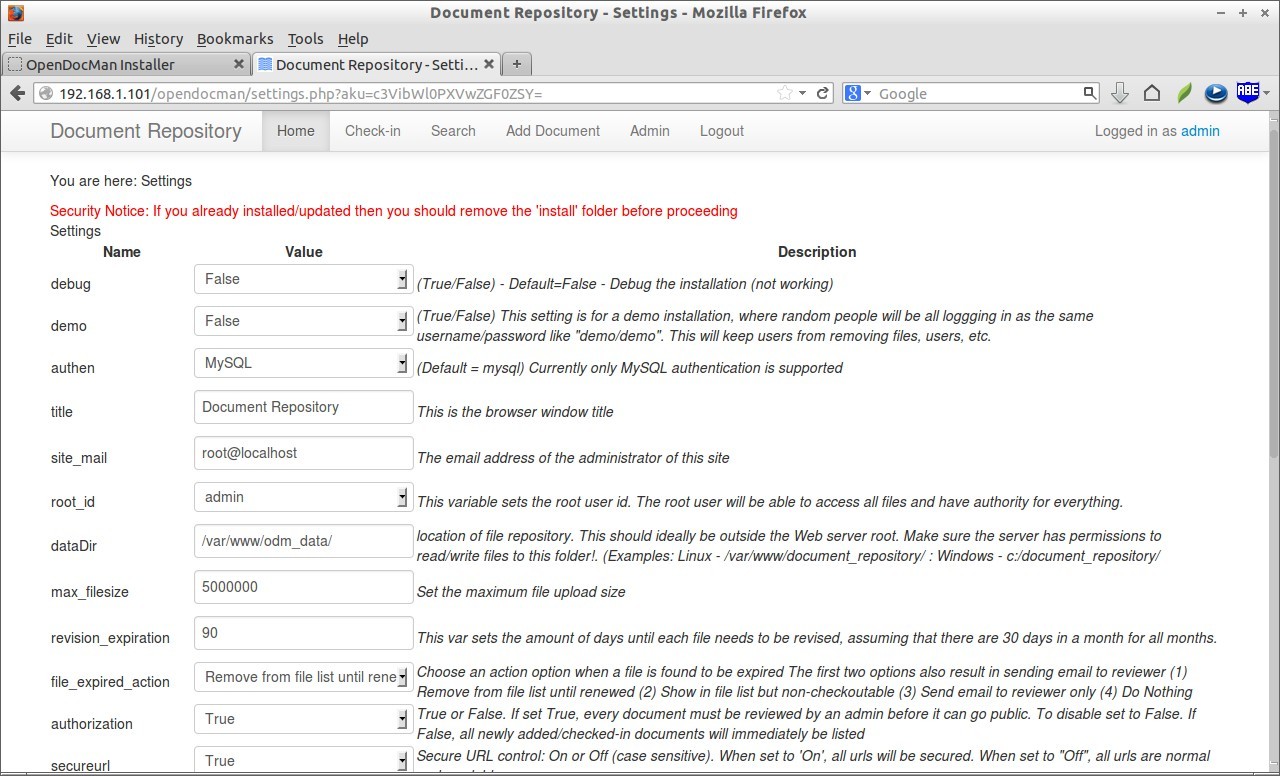
This is how my administrative dashboard looked.
After installing/upgrading OpenDocMan, don’t forget to remove the install folder.
rm -fr /var/www/html/opendocman/install/
In the administrative section, you can adjust various things such as site title, maximum upload size, data directory etc. After defining all settings, hit the save button.
Admin Section
Click on the Admin tab on the top to navigate to Administrative section. In the admin section, you can add/delete/update users, department, category etc.
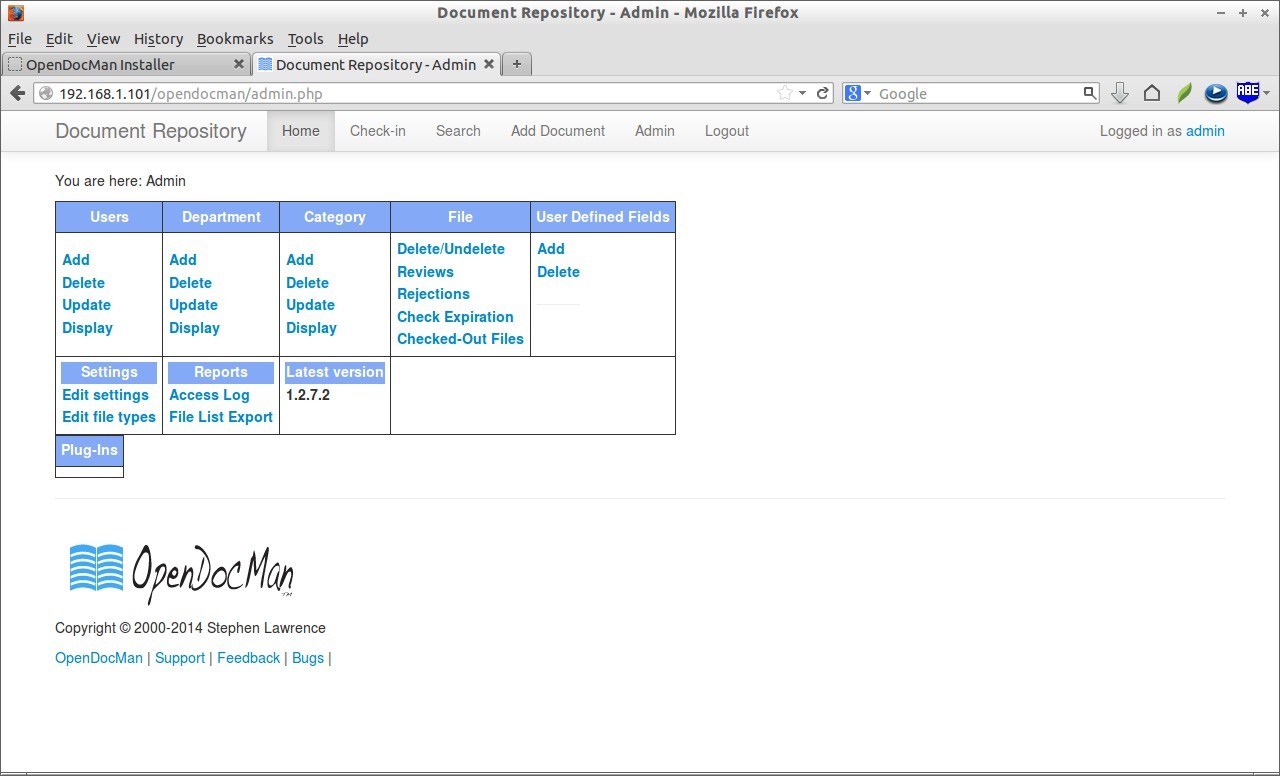
Also, you can adjust user permissions to access the particular files, departments and categories etc.
Adding Documents
Let us add a sample document. Navigate to Add Document section on the top.
Browse to the path to the document. Assign to the owner, department and select the Category etc. And, set the permissions to particular users if you want. Finally, click Submit to upload the document.
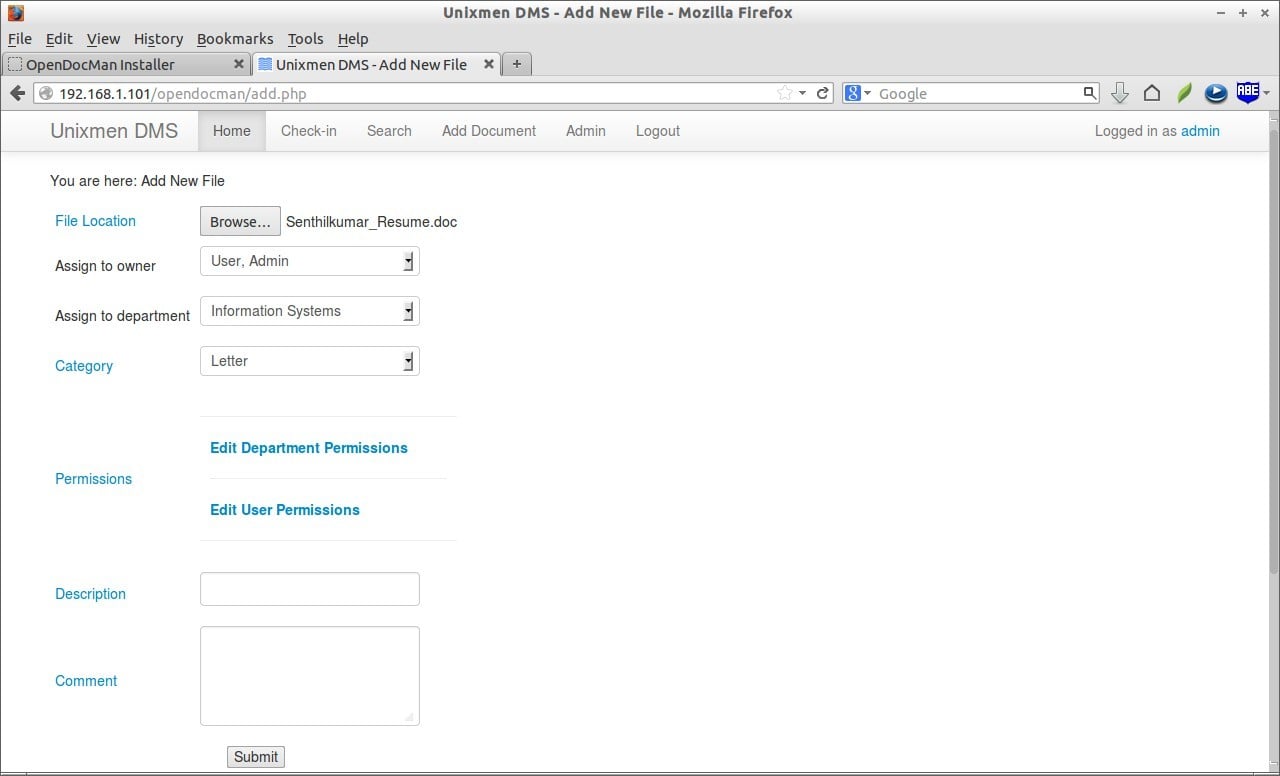
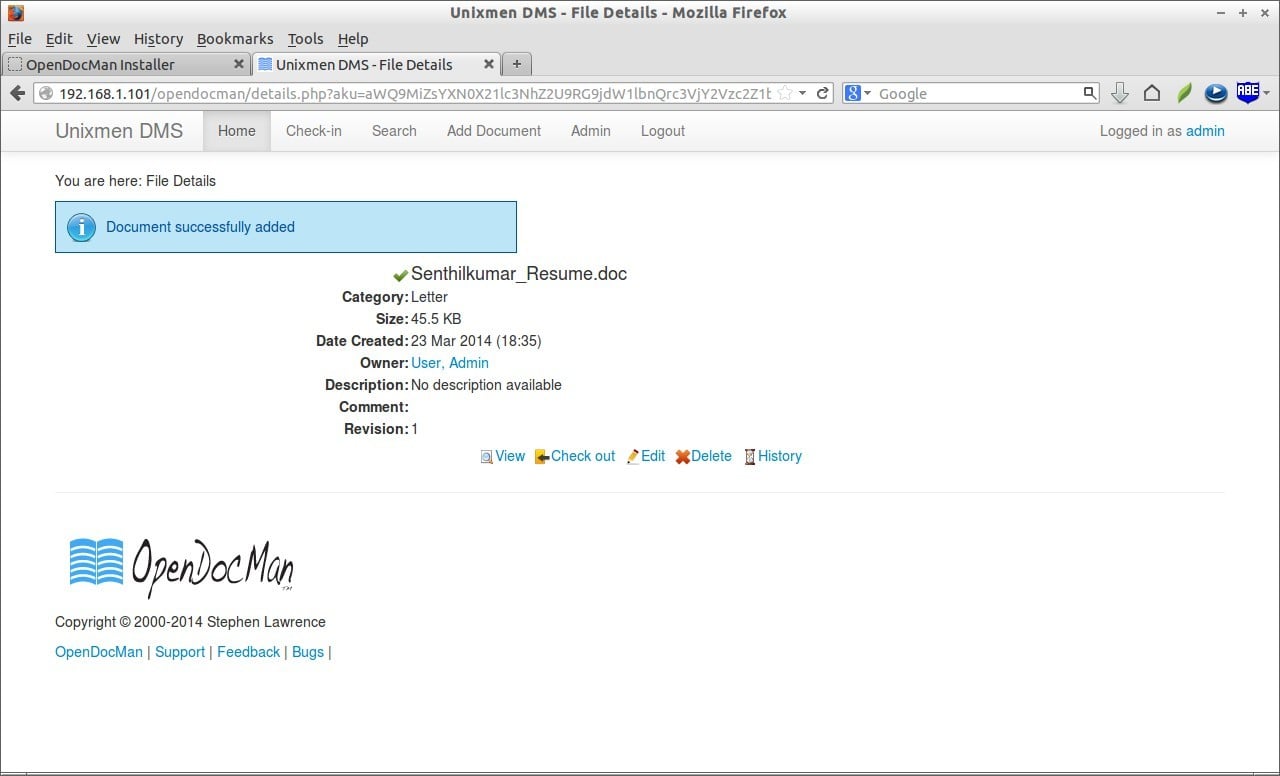
Now, the document is submitted to review. Once you submitted the document for review, your administrator can review and authorize documents.
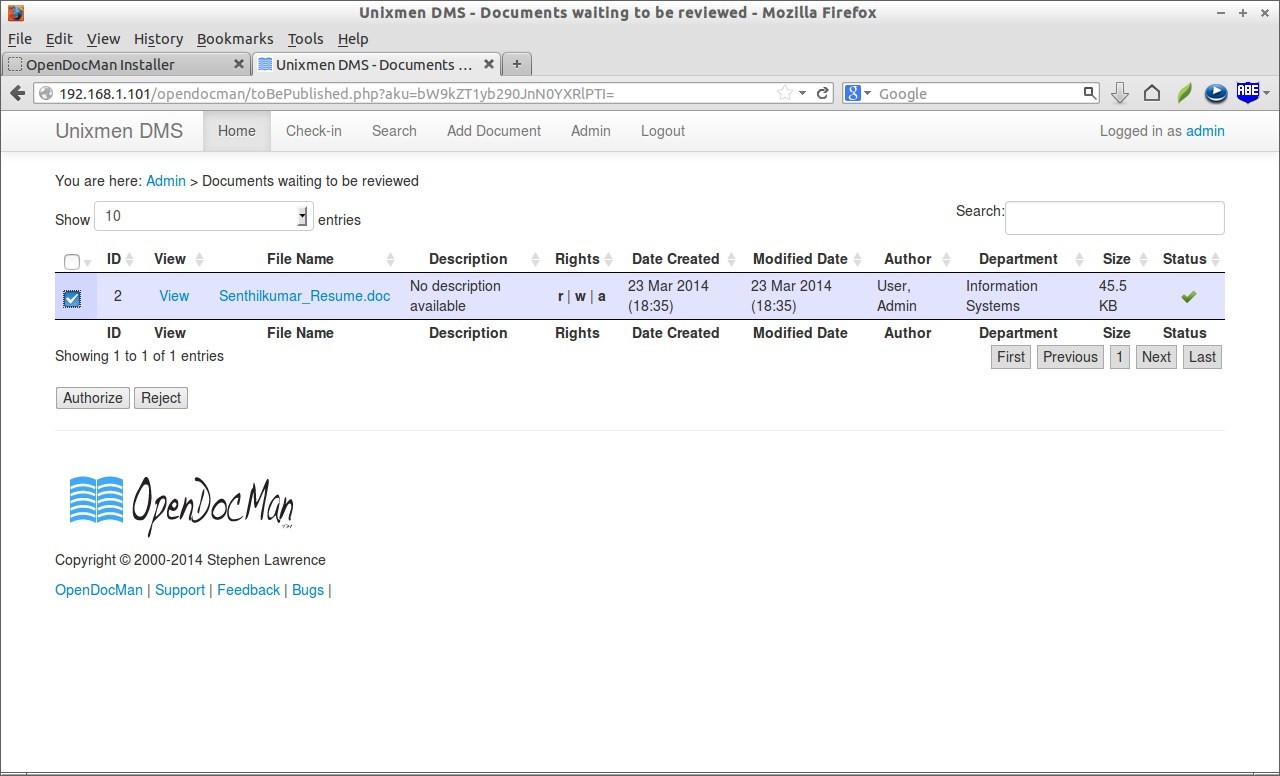
To authorize the documents, log in as admin user. Go to the Admin tab, click on the link Reviews in the file section.
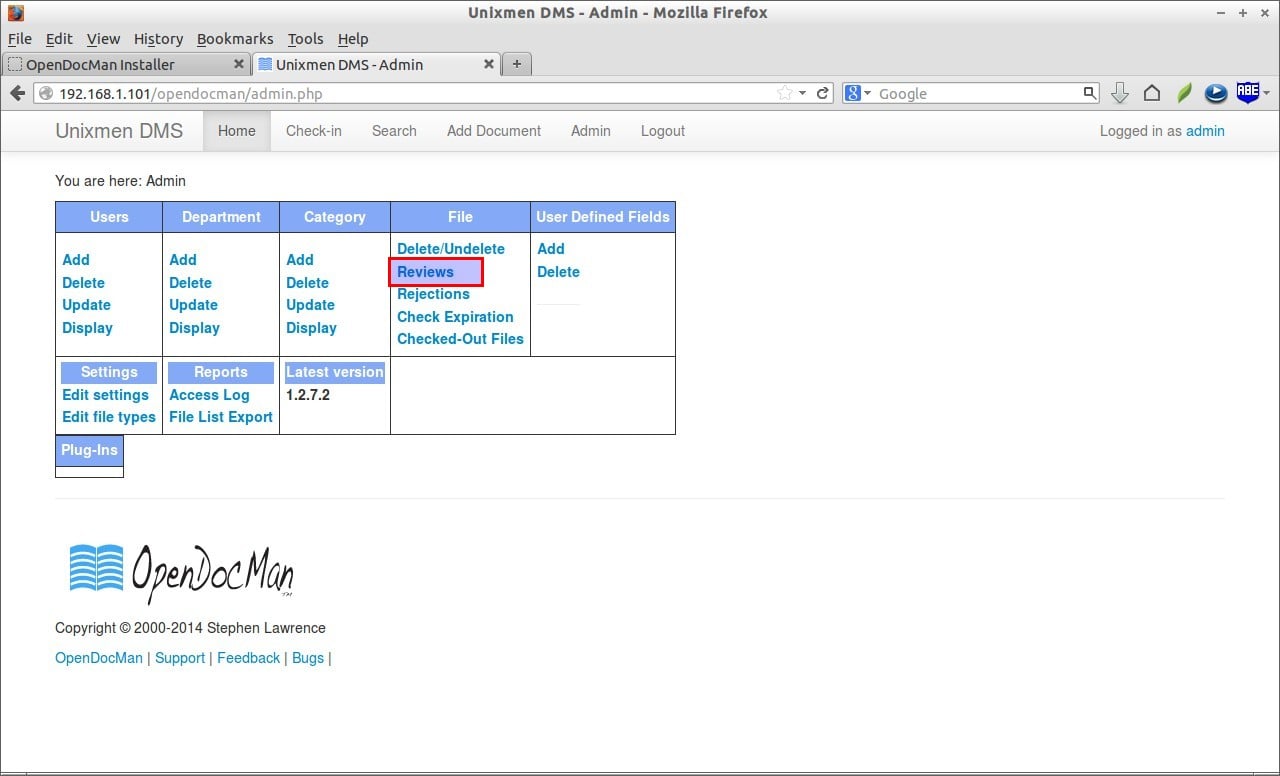
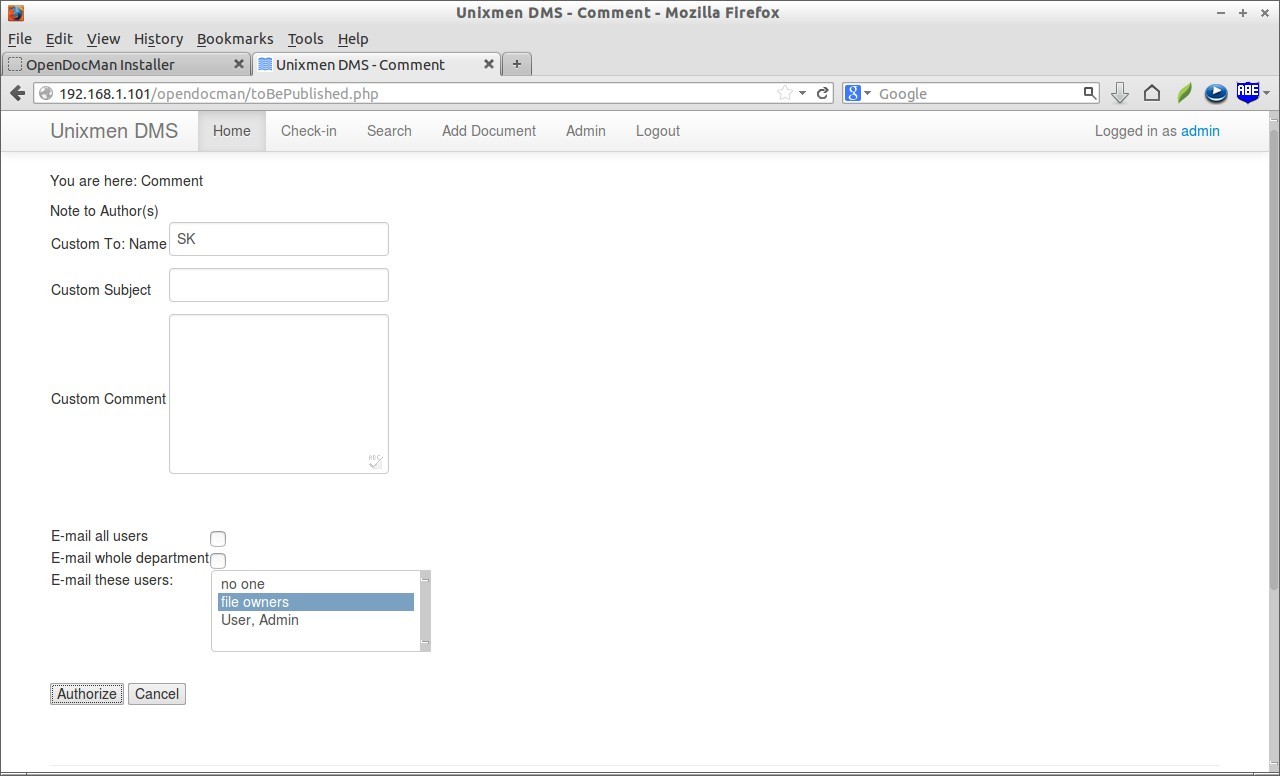
Select the document to review, and click Authorize to approve the document.
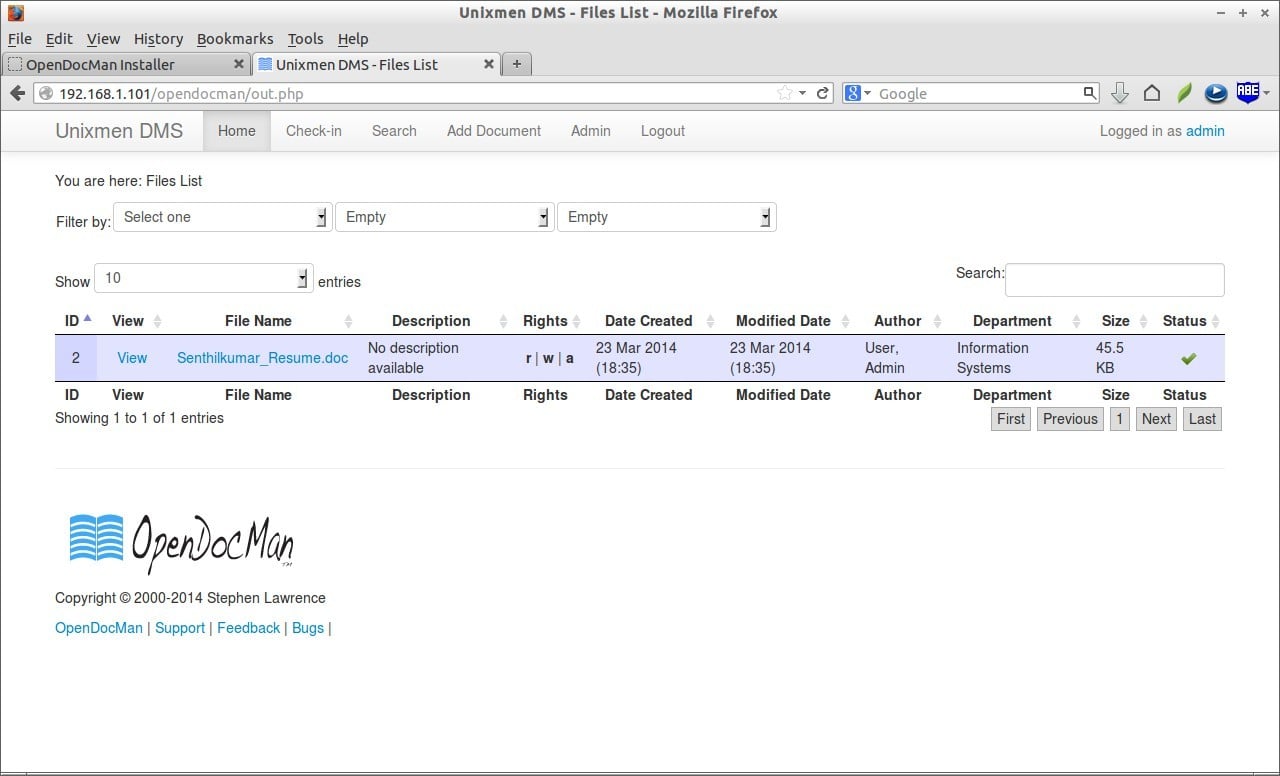
Now, you’ll see the authorized documents in the Home page.
That’s it! Your DMS is ready. Hope this helps. Good luck!
References:


