Elgg is an open-source and powerful social networking engine used to create your own social networking web site. In this How To, I am gonna show you how to build your own social network website, just like Facebook and Linkedin.

Prerequisites
Elgg needs Apache, MySQL and PHP modules in order to build a social networking websites. So let us install the following necessary prerequisites first:
[root@server ~]# yum install mysql mysql-server httpd php php-mysql php-gd php-imap php-ldap php-odbc php-pear php-xml php-xmlrpc php-mbstring wget unzip -y
Open the Apache main configuration file and change from AllowOverride None to AllowOverride All:
[root@server ~]# vi /etc/httpd/conf/httpd.conf
 # AllowOverride controls what directives may be placed in .htaccess files.
 # It can be "All", "None", or any combination of the keywords:
 #   Options FileInfo AuthConfig Limit
 #
 AllowOverride All
Start/Restart MySQL and Apache services now:
[root@server ~]# /etc/init.d/mysqld restart

[root@server ~]# /etc/init.d/httpd restart
Create MySQL Database for elgg
Create a database for elgg called elggdb and database user called elgg with password ‘centos’:
[root@server ~]# mysql -u root -p
Enter password: ******
Welcome to the MySQL monitor.  Commands end with ; or \g.
Your MySQL connection id is 4
Server version: 5.1.69 Source distribution

Copyright (c) 2000, 2013, Oracle and/or its affiliates. All rights reserved.

Oracle is a registered trademark of Oracle Corporation and/or its
affiliates. Other names may be trademarks of their respective
owners.

Type 'help;' or '\h' for help. Type '\c' to clear the current input statement.

mysql> create database elggdb;
Query OK, 1 row affected (0.02 sec)

mysql> create user 'elgg'@'localhost' identified by 'centos';
Query OK, 0 rows affected (0.00 sec)

mysql> GRANT ALL PRIVILEGES ON elggdb.* to 'elgg' IDENTIFIED BY 'centos';
Query OK, 0 rows affected (0.01 sec)

mysql> flush privileges;
Query OK, 0 rows affected (0.01 sec)

mysql> exit
Bye
Downloading elgg
[root@server ~]# wget http://elgg.org/getelgg.php?forward=elgg-1.8.15.zip
Extract the downloaded file:
[root@server ~]# unzip elgg-1.8.15.zip
Move the elgg folder to Apache root document directory:
[root@server ~]# mv elgg-1.8.15/ /var/www/html/elgg
Now go to /var/www/html/elgg/engine directory and copy the file settings.example.php to settings.php:
[root@server ~]# cd /var/www/html/elgg/engine/
[root@server engine]# cp settings.example.php settings.php
Open the file settings.php and enter the details of database name, database user, database password, hostname and database prefix as shown below:
[root@server engine]# vi settings.php
/**
 * The database username
 *
 * @global string $CONFIG->dbuser
 * @name $CONFIG->dbuser
 */
$CONFIG->dbuser = 'elgg';

/**
 * The database password
 *
 * @global string $CONFIG->dbpass
 */
$CONFIG->dbpass = 'centos';

/**
 * The database name
 *
 * @global string $CONFIG->dbname
 */
$CONFIG->dbname = 'elggdb';

/**
 * The database host.
 *
 * For most installations, this is 'localhost'
 *
 * @global string $CONFIG->dbhost
 */
$CONFIG->dbhost = 'localhost';

/**
 * The database prefix
 *
 * This prefix will be appended to all Elgg tables.  If you're sharing
 * a database with other applications, use a database prefix to namespace tables
 * in order to avoid table name collisions.
 *
 * @global string $CONFIG->dbprefix
 */
$CONFIG->dbprefix = 'elgg_';
Create directory called data to upload photos, videos and profile icons etc. The directory should be created outside of the Apache root document folder for security reasons:
[root@server html]# mkdir data
[root@server html]# chmod 777 data/
Adjusting firewall and SELinux
Open the Apache default port 80 through your firewall/router and disable the SELinux:
[root@server html]# vi /etc/sysconfig/iptables
# Firewall configuration written by system-config-firewall
# Manual customization of this file is not recommended.
*filter
:INPUT ACCEPT [0:0]
:FORWARD ACCEPT [0:0]
:OUTPUT ACCEPT [0:0]
-A INPUT -p udp -m state --state NEW --dport 3306 -j ACCEPT
-A INPUT -p tcp -m state --state NEW --dport 3306 -j ACCEPT
-A INPUT -p udp -m state --state NEW --dport 80 -j ACCEPT
-A INPUT -p tcp -m state --state NEW --dport 80 -j ACCEPT
-A INPUT -p udp -m state --state NEW --dport 53 -j ACCEPT
-A INPUT -p tcp -m state --state NEW --dport 53 -j ACCEPT
-A INPUT -m state --state ESTABLISHED,RELATED -j ACCEPT
-A INPUT -p icmp -j ACCEPT
-A INPUT -i lo -j ACCEPT
-A INPUT -m state --state NEW -m tcp -p tcp --dport 22 -j ACCEPT
-A INPUT -j REJECT --reject-with icmp-host-prohibited
-A FORWARD -j REJECT --reject-with icmp-host-prohibited
COMMIT
Restart the iptables to save the changes:
[root@server html]# /etc/init.d/iptables restart
Disable SELinux and reboot your system:
[root@server ~]# vi /etc/sysconfig/selinux
# This file controls the state of SELinux on the system.
# SELINUX= can take one of these three values:
#     enforcing - SELinux security policy is enforced.
#     permissive - SELinux prints warnings instead of enforcing.
#     disabled - No SELinux policy is loaded.
SELINUX=disabled
# SELINUXTYPE= can take one of these two values:
#     targeted - Targeted processes are protected,
#     mls - Multi Level Security protection.
SELINUXTYPE=targeted
Starting elgg installation
Open the web browser and navigate to http://ip-address/elgg/install.php or http://domain-name/elgg/install.php. Follow the on screen instructions:

You may get an error like in the below screen-shot.
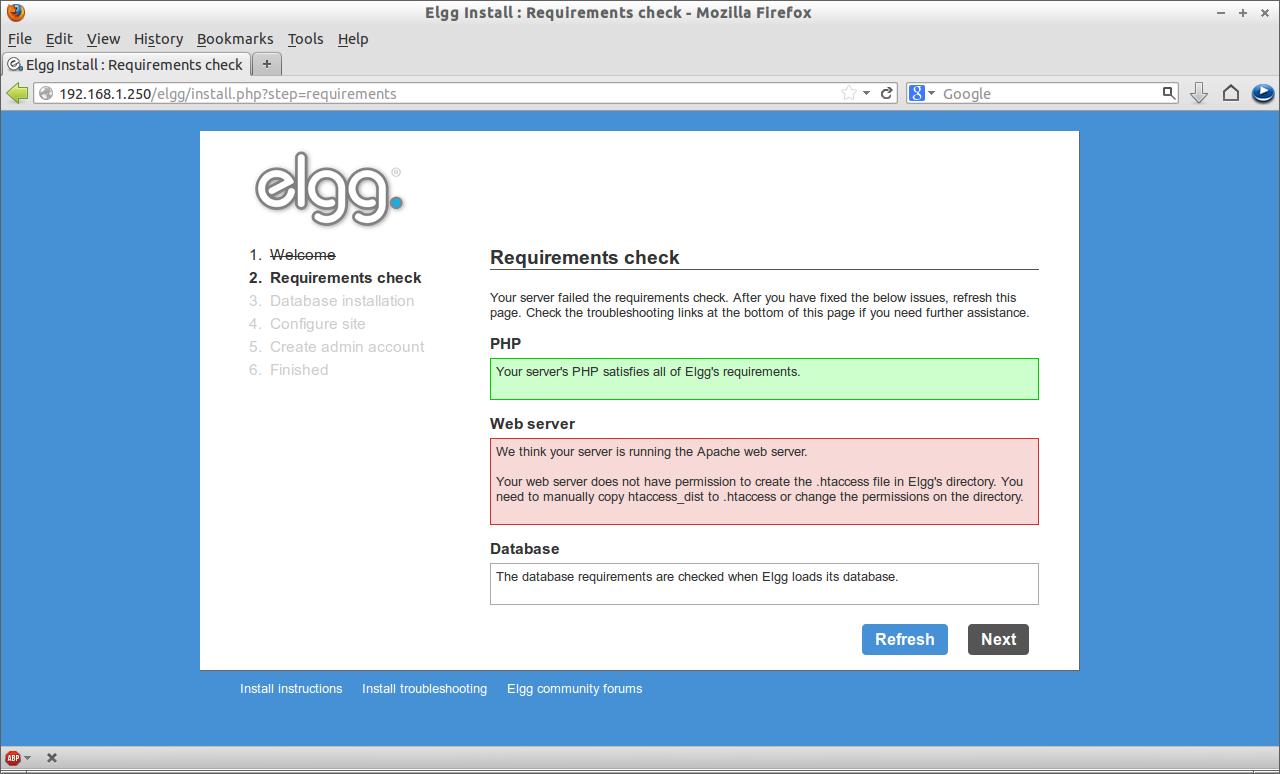
To get rid of this error, open the file .htaccess in the elgg directory and edit as follows. If .htaccess file doesn’t exist, create it by copying the htaccess_dist file in the elgg directory to .htaccess.
[root@server ~]# vi /etc/httpd/conf/httpd.conf
[root@server ~]# cd /var/www/html/elgg/
[root@server elgg]# cp htaccess_dist .htaccess
Now open the .htaccess file in any editor. Uncomment the line 94 and set it as shown below:
[root@server elgg]# vi .htaccess
## Line no 94 - Uncomment and set as below ##
RewriteBase /elgg/
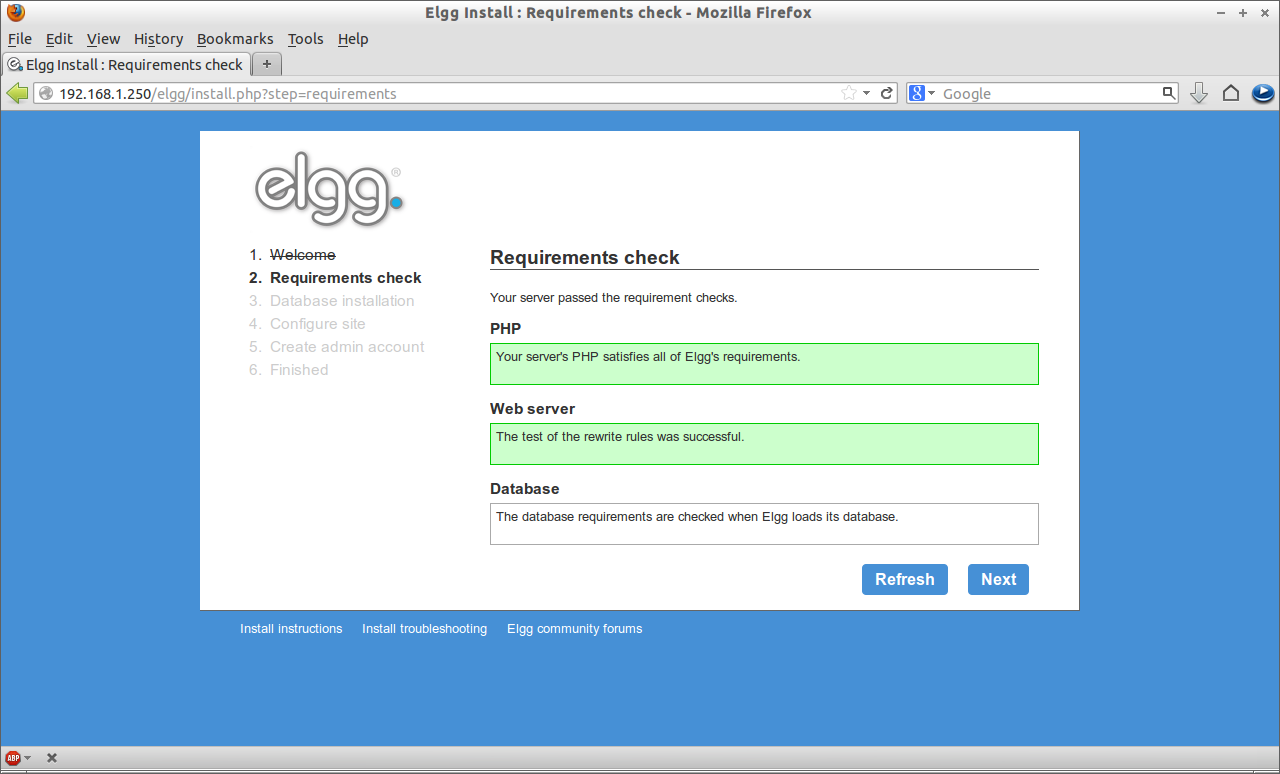
Save and exit the file. Restart the httpd service and try again the installer. This time the error will be gone.
Now enter the Site Name, Site Administrator email ID and data directory path as shown below. Click Next.

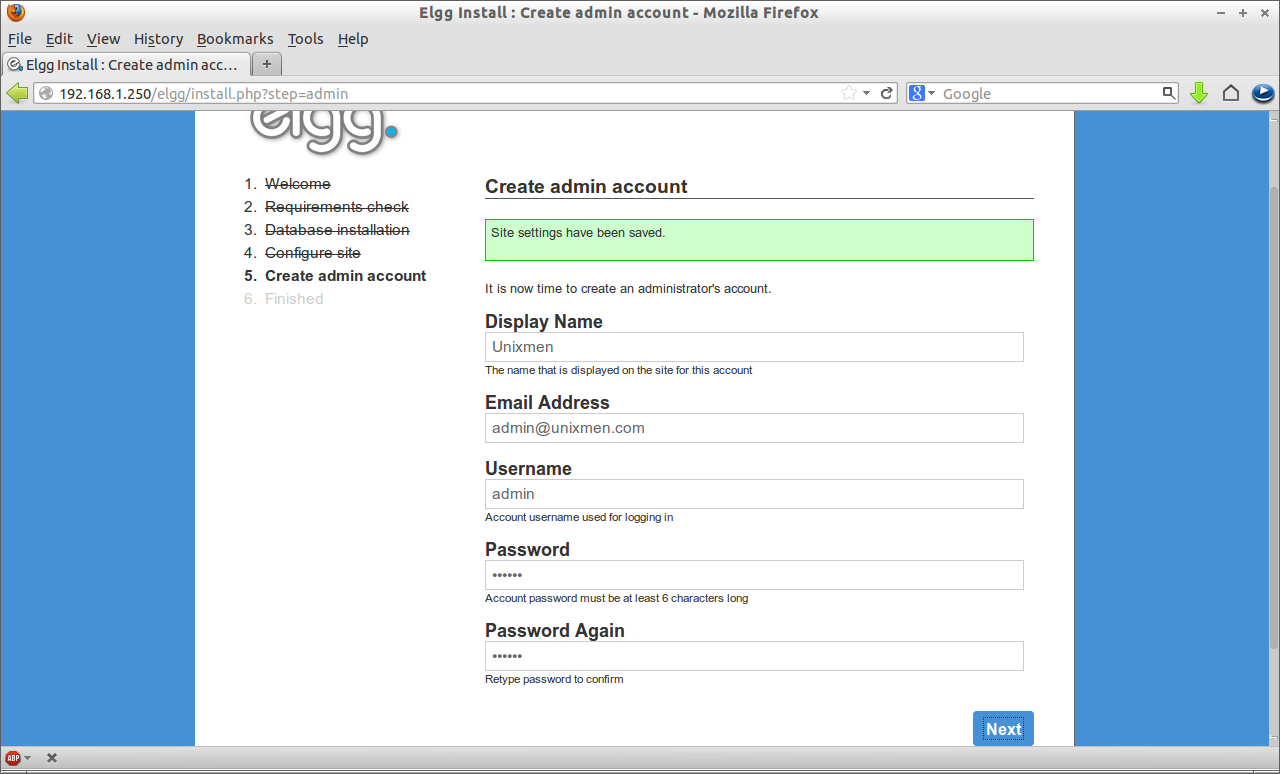
Now create the Admin account for elgg. Fill up details and click Next.
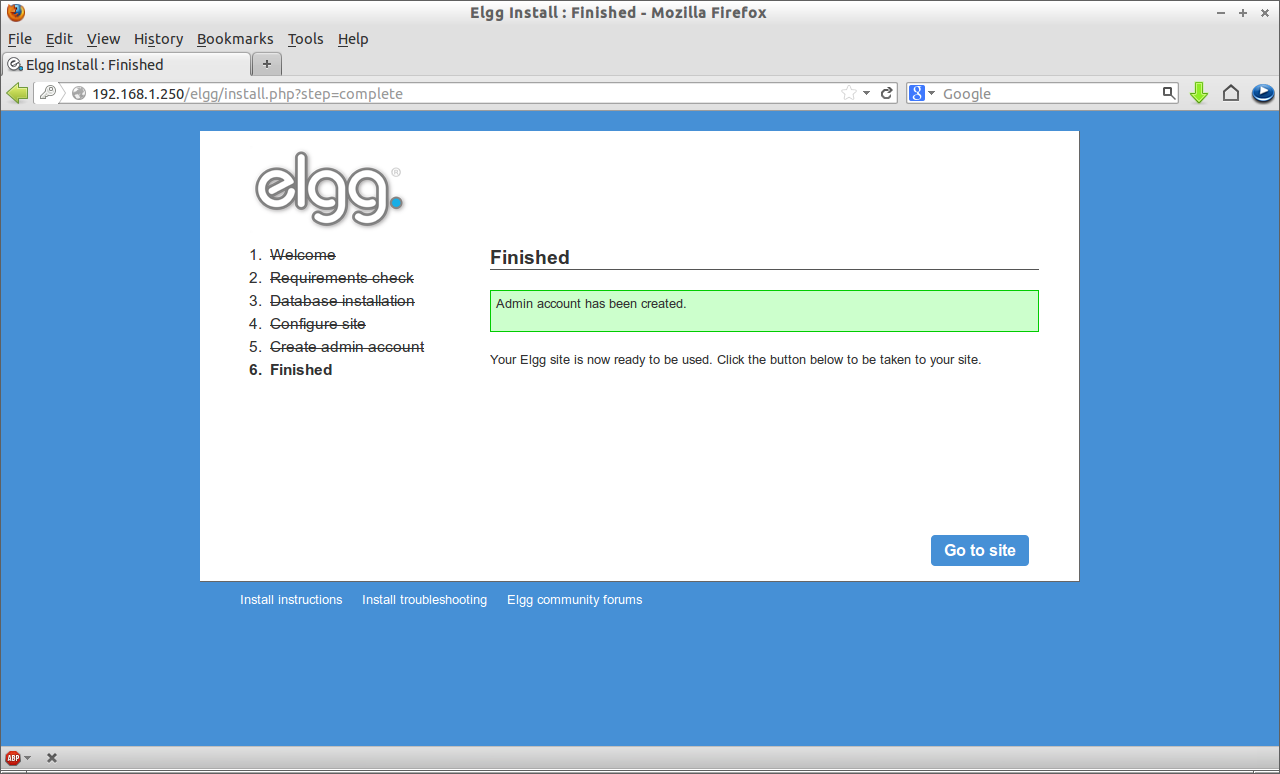
Now your new social network has been created. Click Go to site to get started.
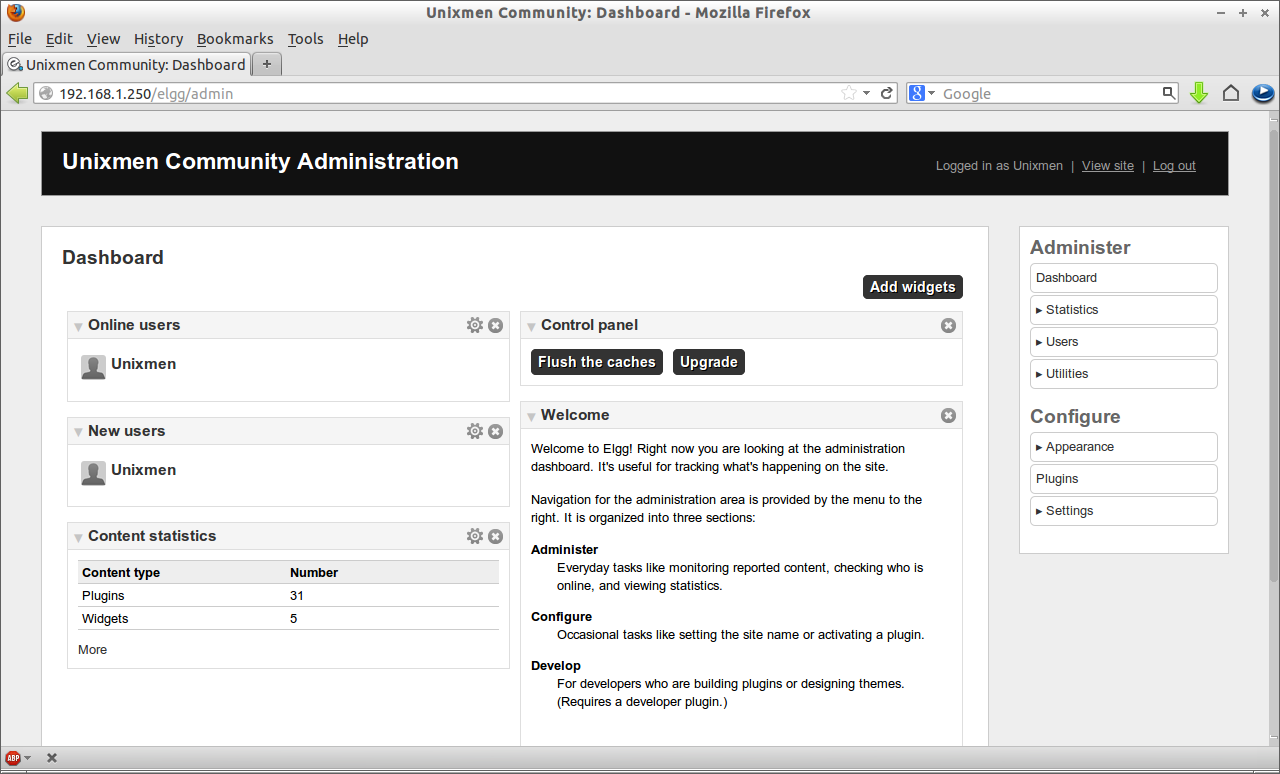
This is how your Administration Dashboard will appear.
Click on the View Site link on the upper right corner of Dashboard page. This is how your home page of your social network website will appear.
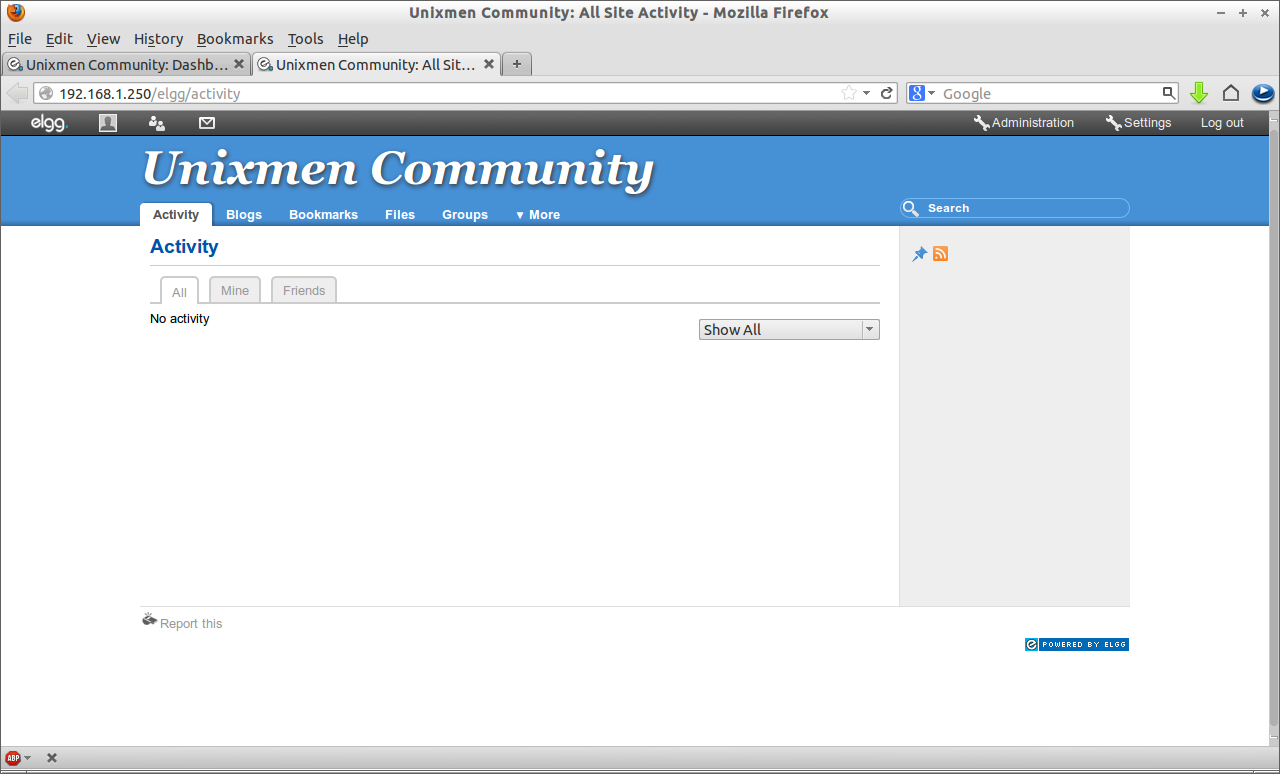
From here, the users can create new blogs, pages, files, groups and so on.


