
Let us say you’re managing a remote server without GUI(headless), and want to manage the virtual machines running on Oracle VirtualBox of that server? What will you do? Ofcourse, we can create, delete, and edit virtual machines from the command line, but why do we bother ourselves while we have option to manage VMs from a web browser, or using a graphical client?
In our previous tutorials, we explained about how to install and manage VirtualBox using phpVirtualBox in a headless Ubuntu and CentOS servers. Using phpVirtualBox, we can access the virtualbox console via a web browser anywhere in our local network, and manage VMs remotely from our Laptop or Desktop.
If you’re not happy phpVirtualBox, and want to have a dedicated GUI client to manage the VMs, then why don’t you try RemoteBox?
What is RemoteBox?
For those who not heard about, RemoteBox is GTK graphical client to manage VMs remotely. The look and feel of RemoteBox is very similar to native Oracle VirtualBox GUI. You can install it on any client system, and you can able to access and manage VMs created in the remote server easily. And the good news is it will run on almost all modern operating systems such as GNU/LInux, Mac OS X, Windows, and BSD systems.
Features
- It’s completely free and open source;
- It manages both Oracle VirtualBox, and it’s guests;
- No Webserver needed;
- It is written using Perl, so there is no need of compilation;
- Can easily view and interact with guests via RDP, including sound and clipboard;
- Create and edit guests;
- We can configure processor, display, input devices, audio, I/O ports, and shared folders of guests;
- Set advanced options such as HPET, Page Fusion, Large Pages, CPU Hotplugging, CPU Throttling etc;
- Attach USB devices and set USB device filters;
- Stop, start, pause and save guest states;
- Provision and attach storage including hard disks, CDs/DVDs and floppy disks;
- Configure networking including host only networks with DHCP servers;
- Supports guest snapshots;
- Compatible with VirtualBox running on Linux, Windows, Mac OS X, and Solaris;
- Runs on Linux, Windows, Mac OS X;
- And more.
Install Oracle VirtualBox On a Headless Server
If you haven’t installed VirtualBox in a headless server yet, refer the following articles.
- Install Oracle VirtualBox And Manage It Using phpVirtualBox On A Ubuntu 14.04 Headless Server
- Install Oracle VirtualBox And Manage It Using phpVirtualBox On A CentOS Headless Servers
Don’t install phpVirtualBox on the server, because we’re going to manage VMs using RemoteBox tool from the client system.
Also, make sure you have created a configuration file for virtualbox web service in your server.
vi /etc/default/virtualbox
Add the following lines:
VBOXWEB_USER=sk_vuser
VBOXWEB_PASSWD=centos
VBOXWEB_TIMEOUT=0
VBOXWEB_HOST=192.168.1.101
Save and close the file. Here,
- VBOXWEB_USER=sk_vuser – VirtualBox web service user.
- VBOXWEB_PASSWD=centos – The web service user’s password.
- VBOXWEB_HOST=192.168.1.101 – Headless server IP address.
Then, start the virtualbox web service.
On CentOS 7/RHEL 7:
systemctl start vboxweb-service
systemctl enable vboxweb-service
On CentOS 6/RHEL 6:
/etc/init.d/vboxweb-service start
chkconfig vboxweb-service on
On Ubuntu/Debian:
sudo /etc/init.d/vboxweb-service start
Install RemoteBox On Client systems
On Fedora clients:
RemoteBox is available in the default repositories, so you can install it using command:
sudo yum install remotebox
On RHEL/CentOS 7:
You need to install EPEL repository first. Refer the following article to install and enable EPEL repository on CentOS 7 systems.
On RHEL/CentOS 6:
Refer the following article to install and enable EPEL repository on CentOS 6 systems.
Now, install remotebox using command:
yum install remotebox
On Ubuntu/Debian Clients:
Install GetDeb repository first.
wget http://archive.getdeb.net/install_deb/getdeb-repository_0.1-1~getdeb1_all.deb
sudo dpkg -i getdeb-repository_0.1-1~getdeb1_all.deb
wget -q -O- http://archive.getdeb.net/getdeb-archive.key | sudo apt-key add -
Now, update source list and install RemoteBox:
sudo apt-get update
sudo apt-get install remotebox
For other distributions refer the RemoteBox downloads page.
Usage
Launch RemoteBox either from Menu or Unity Dash.
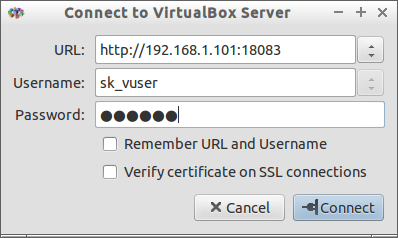
Click on the Connect button on the top left corner. Enter the URL: http://server-ip-address:18083, and enter the virtualbox web service user name and password. In my case, it’s sk_vuser and centos.
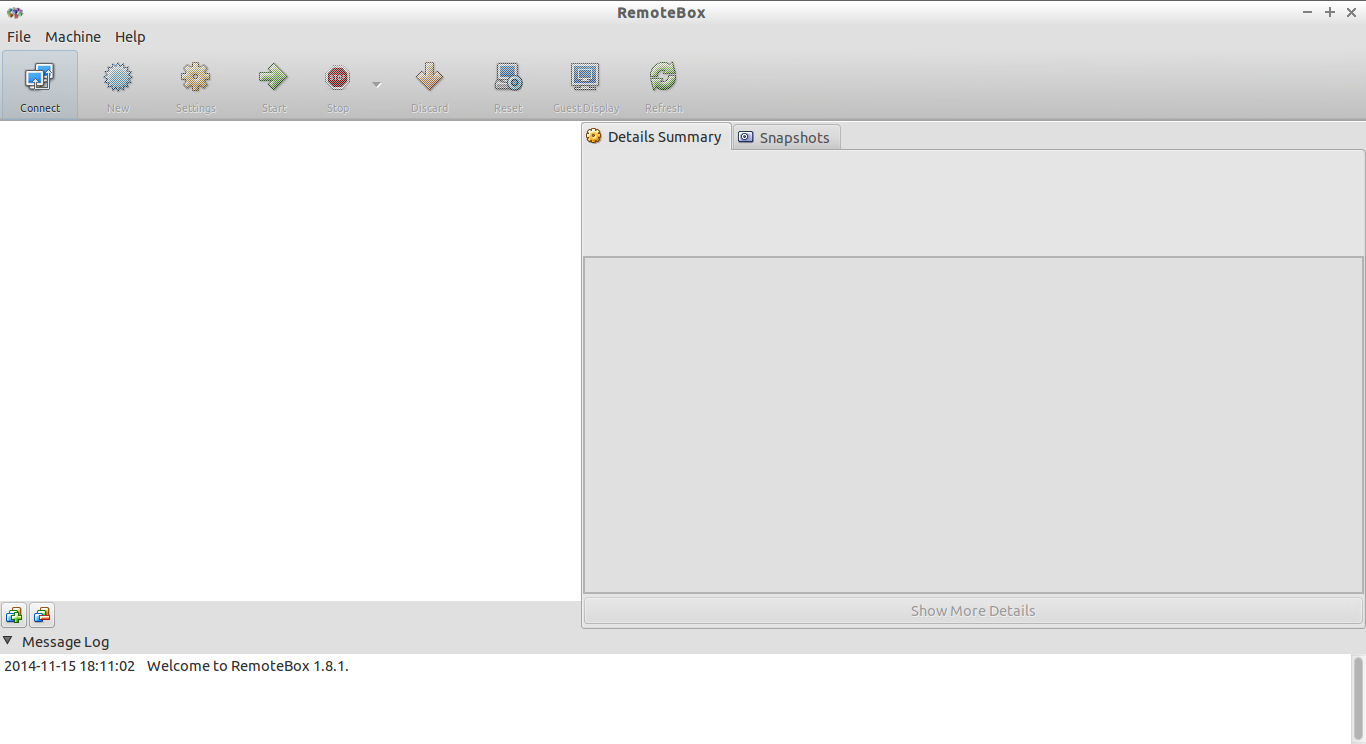
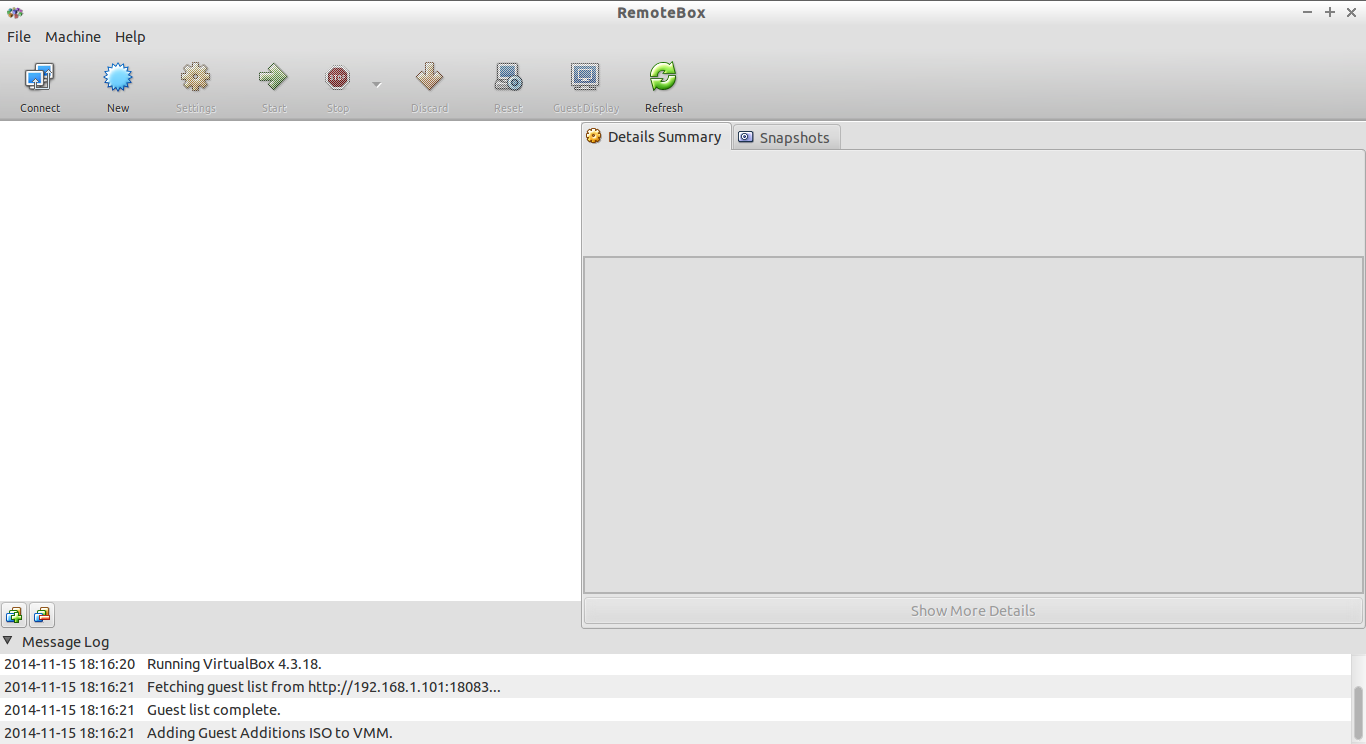
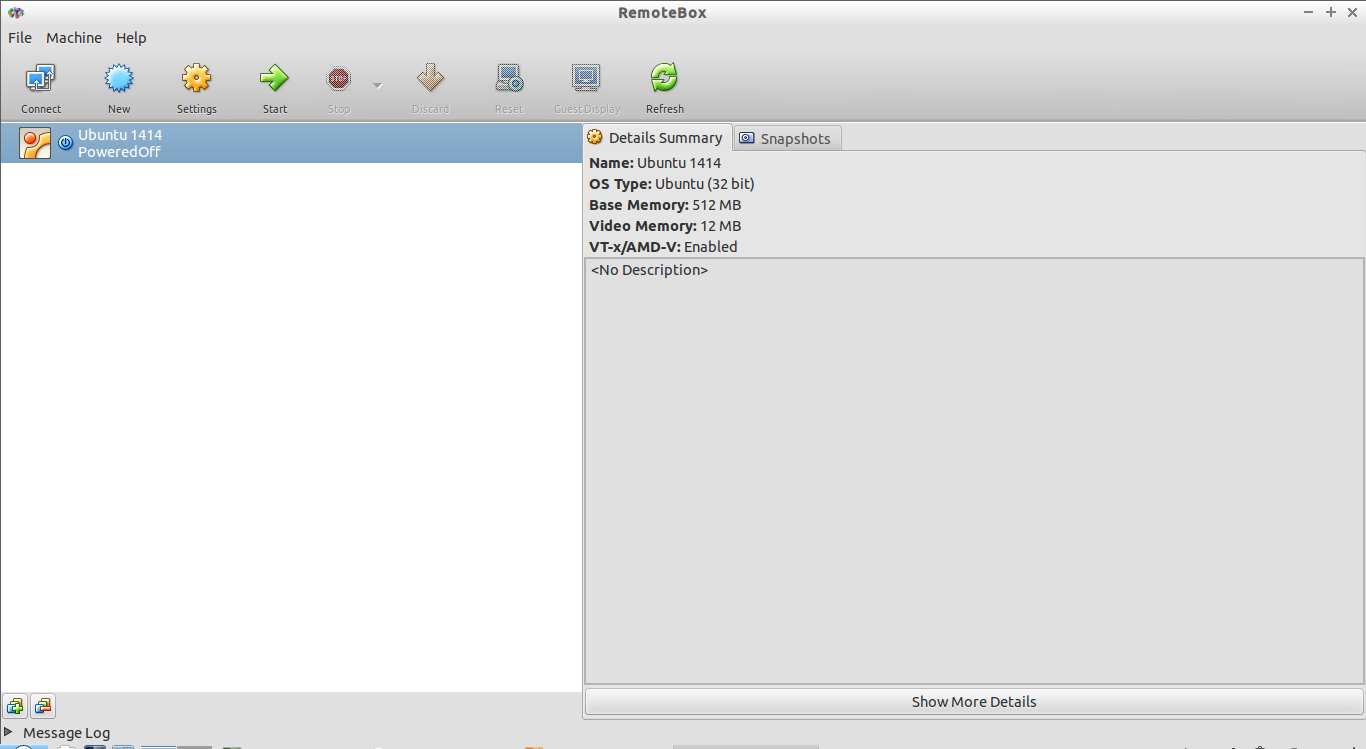
Voila! Now, you get the virtualbox interface. From here, you can create, edit, delete VMs as the way you do in the VirtualBox native GUI.
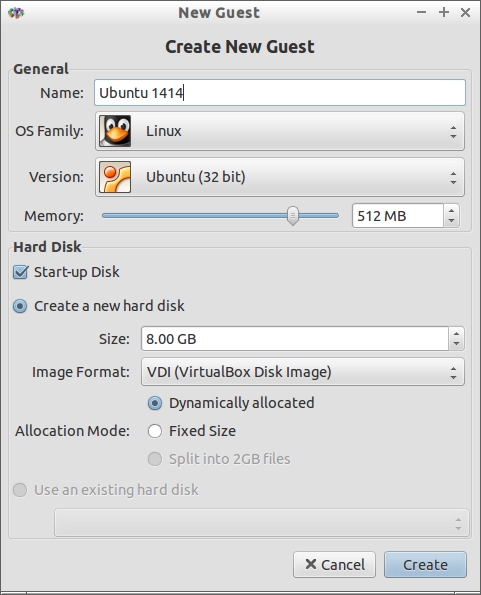
To create a new VM, click on the New button. Select your OS type and version, enter the RAM and Hdd size, and Click Create.
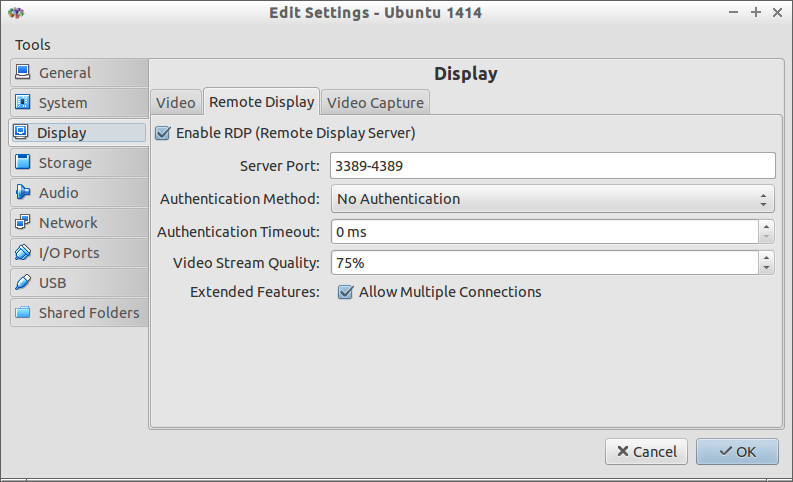
Right click on the VM, go to Settings -> Display -> Remote Display.
Mark the check box: Enable RDP (Remote Display Server), if it’s not enabled.
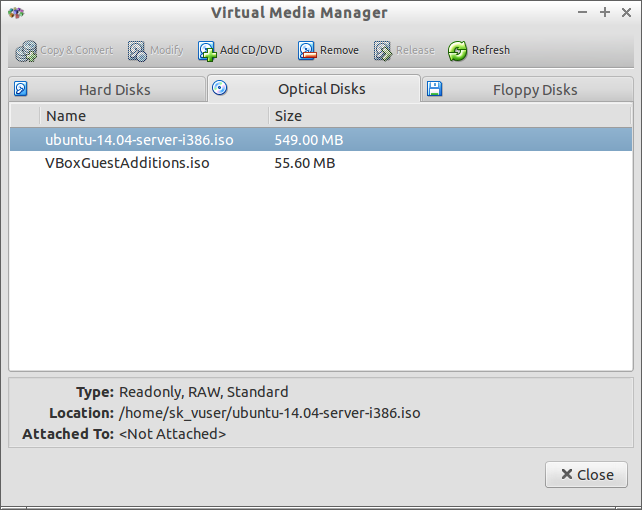
Click Ok to exit. Now, go to File -> Virtual Media Manager -> Optical Disks. Click on the button Add CD/DVD, and select the ISO image location.
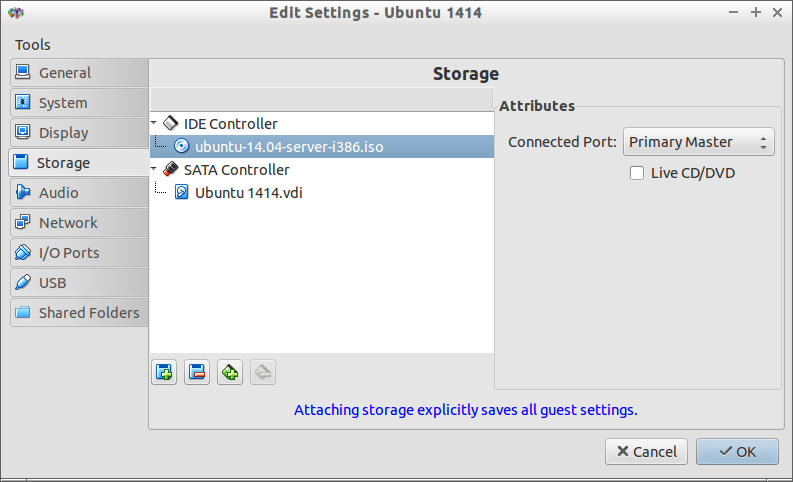
Then, again right click on the VM, and go to Settings -> Storage. Click on the “Attach a Storage medium” button, and select the ISO path. If you wish to install from a real DVD, you don’t need to add the ISO images thorough Virtual Media Manager.
Now, click OK, and press the Start button to install the guess OS.
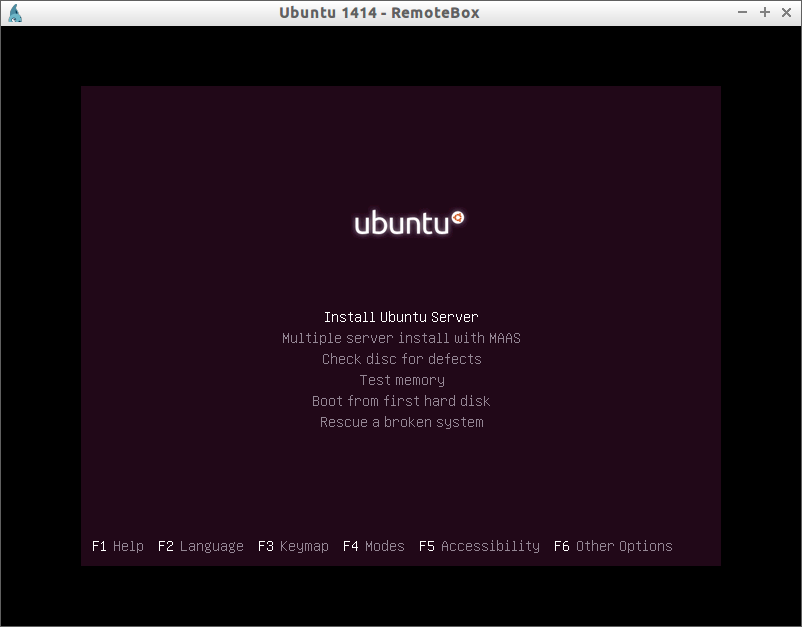
That’s it. Complete the rest of installation steps and use the new VM from your desktop.
Cheers!


