
Introduction
PostgreSQL is a powerful, open-source object-relational database system. It runs under all major operating systems, including Linux, UNIX (AIX, BSD, HP-UX, SGI IRIX, Mac OS, Solaris, Tru64), and Windows OS.
PostgreSQL 9.4 has been released last week with major enhancements, fixes, and features. Read what is new in PostgreSQL 9.4 here.
In this handy tutorial, let us see how to install PostgreSQL 9.4 on CentOS 7/6.5/6.4 server.
Install PostgreSQL
Go to the PostgreSQL repository download page, and add the PostgreSQL 9.4 repository depending upon your server architecture.
For CentOS 6.x 32bit:
rpm -Uvh http://yum.postgresql.org/9.4/redhat/rhel-6-i386/pgdg-centos94-9.4-1.noarch.rpm
For CentOS 6.x 64bit:
rpm -Uvh http://yum.postgresql.org/9.4/redhat/rhel-6-x86_64/pgdg-centos94-9.4-1.noarch.rpm
For CentOS 7 64bit:
rpm -Uvh http://yum.postgresql.org/9.4/redhat/rhel-7-x86_64/pgdg-centos94-9.4-1.noarch.rpm
Update the repository list using command:
yum update
Now, Install postgresql with the following command:
yum install postgresql94-server postgresql94-contrib
Initialize postgresql database using following command:
On CentOS 6.x systems:
service postgresql-9.4 initdb
On CentOS 7 systems:
/usr/pgsql-9.4/bin/postgresql94-setup initdb
Then, start postgresql service and make it to start automatically on every reboot.
On CentOS 6.x systems:
service postgresql-9.4 start
chkconfig postgresql-9.4 on
On CentOS 7 systems:
systemctl enable postgresql-9.4
systemctl start postgresql-9.4
Adjust Iptables/Firewall
Next, adjust iptables to access postgresql from remote systems.
On CentOS 6.x systems:
vi /etc/sysconfig/iptables
Add the following line:
-A INPUT -m state --state NEW -m tcp -p tcp --dport 5432 -j ACCEPT
-A INPUT -m state --state NEW -m tcp -p tcp --dport 80 -j ACCEPT
Save and exit the file. Restart iptables service.
service iptables restart
On CentOS 7 systems:
firewall-cmd --permanent --add-port=5432/tcp
firewall-cmd --permanent --add-port=80/tcp
firewall-cmd --reload
Adjust SELinux
Run the following command to make PostgreSQL work if SELinux enabled on your system.
setsebool -P httpd_can_network_connect_db 1
You may not login to PostegreSQL if you didn’t run the above command.
Access PostgreSQL command prompt
The default database name and database user are “postgres”. Switch to postgres user to perform postgresql related operations:
su - postgres
To login to postgresql, enter the command:
psql
Sample Output:
psql (9.4.0)
Type "help" for help.

postgres=#
To exit from posgresql prompt, type \q following by quit to return back to the Terminal.
Set “postgres” user password
Login to postgresql prompt,
su - postgres

psql
.. and set postgres password with following command:
postgres=# \password postgres
Enter new password:
Enter it again:
postgres=# \q
To install PostgreSQL Adminpack, enter the command in postgresql prompt:
postgres=# CREATE EXTENSION adminpack;
CREATE EXTENSION
Create New User and Database
For example, let us create a new user called “senthil” with password “centos”, and database called “mydb”.
Switch to postgres user:
su - postgres
Create user senthil.
$ createuser senthil
Create database:
$ createdb mydb
Now, login to the psql prompt, and set password and Grant access to the database mydb for senthil:
$ psql
psql (9.4.0)
Type "help" for help.

postgres=# alter user senthil with encrypted password 'centos';
ALTER ROLE

postgres=# grant all privileges on database mydb to senthil;
GRANT
postgres=#
Delete Users and Databases
To delete the database, switch to postgres user:
su - postgres
Enter command:
$ dropdb <database-name>
To delete a user, enter the following command:
$ dropuser <user-name>
Configure PostgreSQL-MD5 Authentication
MD5 authentication requires the client to supply an MD5-encrypted password for authentication. To do that, edit /var/lib/pgsql/9.4/data/pg_hba.conf file:
vi /var/lib/pgsql/9.4/data/pg_hba.conf
Add or Modify the lines as shown below
[...]
# TYPE  DATABASE        USER            ADDRESS                 METHOD

# "local" is for Unix domain socket connections only
local   all             all                                     md5
# IPv4 local connections:
host    all             all             127.0.0.1/32            md5
host    all             all             192.168.1.0/24          md5
# IPv6 local connections:
host    all             all             ::1/128                 md5
[...]
Restart postgresql service to apply the changes:
On CentOS 6.x systems:
service postgresql-9.4 restart
On CentOS 7 systems:
systemctl restart postgresql-9.4
Configure PostgreSQL-Configure TCP/IP
By default, TCP/IP connection is disabled, so that the users from another computers can’t access postgresql. To allow to connect users from another computers, Edit file /var/lib/pgsql/9.4/data/postgresql.conf:
vi /var/lib/pgsql/9.4/data/postgresql.conf
Find the lines:
[...]
#listen_addresses = 'localhost'
[...]
#port = 5432
[...]
Uncomment both lines, and set the IP address of your postgresql server or set ‘*’ to listen from all clients as shown below:
listen_addresses = '*'
port = 5432
Restart postgresql service to save changes:
On CentOS 6.x systems:
/etc/init.d/postgresql-9.4 restart
On CentOS 7 systems:
systemctl restart postgresql-9.4
Manage PostgreSQL with phpPgAdmin
phpPgAdmin is a web-based administration utility written in PHP for managing PosgreSQL.
phpPgAdmin is available only in PostgreSQL RPM repository. If you didn’t add PostgreSQL repository, you should add EPEL repository.
Follow the below link to install EPEL repository on CentOS 6.x.
For CentOS 7, refer the following link.
Or, simply enter the following command:
yum install epel-release
Update the repository using command:
yum update
Now, Install phpPgAdmin, enter the following command:
yum install phpPgAdmin httpd
Note: phpPgAdmin is case sensitive. Use upper and lower cases properly as shown in the above command.
By default, you can access phppgadmin using http://localhost/phpPgAdmin from your local system only. To access remote systems, do the following.
Edit file /etc/httpd/conf.d/phpPgAdmin.conf:
vi /etc/httpd/conf.d/phpPgAdmin.conf
Make the changes as shown below in the bold letters.
[...]
Alias /phpPgAdmin /usr/share/phpPgAdmin

<Location /phpPgAdmin>
    <IfModule mod_authz_core.c>
        # Apache 2.4
        Require all granted
        #Require host example.com
    </IfModule>
    <IfModule !mod_authz_core.c>
        # Apache 2.2
        Order deny,allow
        Allow from all
        # Allow from .example.com
    </IfModule>
</Location>
Start or Restart Apache service:
On CentOS 6.x systems:
service httpd start
chkconfig httpd on
On CentOS 7 systems:
systemctl enable httpd
systemctl start httpd
Configure phpPgAdmin
Edit file /etc/phpPgAdmin/config.inc.php, and do the following changes. Most of these options are self-explanatory. Read them carefully to know why do you change these values.
vi /etc/phpPgAdmin/config.inc.php
Find the following line:
$conf['servers'][0]['host'] = '';
Change it as shown below:
$conf['servers'][0]['host'] = 'localhost';
And find the line:
$conf['extra_login_security'] = true;
Change the value to false:
$conf['extra_login_security'] = false;
Find the line:
$conf['owned_only'] = false;
Set the value as true.ru
$conf['owned_only'] = true;
Save and close the file. Restart postgresql service and Apache services.
On CentOS 6.x systems:
service postgresql-9.4 restart
service httpd restart
On CentOS 7 systems:
systemctl restart postgresql-9.4
systemctl restart httpd
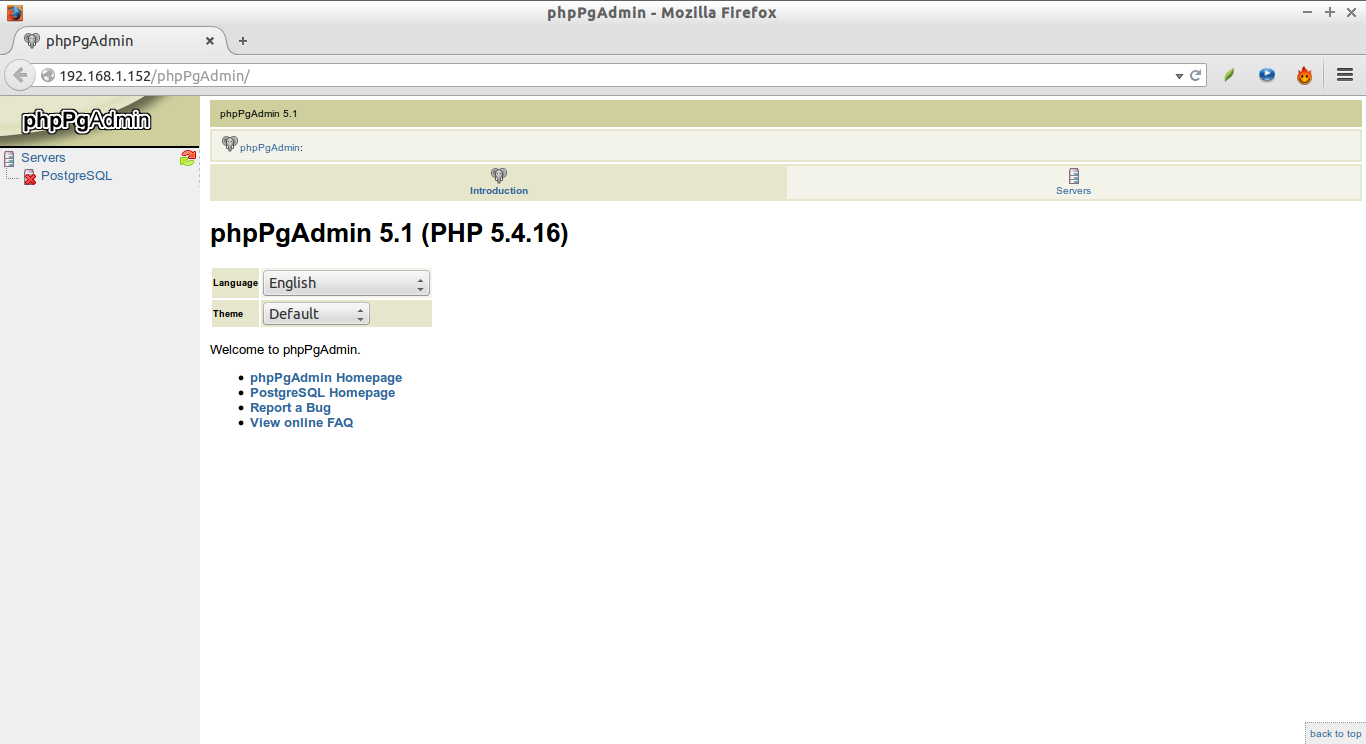
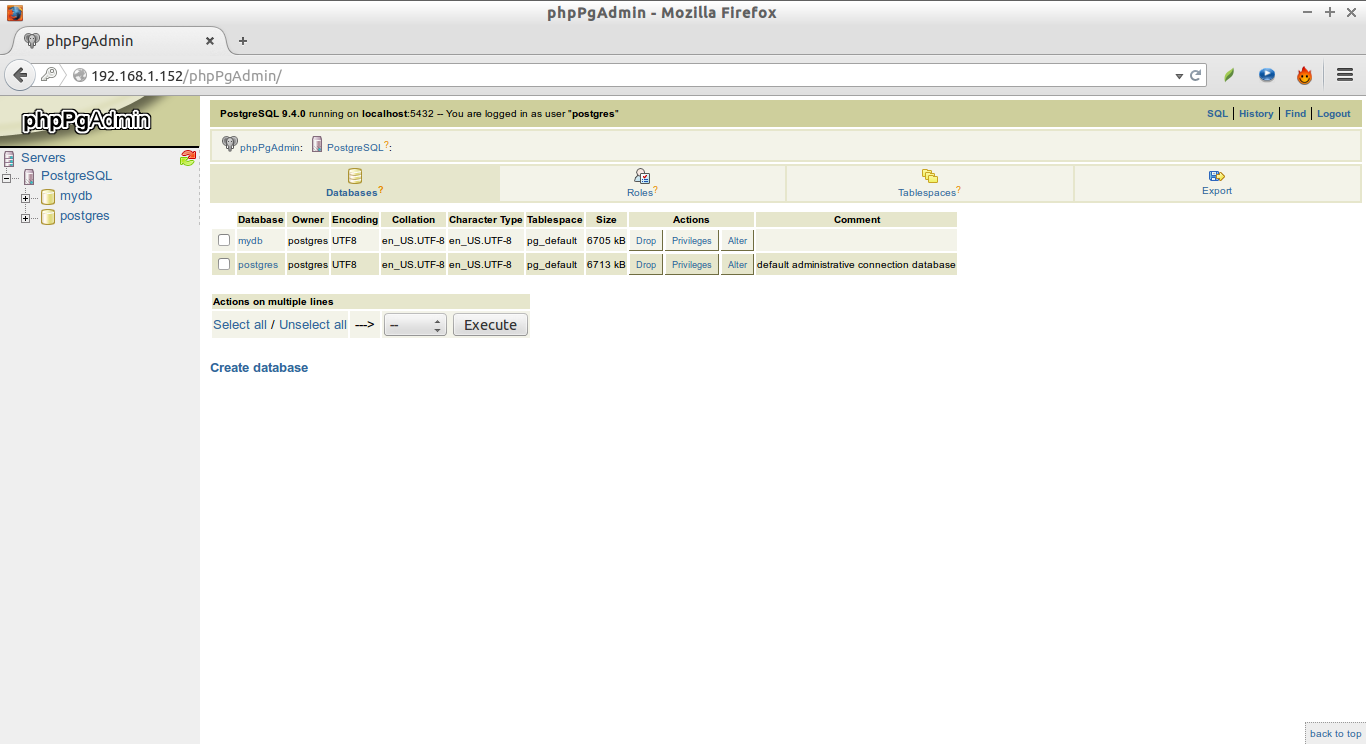
Now open your browser and navigate to http://ip-address/phpPgAdmin. You will see the following screen.
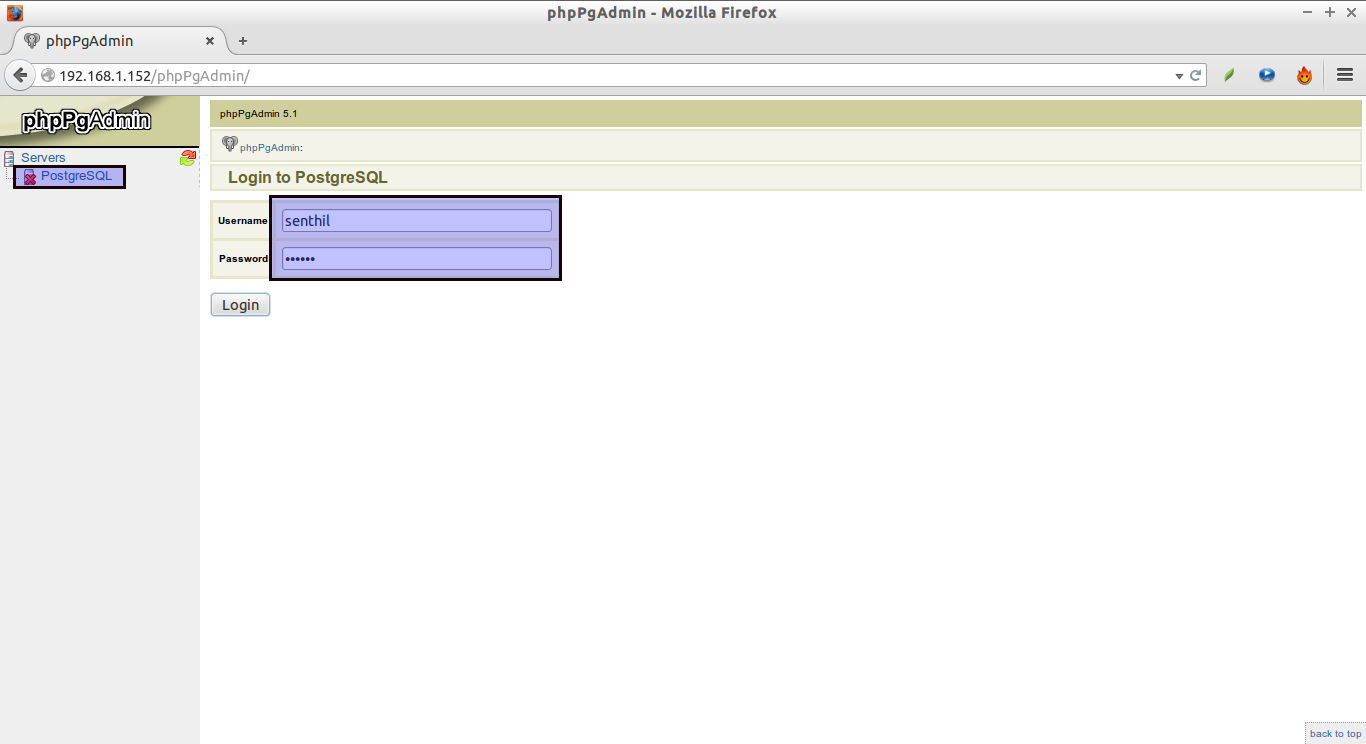
Login with users that you’ve created earlier. I already have created a user called “senthil” with password “centos” before, so I log in with user “senthil”.
You may get an error called: Login failed.
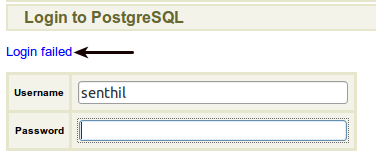
This is because SELinux might restrict the users to log in to the PostgreSQL. Just enter the following command to get rid of this error.
setsebool -P httpd_can_network_connect_db 1
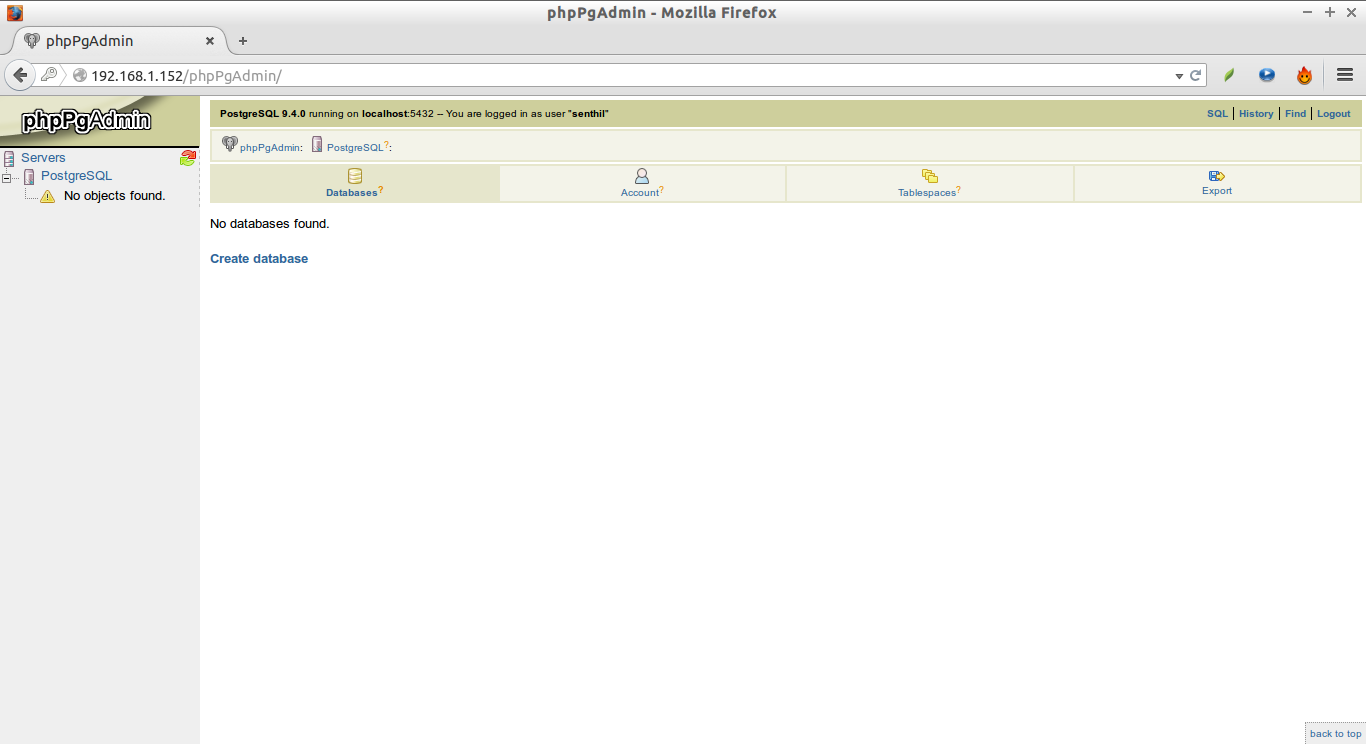
Now, you’ll be able to log in to the Dashboard without any problems.
This is how my phpPgAdmin dashboard looked.
Log in with postgres user:
That’s it. Now you’ll able to create, delete and alter databases graphically using phpPgAdmin easily.
Cheers!


