
Hello friends, if you are an administrator in charge of any computer (or group of computers) connected to the Internet, then Nessus is a great tool to help keep your domains free from the vulnerabilities that hackers and viruses commonly look to exploit. It is not a complete security solution, rather it is one small part of a good security strategy.
Nessus is an Open Source remote security scanning tool, which scans a computer and raises an alert if it discovers any vulnerabilities that malicious hackers could use to gain access to any computer you have connected to a network. It does this by running over 1200 checks on a given computer, testing to see if any of these attacks could be used to break into the computer or otherwise harm it.
Prerequisites:
In this article we are going to show you installation, configuration and usage of Nessus Vulnerability Scanner on CentOS 7 and Ubuntu 15.10/15.04 . The installation is very fast and easy that don’t need you to be a Linux expert to install Nessus. Let’s connect to your server using root user credentials and run below commands to update your system.
For CentOS 7:
[cc]# yum -y update [/cc]
For Ubuntu 15:
[cc]# apt-get -y update [/cc]
Download Nessus:
The first thing you will need to do is to Sign up for a Home license of Tenables Nessus and Download the appropriate installer from this Nessus Resource Page. Once you have downloaded the installer in rpm format for CentOS 7 and Ddebian for Ubuntu, you will need to transfer it to your machine if you have not downloaded this directly using wget.

The Nessus package does not have specific requirements to complete installation, so you should have no issues in simply running the below installer.
Installing on CentOS 7:
Download the required RPM for CentOS 7 and then run below command to install.
[cc] # rpm -ivh Nessus-6.6.0-es7.x86_64.rpm [/cc]

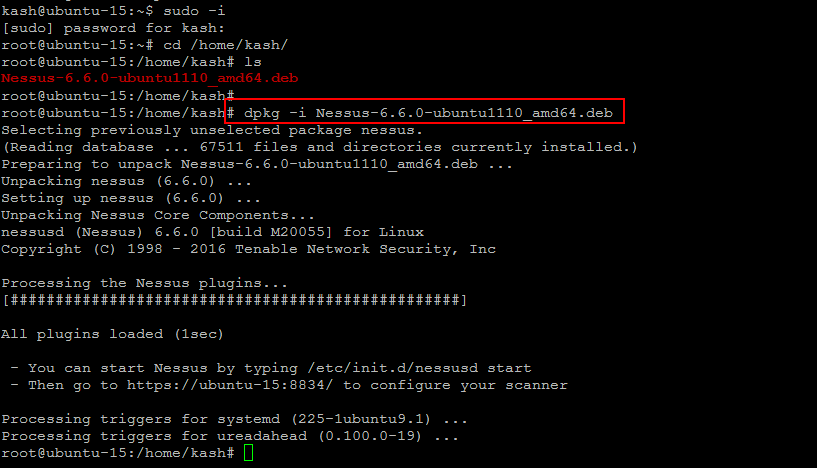
Installing on Ubuntu 15:
Once you have downloaded the .deb package for your Ubuntu 14/15 package, then you will be able to install Nessus by issuing the below command on your Ubungtu 15 server.
[cc] # dpkg -i Nessus-6.6.0-ubuntu1110_amd64.deb [/cc]
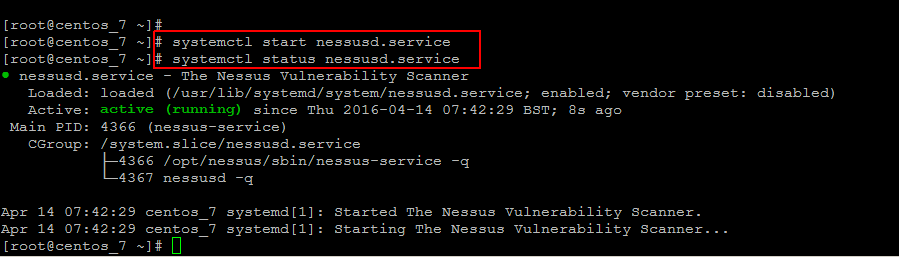
Starting Nessus on CentOS 7
Now run the following commands to start the Nessus service and check its status, that should be active and as shown.
[cc] #systemctl start nessusd.service [/cc]
[cc] #systemctl status nessusd.service [/cc]
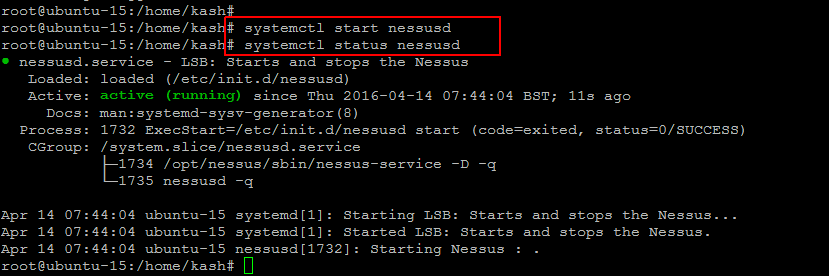
Starting Nessus on Ubuntu 15
Similarly, if you on ubuntu server then run below commands to start Nessus services and checck its status.
[cc] #systemctl start nessusd.service [/cc]
[cc] #systemctl status nessusd.service [/cc]
To ensure that this service will auto-start when the server is rebooted, you will have enable this with using following command.
[cc] #systemctl enable nessusd.service [/cc]
Nessus Web Setup:
Now that nessusd is up and running, the final stage before we are being able to browse the web interface for Nessus is to open up the port in your firewall. This can be done by editing the iptables file on your server to allow access to port 8834 which is the default HTTPS web port for Nessus. You allow this port using below commands.
For CentOS 7:
[cc]#firewall-cmd –zone=public –add-port=8834/tcp –permanent [/cc]
[cc]#firewall-cmd –reload [/cc]
For Ubuntu 15:
[cc]#ufw allow 8834/tcp [/cc]
Run the command below to verify.
[cc]# ufw status verbose [/cc]
Let’s open open your web browser and flow the IP address or FQDN of your CentOS 7 or Ubuntu 15 server along with the default port of Nessus.
[cc]https://your_server_name_or_ip:8834/ [/cc]
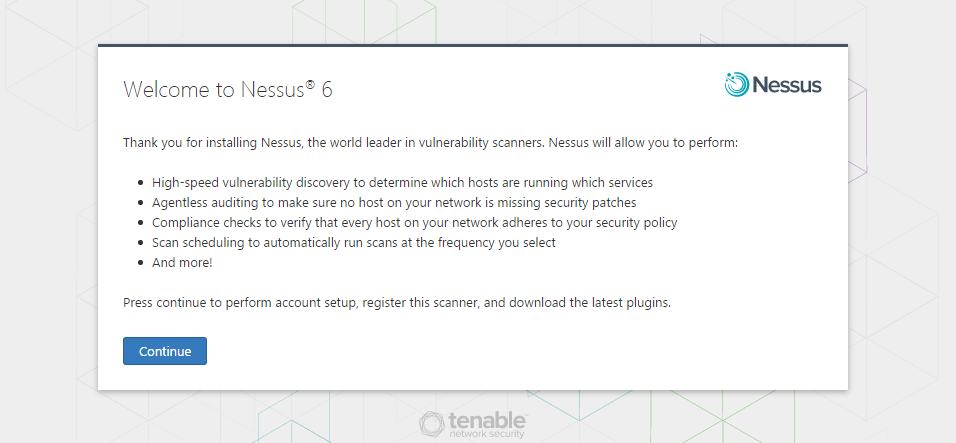
Press continue to perform account setup, register this scanner, and download the latest plugins.
Account Setup
In order to log in to this scanner, a “System Administrator” account must be created. This user has full control of the scanner—with the ability to create/delete users, stop running scans, and change the scanner configuration.
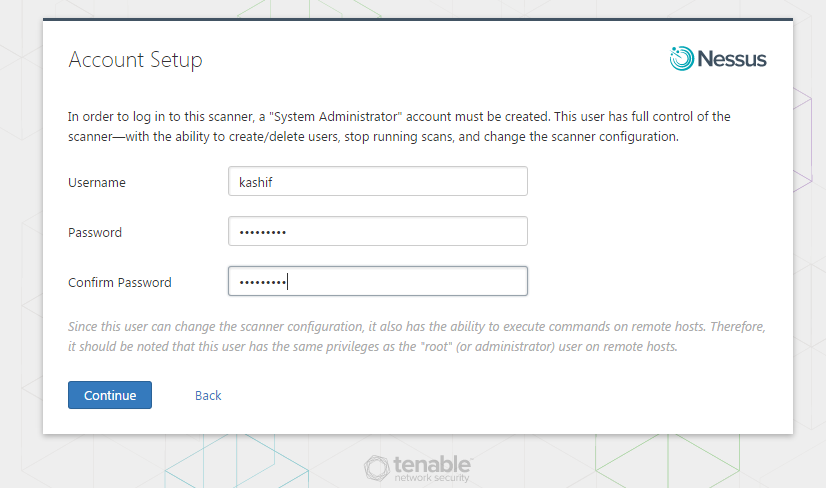
Since this user can change the scanner configuration, it also has the ability to execute commands on remote hosts. Therefore, it should be noted that this user has the same privileges as the “root” (or administrator) user on remote hosts.
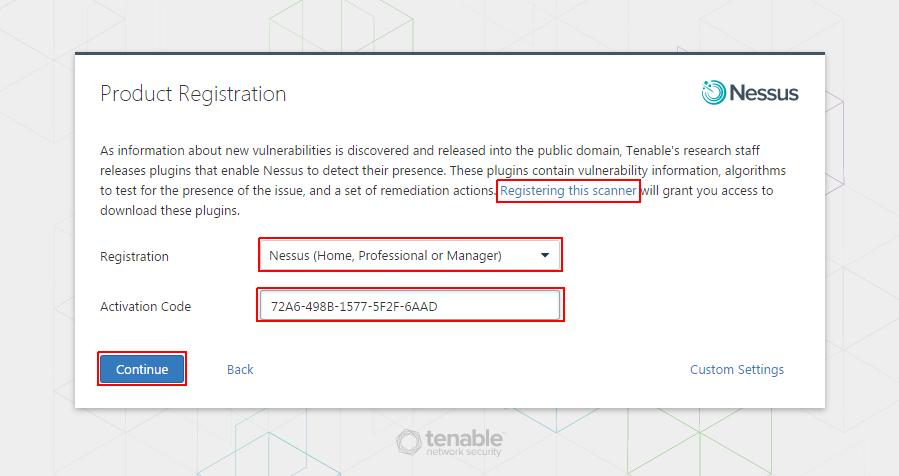
Product Registration:
Tenable’s research staff releases plugins that enable Nessus to detect their presence. These plugins contain vulnerability information, algorithms to test for the presence of the issue, and a set of remediation actions. Registering this scanner will grant you access to download these plugins.
Let’s create your account and you get the code in your email that you have to put here as shown in the below image and then click on ‘Continue’ button.
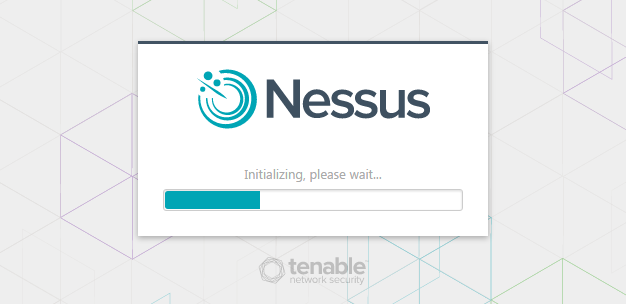
Now wait for a while until Nessus initializing process complete.
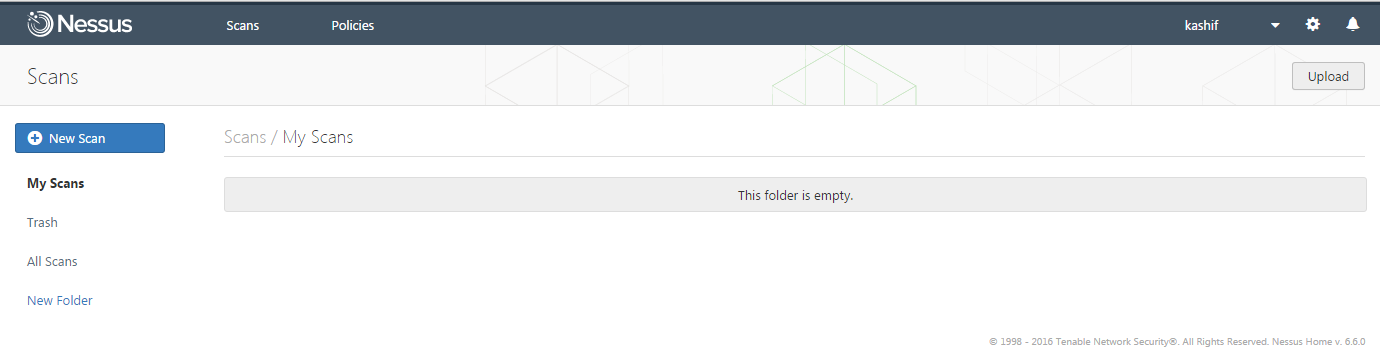
Nessus Management Console:
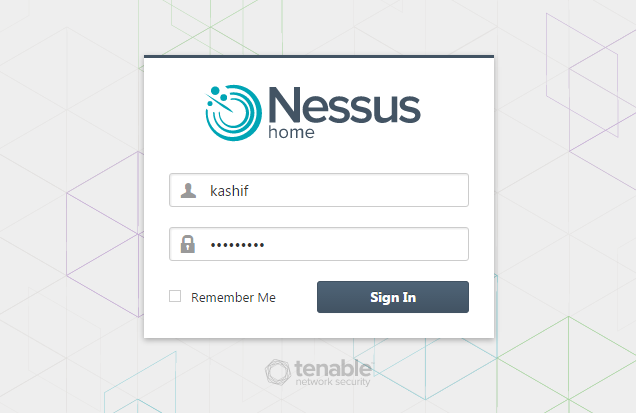
After completing the download and initializing process, you will see the login page of Nessus where you will login with your previously created user account.
Upon successful credentials, you will be directed to the Nessus Vulnerability scanner’s dashboard where you will be able to manage your scan jobs.
Using Nessus Scaner:
Now we are going to setup our first scan with Nessus. Let’s click on the ‘New Scan’ button on the Top left of your Management console, where you will see multiple scanning templates but for few of them you will be required to upgrade your license.
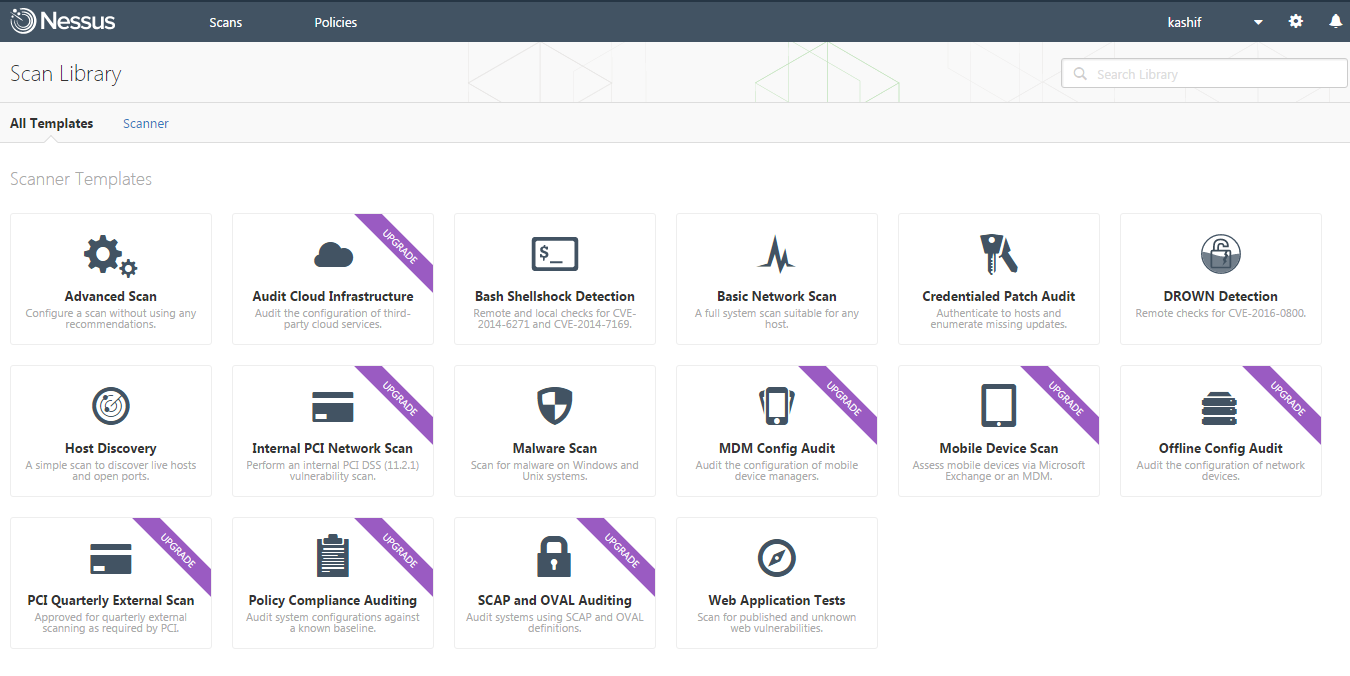
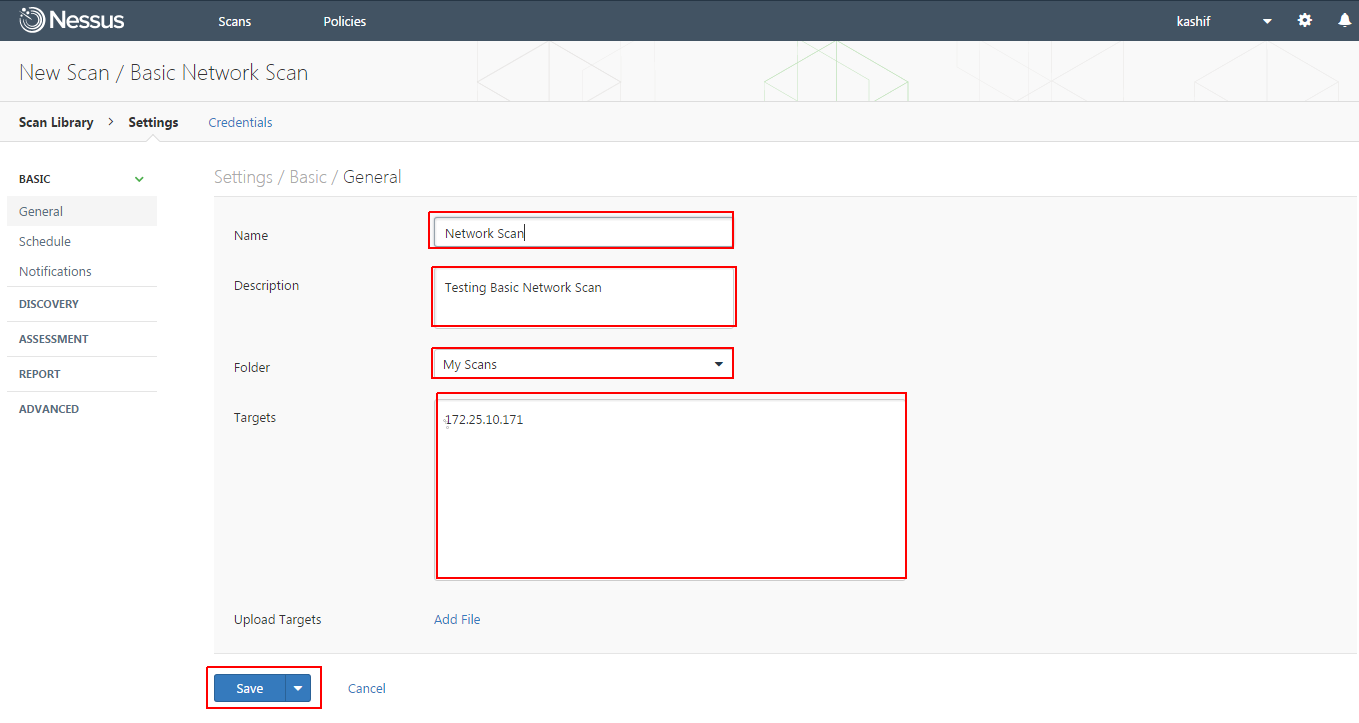
Here we are going to choose the Basic Network scan , where you will be required to configure credentials of your remote host, then define its name and description. After that select the folder and target host IP address or Network rage. Once the settings are complete, click on the save button.
Now you can schedule or run the the scan on demand by selecting the play option as shown.
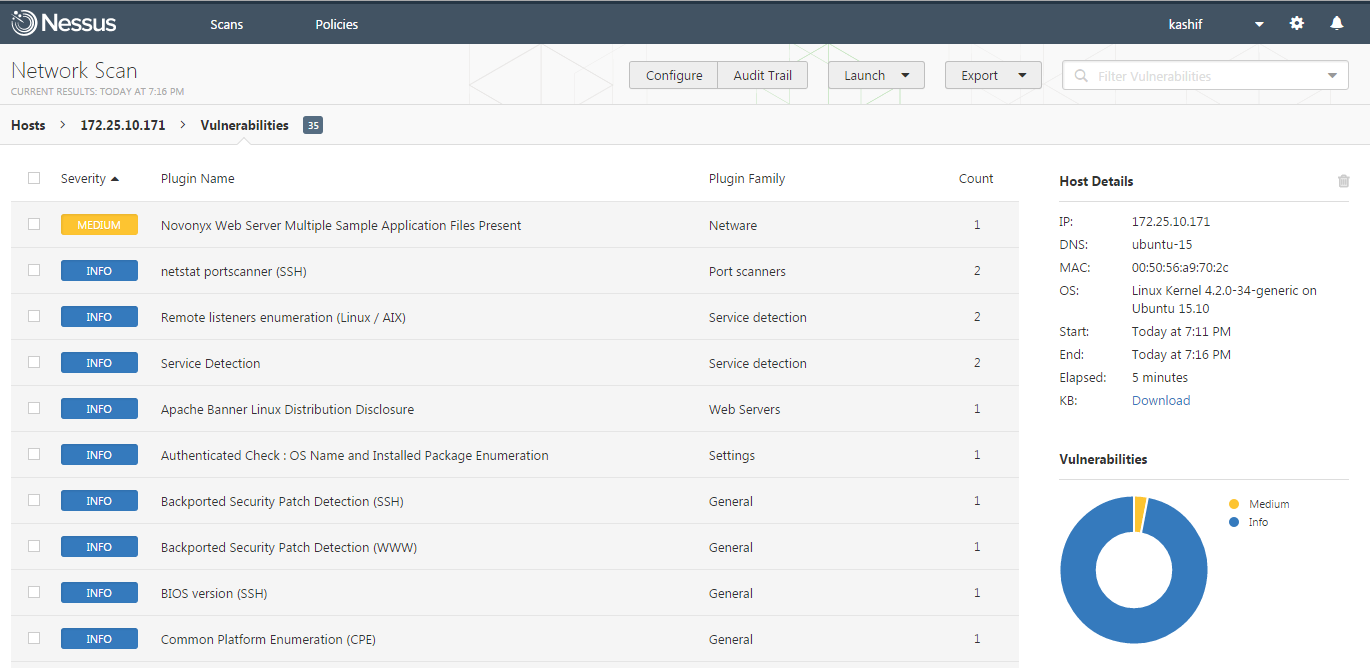
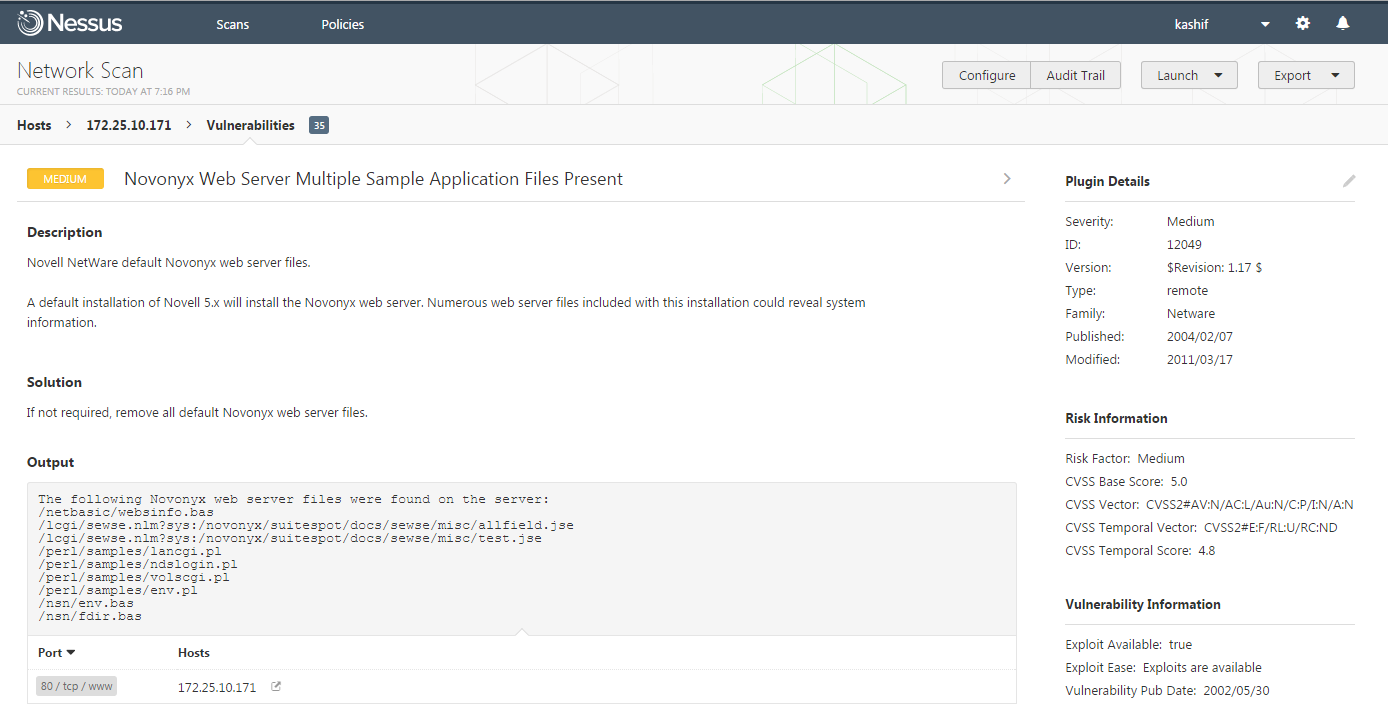
Once the scan is complete, click on the vulnerabilities to expand the list all vulnerabilities found the remote host.

To get more details about each vulnerability , simply click on that and you will find its detailed information.
Conclusion:
Nessus is an incredibly useful, including some distinct advantages over other tools in this genre (including the commercial tools). Now enjoying hunting with Vulnerabilities but don’t forget to leave your valuable comments and suggestions.


