
In our previous tutorial, we have discussed how to install and configure LDAP server in CentOS 7. Check the following link to install and configure 389 Directory Server.
Today, we will see how to manage 389-DS more easily via a graphical interface.
About 389 Management Console
389 management console is a built-in, Java based remote management console that can be used to manage your LDAP server (389-DS) server from any remote or local system. This console helps you to easily create, edit or delete Organizational units, groups, users more easily via a cool graphical interface. You don’t need to memorize or know all commands to manage LDAP server. Everything can be done via 389 management console.
Please be mindful that if you want to manage your 389 ds server graphically, you LDAP server should have installed with a GUI desktop environment. If you did a minimal installation and don’t have GUI in your LDAP server, then, you can’t access the management console.
As I had installed LDAP server in minimal CentOS 7 server, Here, I am going to install XFCE desktop on my server.
yum groupinstall Xfce
After installing GUI, reboot the server to take effect the changes.
reboot
Log in to server.
Now, you can access the 389 ds admin console either from the local server itself or from a remote desktop client.
To access 389 ds admin console locally, type the following command in the Terminal:
389-console
To access 389-ds admin console from the remote system, enter the following command in Terminal.
ssh -X root@192.168.1.150 /usr/bin/389-console -a http://192.168.1.150:9830
Replace the IP address with your own.
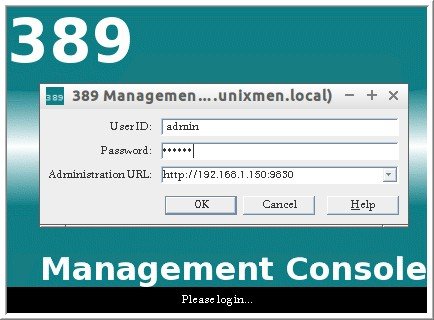
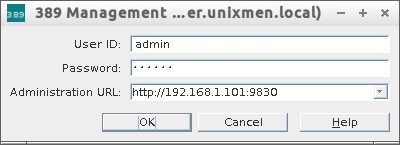
Now, you’ll be asked to enter your LDAP server administrative log in details. In my case my LDAP admin name is admin and password is centos.
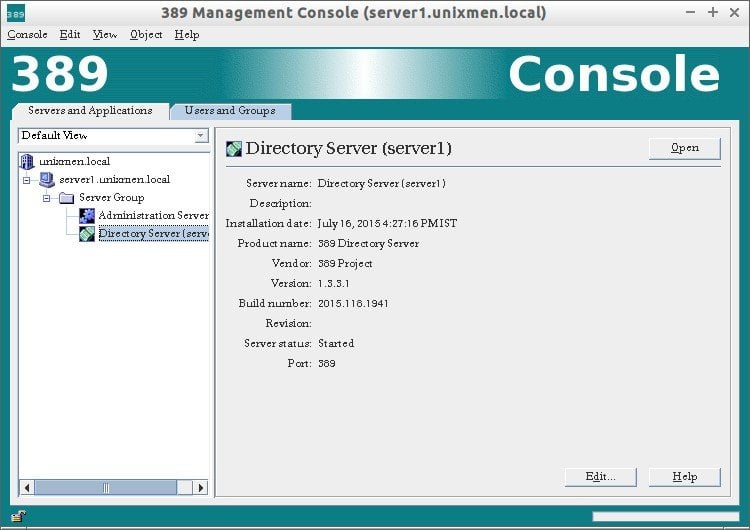
This is how my admin server console looks.
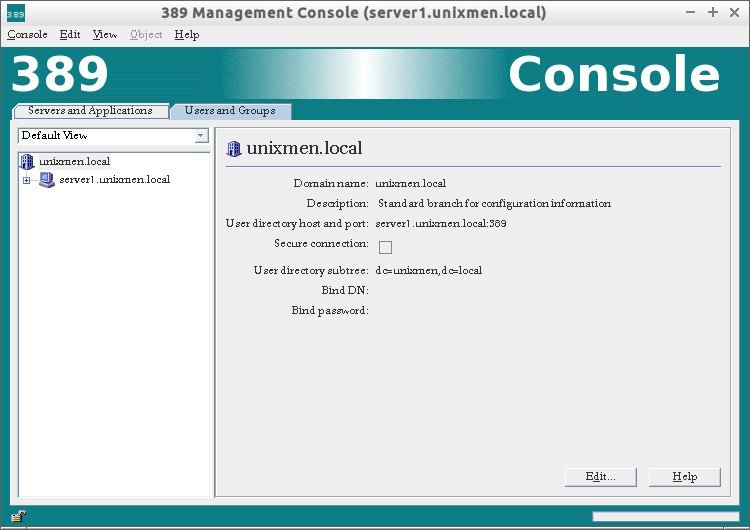
From here, you can create, delete or edit LDAP organizational units, groups and users graphically.
389-ds admin server console has two groups by default:
- Administration Server
- Directory Server
You can use any one of the server group.
1. Administration Server
To access Administration Server interface, click on your LDAP domain name to expand.
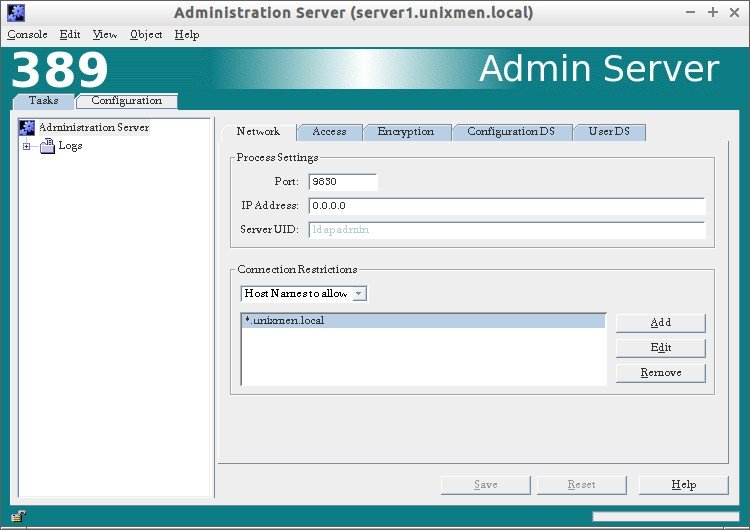
Go to Server Group –> Administration Server and click Open on the right side. Refer the following screenshot.
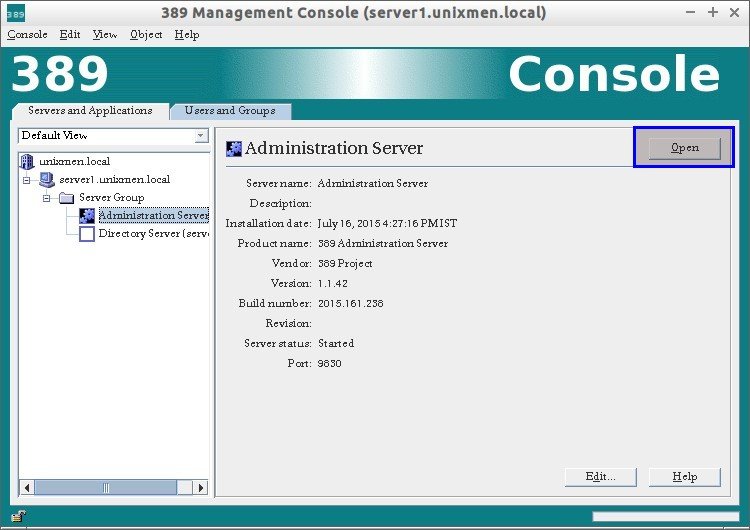
The following screen should appear.
The Admin server has tabs.
- Tasks,
- Configuration.
Tasks Tab:
In the Tasks section, you can Stop/Restart/Configure admin server.
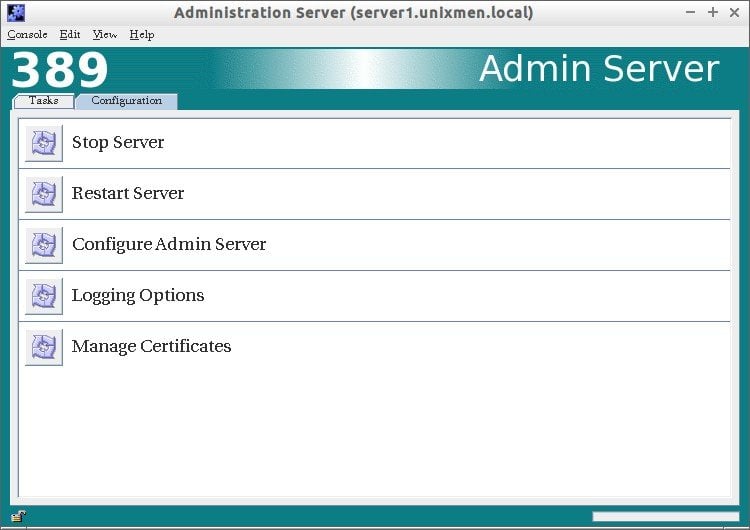
Configuration tab:
In the Configuration tab, you change/edit your Admin server ip address, default port, LDAP admin password, default user directory. Also you can define which host names to allow and which ip addresses to allow to access your LDAP server.
2. Directory server
To access Directory Server interface, click on your LDAP domain name to expand.
Go to Server Group – Directory Server and click Open on the right side. Refer the following screenshot.
In Directory Server section, you can do all necessary configuration for your LDAP server. You can change/modify default port, create users, groups, organizational units etc.
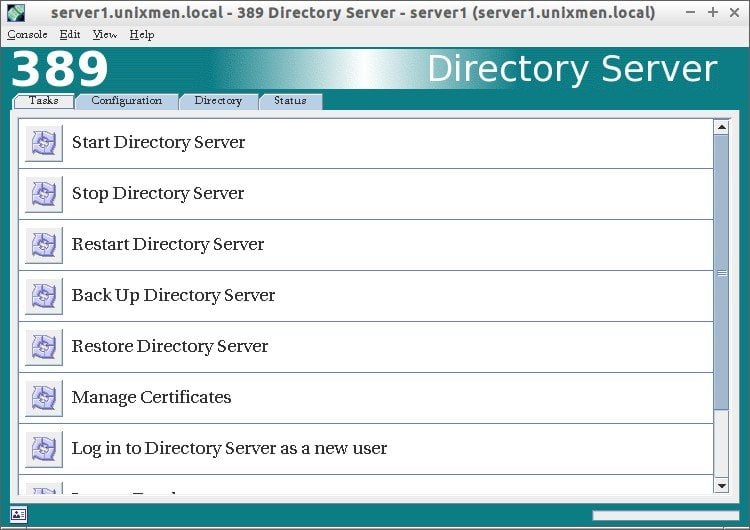
There are lot of options available in Directory Server section. Go thorough the each section and configure your LDAP server as per your requirement.
Create Organization units, Groups And Users
Create organizational unit:
Go to your Directory Server from the main console.
Select Directory tab.
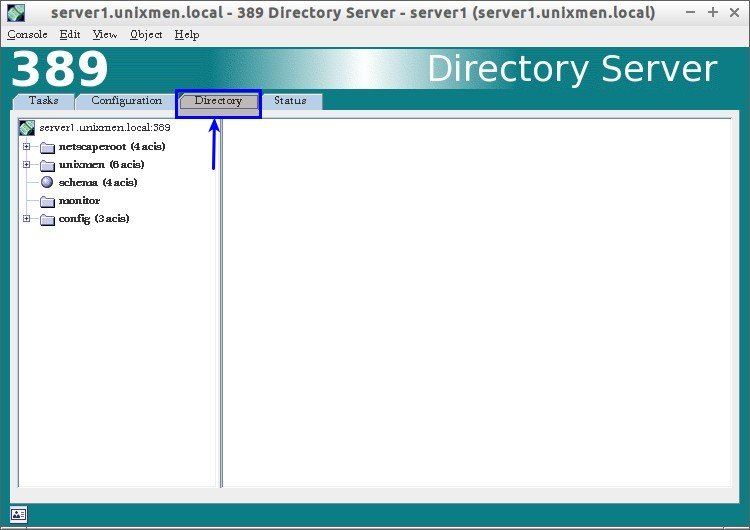
Right click on your Domain name (Ex. Unixmen). Select New -> Organization Unit. Refer the following screen.
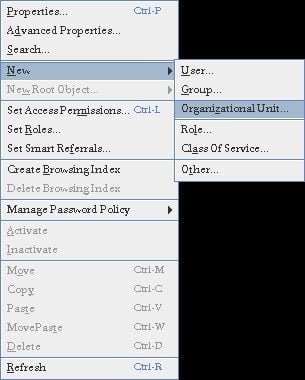
Enter your OU name (ex. Support Division) and click Ok.
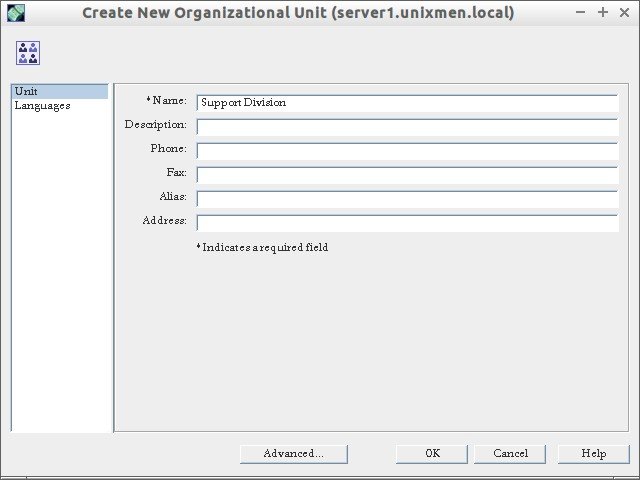
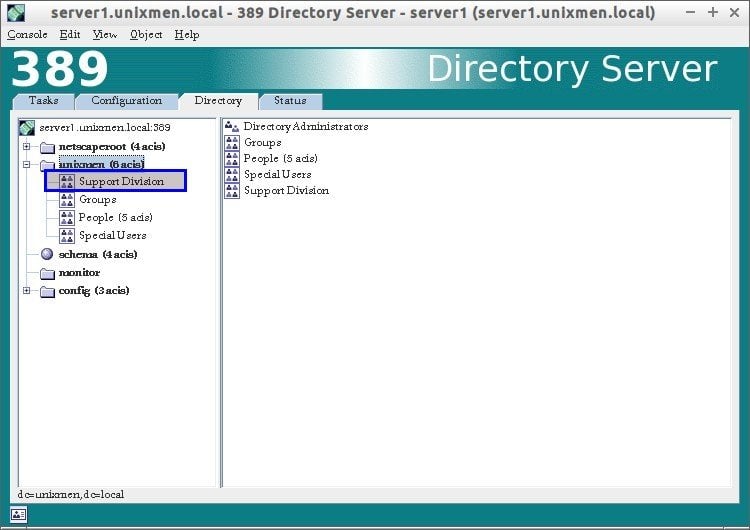
The new OU (ex. Support Division) will be created under Unixmen domain.
Create a Group:
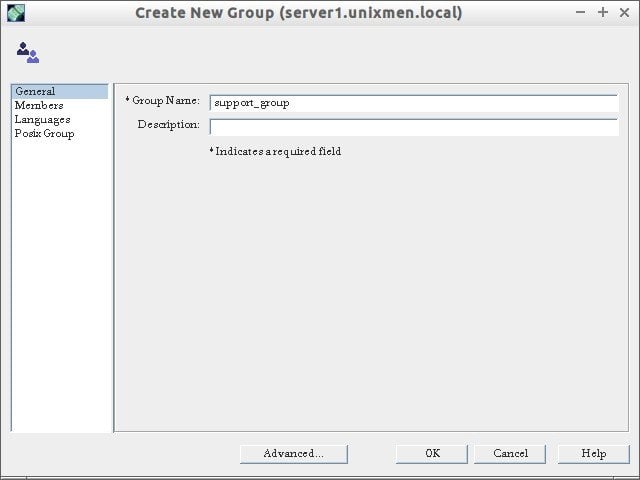
Now navigate to Support Division OU and create a new group (ex. support_group).

Enter group name and click Ok.
The new group will be created under Unixmen/Support Division.
Create User:
Right click on the Support_group, and click New -> User.
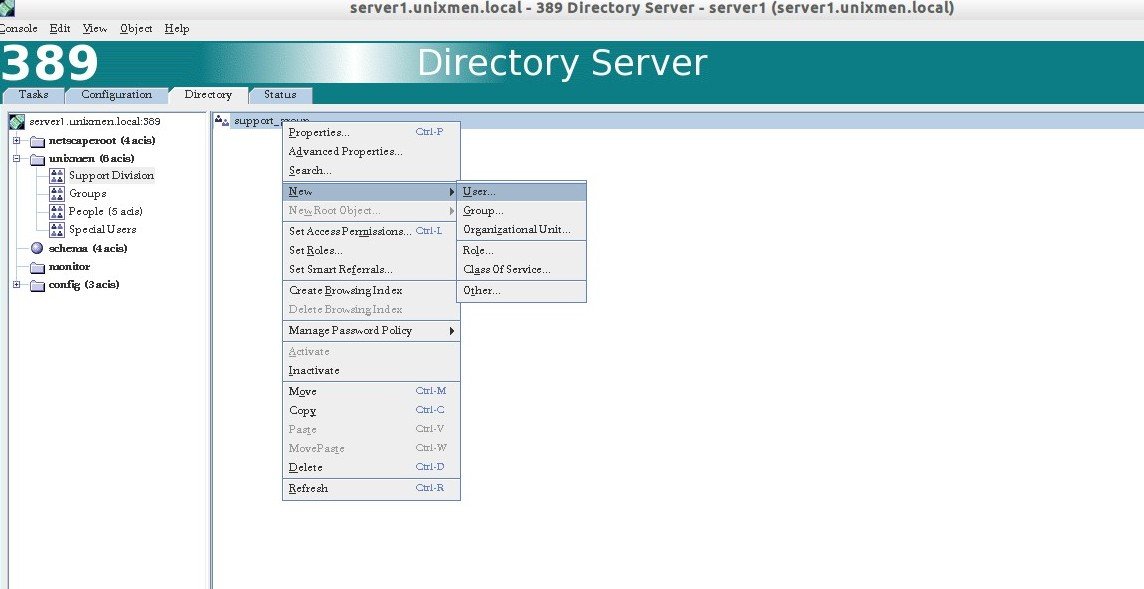
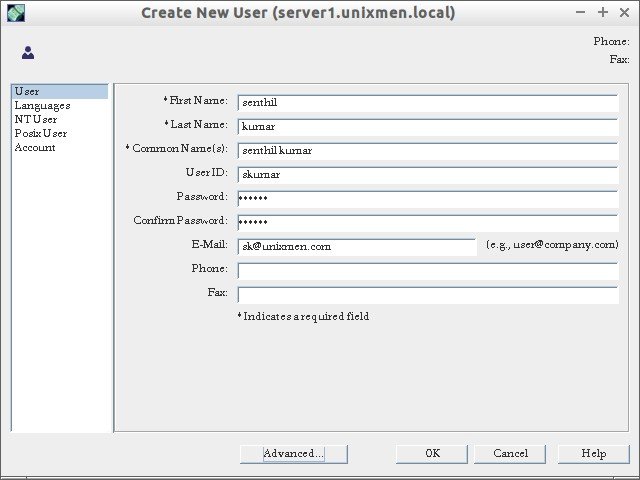
Enter the user details such as first name, last name, userid, mail id etc., and click Ok.
That’s it. Now, we have created OU, Group and an user in LDAP server.
Test LDAP server
Verify whether the newly created Organizational Unit, Group, User with following command on our server.
ldapsearch -x -b "dc=unixmen,dc=local"
Sample output:
Check the result that I have marked as bold at the end.
# extended LDIF
#
# LDAPv3
# base <dc=unixmen,dc=local> with scope subtree
# filter: (objectclass=*)
# requesting: ALL
#

# unixmen.local
dn: dc=unixmen,dc=local
objectClass: top
objectClass: domain
dc: unixmen

# Directory Administrators, unixmen.local
dn: cn=Directory Administrators,dc=unixmen,dc=local
objectClass: top
objectClass: groupofuniquenames
cn: Directory Administrators
uniqueMember: cn=Directory Manager

# Groups, unixmen.local
dn: ou=Groups,dc=unixmen,dc=local
objectClass: top
objectClass: organizationalunit
ou: Groups

# People, unixmen.local
dn: ou=People,dc=unixmen,dc=local
objectClass: top
objectClass: organizationalunit
ou: People

# Special Users, unixmen.local
dn: ou=Special Users,dc=unixmen,dc=local
objectClass: top
objectClass: organizationalUnit
ou: Special Users
description: Special Administrative Accounts

# Accounting Managers, Groups, unixmen.local
dn: cn=Accounting Managers,ou=Groups,dc=unixmen,dc=local
objectClass: top
objectClass: groupOfUniqueNames
cn: Accounting Managers
ou: groups
description: People who can manage accounting entries
uniqueMember: cn=Directory Manager

# HR Managers, Groups, unixmen.local
dn: cn=HR Managers,ou=Groups,dc=unixmen,dc=local
objectClass: top
objectClass: groupOfUniqueNames
cn: HR Managers
ou: groups
description: People who can manage HR entries
uniqueMember: cn=Directory Manager

# QA Managers, Groups, unixmen.local
dn: cn=QA Managers,ou=Groups,dc=unixmen,dc=local
objectClass: top
objectClass: groupOfUniqueNames
cn: QA Managers
ou: groups
description: People who can manage QA entries
uniqueMember: cn=Directory Manager

# PD Managers, Groups, unixmen.local
dn: cn=PD Managers,ou=Groups,dc=unixmen,dc=local
objectClass: top
objectClass: groupOfUniqueNames
cn: PD Managers
ou: groups
description: People who can manage engineer entries
uniqueMember: cn=Directory Manager

# Support Division, unixmen.local
dn: ou=Support Division,dc=unixmen,dc=local
ou: Support Division
objectClass: top
objectClass: organizationalunit

# support_group, Support Division, unixmen.local
dn: cn=support_group,ou=Support Division,dc=unixmen,dc=local
objectClass: top
objectClass: groupofuniquenames
cn: support_group

# skumar, support_group, Support Division, unixmen.local
dn: uid=skumar,cn=support_group,ou=Support Division,dc=unixmen,dc=local
mail: sk@unixmen.com
uid: skumar
givenName: senthil
objectClass: top
objectClass: person
objectClass: organizationalPerson
objectClass: inetorgperson
sn: kumar
cn: senthil kumar

# search result
search: 2
result: 0 Success

# numResponses: 13
# numEntries: 12
As you see in the above output, a new OU called Support Division, a new group called support_vision, a new user called skumar have been created. Voila! Our LDAP server is working.
Conclusion
In this tutorial, I covered only installation part and basic configuration. There are lot to learn about 389 ds. Refer the link provided at the bottom to know more about 389 ds.
In my personal experience, 389-ds is much easier than openldap in terms of installation and configuration. We will see how to configure client systems to authenticate using LDAP server in our next article.
Good luck. Cheers!
Reference:


