
Dear linux geeks,
In this tutorial I will teach you how to analyze disk usage in Ubuntu. Taking care of the hard disk of your machine and running the proper analysis on it is very important to make sure that your system is healthy and that it will run in a very smooth way. To do this, we will use a nice graphical tool called Baobab.
Before going any further I must say that it is a very easy to use tool with many features and I am very sure it will meet your requirements. Baobab was part of gnome-utils, but has been standing as a standalone application since Gnome 3.4. By using this disk analyzer tool you can easily scan the home folder, filesystem and local or remote folders.
Everything is done with only a click! Do you like to stop the scanning process? Cool, just hit the Stop scanning button available on the top of the baobab’s user interface.
I like the simplicity of this tool and the fact that it can graphically represent data in a ring chart or a treemap chart. Now, how about installing and using it in your own machine?
As far as I know it should come installed by default in Ubuntu, but if not, open a new terminal (CTRL+ALT+T) and run the following command to install it.
sudo apt-get install baobab
After the installation is finished go to Applications, System Tools, Disk Usage Analyzer or launch baobab directly from the terminal by running the following command.
baobab
The following picture shows how it should look like when launched in your system.
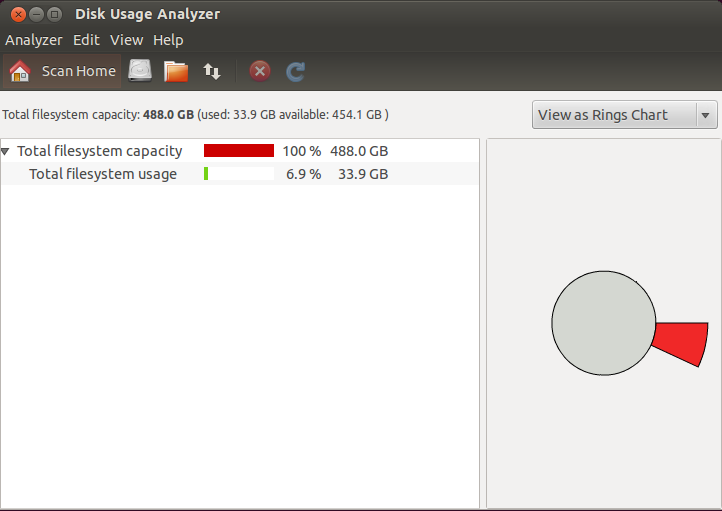
Scan the Home folder by clicking on Scan Home or go to Analyzer and select Scan Home Folder option. The tool will do evrything so wait until the scan is finished and enjoy the results.
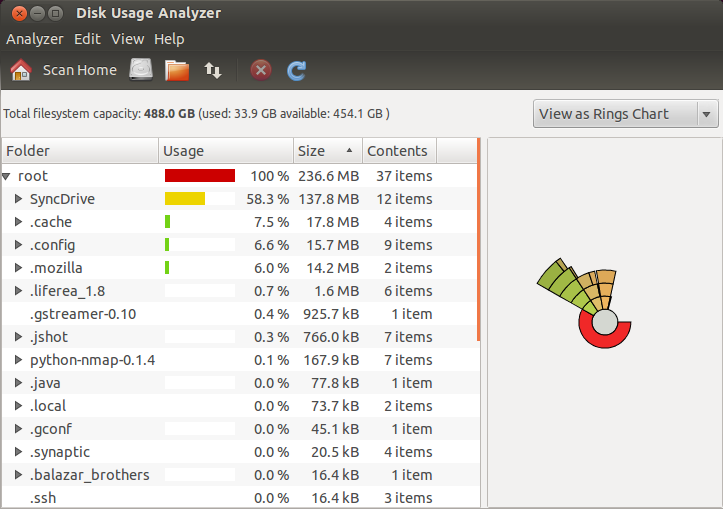
As you can see from the above picture the baobab’s scan gives me information about the Usage of every folder in Home directory, the size and the number of items it contains. The left side shows the graphical representation as a ring chart. But if you like you can easily change it and switch to treemap chart, by selecting View as Treemap Chart.
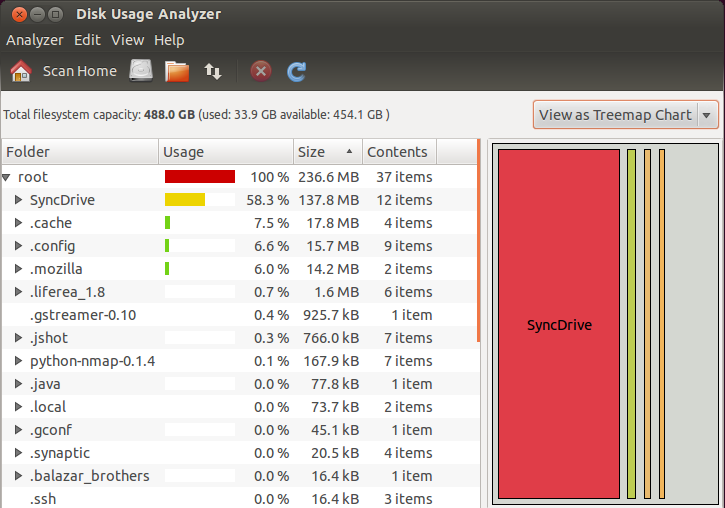
The following picture shows an example where I am using the treemap chart representation instead of the default one, the ring chart.
To scan the filesystem go to Analyzer and select Scan Filesystem, or if you are lazy like go for the smart way, hit CTRL+F on your keyboard.
Both ways work and do the same job, it is up to you which one you like to use. Shortcuts are very useful, practical and they save alot of time, but it is hard to memorize them all when you don’t use the tool everyday.

Now, how about scanning a folder? It is very easy, go under Analyzer, select Scan A Folder and select the folder you want to scan, or hit CTRL+O. Is there an easier way? Yes it is! Can you see the Scan a Folder button? Just click it and the scan on the specified folder will begin.
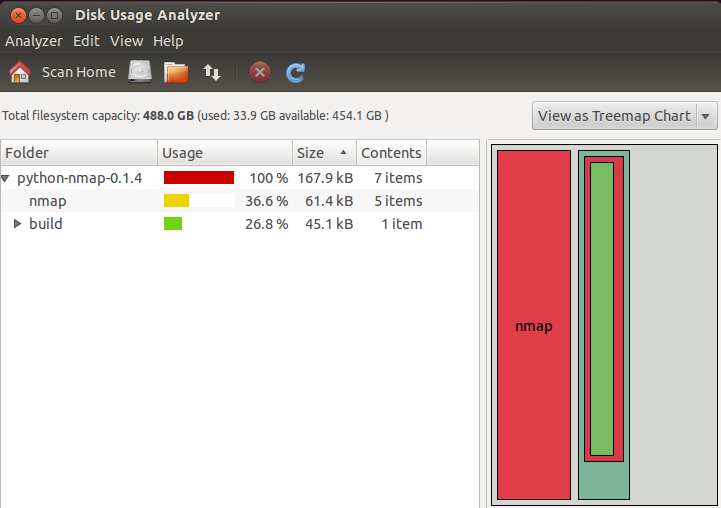
The following picture shows the results of my python-nmap-0.1.4 folder scanning. I get very useful information presented in a beautiful and simple way.
You learned to scan the Home folder, the Filesystem and Folders. There is a very important feature about this tool that you don’t know yet, but I am sure you will find it yourself. Do you have any remote folder that you want to scan? Think about it.


