
Introduction
DeepOfix is debian based dedicated mail server operating system, which is easy to deploy and not sys admin level expertise are required. It comes with a builtin web based management tool known as easy push server management tool.
Features
Some of the highlighted features are:
- LDAP support
The mail server not only comes with a builtin LDAP support but also it sores all of the user accounts and mail addresses in LDAP.
2. Anti-Virus and Anti-Spam
No require to configure or manage additional anti virus or anti spam tools as it comes with builtin ClamAV antivirus and spam assassin for spam filtering, both of the tools got updated automatically.
3. Web Based Email
Email can be accesses via internet or on a local network, easy to use web based mail client. User can manger their mail account and passwords.
4. Email Fetch
DeepOfix works with POP3 and IMAC types of multiple protocols, user can fetch emails from service provider’s server. Single email account can receive emails from multiple users in single inbox.
5.Server Management
Exclusive web based server management or ESM is provided to manage mail accounts, it comes with very rich features including firewall, network,account management, spam control, server control etc. features which do not require tricky command line skills and a fresher user can also handle their user mail accounts.
Installation
A dedicated server is required with minimum 4 GB RAM, Dual Core Processor with 80 GB of Disk Space. Download the .iso image from here.
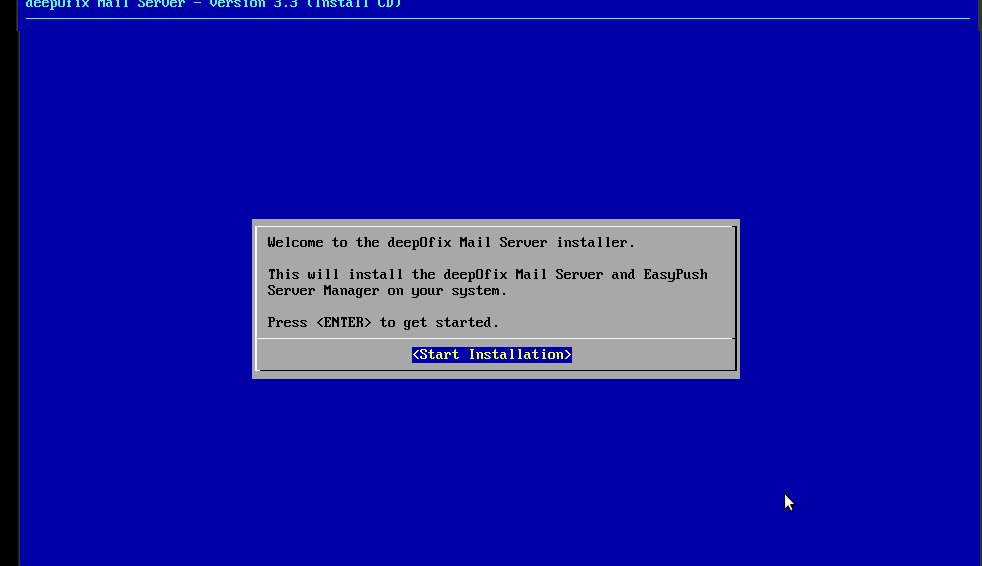
Boot system, press enter
Press enter and continue
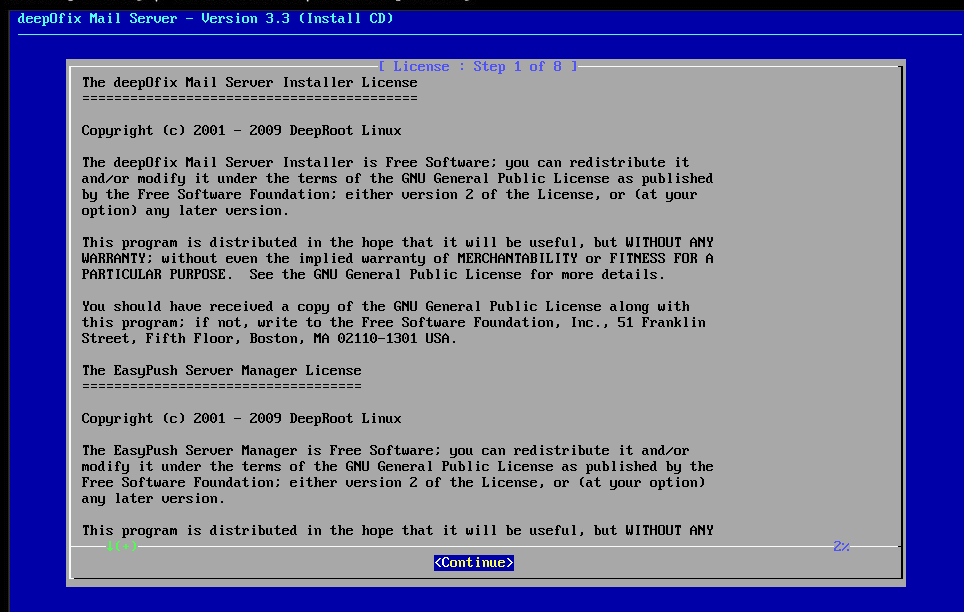
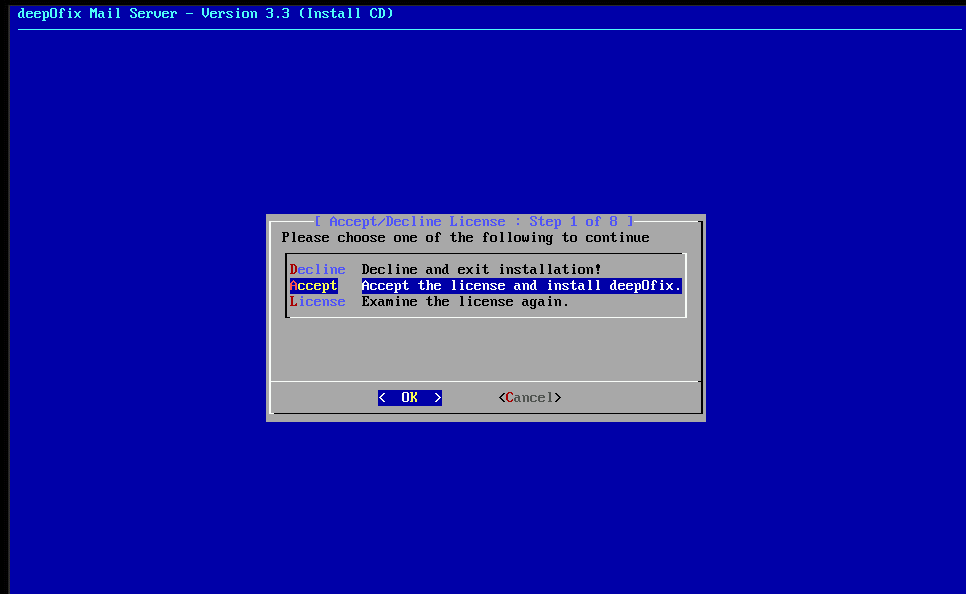
Accept license agreement press ok to proceed
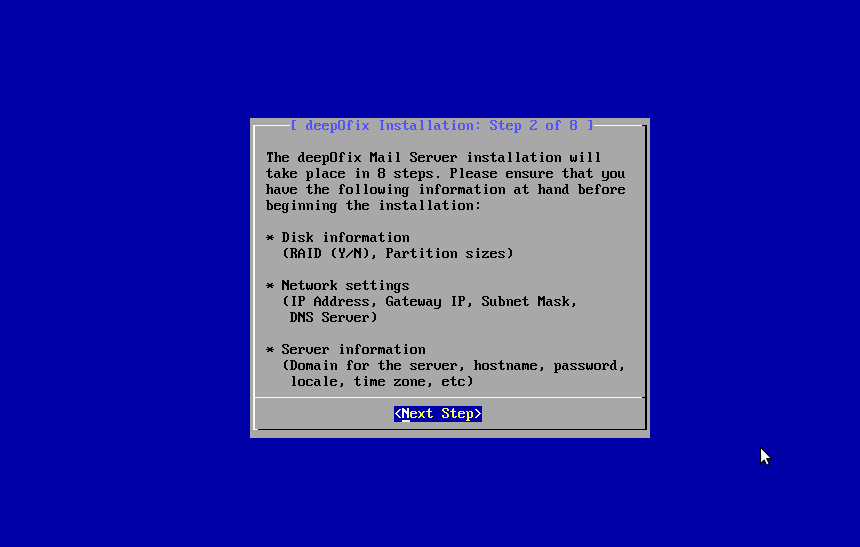
Make sure you have connected to network, make plan for your domain name, ip address etc and proceed to next step
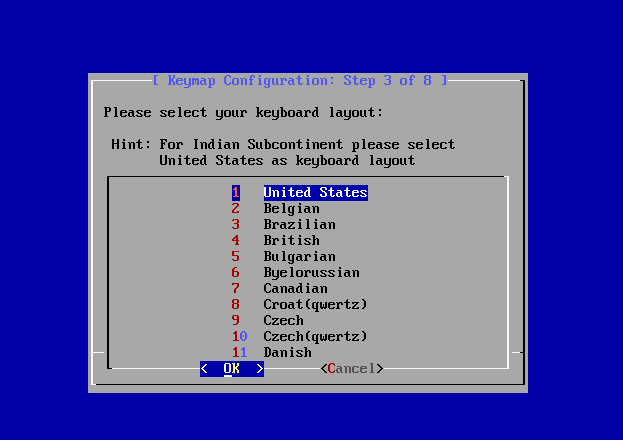
Select your keyboard format
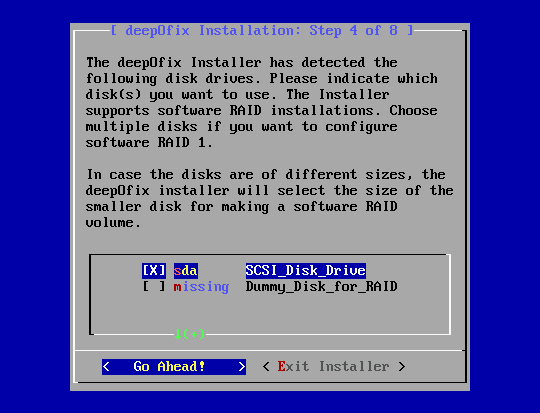
Select drive in which you are going to make this installation, press enter to proceed
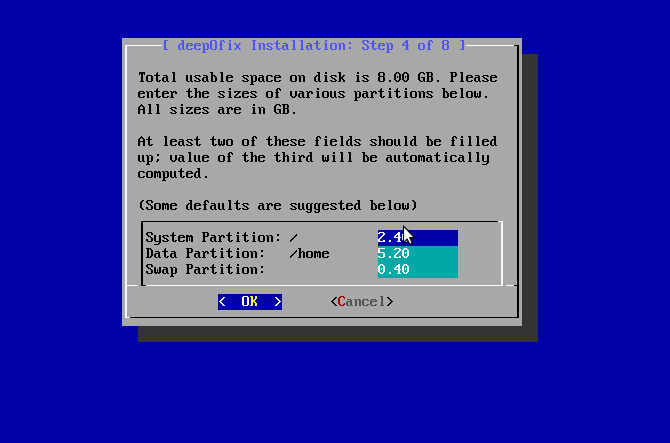
Define your partitions as per need and click next
Accept changes press enter to format disk, press enter to configure network settings in next step

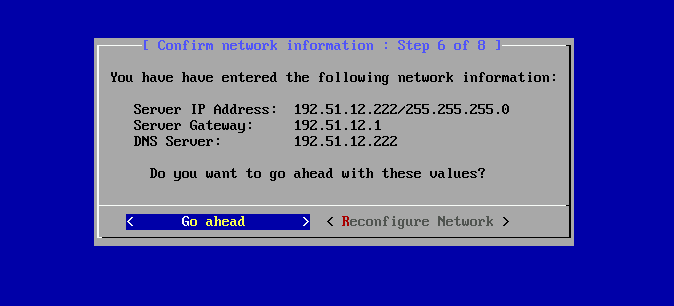
Define IP address in our scenario ip addr will be 192.51.12.222/24

Configure rest of the settings and make sure you have provided proper gate way and dns addresses
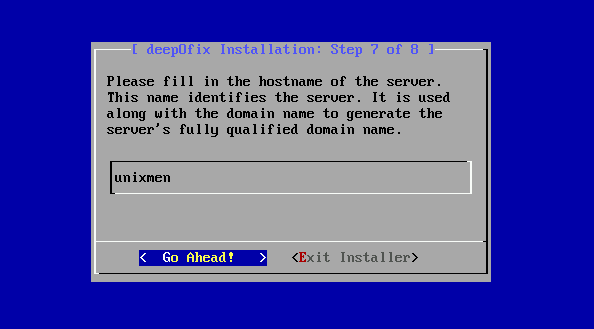
Define hostname of system and click next to proceed
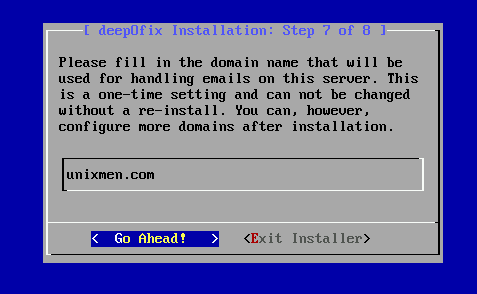
Define domain name and, it will be used for email accounts.
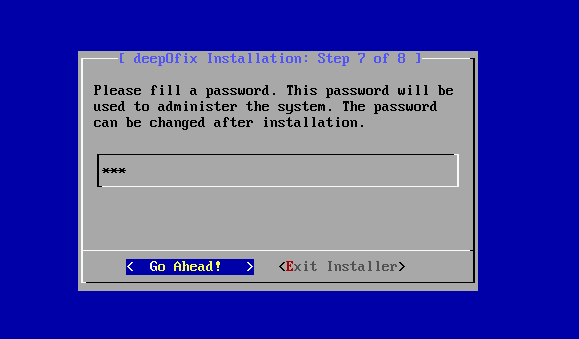
For mail server administration we need admin account, define password for admin account
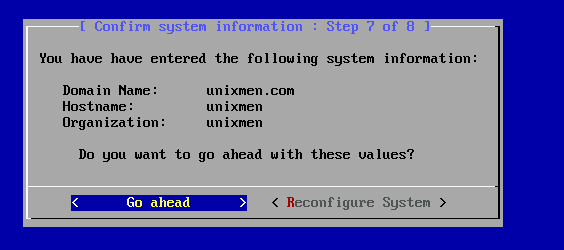
Make sure you have applied all of the settings appropriately
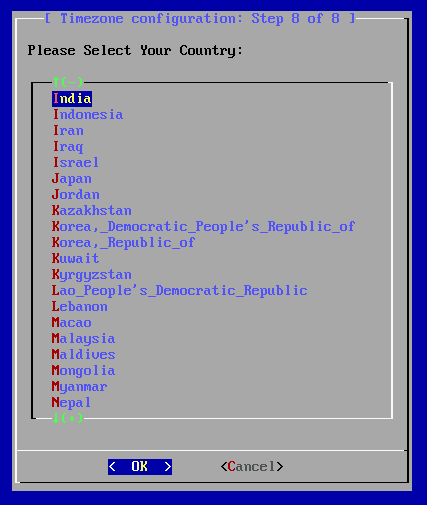
Select your time zone and country:
Press ok, let the installation begin, after reboot you have to login to server via browser
IP_address:4080
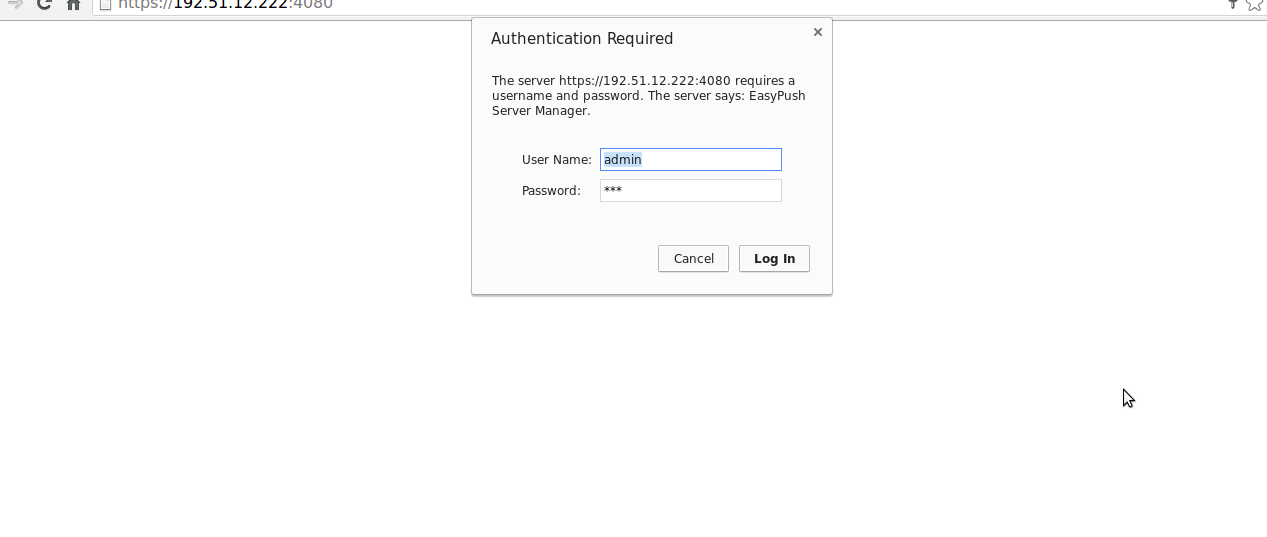
login to server to manage mail services.
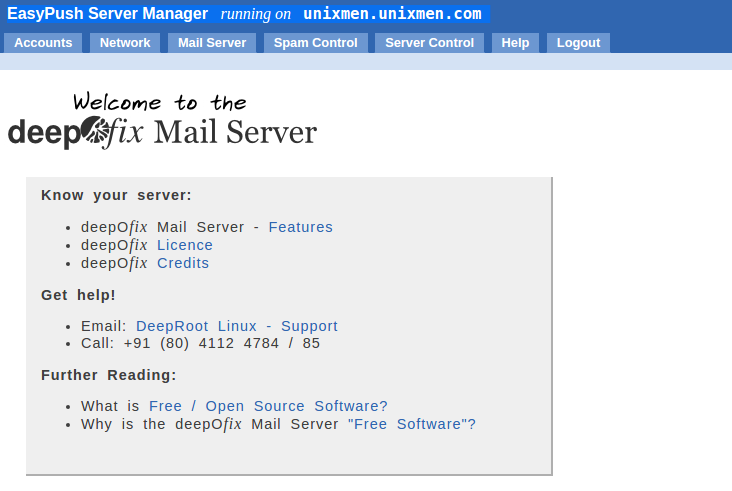
With easypush email management wizard you can manage all of your email related services
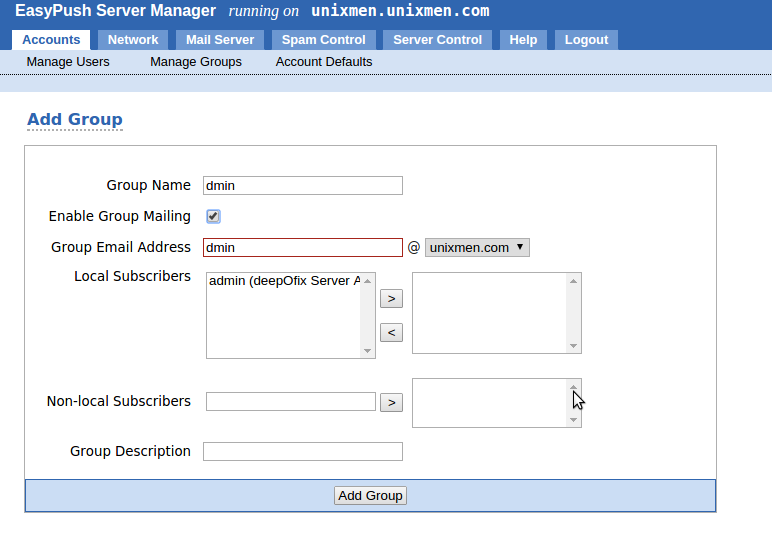
Manage accounts
Click accounts, click on manage groups add a group, let us assume to create a admin group.
Create a mail account in that mail new group, click manage users-> Manage user->click to add user-> provide account details, password and email password warning and password age, make sure warding date must be less then password change date. Along with user email account you can manage all of other contact details also.

Let us test wheather this email address is working or not. Open browser type ip address or domain name and press enter:
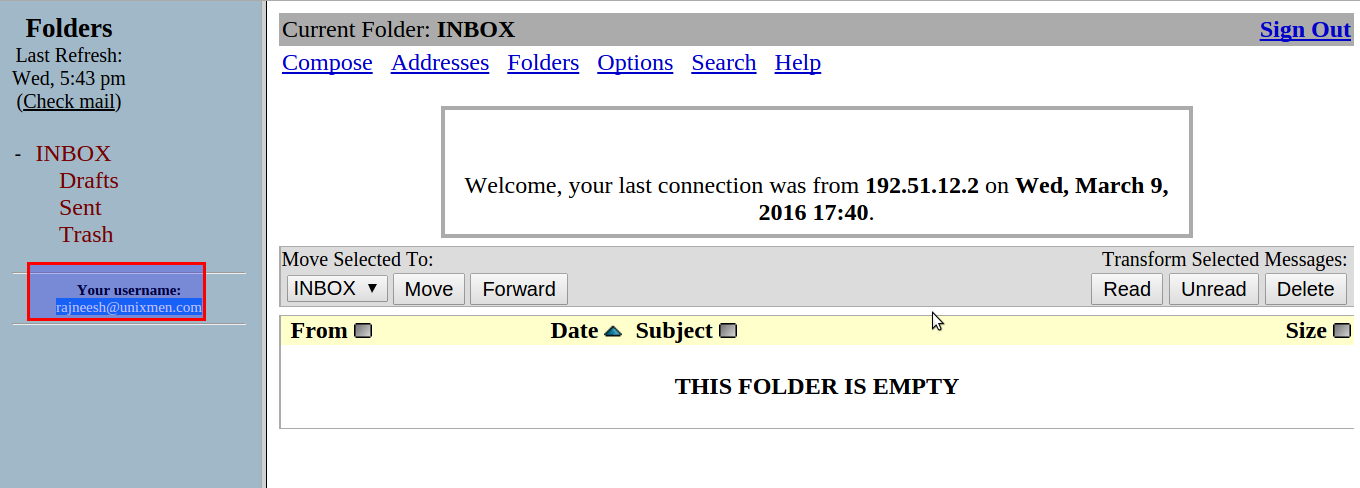
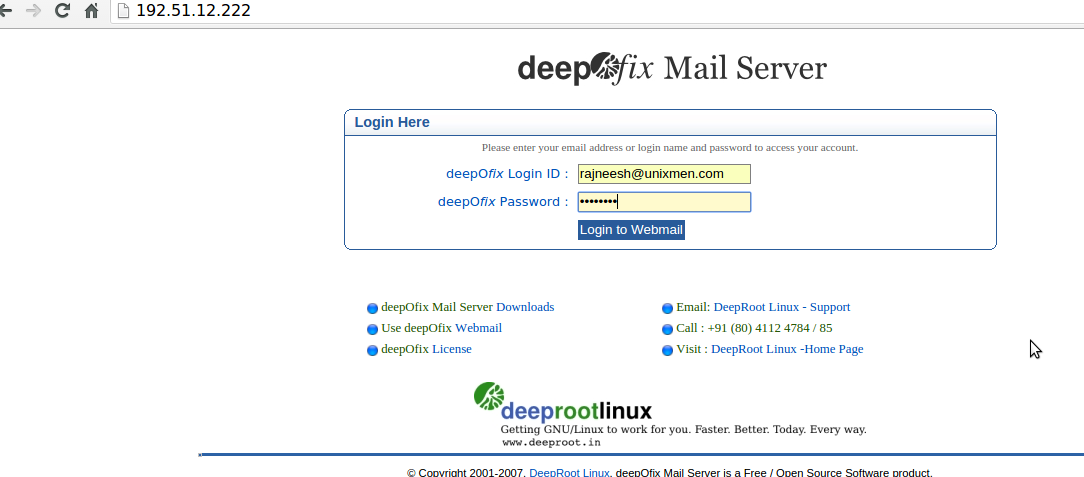 Login box will appears which indicates that all of the services are working properly.
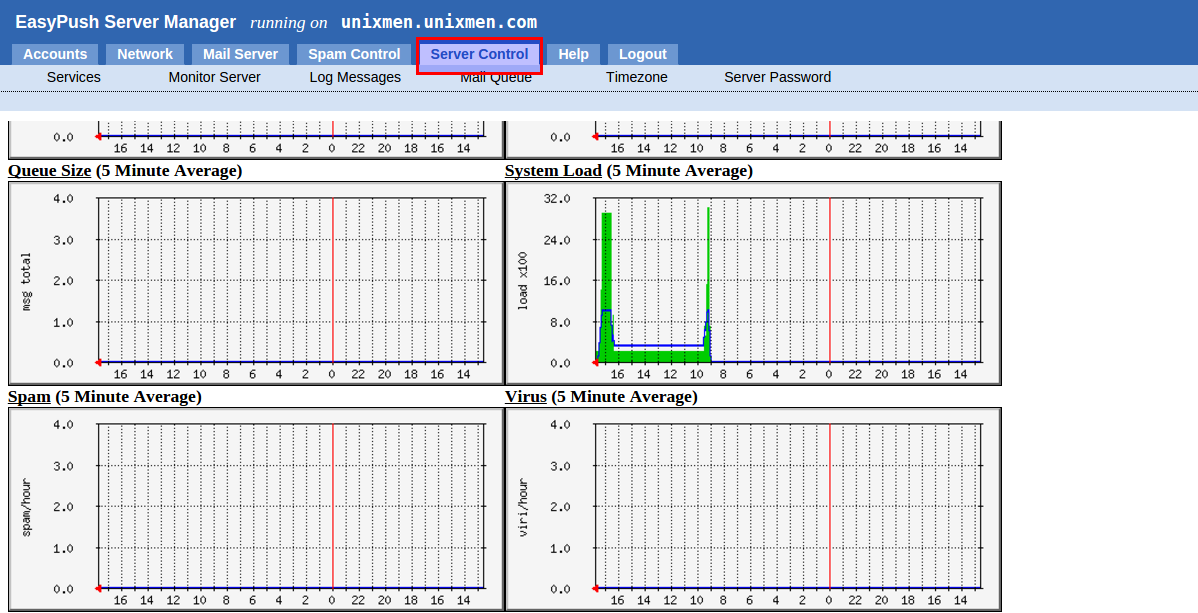
Explore other management tabs, let us open Server Control Tab, click monitor server and click resource graphs, where you can explore status of running processes
To edit and configure SMTP settings, click to mail server tab, click smtp settings
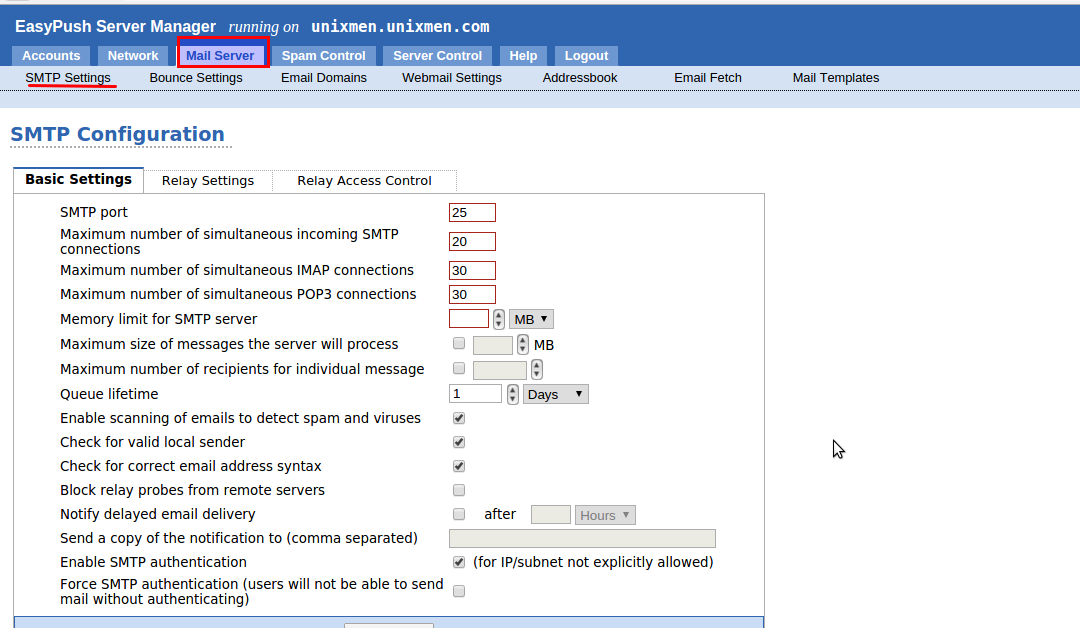
Similarly you can mange rest of the required settings by your self.
Conclusion:
Deepofix mail server is a must try for users who are seeking a simple and easy to manage stable mail server, as it comes in dedicated os form there is no need to make complicated configurations so that even no technical users can also configure the server very easily.
Have fun!!


