
Zulip is an open source group chat application released under the Apache license by Dropbox. Dropbox launched the project as it was intended to be – a workplace chat solution for desktop and mobile that allows sharing private and public messages. This projects uses Django, Python, JavaScript, and PostgreSQL database. Naturally, as a standalone group chat, Zulip has a lot of competition. But its developers tried to gather the best and most important features into one simple app. For example, threaded conversations keep your communication in order and easily navigate through the sea of information. Streams and topics decrease deviation from the main theme and help to concentrate on the customer’s project.
In order to use Zulip you will have to install an instance of Zulip server. At the moment it supports only Ubuntu 14.04 Trusty and has to be the only process running. But after server setup it is easy for your team to either use a Zulip tab in the browser, or to install a Zulip client for a preferred platform. Zulip desktop app provides rich desktop notifications and seamlessly assists your workflow. Mac and Windows clients are already available, Linux binaries are well on their way.
Prerequisites:
Currently, the automated Zulip server installation process only supports Ubuntu 14.04 Trusty. In this article we are going to use Ubuntu 14.04 with 1 CPU , 2 GB RAM and 40 GB Disk space.
You can run a Zulip server for a small site on a system with 2G of RAM, but for production use with more than a few dozen users, a system with 4GB of RAM or more is recommended.
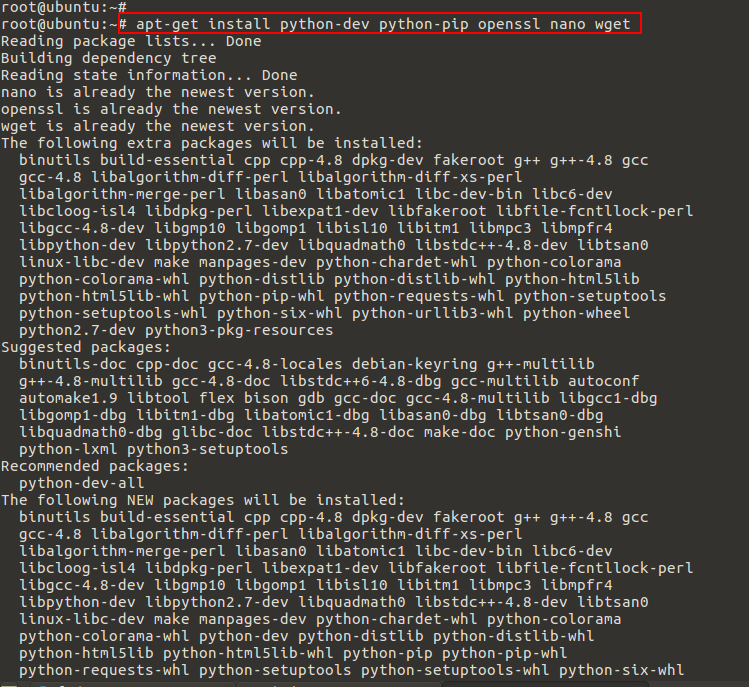
Lets login to your server using root user credentials to update the system and install necessary packages.
[cc]# apt-get update && sudo apt-get -y upgrade[/cc]
[cc]# apt-get install python-dev python-pip openssl nano vim wget [/cc]
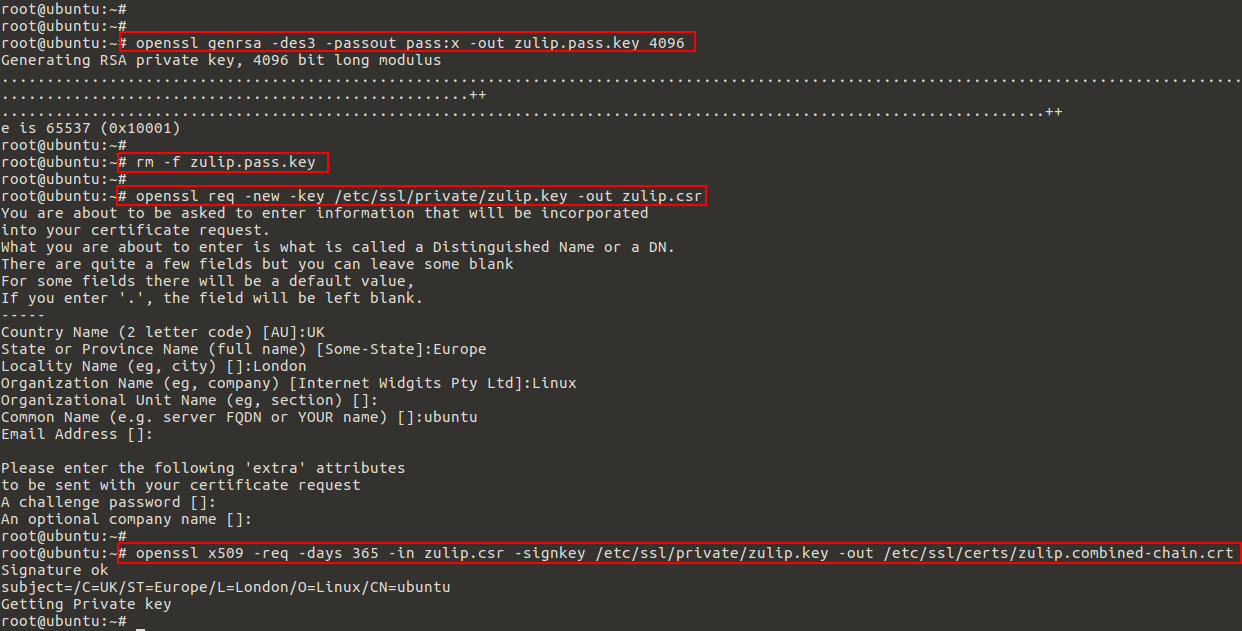
Installing ssl certificate:
Install opensl if its not already installed on your system using below command.
[cc]#apt-get install openssl [/cc]
Then run the commands below to generate self signed ssl certificates.
[cc]# openssl genrsa -des3 -passout pass:x -out zulip.pass.key 4096[/cc]
[cc]# openssl rsa -passin pass:x -in zulip.pass.key -out /etc/ssl/private/zulip.key [/cc]
[cc]# rm -f zulip.pass.key [/cc]
[cc]# openssl req -new -key /etc/ssl/private/zulip.key -out zulip.csr [/cc]
[cc]# openssl x509 -req -days 365 -in zulip.csr -signkey /etc/ssl/private/zulip.key -out /etc/ssl/certs/zulip.combined-chain.crt [/cc]
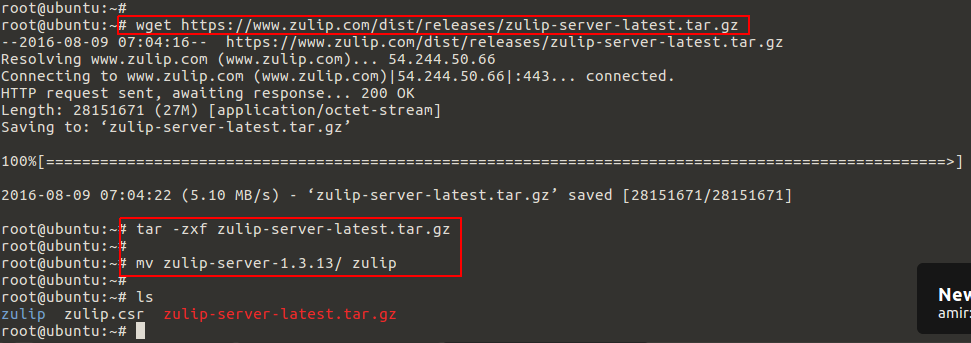
Download latest Zulip build:
Download the latest Zulip archive and extract it to the /root/zulip directory or move the extracted build to the zulip working directory using command below.
[cc]# wget https://www.zulip.com/dist/releases/zulip-server-latest.tar.gz [/cc]
[cc]# tar -zxf zulip-server-latest.tar.gz[/cc]
[cc]# mv zulip-server-1.3.13/ zulip[/cc]
Installing Zulip:
Change to zulip directory first and then run the ‘install’ script to start the installation script using the following commands.
[cc]# cd zulip/ [/cc]
[cc]# ./scripts/setup/install[/cc]
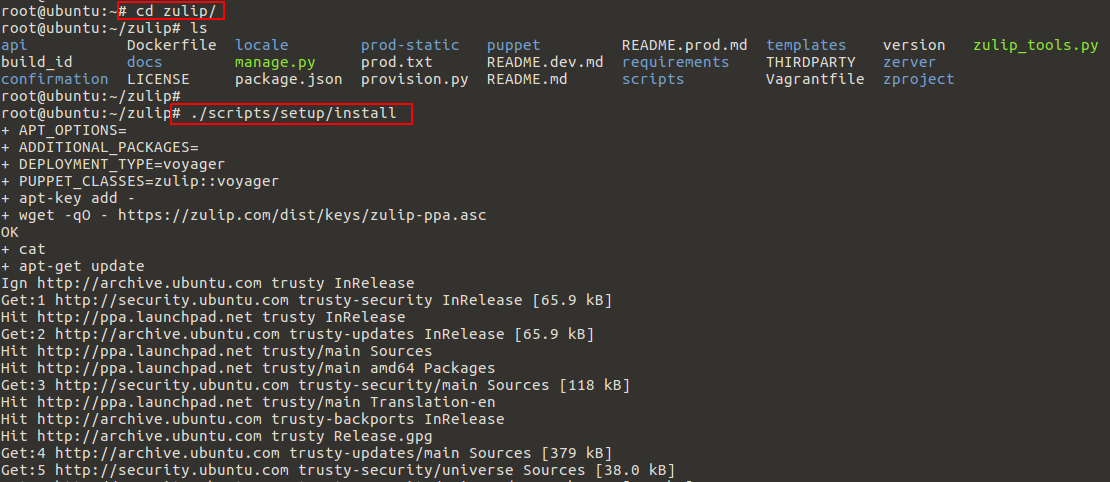
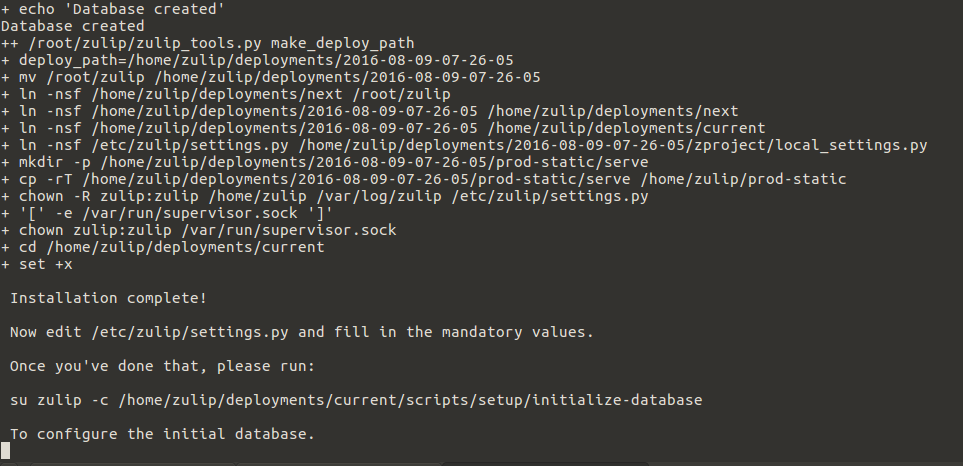
Once the installation process starts, it will takes a while to complete the whole process. If you did not get any error message, the you will be greeted with the installation complete message and will be instructed about what to do next.
Change Zulip settings:
Now edit the ‘/etc/zulip/settings.py’ file and fill all mandatory values after opening it in your editor.
[cc]# vim /etc/zulip/settings.py[/cc]
EXTERNAL_HOST (The user-accessible Zulip hostname for this installation)
ZULIP_ADMINISTRATOR (The email address for the person or team who maintain the Zulip)
ADMIN_DOMAIN (The domain for your organization)
DEFAULT_FROM_EMAIL (The email From address to be used for automatically generated emails)
NOREPLY_EMAIL_ADDRESS (The noreply address to be used as Reply-To for certain generated emails)
Setup the database:
Now initialize the postgresql database using ‘initialize-database’ command as shown.
[cc]# su zulip -c /home/zulip/deployments/current/scripts/setup/initialize-database[/cc]
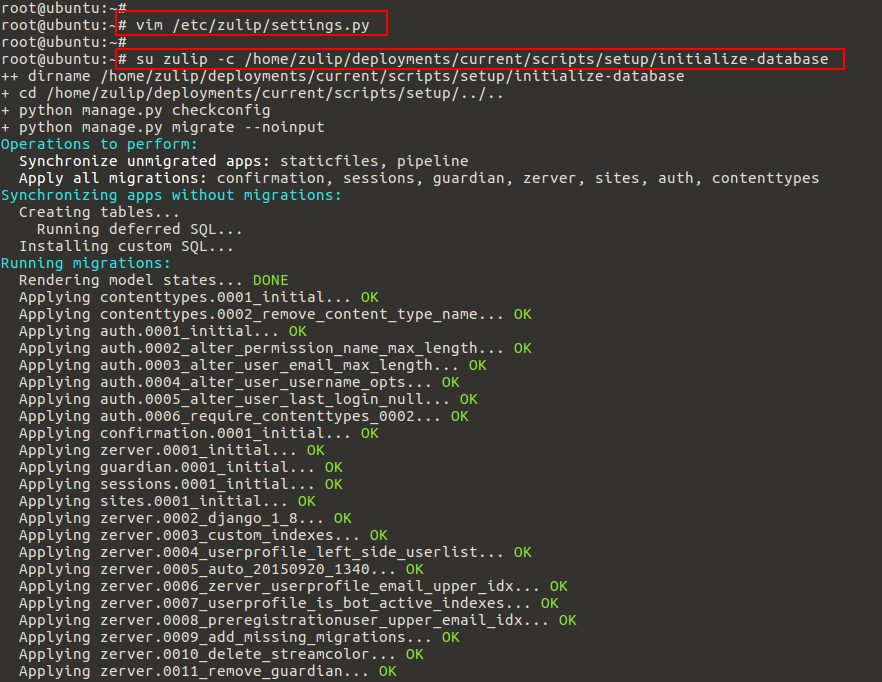
The script will generate an error if you did not fill in all the mandatory settings. Once everything is setup correctly you will get the message that you have successfully configured your Zulip database.
If you haven’t already, you should configure email in /etc/zulip/settings.py
And then you should now be able to visit your server over https and sign up using
an email address that ends with @ADMIN_DOMAIN (from your settings file).
See README.prod.md for instructions on how to confirm your Zulip install is healthy,
change ADMIN_DOMAIN, debug common issues, and otherwise finish setting things up.
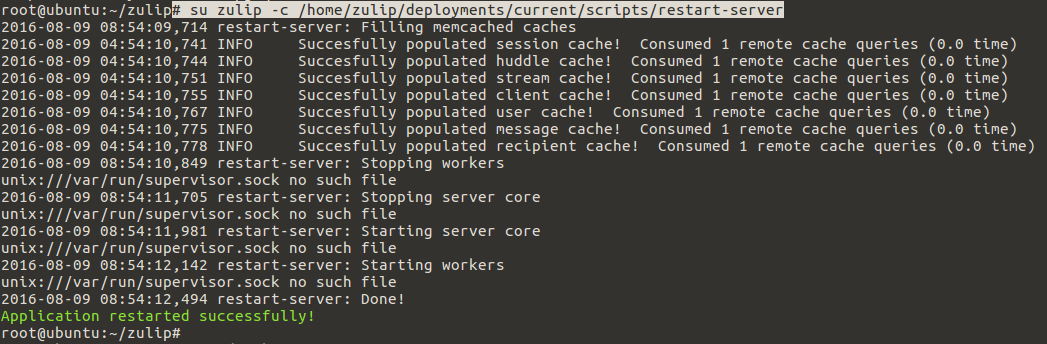
You can restart zulip to check for any errors using below command.
[cc]# su zulip -c /home/zulip/deployments/current/scripts/restart-server[/cc]
Zulip Web Access:
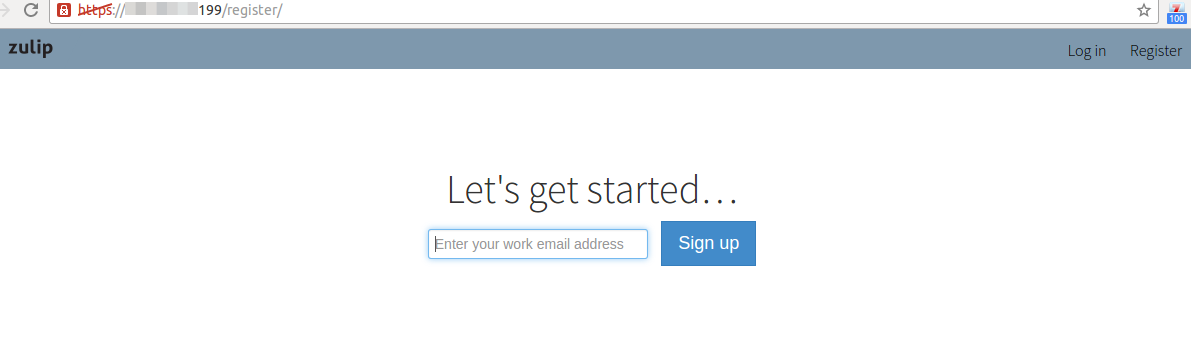
Now the installation process and database initialization are completed. Open your web browser followed by the IP or FQDN of your server and register your new account.
Conclusion:
That’s it, we have successfully installed and setup Zulip on Ubuntu 14.04 LTS server. Zulip is and open source self-hosted group chat and collaborative application written in Python on top of the Django framework and supports both group and private messaging. If find any difficulty in it setup, feel free to get back to us and leave your valuable comments and suggestions.


