
Introduction
LEMP is a variation of the ubiquitous LAMP stack used for developing and deploying web applications. Traditionally, LAMP consists of Linux, Apache, MySQL, and PHP. Due to its modular nature, the components can easily be swapped out. With LEMP, Apache is replaced with the lightweight yet powerful Nginx. In this article we will show you how to install Nginx, MySQL, PHP and WordPress on an Ubuntu 14.04
Prerequisites
As prerequisites for this tutorial it is required to have a server with an installed Ubuntu 14.04.
We will start by installing the WordPress on Nginx LEMP Stack Using Ubuntu 14.04. We will use the following command to check of our server is up to date:
sudo apt-get update
sudo apt-get upgrade
If you have apache2 on your system, you have to remove it using the following commands:
sudo apt-get remove apache2*
sudo apt-get autoremove
Installation of Nginx
We will use the following command to install Nginx on our system:
sudo apt-get install nginx
You have to press “enter” key while there is a question if you wan’t to continue and use the following command to open Nginx service:
sudo service nginx start
If you want to test Nginx, you have to use your hostname or IP address in your browser’s address bar. And if you have forgot it you can use the following command to get it.
ifconfig
After getting your address go to your browser and enter it as a link, you will receive something like this:
So now after installing WordPress and Nginx we can install MySQL which will be our next step.
Installation of MySQL
You have to use the following command:
sudo apt-get install mysql-server
You will get something like this where you have to enter a strong password for your MySQL :
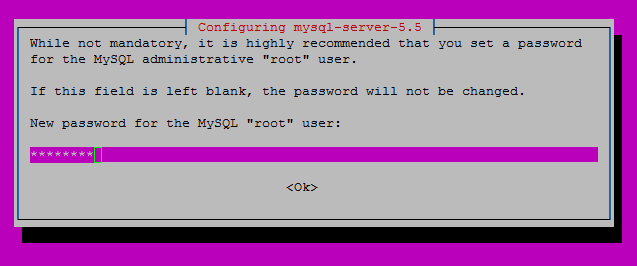
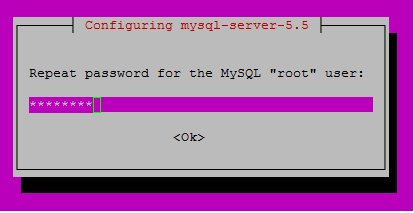
Hit enter to continue and then you will receive a new screen where you have to re-enter your password:
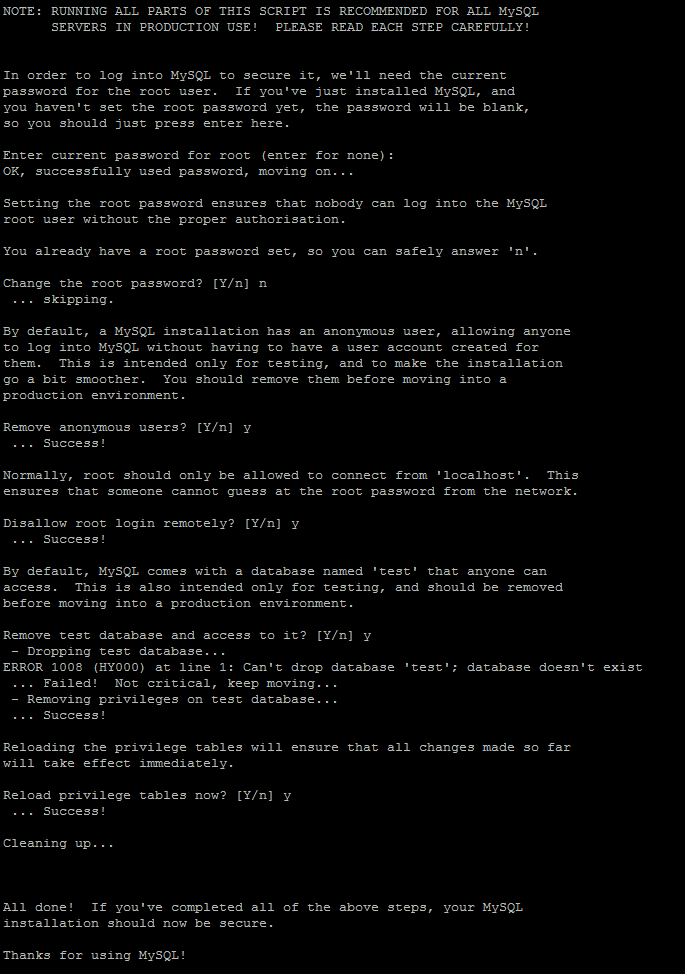
After installing our MySQL successfully, now we will use the following command to make it more secure:
sudo mysql_secure_installation
You will be asked to enter your already created password, so enter it and press enter if you want to skip and continue.
After installing MySQL too, we will move to make the installation of PHP.
Installation of PHP
We will now install PHP, to do we will use the following command:
sudo apt-get install php5 php5-fpm php5-mysql
And as previously hit enter key to continue.
It is required to edit the Nginx file configuration to be able to work with PHP correctly. So we need to start by removing the original Nginx file configuration using the following command:
sudo mv /etc/nginx/sites-available/default /etc/nginx/sites-available/default.old
Now we will use the following command to create a new file which will be called Anisf:
sudo nano /etc/nginx/sites-available/Anisf
And then you have to copy the following text into your text editor :
server {
listen 80;
server_name your_site_name.com;
root /usr/share/nginx/html;
index index.php index.html;

location / {
try_files $uri $uri/ =404;
}

error_page 404 /404.html;
error_page 500 502 503 504 /50x.html;

location = /50x.html {
root /var/www/html;
}

location ~ \.php$ {
try_files $uri =404;
fastcgi_pass unix:/var/run/php5-fpm.sock;
fastcgi_index index.php;
fastcgi_param SCRIPT_FILENAME $document_root$fastcgi_script_name;
include fastcgi_params;
}
}
Then save and exit.
Now we have to restart Nginx since some modifications were made to its configuration file. To do we will use the following command:
sudo service nginx restart
Now we will create a simple PHP page to check its functionality. For that we will use the following command to create a fie (called AnisTest.php):
sudo nano /usr/share/nginx/html/AnisTest.php
And we will copy the following text to our text editor:
<?php
phpinfo();
?>
Now after making the test we will remove our created file called AnisTest.php since it may give a potential attacker information that can be used to craft a particular attack against our server. For that we will use the following command:
sudo rm /usr/share/nginx/html/AnisTest.php
And we can remove the index.html file too using the following command:
sudo rm /usr/share/nginx/html/index/html
Now we will move to the next step where we will install the wordpress.
Set up MySQL database for WordPress with Ubuntu
Now we will set up the MySQL database. To do we will start by using the following command:
sudo mysql -u root -p
Then we will be asked to enter our MySQL root password which was setting up during the installation of MySQL.
Then use the following commands in MySQL and don’t forget to choose a secure password in the “Your_password” place:
create database wordpress character set utf8 collate utf8_bin;
grant all privileges on wordpress.* to wordpressuser@localhost identified by "[Your_password]";
flush privileges;
exit
Now that the database is created, we will download the latest version of WordPress with the following command:
sudo wget http://wordpress.org/latest.tar.gz
Then we will use the following command to decompress the file:
sudo tar -xzvf latest.tar.gz
Configure WordPress on Ubuntu
Now, we have to copy wp-config-sample.php to wp-config.php. To do that, we will use the following command:
sudo cp wordpress/wp-config-sample.php wordpress/wp-config.php
Then using your selected text editor, you have to edit wordpress/wp-config.php using the following command:
sudo nano wordpress/wp-config.php
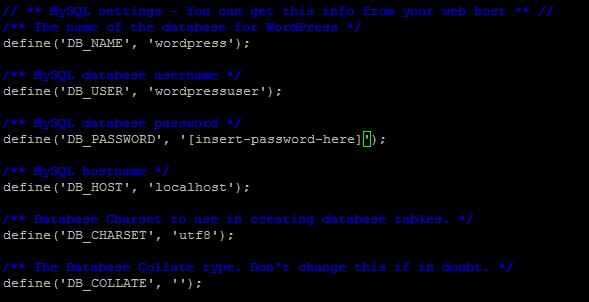
For a basic setup, we need to have the following.
define(‘DB_NAME’, ‘wordpress’)
define(‘DB_USER’, ‘wordpressuser’);
define(‘DB_PASSWORD’, ‘[insert-password-here]’);
You have to get something like the following screen after completing the required modification:
Then use the following command to move the WordPress folder to your web directory:
sudo cp -r wordpress/* /usr/share/nginx/html
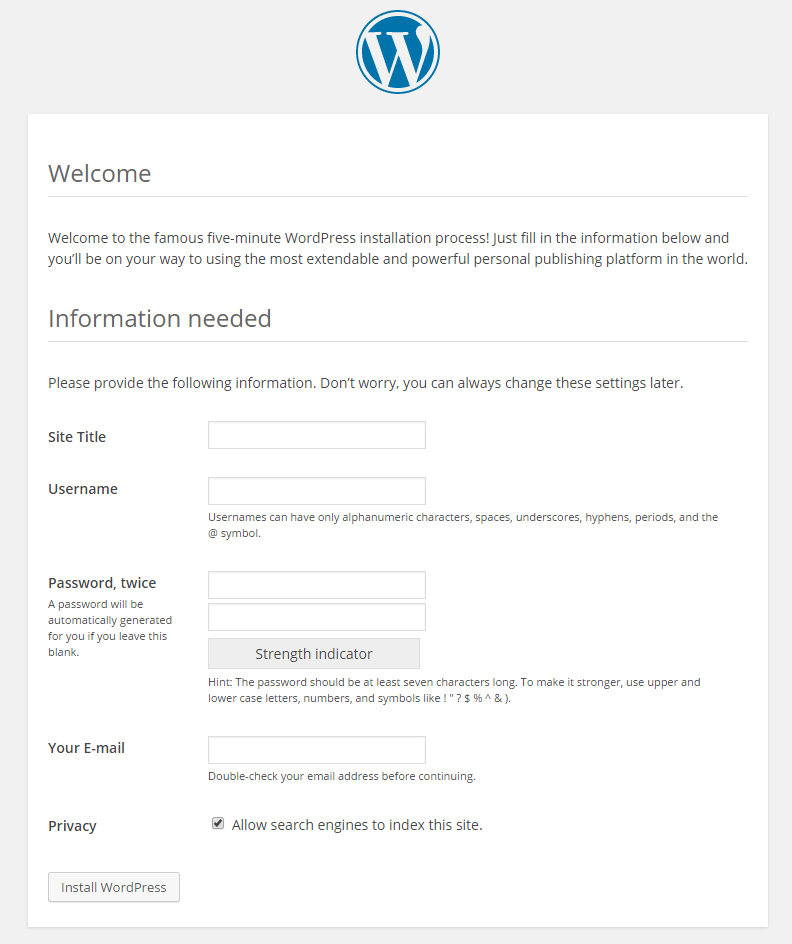
Now, using your hostname or IP address in your browser’s address bar you can go to the WordPress web installation:
Conclusion
That’s all, you have installed WordPress on an Nginx with Ubuntu. You can now use it safely and in a correct way.


