
Server provisioning is a set of actions to prepare a server, taking it from bare metal to a functioning system complete with an operating system, data and software. There are a number of sophisticated tools available for Linux that are adopted in provisioning servers, offering the ability to simultaneously set up thousands of machine unattended. Automation and consistency across Linux infrastructure is hard but in our today’s article we will be setting up Linux installations of heterogeneous hardware across 10’s to 1000’s of machines fast, flexible, and absolutely consistent using Stacki.
Stacki (Stack Installer) is the world’s fastest and easiest-to-use Linux server provisioning tool that can take your servers from bare hardware (or virtual hardware) to working Linux, ready to install applications. It includes parallel installation of your servers configuration of many things and will be there to help you easily expand your network and also help you manage it. You can easily and quickly provision and add nodes to your network without all the usual headaches and time-intensive setup tasks.
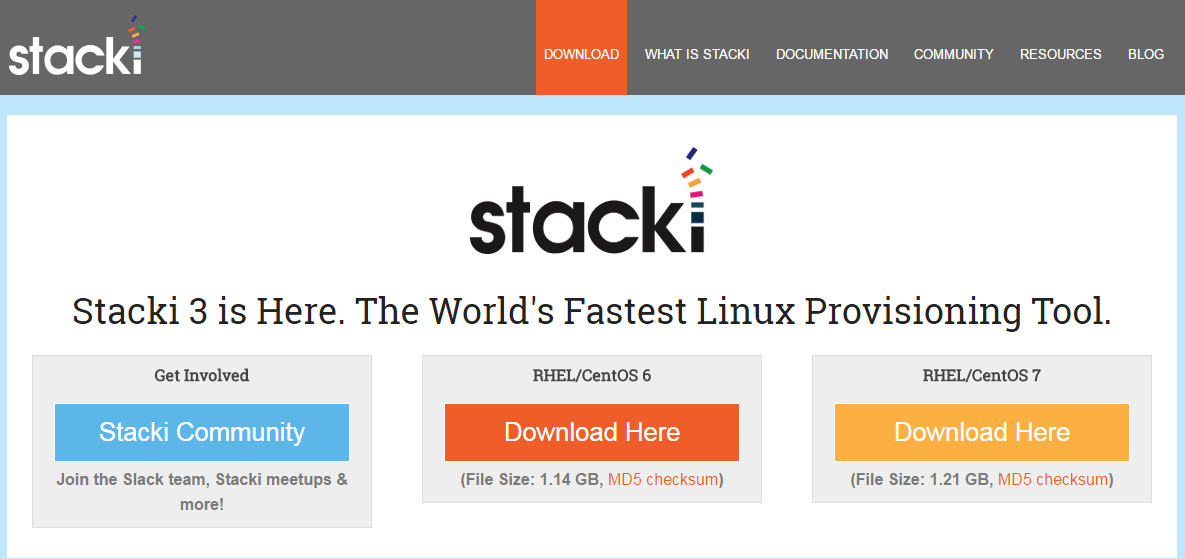
Download Stacki-OS
The quick and easy way to run Stacki is to download pre-built ISO RHEL/CentOS 6/7, MD5 checksum available on Stack IQ Offical Page. The ISO image is released as open source with a combination of licenses and its source code is available on the StackIQ GitHub in the Stacki source repository.
Requirements for Frontend Installation
Stacki assumes a single network for all servers that refers to the private network as an isolated network. Stacki-OS frontend has the following hardware requirements to install on the single server.
Resource Minimum Recommended
[cc]
System Memory 2 GB 16 GB
Network Interfaces 1 1
Disk Capacity 64 GB 200 GB
CD/DVD Device 1 1
[/cc]
Boot-up from Stacki-OS Frontend Installation
Once you have downloaded the ISO image, then create a new VM in your VMware and give the VM access to the ISO or DVD to boot from this. Then Send the Ctrl+Alt+Delete key to boot from your ISO image. You will see a screen that looks like the image as shown below. Select your install method – via DVD or via USB – and
hit enter.

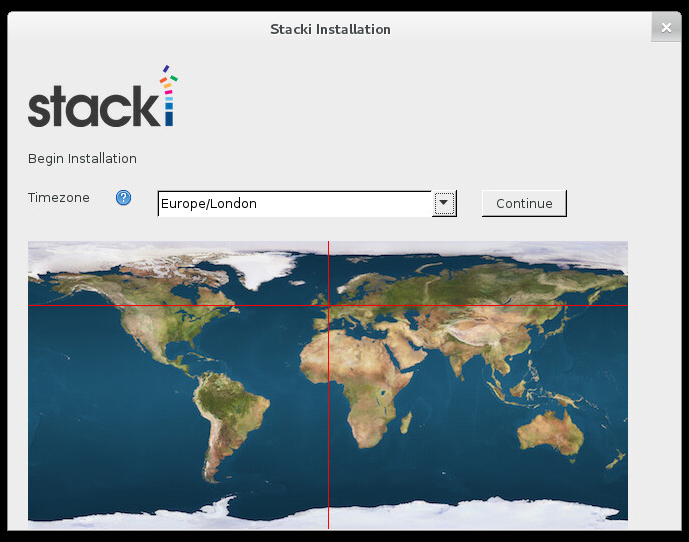
Setup Time Zone
After boot-up you will be prompted to enter your timezone. To correctly set the time, we need the timezone this
stacki server is installed in by selecting the relevant timezone and then click “Continue”.
Network Settings
Stacki uses the network defined to communicate with the servers that it manages. If you are new to Stacki and working in a sandbox environment, then values below will provide a working installation, with the only item that needs to be checked for your local configuration being the Device. Make sure you select the device that
is on the same network as all of your servers that Stacki will manage.
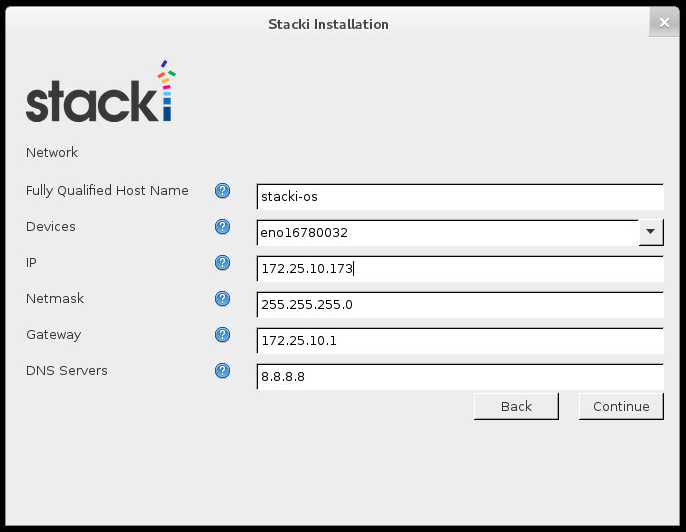
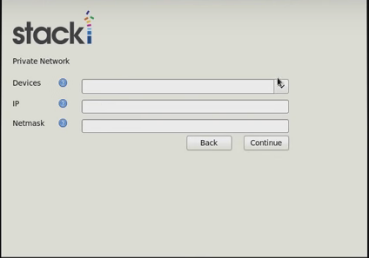
If are using the same server to setup the backend server then add another Private network.
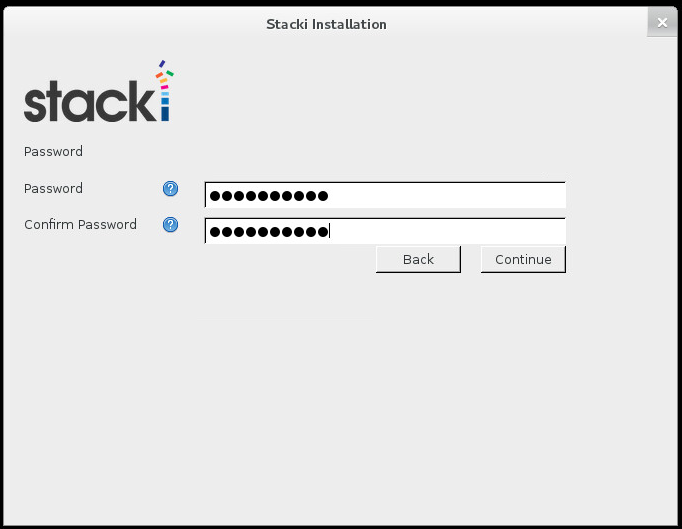
Setup Root Password
Enter the password for the root account on the frontend. After installation you can change
it with the “stack set password” command.
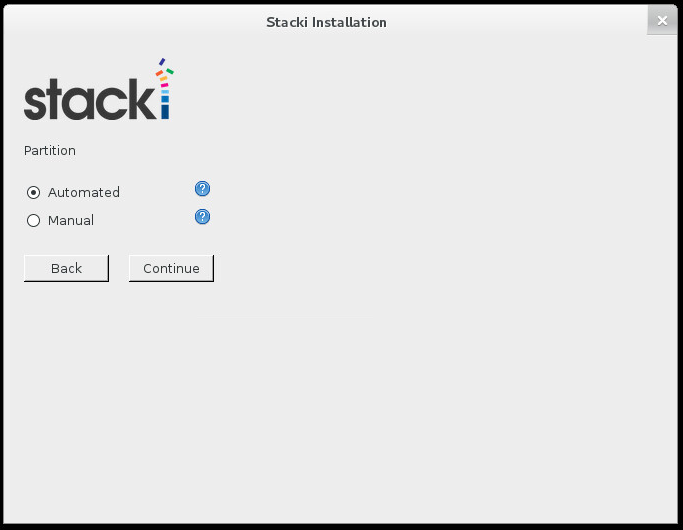
Choose Partitioning Option
If you are familiar with linux partitioning practices and want to set up your own partitions then choose “manual”, but as new starter I would recommend to use “Automated”. In automated, the installer will repartition and reformat the first discovered hard drive that is connected to the frontend while all other drives connected to the frontend will be left untouched.
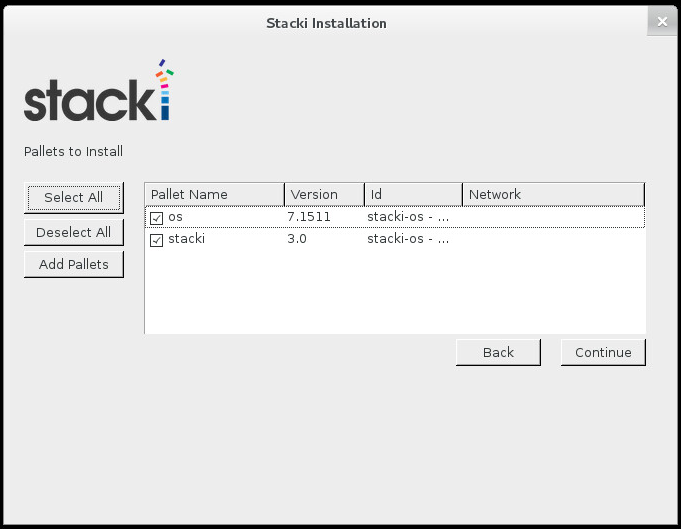
Install the Pallets
Choose the Pallets you want to install. Booting from a DVD, pallets should automatically load onto the list for you to choose.
Click on Select All or Select stacki and os pallets to install and click on to “Continue” .
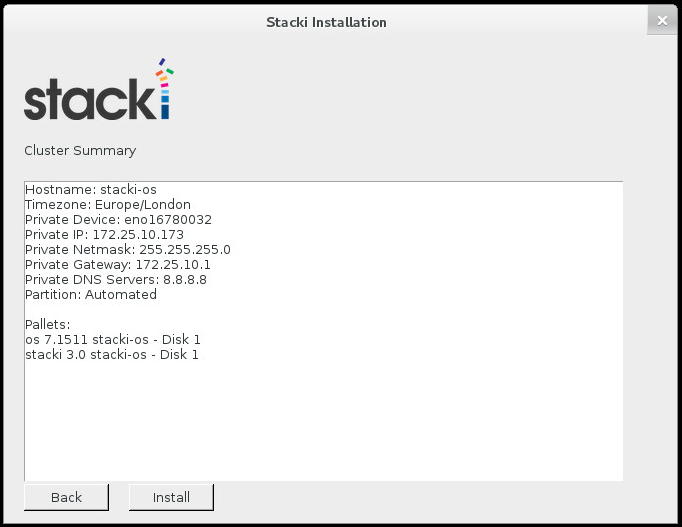
Summary
Review the installation parameters and click Continue to proceed as you have given Stacki all the information that it needs to perform the installation.
Installation Progress
The frontend will now format its filesystems and copy the pallets from the DVD onto its hard disk. Here you can add your user settings.
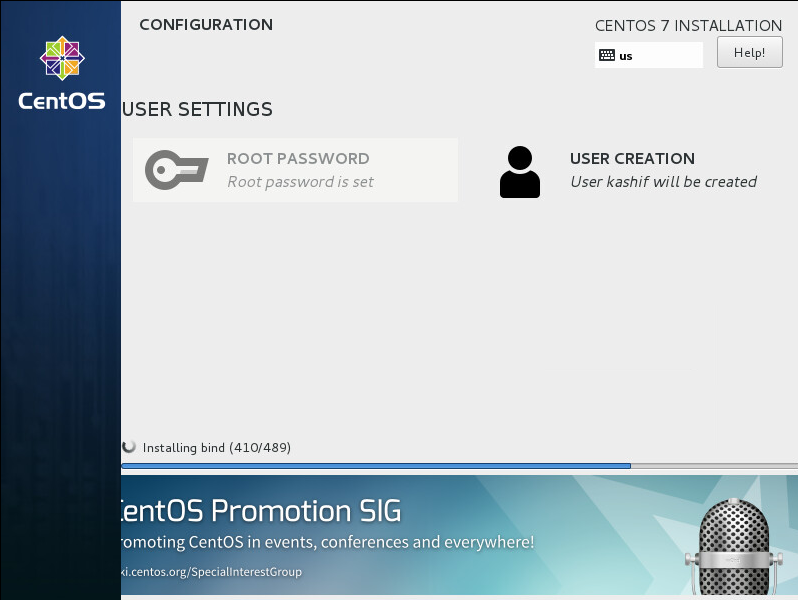
Next, it will install all the packages and then run post configuration scripts. When this completes, the frontend will reboot and your Stacki frontend will be ready.
Testing Frontend Installation
Once your server is back after reboot, log into your new Stacki server, and type the following commands.
[cc]# stack list host[/cc]
This will show you information about the Stacki host. Check the information and see that it is correct.
[cc] # stack list network [/cc]
This will show you information about the network that you entered during installation.
[cc]# stack list box [/cc]
This will show you information about your installation platform as shown below.
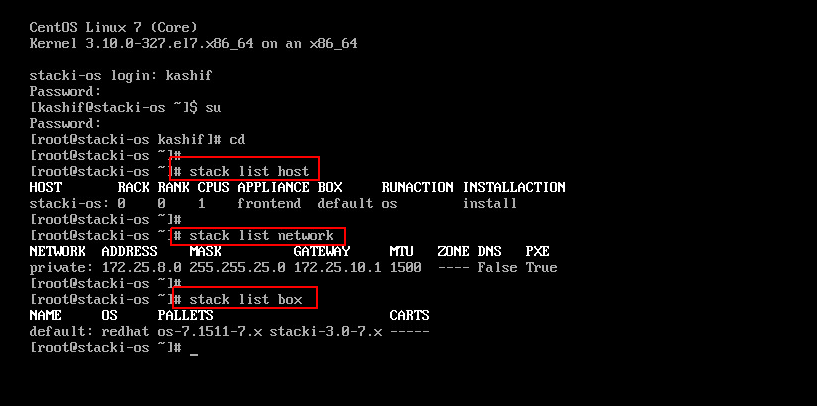
Your Stacki frontend is now ready to install backend servers now.
Provisioning Backend Server
To install a new backend node, Stacki needs to add information about the server (IP address, MAC address, appliance type, etc) to the configuration database. We can choose between the Discovery or SpreadSheet procedure to install the new backend nodes.
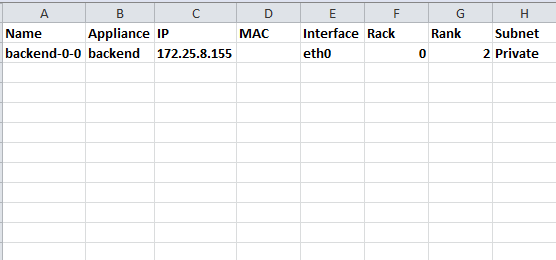
Let’s specify all the information about new host before installation in a CSV (Comma Separated Value) file.The advantage of using CSV files, is that it gives fine-grained control over the configuration of the cluster but you must know the MAC of the backend server to be mentioned in the file.
Your Host CSV file should be look the below image.
Once the CSV file is created and copied to the frontend it can be loaded by root using below command.
[cc]# stack load hostfile file=stacki.oneserver.csv [/cc]
You can verify the data was correctly loaded be listing the host information from the configuration database.
[cc][root@stacki-os ~]# stack list host [/cc]
[cc
]HOST RACK RANK CPUS APPLIANCE BOX RUNACTION INSTALLACTION
stacki-os: 0 0 1 frontend default os install
backend-0-0: 1 1 2 backend default os install
[/cc]
The number of CPUs on every backend node is set to 1 by default which will be updated automatically once a backend node is installed.
Every time a backend node boots, it will send a PXE request to the frontend. Then frontend will tell the backend node to either boot its OS or to install. You can see using below command the default boot action.
[cc][root@stacki-os ~]# stack list host boot[/cc]
[cc]
ACTION
frontend-0-0: ——
backend-0-0: install
[/cc]
Once the things are setup accordingly you can now power up the backend machines. The backend machines will first boot into the Stacki installer, install the OS, set its boot action back to os and reboot.
In case you wish to reinstall the backend node, you can just change the boot action back to install then it will rebuild itself after your next boot.
[cc]# stack set host boot backend-0-0 action=install [/cc]
By default, it will only reformat the swap, /var, and / partitions and all data will be there in /export, or any other data disks you’ve partitioned, is maintained across re-installations. To completely reformat all data on the backend host during the re-installing you need to set an Attribute for the given host before you reboot the server as shown.
[cc]# stack set host attr backend-0-0 attr=nukedisks value=true [/cc]
The value of the attribute will be automatically set to false when the next time you re-install it and will do the default operations.
Conclusion
In this article we have learned about the Sacki-OS frontend installation and how we used it to provision backend servers. We hope you understand the basic functionality of Stacki, anyone can use Stacki to automate their server provisioning, Big Data and Cloud installations does not matter if you have a small environment or large. You can even use this at you personal laptop. Feel free to share your Stacki experience with us and leave your valuable comments or suggestions.


