
Introduction to Quagga
In this fast moving technological world where every day new innovations are occurring open source technologies have gained significant importance. Cisco, juniper and other vendors have occupied a major portion of market but since it’s not affordable for all companies lying in third or fourth tier so they rely on open source software’s where little development of their own can produce better results. Quagga routing suite is an example of open source routing software which has major functionality of routing and people who find ease to access router and give commands to the router can do the same to this application. Its architecture is very interesting since it is installed on Linux and it acts as an abstraction layer on the Kernel of Linux server and rest of the architecture consists of sockets on which all the communication occurs. It has a special API named Zserv API which uses TCP sockets of Linux server. It acts as a client and is responsible for implementing the routing protocol and as soon as it implements it is also responsible for communicating the changes to the daemon. Different protocols like OSPF (Open shortest path first), RIP (Routing Information Protocol), BGP (Border Gateway Protocol), IS-IS (Intermediate system to Intermediate system) and MPLS (Multi-Protocol Layer Switching) are present in the mentioned routing application. You can access all the protocols through CLI just like you are accessing some third layer router and you will not feel any difference in applying commands.
Installing and configuring Quagga
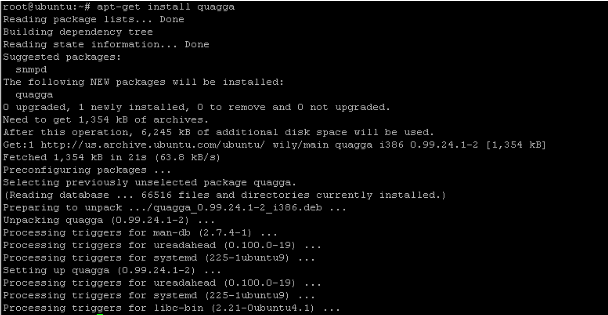
Now we will see how to install it on our Ubuntu server. It is easy to install but you need to make some changes in kernel as it operates on the kernel level.
[cc] root@ubuntu:~# apt-get install quagga[/cc]
As discussed above, initially routing is disabled at kernel level in Ubuntu so we have to activate it on kernel level by the following commands
[cc] root@ubuntu:~# echo “net.ipv4.conf.all.forwarding=1” | sudo tee -a /etc/sysctl.conf [/cc]
[cc] root@ubuntu:~# echo “net.ipv4.conf.all.forwarding=1” | sudo tee -a /etc/sysctl.conf [/cc]
Now we have to cross check if the following parameters have been actually activated or not. So we will use the following command to verify this.
[cc] root@ubuntu:~# sysctl -p [/cc]
As you can see you have successfully enable packet forwarding in your Ubuntu server. Following are the files you need to check while configuring this routing suite.
- babeld.conf
- bgpd.conf
- bgpd.conf
- isisd.conf
- ospf6d.conf
- ospfd.conf
- ripd.conf
- ripngd.conf
- vtysh.conf
- zebra.conf
These configuration files are not placed initially in /etc/quagga/ so you can just simply copy these files from /usr/share/doc/quagga/examples/ directory.
Now you can copy these files to the required folder by the following command.
[cc] root@ubuntu:~# cp /usr/share/doc/quagga/examples/*.sample /etc/quagga/ [/cc]
Since all the files have been copied over to the the desired directory, you will have to change all the files one by one by renaming them and removing .sample extension from their names. Here are the commands you should be using to achieve this, appears a bit boring work, but if you can come up with any automated script to do this, please share it in comments section of the article so everyone reading this article should benefit.
[cc] mv babeld.conf.sample babeld.conf [/cc]
[cc] mv isisd.conf.sample isisd.conf [/cc]
[cc] mv ospfd.conf.sample ospfd.conf [/cc]
[cc] mv ripngd.conf.sample ripngd.conf [/cc]
[cc] mv zebra.conf.sample zebra.conf [/cc]
[cc] mv bgpd.conf.sample bgpd.conf [/cc]
[cc] mv ospf6d.conf.sample ospf6d.conf [/cc]
[cc] mv ripd.conf.sample ripd.conf [/cc]
[cc] mv vtysh.conf.sample vtysh.conf [/cc]
There is a restriction in Quagga that it runs under user “quagga” instead of root, so you have to change the ownership of the files inside directory /etc/quagga to “quagga” user. You don’t need to worry the user is automatically added when the package of Quagga is installed.
You can change the ownership by the following command.
[cc] root@ubuntu:/etc/quagga# chown quagga:quagga * [/cc]
Now coming to the last step in which you have to enable different protocols and daemons used in Quagga. The most important one is Zebra as it’s the core part of Quagga. Furthermore we will enable OSPF just for reference. Daemons can be enabled by making changes in the file /etc/quagga/daemons.
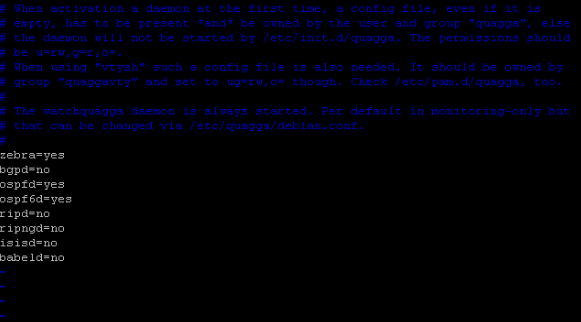
As you can see in the above screenshot how easy it is to enable protocols and we have enabled only two protocols to check the working of Quagga. Now you can start the Quagga service by the following command
[cc] root@ubuntu:/etc/quagga# /etc/init.d/quagga start [/cc]
Now you can check how many ports are in use for Quagga and which one is enabled at the moment by issuing the following command.
[cc] root@ubuntu:/etc/quagga# netstat -nlp | grep qua [/cc]
You can access Zebra module by the following command
[cc] root@ubuntu:/etc/quagga# telnet 127.0.0.1 zebra [/cc]
This will show you an output like the following screenshot.
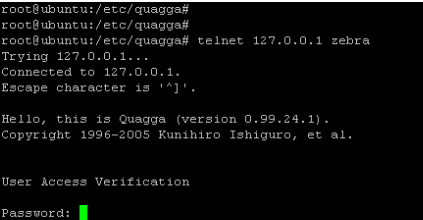
Congrats you have successfully installed Quagga on your system.
Conclusion
You can enable any module you want to ensure proper dynamic routing of your choice and configure the scenarios as much you want. Quagga is a feature rich opensource application, feel free to test and play around with it, do let us know in comments if you run into any issues or have any questions. Enjoy!


