
Today, we will learn how we can install Prestashop on our CentOS 7 Linux distribution.
Why CentOS?
CentOS Linux is a community-supported distribution derived from sources freely provided to the public by Red Hat for Red Hat Enterprise Linux (RHEL). As such, CentOS Linux aims to be functionally compatible with RHEL. The CentOS Project mainly changes packages to remove upstream vendor branding and artwork. CentOS Linux is no-cost and free to redistribute. Each CentOS version is maintained for up to 10 years (by means of security updates — the duration of the support interval by Red Hat has varied over time with respect to Sources released). A new CentOS version is released approximately every 2 years and each CentOS version is periodically updated (roughly every 6 months) to support newer hardware. This results in a secure, low-maintenance, reliable, predictable and reproducible Linux environment.
You can download CentOS from here. You can directly download the ISO file format disk image from here.
What is PrestaShop?
PrestaShop is a free shopping cart platform that helps small to large businesses to create and run a successful online store. PrestaShop is 100% free. This software is published under the Open Software License (OSL). It is written in PHP programming language with support for the MySQL database management system. More than 250,000 ecommerce sites run on PrestaShop. It supports many different payment gateway systems like PayPal, Google Checkout etc etc.
PrestaShop is supported by a community where you can take technical help regarding PrestaShop. Here is the official community link for you guys. Also you can have a look at the Prestashop blogs by visiting this link. To know more about the documentation of PrestaShop, please visit over here.
It has the following features
- Themes
- Modules
- Mobile-Responsive Design
- Full Featured Dashboard
- Easy Integration with Payment Gateway
- Google Analytics Integration
- Merchant Features
- Free support and many more.
Download latest PrestaShop from here. Or you can directly download it from here.
Prerequisites
To install Prestashop, we will need these following thing that needs to be installed or available on our CentOS 7 Linux server.
- Apache 1.3, Apache 2.x or Nginx as Web Server
- PHP 5.2+
- MySQL 5.0+ as Database
Required PHP libraries / modules
- GD
- CURL
- SimpleXML
- SOAP
To know more about server requirements to run Prestashop, please visit this page.
Make sure your firewall / iptables or SELinux is not blocking any port(s) which is required over here or you don’t have any problem with proper user permission.
To disable SELinux, type the following
setenforce 0
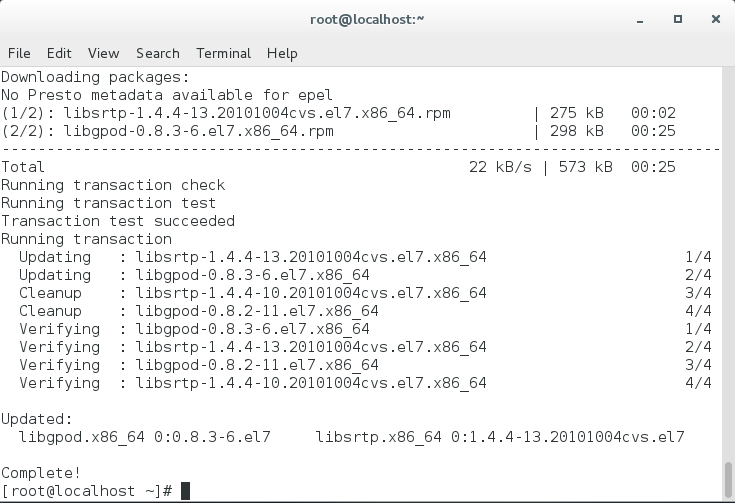
Let’s update the CentOS 7 Linux server first. This is a good practise to keep your server up to date. To do so, issue the below command one after another and wait till it gets updated. It will depends on your internet speed and it will take a long. So, please have patience.
sudo yum clean all
sudo yum -y update
You will see something like below image once you are done with it. Depending on how old your system softwares are or which packages are needs to be updated. The below image indicates an successful update and may require to reboot system as well.
Installing Apache as web server
To install Apache on your CentOS 7, issue the below command on your terminal.
sudo yum -y install httpd
This will download and install Apache as a web server on the system.
Let’s start Apache by issuing the below command.
sudo systemctl start httpd
Set Apache at start or booting time so after every reboot, it get started automatically without manual start.
sudo systemctl enable httpd
Test Apache
To test apache issue the below command.
sudo systemctl status httpd
This will show the status of Apache for you.
Or you can open a web browser and type “localhost” without the double quote in to the address bar. You will see something like this.
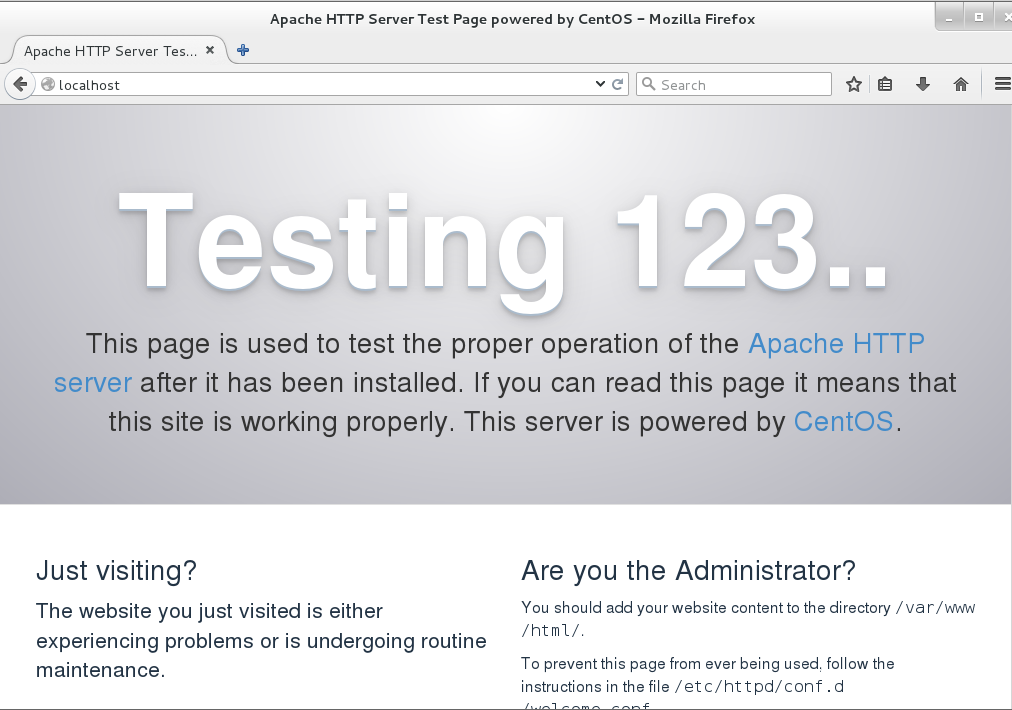
It indicates that our web server up and running 🙂
You may need to enable mod_rewrite module as well. Just open the file located on /etc/httpd/conf/httpd.conf by your favorite file editor and change the following line
AllowOverride None
to
AllowOverride All
We are done with Apache.
Installing MySQL / MariaDB
To install MySQL / MariaDB on to your system, issue the below command.
sudo yum install mariadb-server mariadb
This will download and install MySQL / MariaDB on to the system.
To start the MariaDB server, issue the below command.
sudo systemctl start mariadb
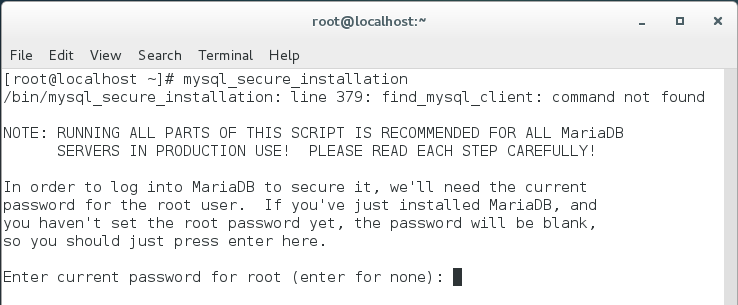
Now, we need to set the password for the “root” user of MySQL / MariaDB. Let’s do it by typing the following and this is must for security reason.
sudo mysql_secure_installation
You will see something like this. Hit Y to continue and type a complex password and remember it.
After setting the root password, you will see something like below image.
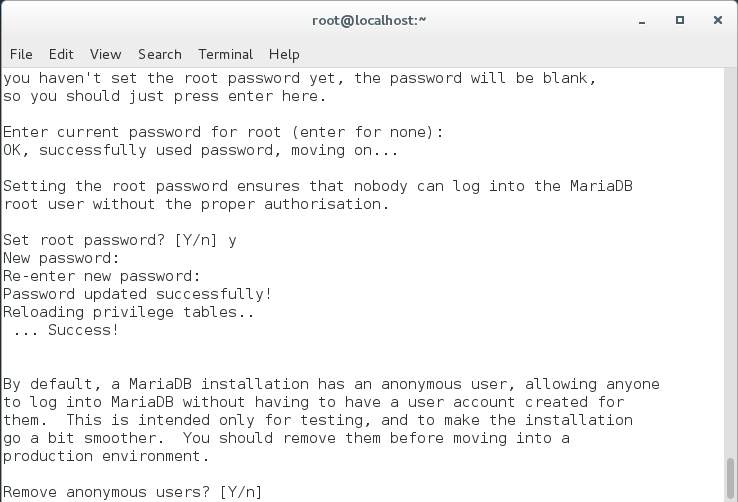
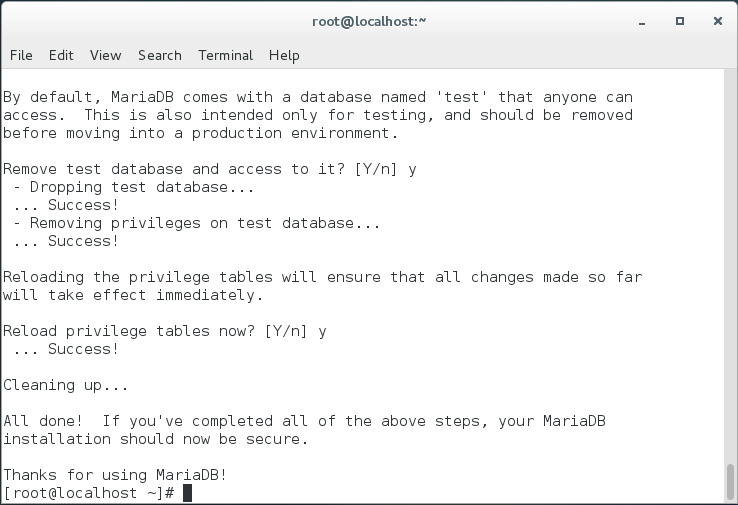
Now, you will get few prompts on your terminal with Y/N options.
Hit Y for the prompt “Remove anonymous users?”
Hit Y for the prompt “Disallow root login remotely?”
Hit Y for the prompt “Remove test database and access to it?”
Hit Y for the prompt “Reload privilege tables now?”
After finishing all the prompts, you will see something like below.
We are done with MySQL / MariaDB.
Installing PHP
To install PHP, open a terminal and issue the below command.
sudo yum -y install php php-mysql php-gd php-ldap php-odbc php-pear php-xml php-xmlrpc php-mbstring php-snmp php-soap php-mcrypt curl zlib
This will download and install PHP on your CentOS 7 system along with some others PHP modules which are required for Prestashop.
Installing phpMyAdmin
To install phpMyAdmin, issue the below command in the terminal.
sudo yum -y install epel-release
And then issue the below command again.
sudo yum -y install phpmyadmin
After installing PHP, we need to restart the Apache or other web server in order to work with PHP. Type the following to do so.
sudo systemctl restart httpd.service
To test whether you can access phpMyAdmin or not, open any web browser and type the following in the address bar.
localhost/phpmyadmin
You will see something like this.

We are done installing PHP.
Installing PrestaShop
Create a folder called prestashop and change directory to that prestashop folder.
mkdir prestashop
cd prestashop
Download the latest PrestaShop from here. After downloading, you will get a zip archive format file with a name “prestashop_1.6.1.4.zip”.
Let’s unzip it by typing the below command on the terminal.
sudo unzip prestashop_1.6.1.4.zip
After unzipping the zip archive file, you will get a folder name “prestashop_1.6.1.4”. Rename the “prestashop_1.6.1.4” folder to prestashop.
Now, copy this “prestashop” folder to the /var/www/html folder path by doing the following.
sudo cp -avr prestashop /var/www/html
Now, move to the /var/www/html folder and issue the below two commands.
sudo chmod -R 775 prestashop
sudo chown apache:apache prestashop
Now, type the following in your web browser address bar.
localhost/prestashop
You will see a window like the below image.
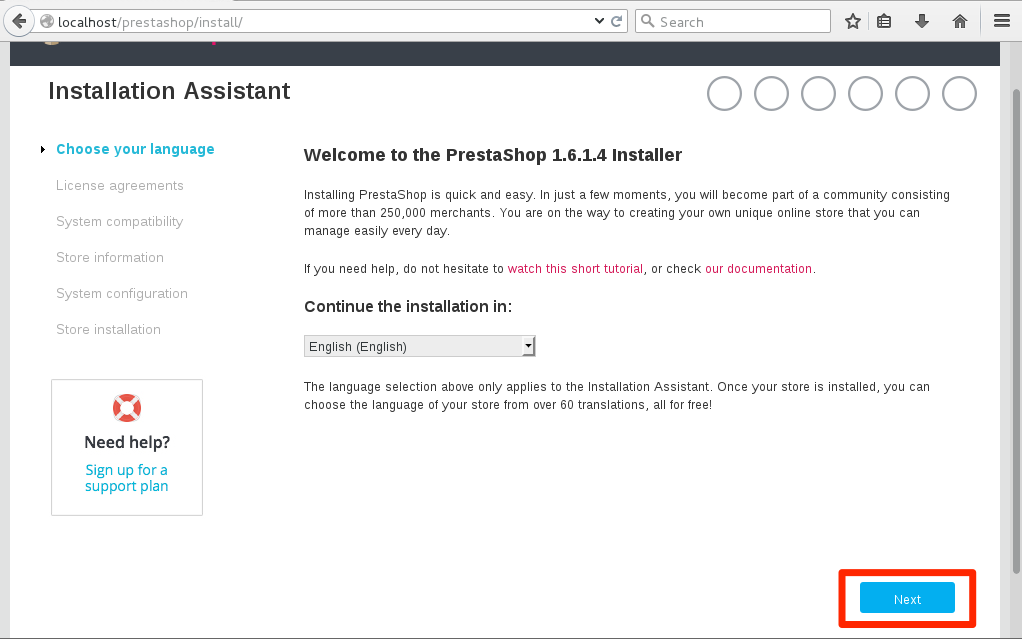
Click “Next” button to begin installation. After clicking “Next” button, you will see a window like below image. Put a tick mark for agreeing the license agreement and click “Next” button.
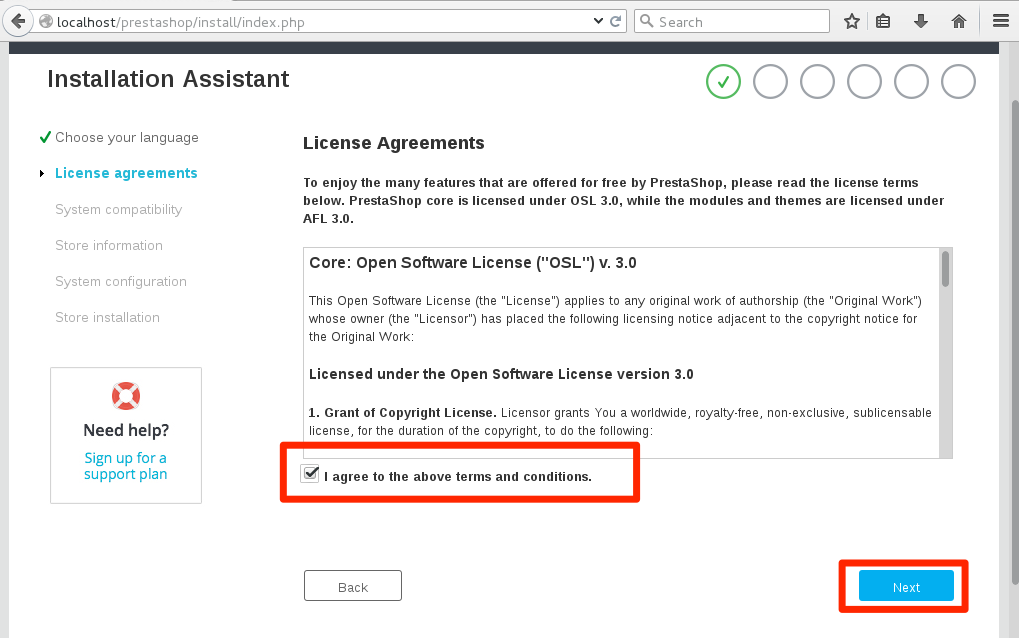
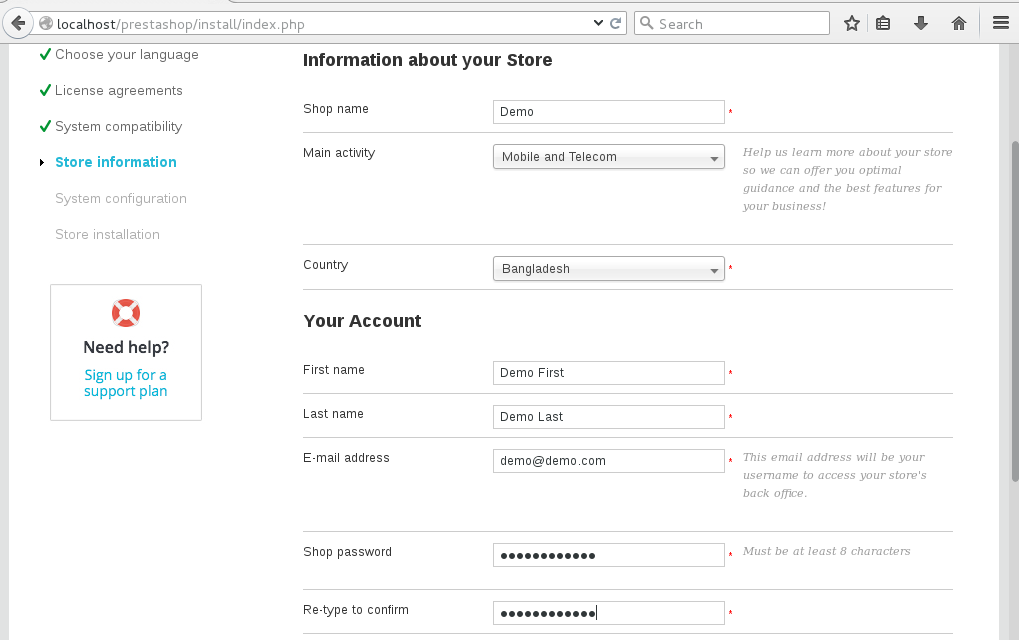
Now, you will see something like this below image.
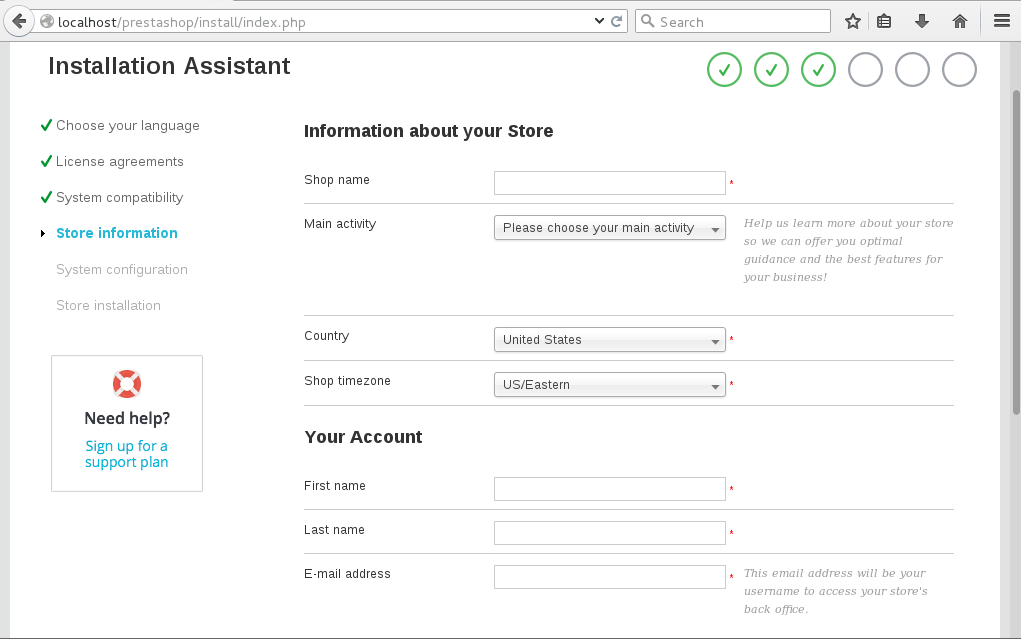
Fill it up to meet your requirements. Type a shop name and select your main activity from the drop down list which fits you most. Rest other is self explanatory. Enter a password and confirm it and this password will be used later on to access the backend admin panel of your shop driven by PrestaShop. The below image is a demo so that you can have an idea of how to fill this window. Once you are done filling it up, click “Next” button.
This time, you will see a window like this.
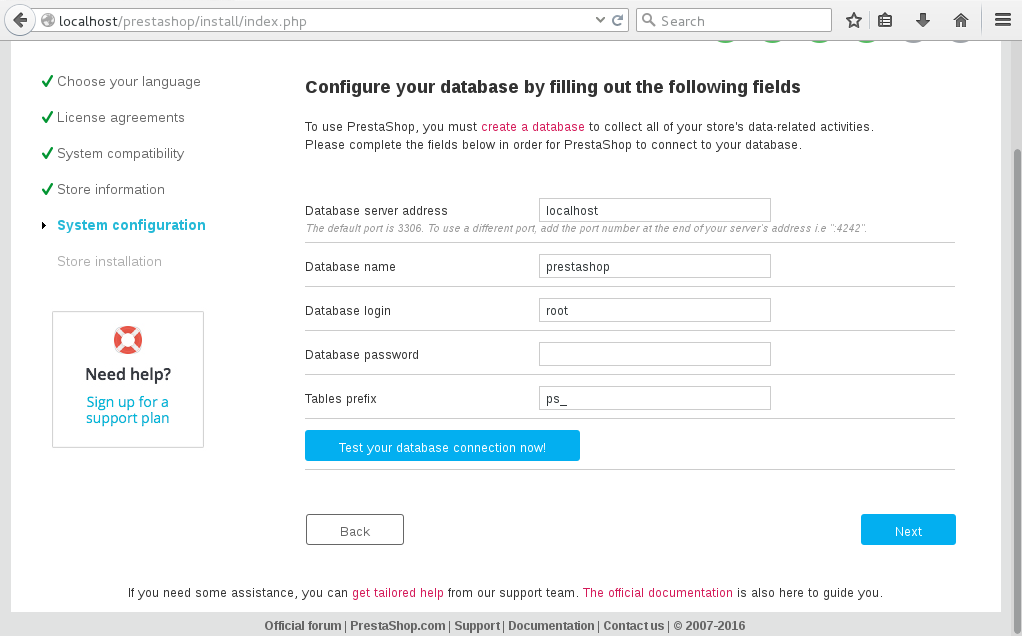
Now, we need to create a database with a name whatever you wish for installing Prestashop.
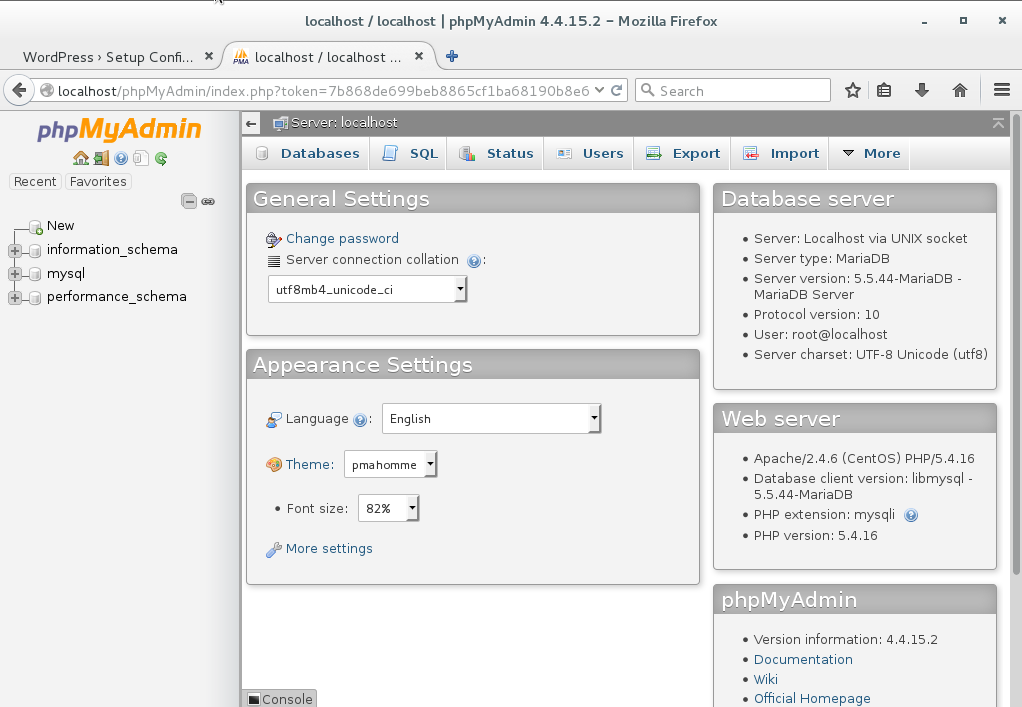
Let’s create the database then. To do so, open the web browser and type the following.
localhost/phpmyadmin
Then it will ask for a user name & password. Type “root” as user name and the password that you had set earlier while installing MySQL/ MariaDB. I hope that you can remember that. Once you are logged in, you will see something like this.
Now click New from the left top corner marked as red in the following image.
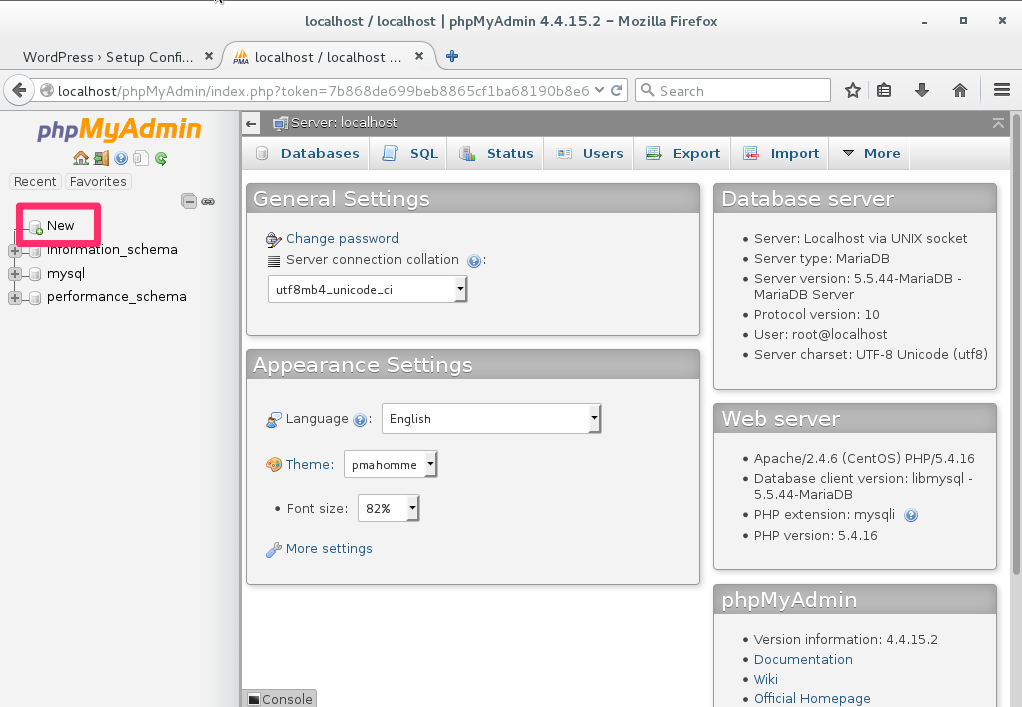
After clicking New, you will see something like below image. Type a database name and click “Create” button. Here, I am typing iftekher for my database name. You can type whatever you wish.
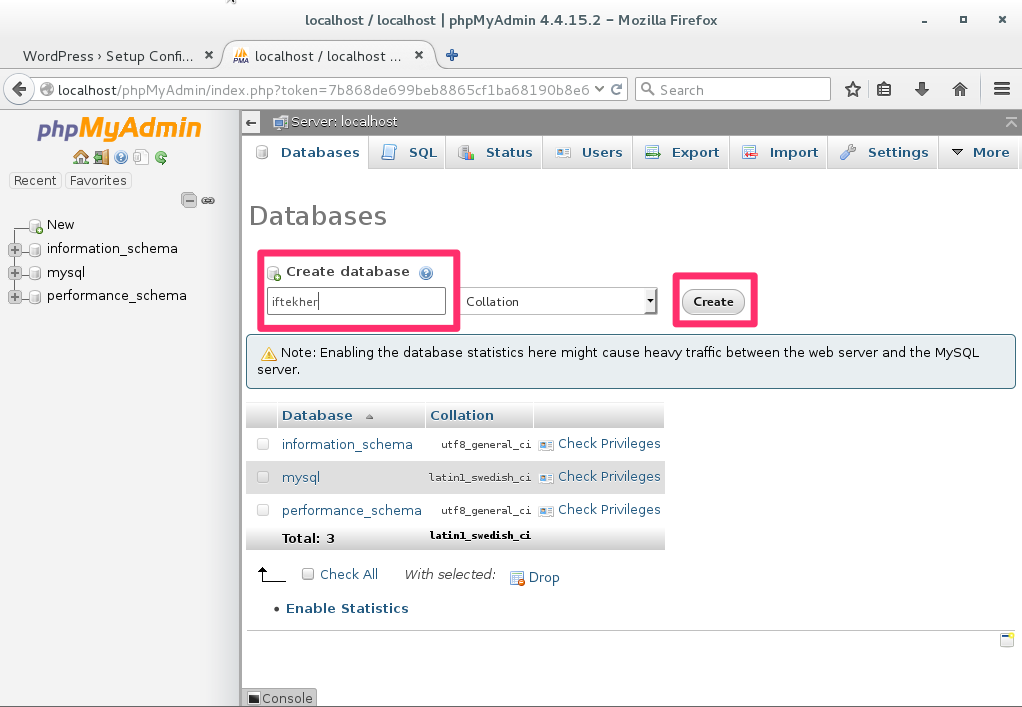
We are done creating our database for installing Prestashop.
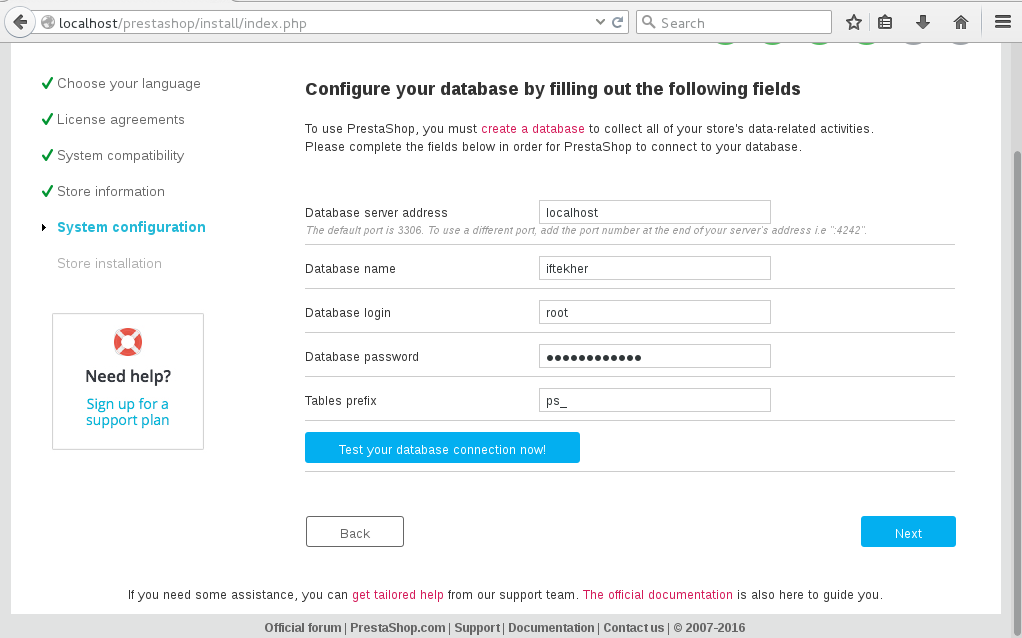
Now, move back to the Prestashop installation. Fill the window just like the below image. Type “localhost” for Database server address field, type your Database name ( I am typing “iftekher” for my Database name ) that you created earlier by using PhpMyAdmin, “root” for Database Login field and the Database password for your root user of MySQL. You can leave Tables prefix field as it is or you can change it whatever you wish and click “Next” button.
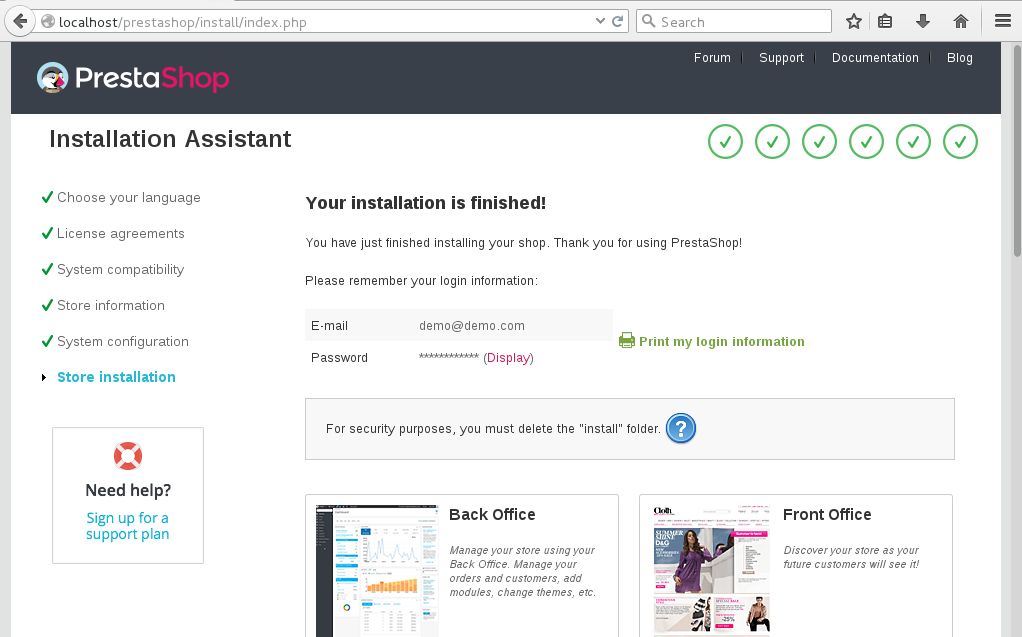
Now, setup will start to install PrestaShop. It may take some time to finish the installation of PrestaShop. After successful installation, you will see a window like this which indicates that we are done installing PrestaShop on our CentOS 7 Linux server.
We need to delete the installation folder of Prestashop first. To do so, open a terminal and issue the below commands.
sudo cd /var/www/html/prestashop
sudo rm -rf install
Now, type the following in your web browser address bar and you will see something like this.
localhost/prestashop

To access the Prestashop admin panel, type the following in the web browser address bar.
localhost/prestashop/admin808jmnmhc
For login into the admin panel, use the email address and the password that you entered earlier while you set up Prestashop. After successful login, you will see something like this.
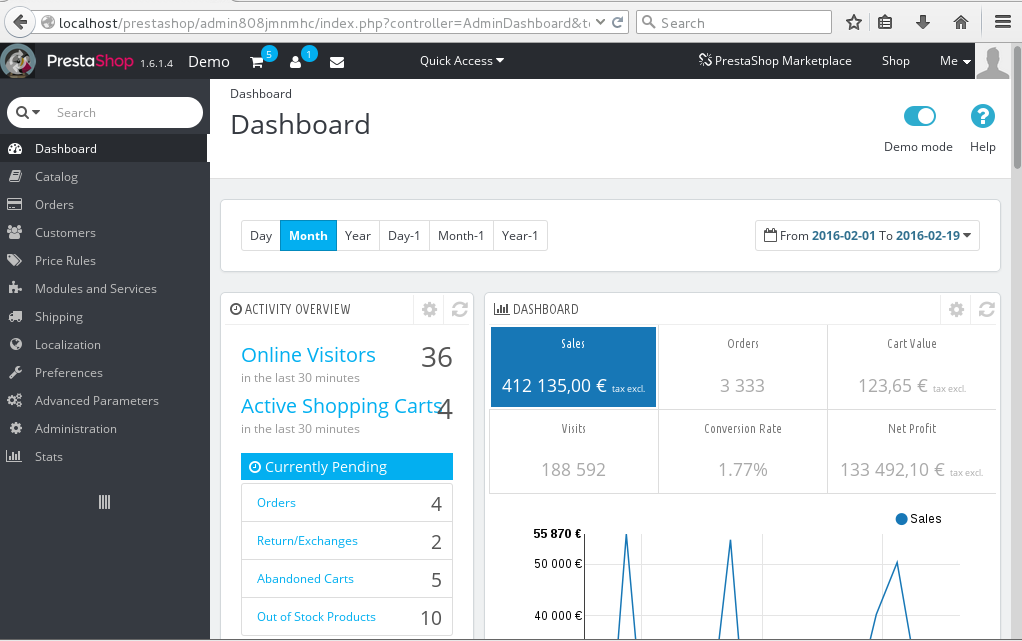
Explore it by yourself now by using the Prestashop backend admin panel.
We are done with our today’s tutorial.
Have a great day.


