
You might have heard the news about Mandriva’s liquidation almost a month ago, now the OpenMandriva team has paid their tribute to Mandriva by releasing the new operating system OpenMandriva Lx 2014.2, also known as “The Scion”. It comes with Linux 3.18 kernel and KDE version 4.14.3. It’s been in news from last few hours. Lets see how we can install this new operating system.
Installing “The Scion”
There are couples of ways through which you can initiate the install of this OS.
(a) Download OpenMandriva Lx 2014.2 and burn it to DVD/USB drive and boot your system using this DVD/USB.
(b) Create Virtual machine on your current operating system using tools like Oracle Virtual Box and boot your Virtual machine using ISO of this operating system.
Whichever method you choose, here is the very first screen you should see when booting your system using this ISO.

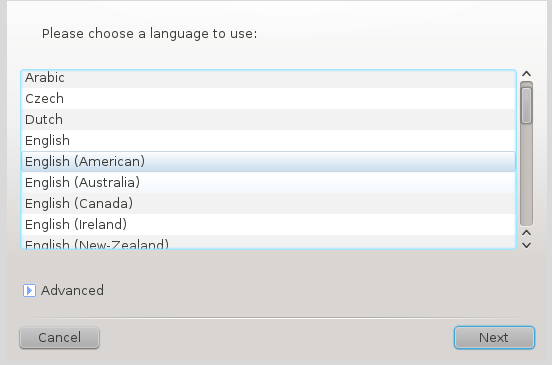
From here choose “Install OpenMandriva Lx” option. Select your preferred language for the installation on next step.
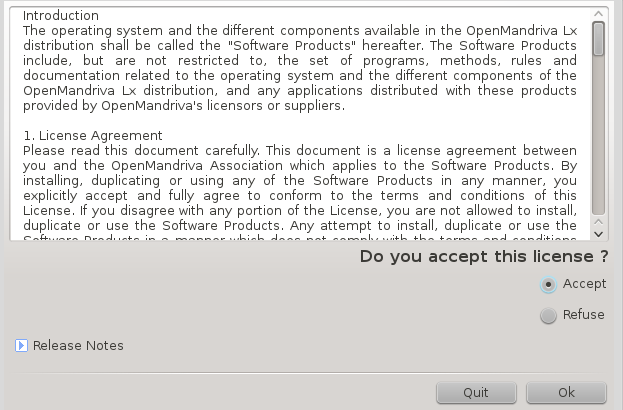
Accept the License Agreement to proceed further with installation.
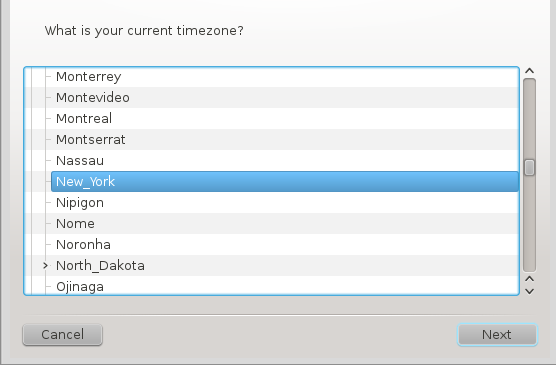
Select your timezone.
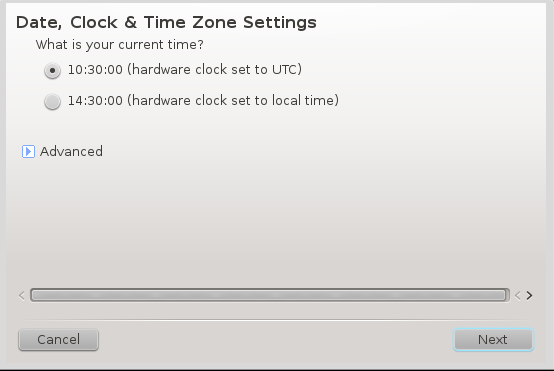
Select Date and Time settings from here.
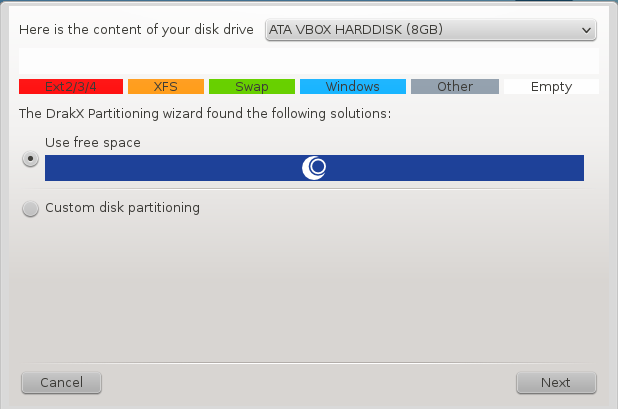
We are on most important stage of installation now. From here specify how you want disk partition to take place, default option should work for most of us, but if you are looking to setup custom partition settings, choose “Custom disk partitioning” option from here.
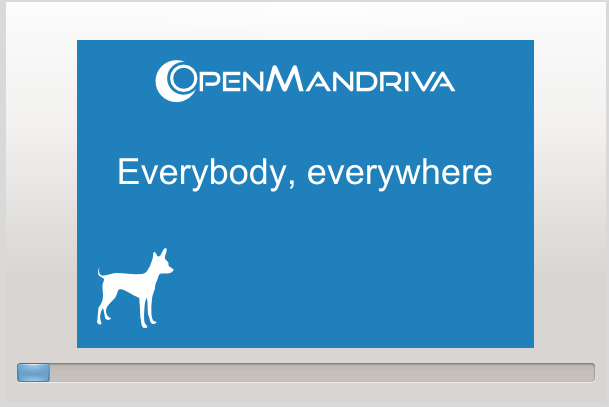
That’s all, OpenMandriva installation is in progress now. Sit tight, it might take a bit to complete.
As soon as installation is complete, reboot and start using the lightweight desktop 🙂

Conclusion
At first look, OpenMandriva Lx looks to be feature rich operating system, graphical user interface is impressive and operating system speed is optimal as well. Hope you enjoyed this article, do let us know in comments please 🙂


