
Introduction
If you want to remote access into your Ubuntu 14.04 server, VNC might be the best option. VNC “Virtual Network Computing”, is a program that that allows users to a remote access to linux servers. VNC allows you to open a remote GUI session to your server and thus providing you with a full graphical interface accessible from any remote location.
There are many ways to install VNC. The VNC server we will be using is vnc4server, a fast and lightweight remote control package. The only requirement is that you need to install VNC-Client on the connecting OS, we’ll discuss that in a later entry.
Prerequisites
This guide explains the installation and configuration of a VNC server on Ubuntu 14.04 server. So you need to have a fresh installed Ubuntu14.04 server in your vps.
Also you need to have SSH access into your server to continue with the installation of your VNC server.
Let’s start the installation.
Step One — Install required packages
Before you start the installation, you need to be the root user and to make sure that no VNC-server are installed as this could give errors in future mostly that clipboard sharing between the host Ubuntu Server & vnc-client machine. You can check it as follows:
dpkg -l | grep vnc
Please uninstall if tightvnc or anything similar installed.
There are a just a couple of packages to be dealt with.
By default, most Linux server installations will not come with a graphical desktop environment.In this case you need to install one that you can work with. In this example, we will install XFCE4.
 apt-get install gnome-core xfce4 firefox
 apt-get install vnc4server
To make sure that vnc server is installed, type this command:
dpkg -l | grep vnc
Sample output:
ii vnc4server 4.1.1+xorg4.3.0-37ubuntu5 amd64 Virtual network computing server software
Step Two — Configure VNC Server
In this step you need to create userd that needs to gain access to the VNC server. In my case i create user anism.
root@ubuntutest:~# adduser anism
For each user that needs to gain access to the VNC server, you must set a VNC password for them.
root@ubuntutest:~# adduser anism
Adding user `anism' ...
Adding new group `anism' (1001) ...
Adding new group `anis' (1001) ...
Adding new user `anism' (1001) with group `anism' ...
Creating home directory `/home/anism' ...
Copying files from `/etc/skel' ...

Enter new UNIX password: <--yourpassword
Retype new UNIX password: <--yourpassword
passwd: password updated successfully
Changing the user information for anism
Enter the new value, or press ENTER for the default
    Full Name []: <--ENTER
    Room Number []: <--ENTER
    Work Phone []:<--ENTER
    Home Phone []:<--ENTER
    Other []:<--ENTER
Is the information correct? [Y/n]<--ENTER
After that, you need to start the vncserver with the user, for this user
su - anism
anism@ubuntutest:~$ vncserver

You will require a password to access your desktops.

Password:<--Put your VNC password
Verify:<--Put your VNC password
Password too long - only the first 8 characters will be used
xauth:  file /home/anism/.Xauthority does not exist

New 'server1:1 (anism)' desktop is server1:1

Creating default startup script /home/anism/.vnc/xstartup
Starting applications specified in /home/anism/.vnc/xstartup
Log file is /home/anism/.vnc/server1:1.log
Before we begin configuring our new xstartup file, let’s back up the original in case we need it later:
cp ~/.vnc/xstartup ~/.vnc/xstartup.bak
> ~/.vnc/xstartup
vi ~/.vnc/xstartup
Then make the configuration as follows:
#!/bin/sh
unset SESSION_MANAGER
unset DBUS_SESSION_BUS_ADDRESS
startxfce4 &

[ -x /etc/vnc/xstartup ] && exec /etc/vnc/xstartup
[ -r $HOME/.Xresources ] && xrdb $HOME/.Xresources
xsetroot -solid grey
vncconfig -iconic &
You’ll need to first stop the VNC server instance that is running on port 5901
vncserver -kill :1
To easily control our new VNC server, we should set it up as an Ubuntu service.
You need to make the startup script for the vncserver like this:
su
vi /etc/init.d/vncserver
After that copy this configuration and save it into the file
#!/bin/bash

unset VNCSERVERARGS
VNCSERVERS=""
[ -f /etc/vncserver/vncservers.conf ] && . /etc/vncserver/vncservers.conf
prog=$"VNC server"
start() {
 . /lib/lsb/init-functions
 REQ_USER=$2
 echo -n $"Starting $prog: "
 ulimit -S -c 0 >/dev/null 2>&1
 RETVAL=0
 for display in ${VNCSERVERS}
 do
 export USER="${display##*:}"
 if test -z "${REQ_USER}" -o "${REQ_USER}" == ${USER} ; then
 echo -n "${display} "
 unset BASH_ENV ENV
 DISP="${display%%:*}"
 export VNCUSERARGS="${VNCSERVERARGS[${DISP}]}"
 su ${USER} -c "cd ~${USER} && [ -f .vnc/passwd ] && vncserver :${DISP} ${VNCUSERARGS}"
 fi
 done
}
stop() {
 . /lib/lsb/init-functions
 REQ_USER=$2
 echo -n $"Shutting down VNCServer: "
 for display in ${VNCSERVERS}
 do
 export USER="${display##*:}"
 if test -z "${REQ_USER}" -o "${REQ_USER}" == ${USER} ; then
 echo -n "${display} "
 unset BASH_ENV ENV
 export USER="${display##*:}"
 su ${USER} -c "vncserver -kill :${display%%:*}" >/dev/null 2>&1
 fi
 done
 echo -e "\n"
 echo "VNCServer Stopped"
}
case "$1" in
start)
start $@
;;
stop)
stop $@
;;
restart|reload)
stop $@
sleep 3
start $@
;;
condrestart)
if [ -f /var/lock/subsys/vncserver ]; then
stop $@
sleep 3
start $@
fi
;;
status)
status Xvnc
;;
*)
echo $"Usage: $0 {start|stop|restart|condrestart|status}"
exit 1
esac
To ensure that the VNC server will be able to use this new startup file properly, we’ll need to grant executable privileges to it:
chmod +x /etc/init.d/vncserver
Now try using the service and command to start a new VNC server instance:
service vncserver start
In VNC you can define a separate access session for each particular user. For this we will use VNC configuration file:
mkdir -p /etc/vncserver
vi /etc/vncserver/vncservers.conf
To configure VNC for a user “anism” /etc/vncservers/vncservers.conf file insert the following lines:
VNCSERVERS="1:anism"
VNCSERVERARGS[1]="-geometry 1024x768"
Here your port comes to be 5901 & 1024×768 resolution for the VNC client, you can choose resolution of your own choice.
Now I will add it into boot startups:
root@ubuntutest:~# update-rc.d vncserver defaults 99
 Adding system startup for /etc/init.d/vncserver ...
   /etc/rc0.d/K99vncserver -> ../init.d/vncserver
   /etc/rc1.d/K99vncserver -> ../init.d/vncserver
   /etc/rc6.d/K99vncserver -> ../init.d/vncserver
   /etc/rc2.d/S99vncserver -> ../init.d/vncserver
   /etc/rc3.d/S99vncserver -> ../init.d/vncserver
   /etc/rc4.d/S99vncserver -> ../init.d/vncserver
   /etc/rc5.d/S99vncserver -> ../init.d/vncserver
Finally reboot your server.
reboot
Step Four — Connect to Your VNC Desktop with VNC Client
To test your VNC server, you’ll need to use a client.
If you are using Windows, you could use TightVNC, RealVNC, or UltraVNC. Mac OS X users can use the built-in Screen Sharing, or can use a cross-platform app like RealVNC.
You download VNC client from this link: http://www.realvnc.com/download/viewer/
Now I am going to connect with the VNC server through my VNC-client
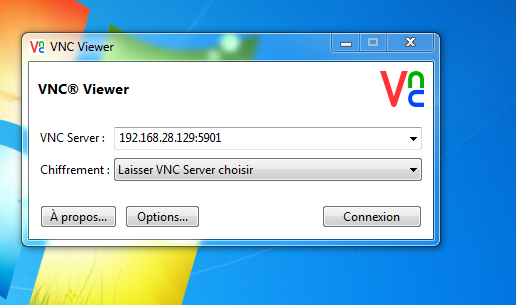
You will be ask for the password as follows:
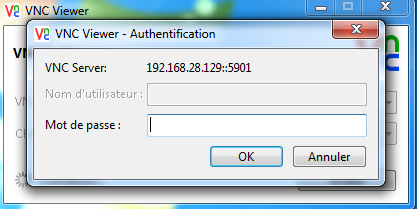
Enter the password as VNC password that you had set for the user “anism” on the server.
Now you are logged into the GUI of your server.
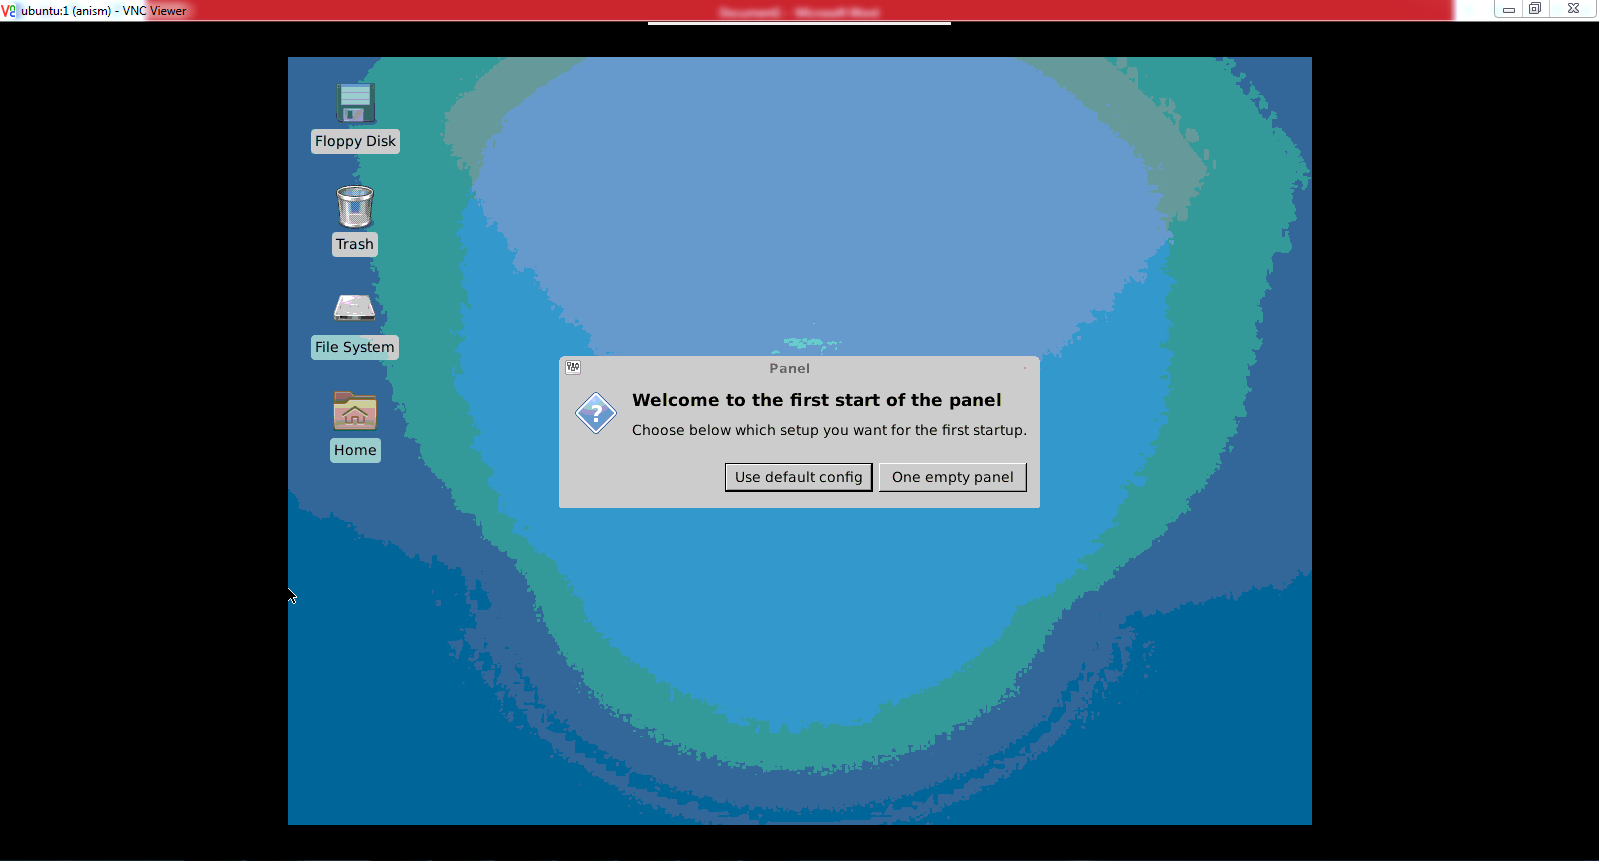
You can choose Use default config:
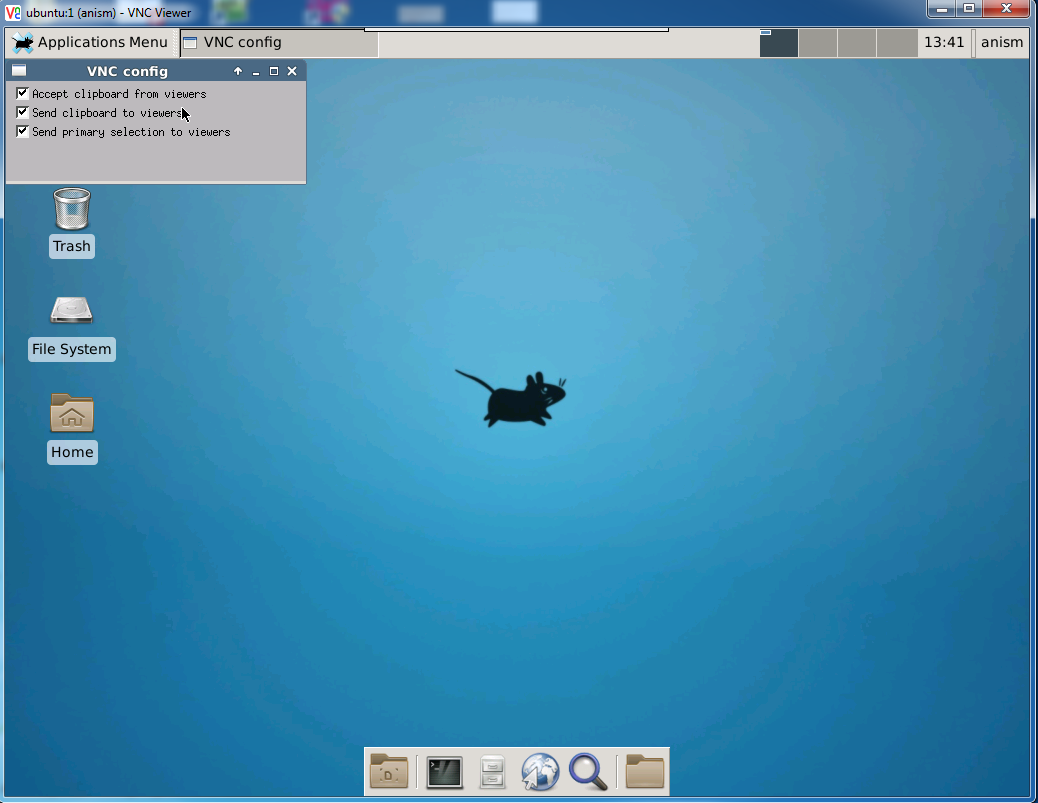
Enjoy you have configured VNC-server successfully.


