
Today, we will come to know how we can install and configure arno iptables on Ubuntu 14.04 LTS. This is related to security hardening of your server. A good System Administrator must secure his Linux driven servers. There are many ways we can secure our servers. Setting up a good solid firewall is an essential step to take in securing any modern operating system according to your needs. I will show you how to install & Configure arno iptables On Ubuntu 14.04 LTS for securing your servers.
We choose Ubuntu 14.04.3 LTS Linux as this is the latest Long Term Supported Ubuntu Linux distribution. Ubuntu is very easy to work with and has all the beauty that every Linux distribution has.
What is iptables?
Iptables requires elevated privileges to operate and must be executed by user root, otherwise it fails to function. Iptables is a user-space application program that allows a system administrator to configure the tables provided by the Linux kernel firewall (implemented as different Netfilter modules) and the chains and rules it stores. Different kernel modules and programs are currently used for different protocols; iptables applies to IPv4, ip6tables to IPv6, arptables to ARP, and ebtables to Ethernet frames.
We can call it as the basics of Firewall in Linux in general. Iptables is a rules driven firewall system and is normally available pre-installed on most Linux systems for controlling the incoming and outgoing packets. By-default, iptables runs without any rules or policies so we can create, add, edit rules to it according to our needs.
What is arno iptables?
It’s a single & multi-homed firewall script with DSL/ADSL support. It is written by Arno van Amersfoort and dedicated to his father. This program is a free software and available under GNU General Public License agreement. This is the github link for the project. For more details, you can visit the author’s website as well.
It’s a very secure stateful filtering firewall which supports Masquerading (NAT) and SNAT. To learn about all the features, please visit this link.
Here, I will show how to configure arno iptables with two interfaces. Which means, I have two wired LAN / NIC (with RJ 45 port) card already installed and IP address has been already assigned to those interfaces. One will be external and one will be internal interfaces. This two interfaces are normally known as eth0 & eth1. I hope you already know that 🙂
# STEP 1
Let’s update the repository for packages lists by issuing the following command in the terminal. It’s a good practice to do so whenever you are installing something on your server. It is not mandatory but it will make your server packages up to date.
To do so, open a terminal on your Linux and issue the following command
sudo apt-get update
If you are using CentOS, RedHat or Fedora Linux distribution, please use the following command to get updated.
sudo yum update
# STEP 2
Let’s install arno iptables. Type the following command in the terminal to install it. Hit y/Y to continue.
sudo apt-get install arno-iptables-firewall
While installing arno iptables, it will show you a window like following with a Yes / No options.

Select or hit Yes to continue.
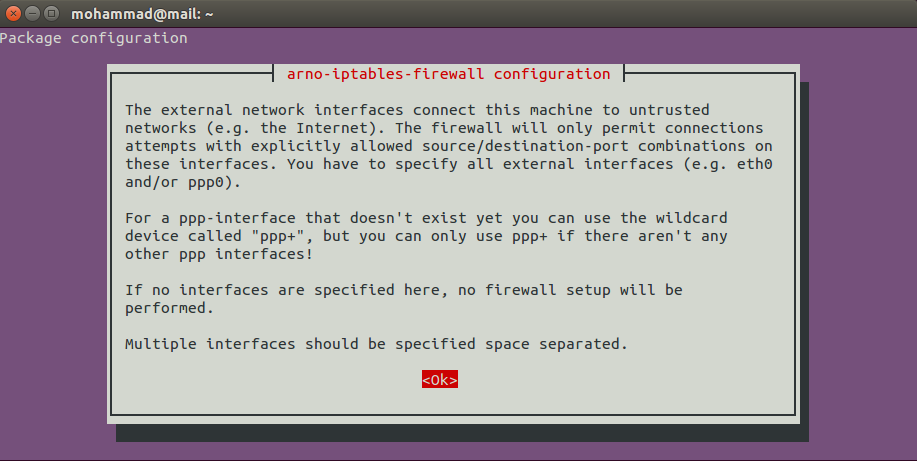
Now, you will see something like below image. Select OK to continue.
# STEP 3
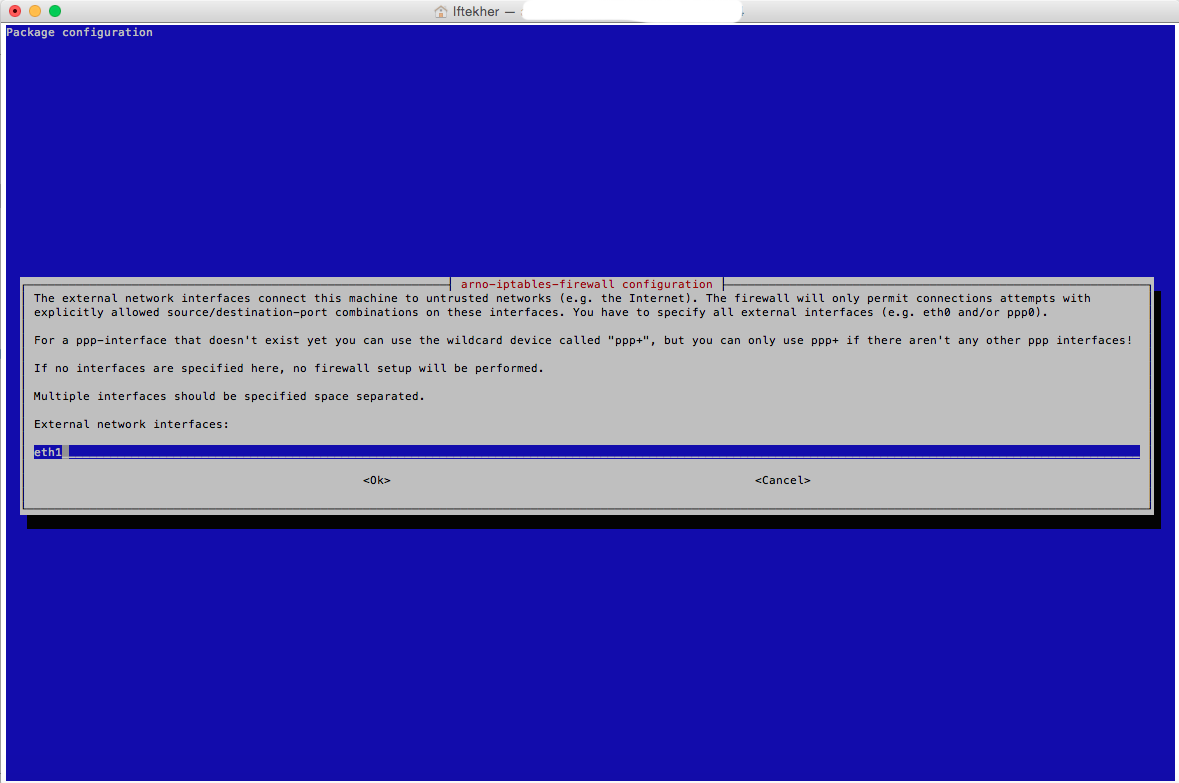
Now, you will see a window like below. Enter your external network interface card alias name. For me, it is eth1. So, I am putting eth1 over here for my external interface card.
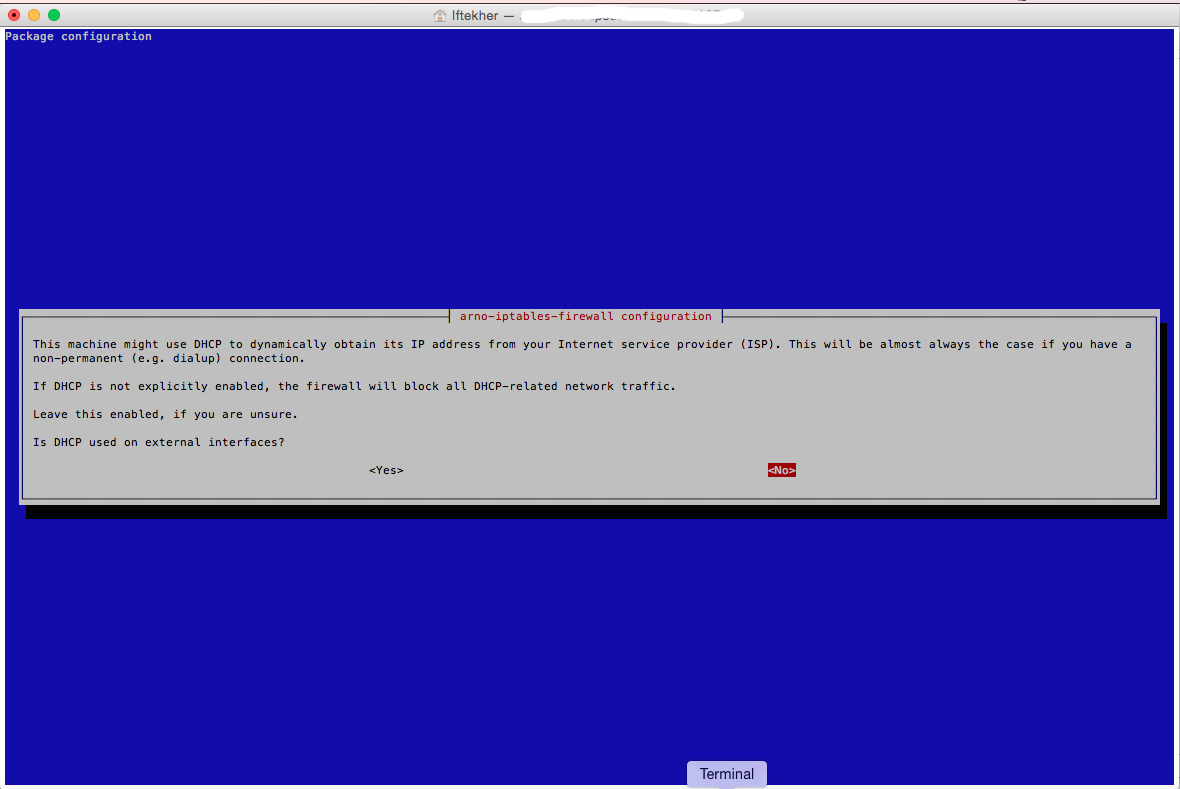
Then, you will get a new window where it will ask that whether the external interface is getting IP address from a DHCP server or not. For me, it is not. My external interface card IP address is manually/statically assigned. So, I am selecting NO.
# STEP 4
The next window heading tells the story. The default firewall policy is to deny all incoming traffic on the external interfaces. Note that, this is for TCP protocols only. Please type your port numbers which will be opened by the firewall. I am typing according to my needs and you should open your desired ports for the external interface.
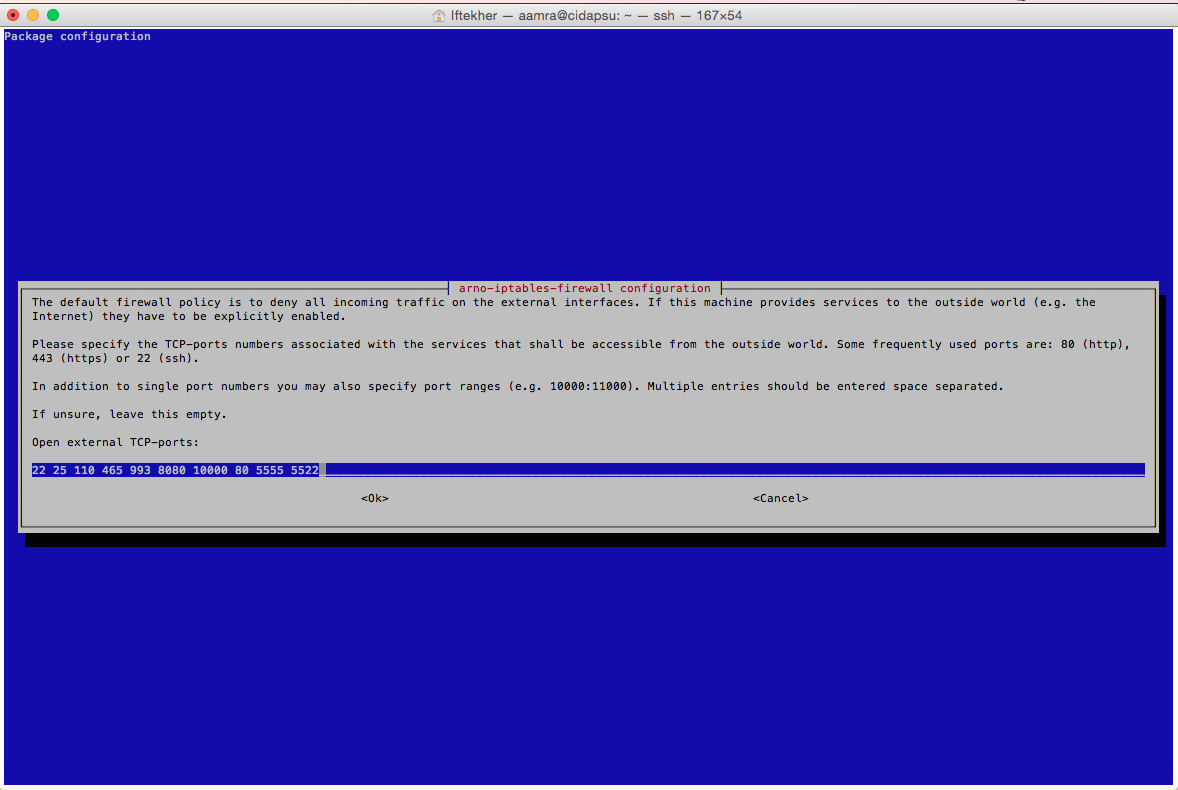
You can see that I am opening some commonly known ports like 22 (SSH), 25 (SMTP), 8080 (Proxy), 10000 (webmin) and few other TCP ports according to my requirements. You should type your desired TCP port numbers over here. Hit OK once you are done.
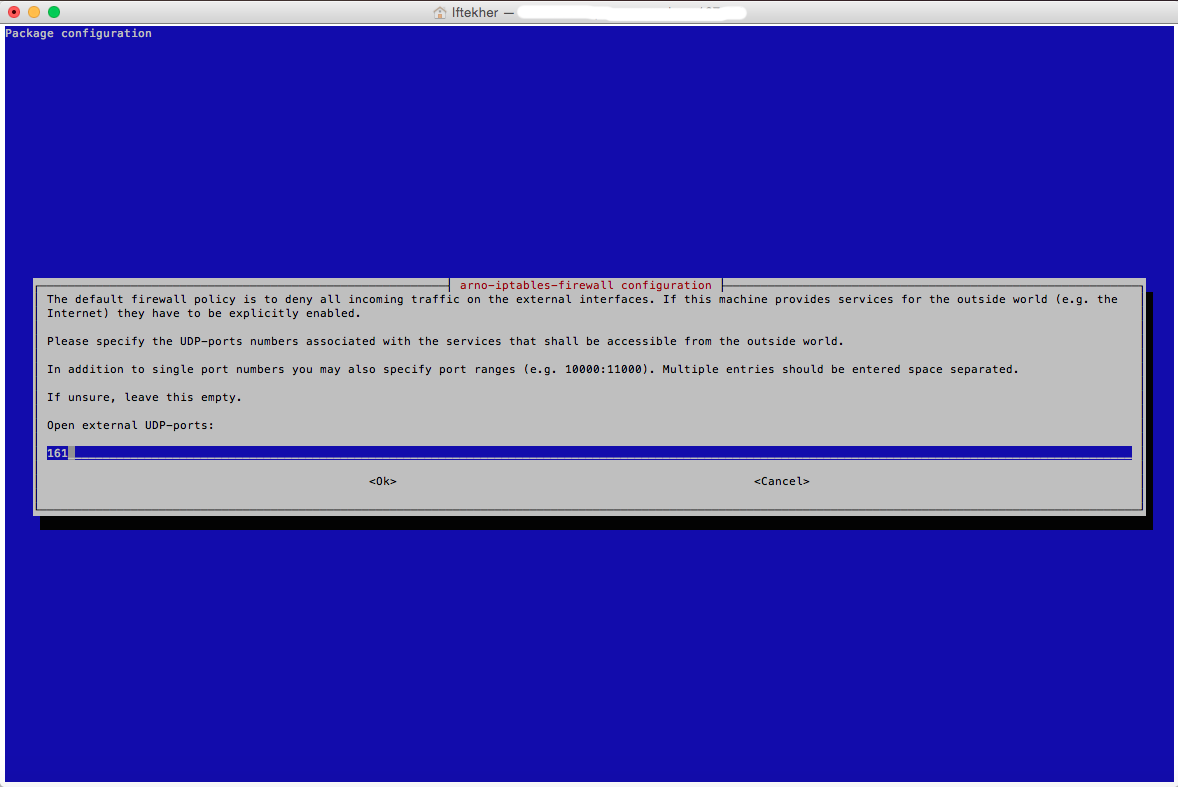
The next window is almost similar like the previous one. But it is related to UDP ports. It will open your desired UDP ports on the external interface card. I am typing my one over here. You should type your’s desired UDP port to be opened for the external interface. I am opening 161 for my purpose.
# STEP 5
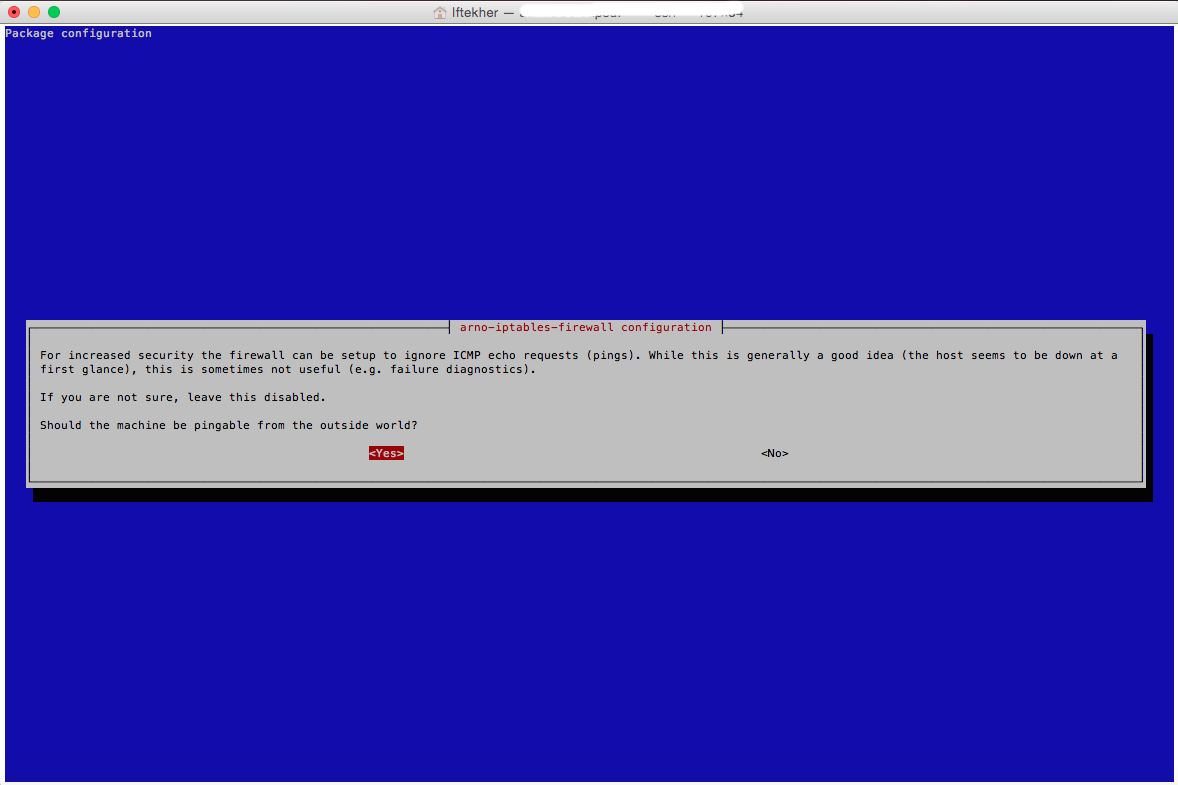
The next window is all about ping/ICMP for your server from outside of the world. I am selecting YES cause I want to ping my server from anywhere from the outside world. If you don’t want to ping your server from the outside world, select NO.
# STEP 6
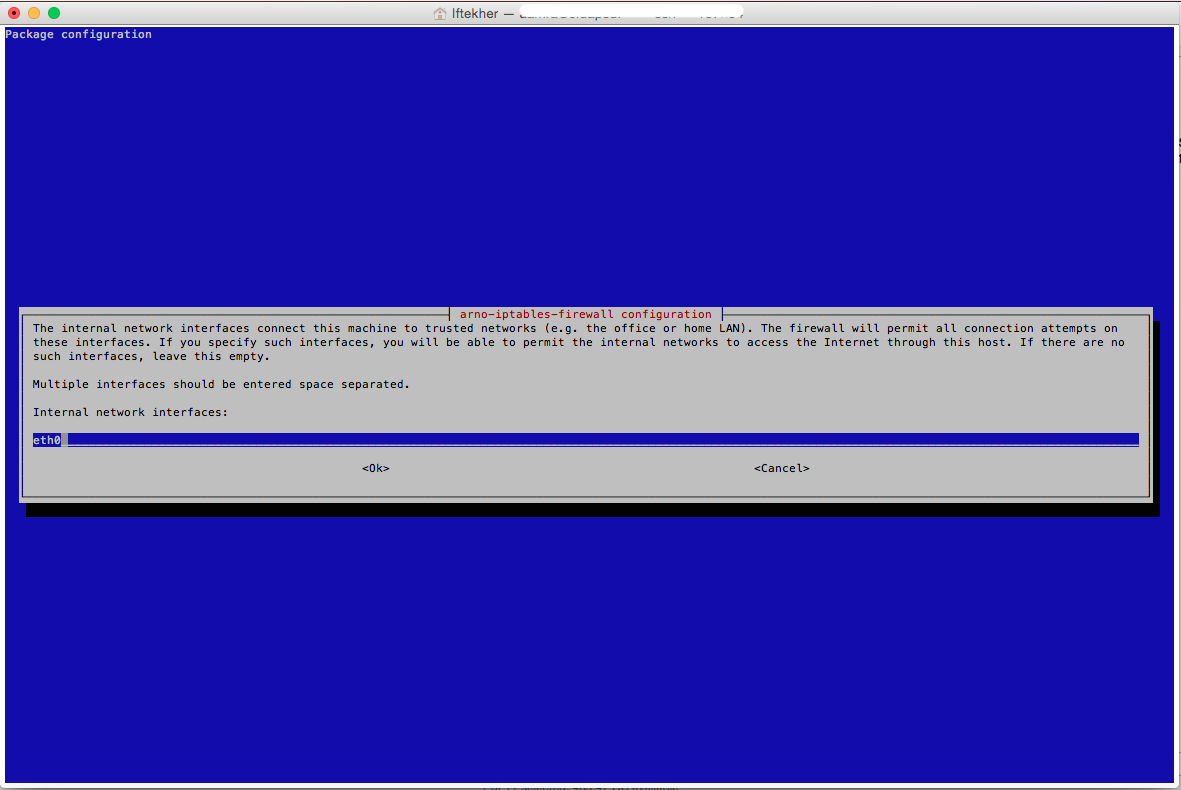
Now, enter the name of your internal network interface card. Mine is eth0. Enter your own internal network interface ethernet card alias name. This is normally connected to your private internal LAN.
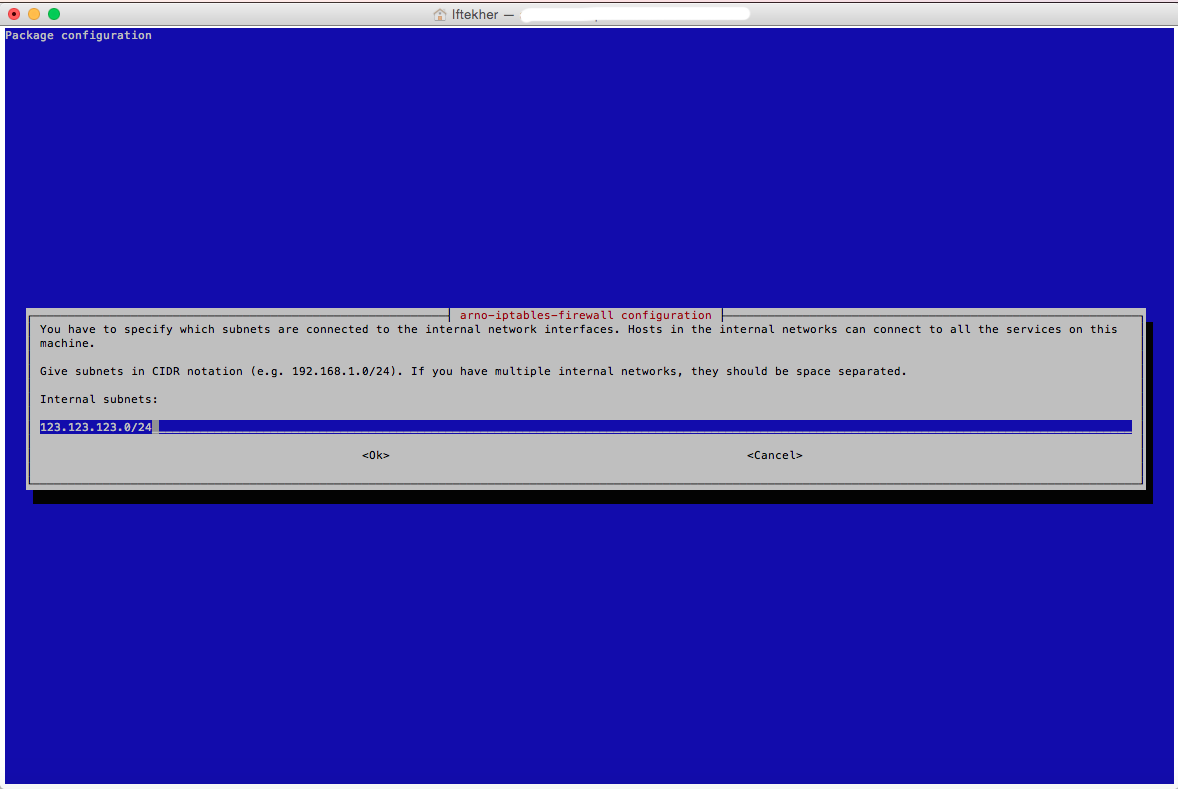
Now enter your internal subnets ip address with proper CIDR (Classless Inter-Domain Routing) values. I am entering 123.123.123.0/24 for mine. You may have 192.168.1.0/24.
Now, enable NAT (Network Address Translation). This is required if you want to get internet access from your internal network (LAN). This is a very common method to connect to internet via a single public/real IP by using NAT. I am enabling it for me by selecting YES.

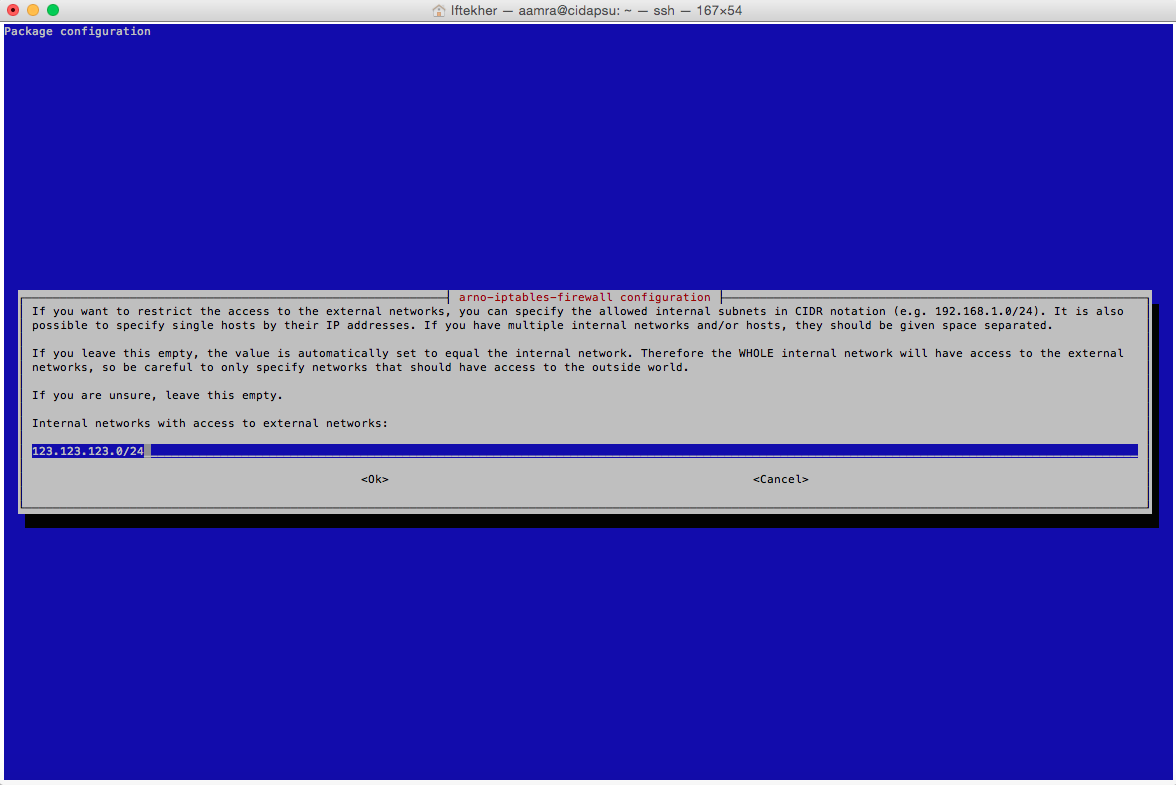
The next window of the wizard is for internal networks with access to external networks. I am using 123.123.123.0/24 for mine. Please use your own.
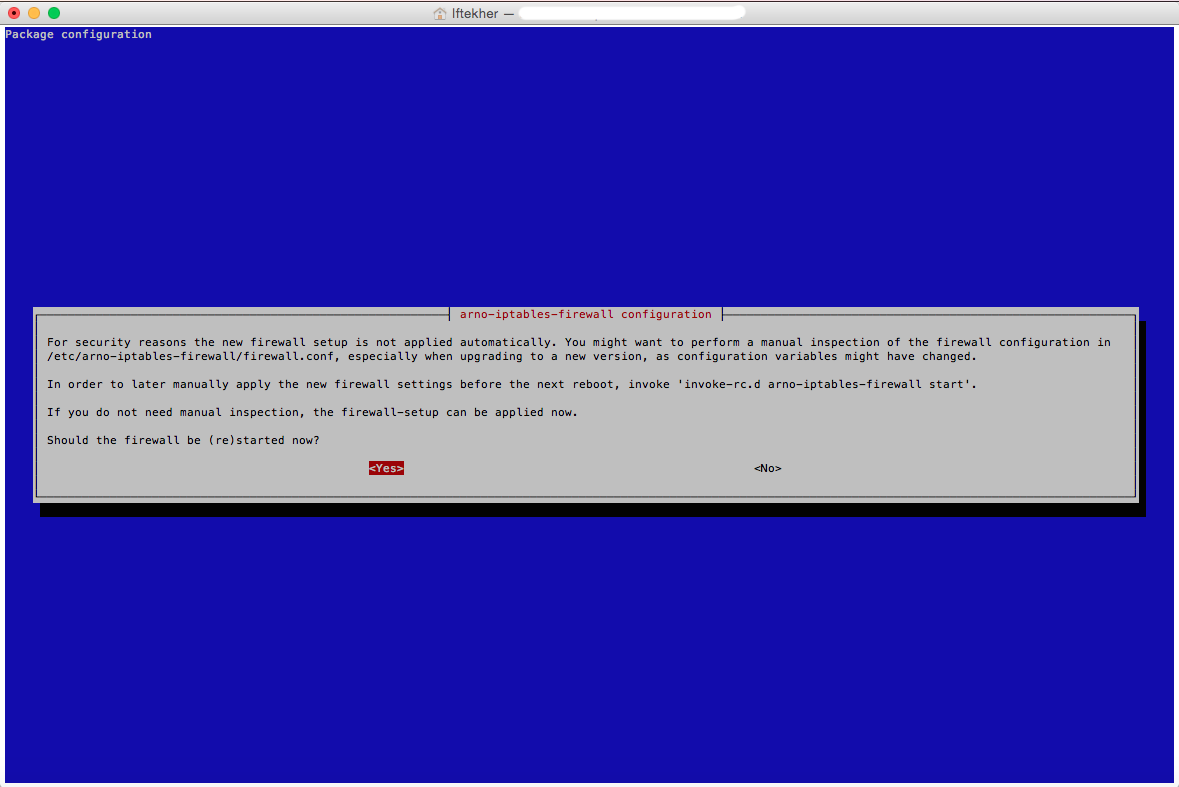
Let’s restart the firewall so that our new applied rules can take place.
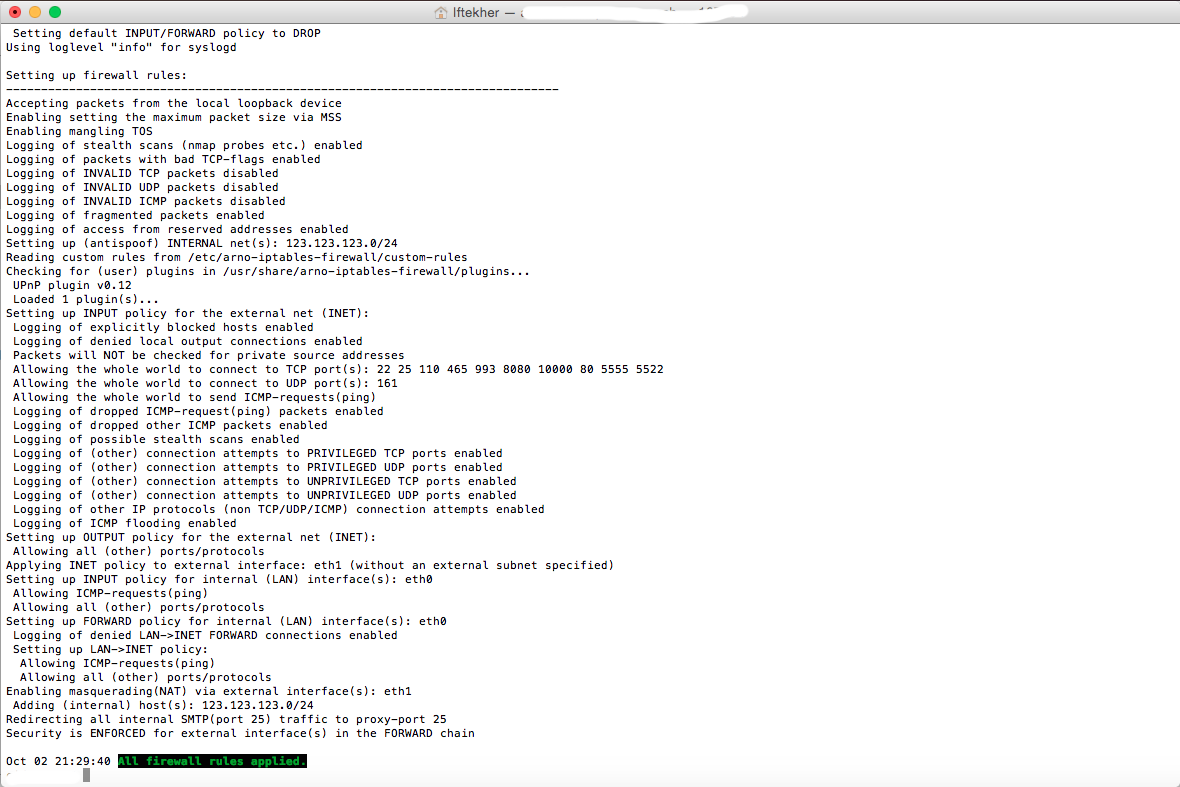
After restarting the firewall, you will see something like below image and will see that it is applying all the newly created policies to that.
# STEP 7
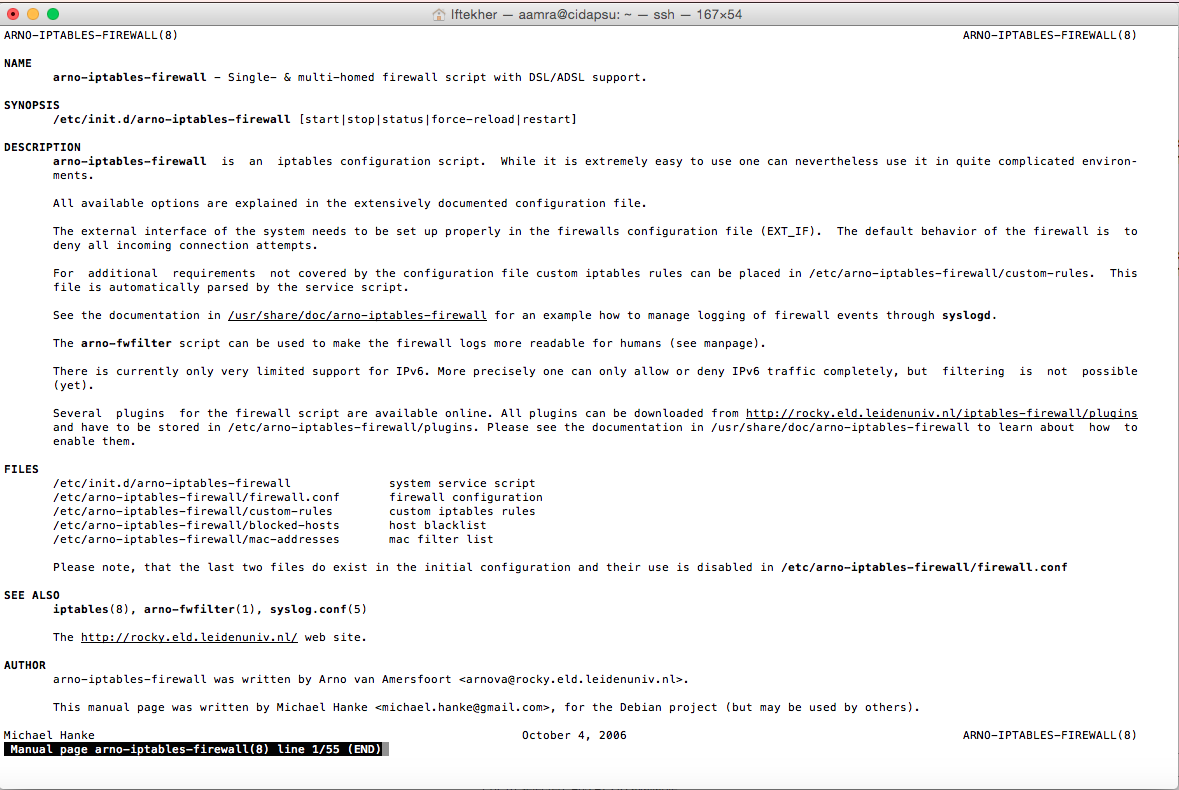
To know more about arno iptables, issue the following command in the terminal so that you can read the manual file.
sudo man arno-iptables-firewall
After issuing the above command, you will see something like below image.
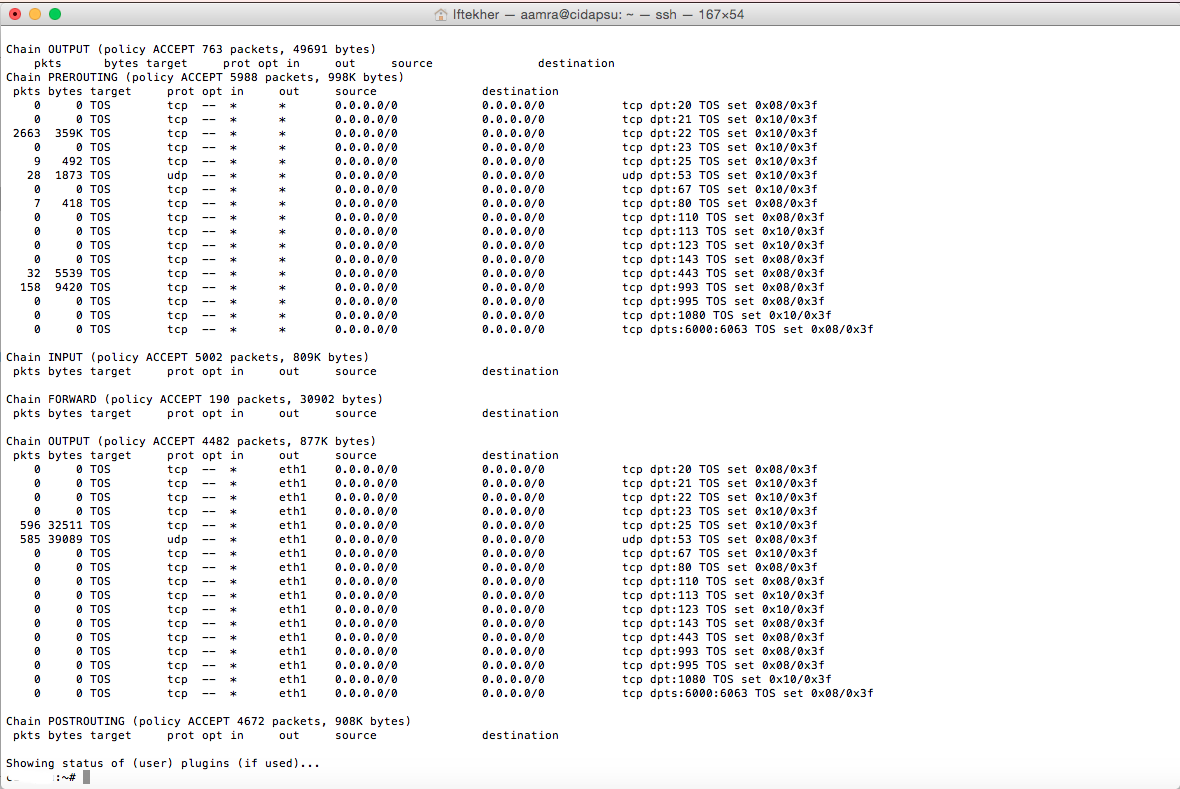
Now, issue the below command in the terminal to know the status of the arno firewall.
sudo /etc/init.d/arno-iptables-firewall status
This will show the rules and policies available on the arno firewall just like below image.
# STEP 8
You can edit the firewall config file as well. To do so, use your favourite file editor to edit the below file. I am using vim as my editor.
vim /etc/arno-iptables-firewall/firewall.conf
If you want to add more custom rules, please use the following command to edit the custom rule file.
vim /etc/arno-iptables-firewall/custom-rules
If you want to block host, edit the following file.
vim /etc/arno-iptables-firewall/blocked-hosts
That’s all for today. I hope this will help you to build your own firewall.
Featured image: Luca Racioppa Via Flickr.


