Hi unixmen readers,
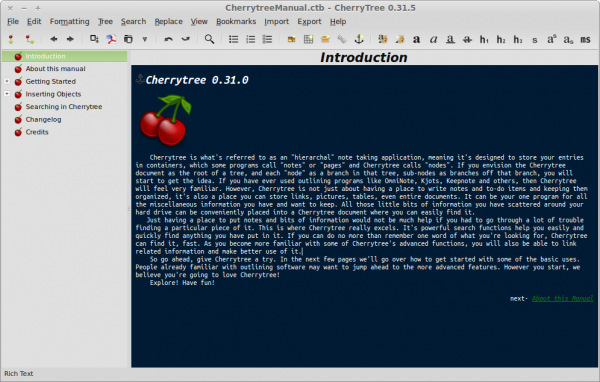
In this tutorial I will teach you how to install a nice and modern text editor in your Ubuntu machine. Are you curious to know about it? It is called CherryTree.
If offers features such as syntax highlighting, spell check, export to html, password protection, hierarchical note taking, pdf output and many others. You can read the full list of features here.
Installing CherryTree
How to install the CherryTree text editor in your Ubuntu Linux machine? Ok, open a new terminal and run each one of the following commands.
1. Use the wget utility to download the deb package file.
wget -c giuspen.com/software/cherrytree_0.31.5-1_all.deb
2. After the download is finished, use the dpkg package manager to install CherryTree in your machine.
sudo dpkg -i cherrytree_0.31.5-1_all.deb
sudo apt-get install -f
Bear in mind that installing CherryTree with this method disables automatic updates for the tool. You will need to update the program manually.
You can also install CherryTree from the Ubuntu base repositories. You can click on this link on an Ubuntu machine to install it directly or run the following commands to carry out the installation:
sudo apt-get install cherrytree
While installing CherryTree from these repositories is simple, it does pose a disadvantage. The CherryTree package on the Ubuntu base repositories is outdated.
To install the latest version of the text editor, download and install the deb file from the official site. You could also install the latest version by adding PPA.
CherryTree Features
CherryTree is among the handful of Linux applications that can present your notes in a tree structure. It offers an extensive range of other helpful features:
- Easy embedded file handling
- Multi-level list support
- Basic table handling options
- Alignment
- Codebox conversion
- Supports hyperlinks for both images and text
- Spellcheck
- “Save as PDF” and “print” options
- Several exporting options
- Complete rich text support
- Syntax highlighting for several programming languages
- Supports LATEX rendering
- Supports intra and cross-application copy/paste
- Excellent find features
- Iterations of the latest finds, replace, and applied formatting
- Supports importing from HTML files and folders of HTML files
- Import from a range of different text editing tools
- Export to CherryTree file – users can export a selection, node, subnodes, or the entire tree
- Password protection
- Drag and drop tree nodes
- Links to websites automatically when a URL is typed
- Links to node automatically when typing node name surrounded by double square brackets
- Supports insertion and editing of images
- Supports saving images as a PNG file
- Code execution for code nodes and codeboxes
- The terminal is configurable from the preferences dialog
It’s important to note that when users open a CherryTree document, an unprotected copy of the document is stored in the filesystem’s temporary folder. However, this copy of the document is deleted when CherryTree is closed.
One of the unique features of CherryTree is that pasting a list of files from the file manager into the application creates a list of links to the files and images inserted into the text.
Uninstalling CherryTree
Ubuntu users can use the apt command to uninstall the CherryTree package from their machine. Here’s the command you need to run
sudo apt-get remove cherrytree
Users can also remove the CherryTree package along with its dependencies by running the following command on the terminal:
sudo apt-get remove --auto-remove cherrytree
To delete the configuration files and data associated with CherryTree, run the following command:
sudo apt-get purge cherrytree
Alternatively, run the command:
sudo apt-get purge --auto-remove cherrytree
Remember that running the above command is irreversible and will permanently delete the data.


