
Dolphin application is developed by Boonex, it lets you create your own custom social networking websites. Dolphin is available in both trial and paid versions. You can easily create a customized social networking site using this application. No need to hire developers and spend massive amount of time and money, simply install dolphin, customize it and your Facebook-like social network site is ready.
Boonex Dolphin Prominent Features
You can upload, browse and share photos, music and other media easily with friends and family members. It lets you crop, manage and upload multiple avatars for your profile image. Multi-User chat and custom RSS feeds are also considered to be important features for dolphin. You can easily create and manage events and publish website’s profiles. It lets you easily add payment gateways, so you may collect payment earned with your social network venture. “Facebook Connect” feature lets you join and login Dolphin developed sites using your Facebook account. It lets you create classified ads, sell your products, and earn a handsome revenue from social network sites.
Installing Boonex Dolphin on Ubuntu 15.04
Let’s see how we can install Boonex Dolphin on Ubuntu. Please note that it requires following software components to be installed on our system before we attempt to install or run Dolphin.
- PHP
- Apache
- MySQL Server
Launch your Ubuntu system terminal and run following command to install Lamp-stack. Lamp-stack comes with Apache, MySQL and PHP so it should suffice for our needs.
[cc]sudo apt-get install lamp-server^[/cc]
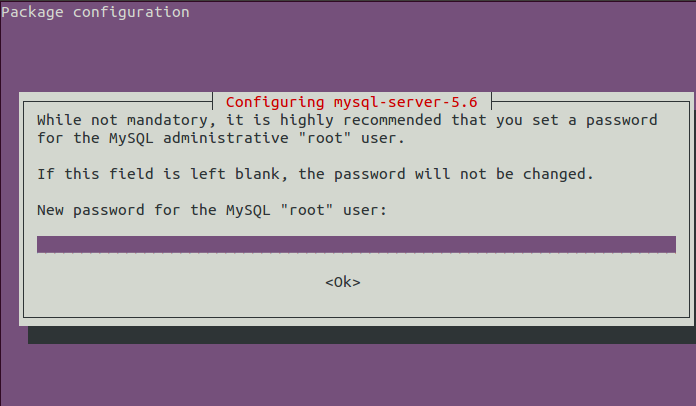
During the installation of Lamp-stack, it will launch a pop up to set MySQL root password, note down the password you set here as it will be used later while installing Dolphin.
Once the installation is complete, run following command to start apache web service.
[cc] sudo /etc/init.d/apache2 start [/cc]
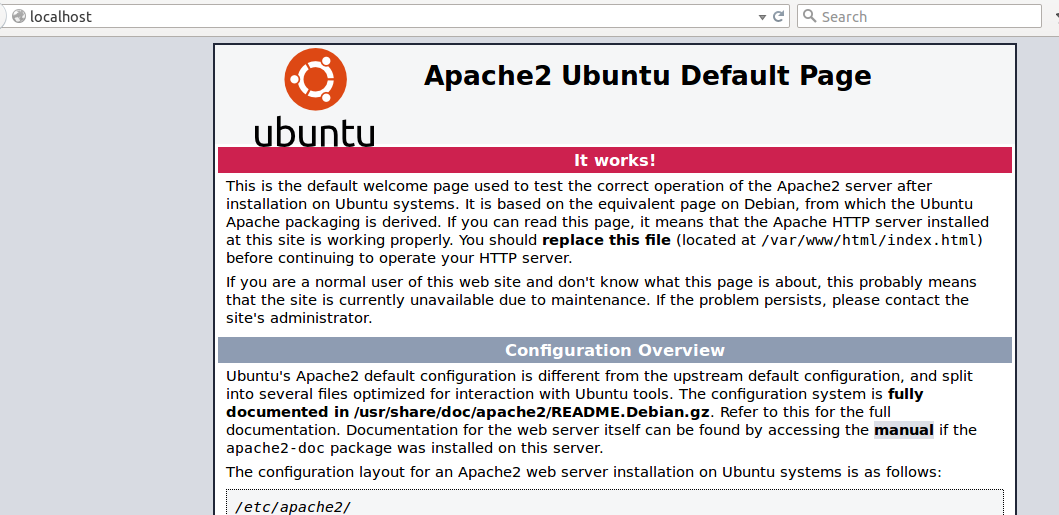
Launch your browser and load http://localhost , it should display a page as shown below.
Important note: By default, Apache document root directory is /var/www/html. You should place your web scripts in this directory so Apache may serve them fine.
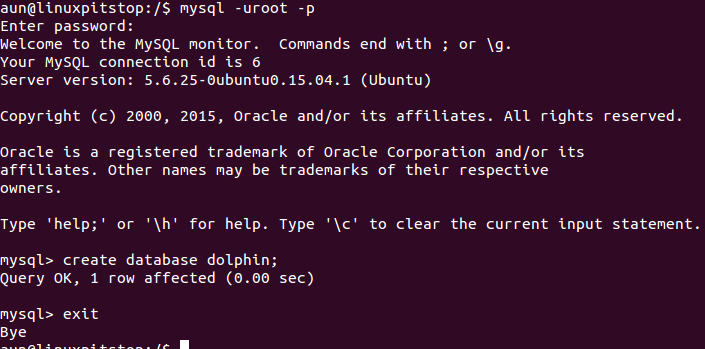
Login MySQL and create a database for new dolphin installation. Run following commands to login MySQL console and create database.
[cc]mysql –uroot –p[/cc]
[cc]create database dolphin;[/cc]
The following screenshot should better clarify this process.
Our Ubuntu system is all set to install dolphin now. Download the latest Boonex Dolphin version from following URL.

Once the download process is complete, go to the download location and move this file to apache document root.
[cc]sudo mv Dolphin-v.7.1.6.zip /var/www/html/[/cc]
Change your working directory to Apache document root.
[cc] cd /var/www/html/[/cc]
Run following command to unzip this downloaded file.
[cc] sudo unzip Dolphin-v.7.1.6.zip[/cc]
Additional Note: If zip/unzip utility is not installed on your system, you can do it by running: sudo apt-get install zip
Rename the extracted directory to something more meaningful.
[cc] sudo mv Dolphin-v.7.1.6 Dolphin[/cc]
Grant writable permissions to “Dolphin” directory for the installation purpose.
[cc] sudo chmod -R 777 Dolphin[/cc]
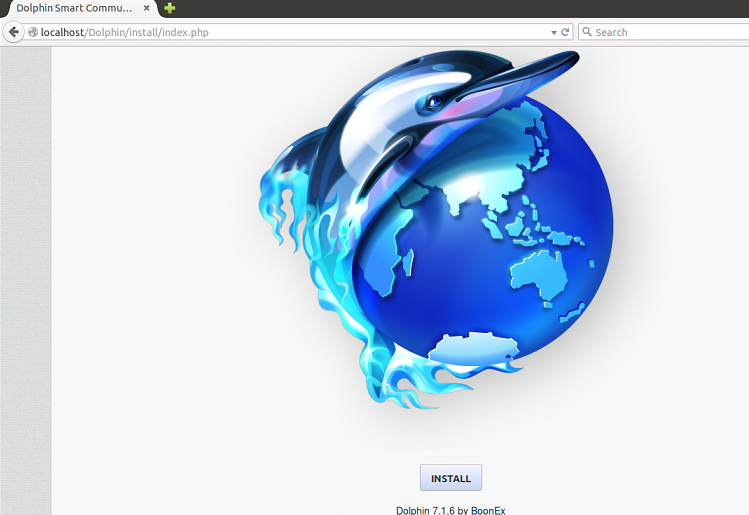
Launch your browser and load http://localhost/Dolphin, it should immediately redirect to the installer page. Click “Install” from here to start the installation Wizard.
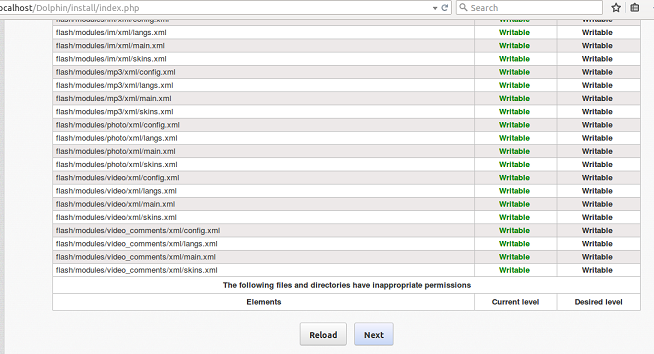
On next step, it will verify if certain directories are writable or not, hit “Next” from here.
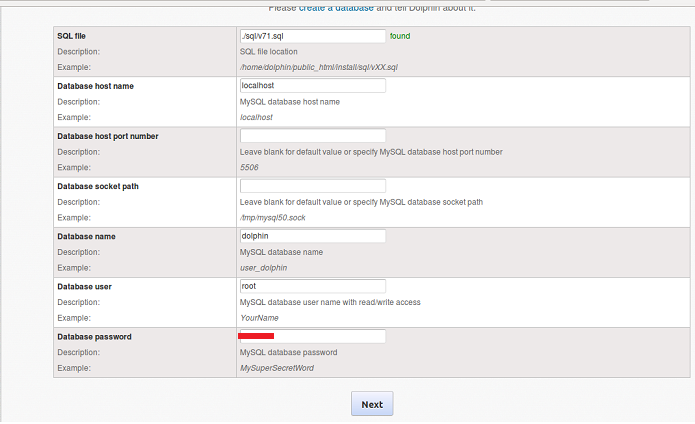
Specify your MySQL logins and DB name here, click “Next” to proceed further with the installation process.
Specify your email account and admin login details for this new installation here.

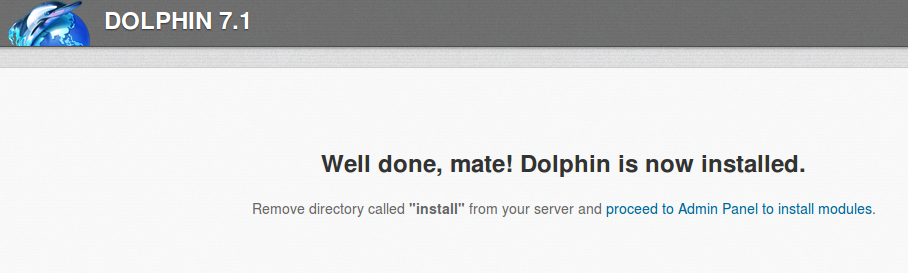
Click “Next” and it should take few seconds to install Dolphin for you. Here is the Congratulation message.
Remove “install” directory by running the following command.
[cc]sudo rm –rf /var/www/html/Dolphin/install[/cc]
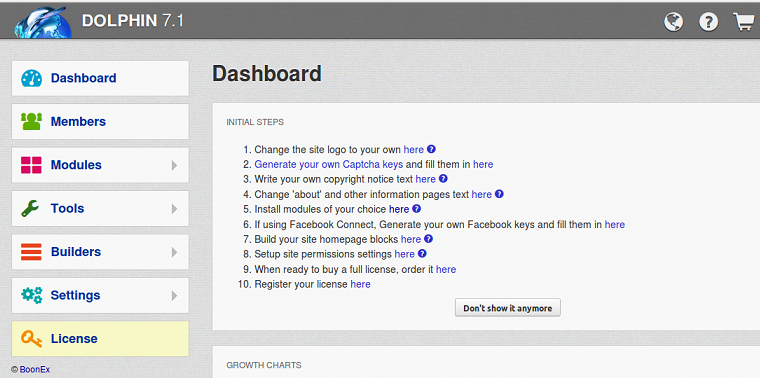
That’s it, click “Proceed to Admin Panel to install modules” option and it will take you to the Admin panel of the dolphin. Start customizing your social network site.
Conclusion
With the boom in social networking, Boonex dolphin has achieved a very loyal and large user base now. Many popular hosting providers are offering dolphin based hosting services for start ups. It is no doubt a good choice if you looking to enter into the world of social networking as a competitor.


