
About OpenLDAP
OpenLDAP is a free open source Light Weight Directory Access protocol developed by the OpenLDAP project. It is a platform independent protocol, so that it runs on all Linux/Unix like systems, Windows, AIX, Solaris and Android.
OpenLDAP includes:
- slapd – stand-alone LDAP daemon (server)
- libraries implementing the LDAP protocol, and
- utilities, tools, and sample clients.
In this tutorial, let us see how to install and configure OpenLDAP in Ubuntu / Debian server. Due to lack of resources and time, I tested this how-to only in Ubuntu 15.04. However, the following steps should work on Debian 7/8 and previous versions of Ubuntu, including Ubuntu 14.10/14.04/13.10/13.04/12.10 etc. If you had any issues while installing OpenLDAP in other distros, feel free to let me know, I will check and update this how-to ASAP.
Well, let us begin to setup LDAP server.
Here is my LDAP server’s details:
Operating System : Ubuntu 15.04
Hostname         : server.unixmen.local
IP Address       : 192.168.1.100
Replace the above values with your own.
Install And Configure OpenLDAP
First let us see how to install OpenLDAP in DEB based systems.
1. Install OpenLDAP
Enter the following command in Terminal to install openldap.
Switch to root user:
sudo su
Or
su
Run the following command to install OpenLDAP.
apt-get install slapd ldap-utils
During the installation, you’ll be asked to set password for the LDAP admin account. Enter your admin password here.

Re-enter the password.

OpenLDAP is installed now. Let’s go to the configuration task.
2. Configure OpenLDAP
Edit “/etc/ldap/ldap.conf” file,
vi /etc/ldap/ldap.conf
Find, uncomment and replace ‘BASE’ and ‘ URI’ values with your domain name and IP Address as shown below.
#
# LDAP Defaults
#
# See ldap.conf(5) for details
# This file should be world readable but not world writable.
BASE    dc=unixmen,dc=local
URI     ldap://server.unixmen.local ldap://server.unixmen.local:666
#SIZELIMIT      12
#TIMELIMIT      15
#DEREF          never
# TLS certificates (needed for GnuTLS)
TLS_CACERT      /etc/ssl/certs/ca-certificates.crt
Save and close the file.
Next, we should reconfigure the slapd with the updated values.
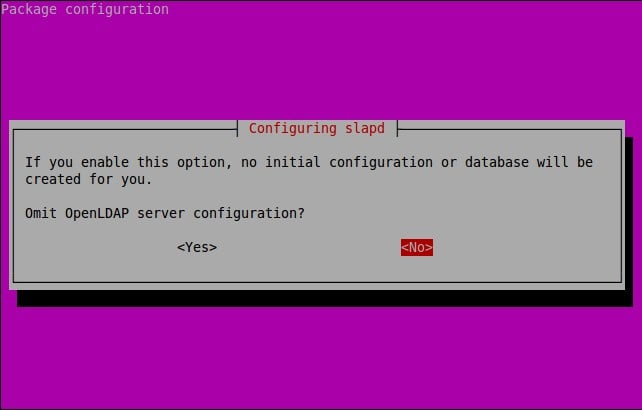
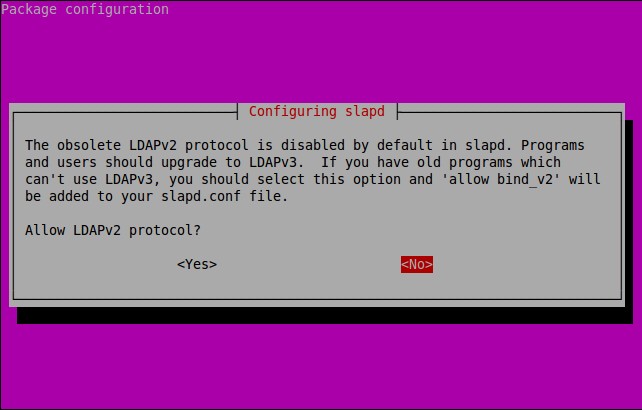
dpkg-reconfigure slapd
The following screen should appear. Select “No” and press Enter.
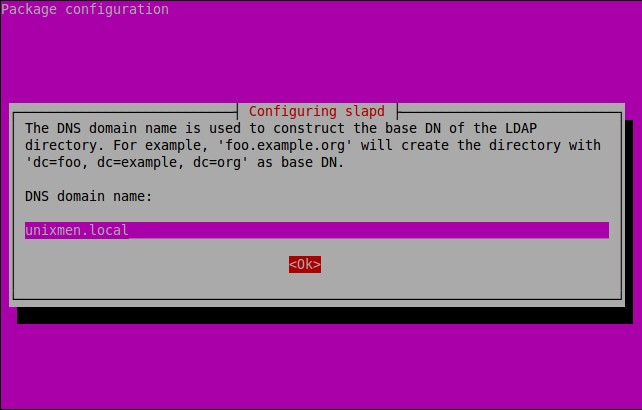
Enter the DNS domain name.
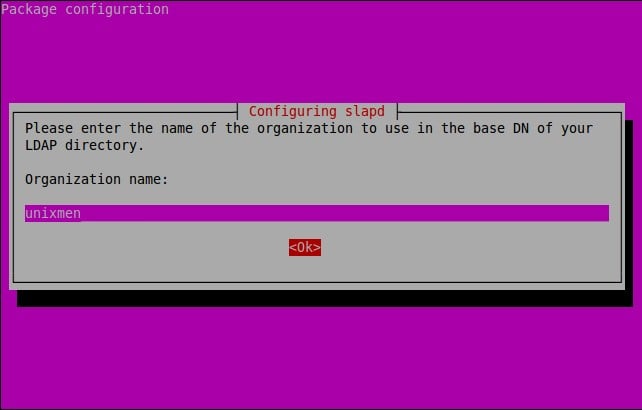
Enter the Organization name (i.e your company name).
Enter the LDAP admin password which you created in the earlier step.
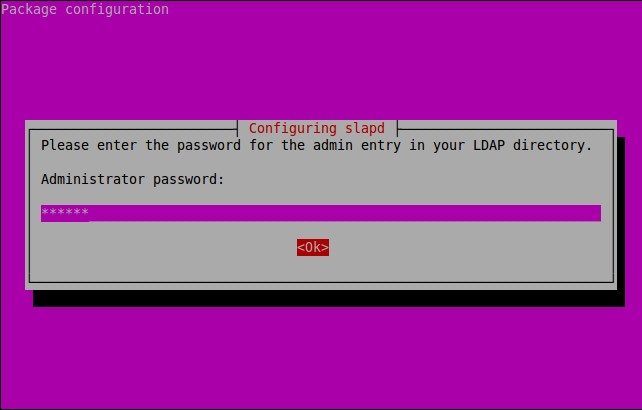
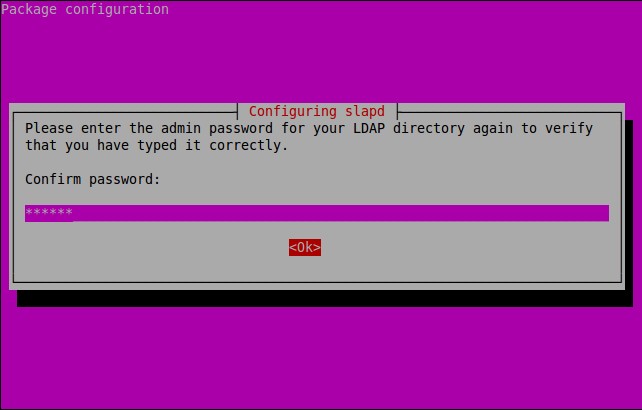
Re-enter the password.
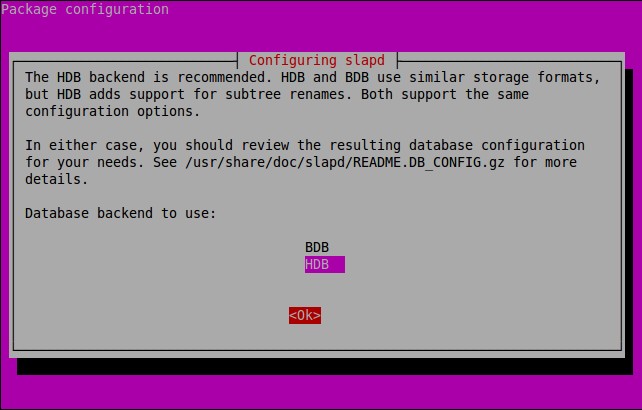
Select the backend database. I go with defaults.
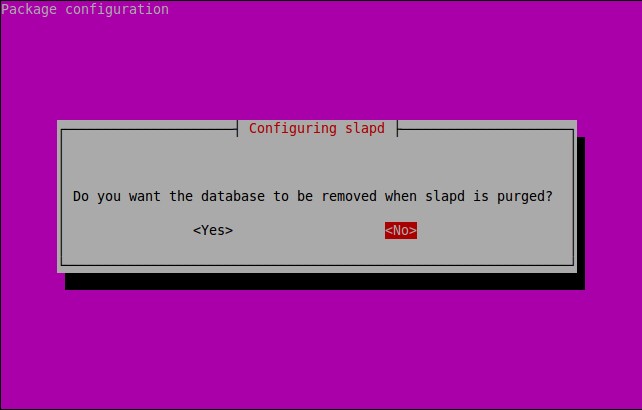
Select whether you want to delete the database automatically or keep it when slapd is removed. Here i want to keep my old database, hence i clicked No.
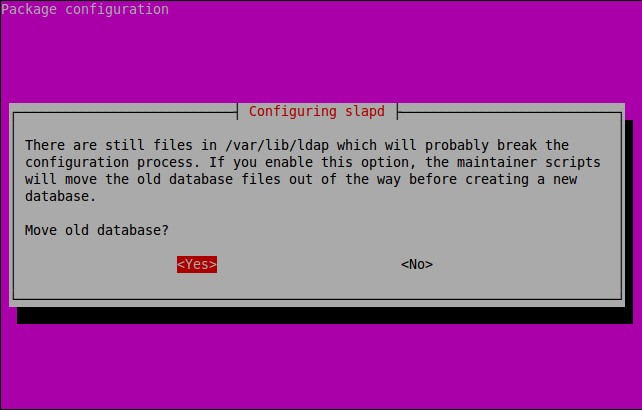
Select Yes to move old database.
Select No and Press Enter.
That’s it. We have successfully configured OpenLDAP. Let us go ahead and check whether it’s working or not.
Test LDAP Server
Run the following command to test OpenLDAP:
ldapsearch -x
Sample output:
# extended LDIF
#
# LDAPv3
# base <dc=unixmen,dc=local> (default) with scope subtree
# filter: (objectclass=*)
# requesting: ALL
#

# unixmen.local
dn: dc=unixmen,dc=local
objectClass: top
objectClass: dcObject
objectClass: organization
o: unixmen
dc: unixmen

# admin, unixmen.local
dn: cn=admin,dc=unixmen,dc=local
objectClass: simpleSecurityObject
objectClass: organizationalRole
cn: admin
description: LDAP administrator

# search result
search: 2
result: 0 Success

# numResponses: 3
# numEntries: 2
If you see the ‘Success’ message in your output, then Congratulations! LDAP Server is working!!
LDAP Server Administration
Administration of LDAP server in command mode is bit difficult. We can’t remember all LDAP commands. So, we will use an easier GUI administration tool called “phpldapadmin” to manage, configure, and administer LDAP server.
Install phpLDAPadmin
phpLDAPadmin is a web-based LDAP administration tool for managing your LDAP server. Using phpLDAPadmin, you can browse your LDAP tree, view LDAP schema, perform searches, create, delete, copy and edit LDAP entries. You can even copy entries between servers.
Enter the following command to install phpLDAPAdmin:
apt-get install phpldapadmin
Create a symbolic link for phpldapadmin directory.
ln -s /usr/share/phpldapadmin/ /var/www/html/phpldapadmin
On Ubuntu 14.10 and lower versions, run:
ln -s /usr/share/phpldapadmin/ /var/www/phpldapadmin
Edit “/etc/phpldapadmin/config.php” file,
vi /etc/phpldapadmin/config.php
Set the correct timezone. To do that, find and uncomment the following line and set your Timezone.
[...]
$config->custom->appearance['timezone'] = 'Asia/Kolkata';
[....]
Scroll down further and Replace the domain names with your own values.
To do that, Find “Define LDAP Servers” section in the config file and edit the following lines as shown below.
[...]
// Set your LDAP server name //
$servers->setValue('server','name','Unixmen LDAP Server');
[...]
// Set your LDAP server IP address //
$servers->setValue('server','host','192.168.1.100');
[...]
// Set Server domain name //
$servers->setValue('server','base',array('dc=unixmen,dc=local'));
[...]
// Set Server domain name again//
$servers->setValue('login','bind_id','cn=admin,dc=unixmen,dc=local');
[...]
Restart the apache service.
systemctl restart apache2
On Ubuntu 14.10 and older versions, run:
service apache2 restart
Make sure that you have opened apache server port “80” and LDAP default port “389” in your firewall/router configuration.
ufw allow 80
Sample output:
Rules updated
Rules updated (v6)
ufw allow 389
Sample output:
Rules updated
Rules updated (v6)
The above steps are not necessary for Debian systems.
Test phpLDAPadmin
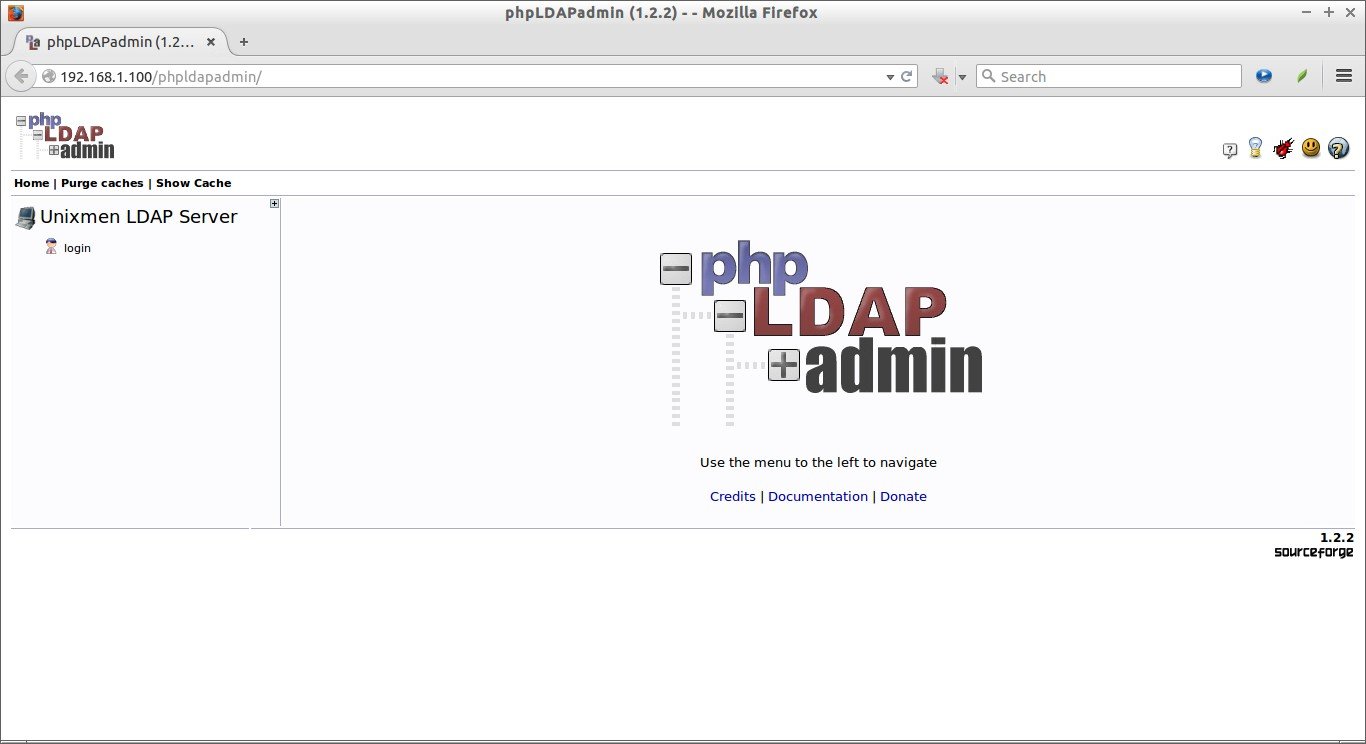
Open your web browser and navigate to: “http://192.168.1.100/phpldapadmin”.
The following screen should appear.
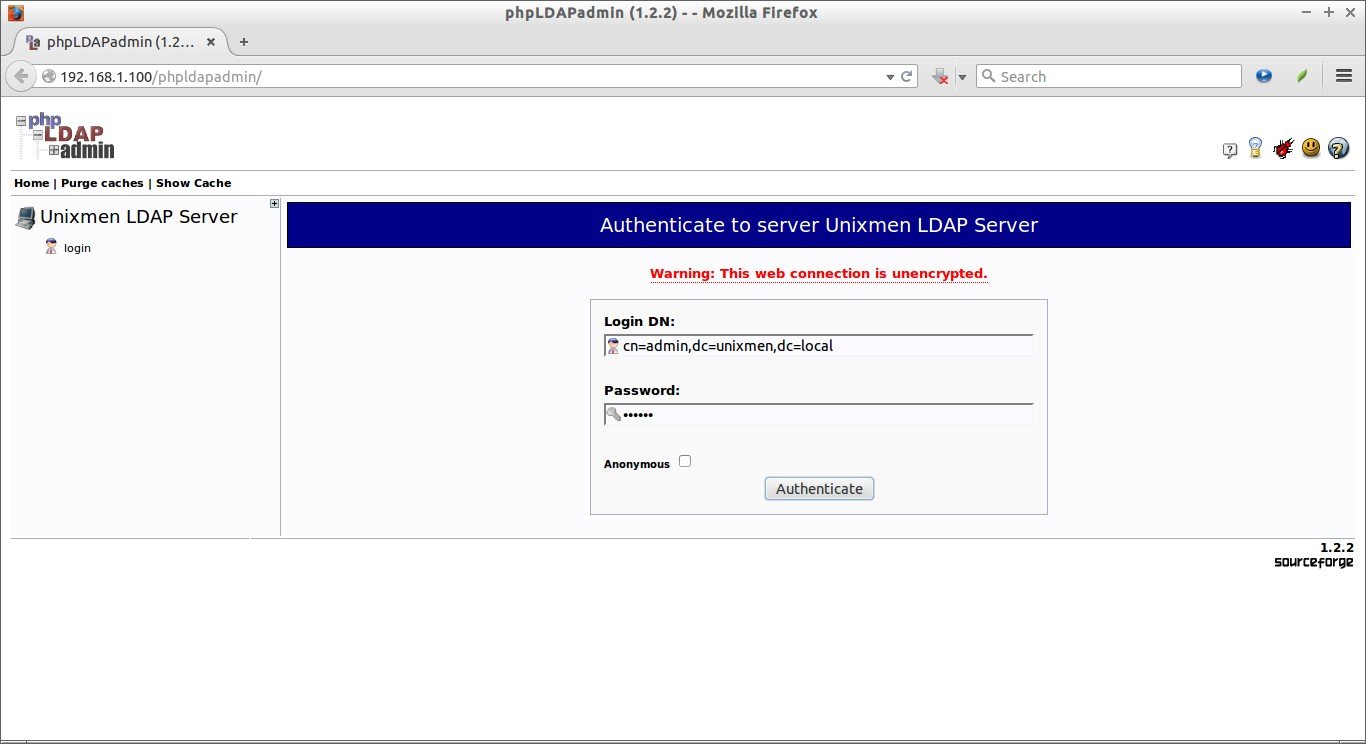
Click “login” on the left pane. Enter the LDAP admin password that you have created during OpenLDAP installation, and click “Authenticate”.
Now the main console screen of phpldapadmin will open.
You can see the LDAP domain “unixmen.local” and other details on the left.
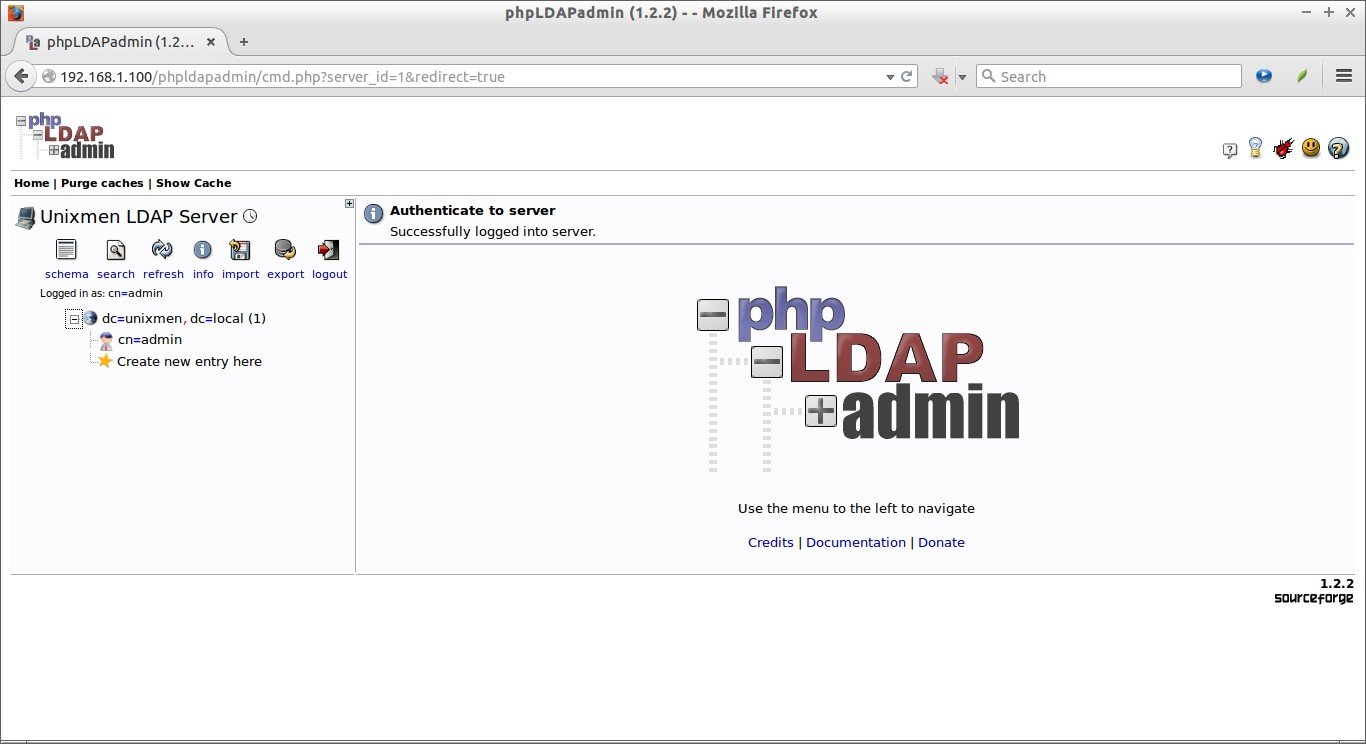
From here, you can add additional objects, such as Organizational Unit, Users and groups etc.
Creating Objects
1. Create Organizational Unit(OU):
Lets create some sample objects from the phpldapadmin console. First, we will create an OU.
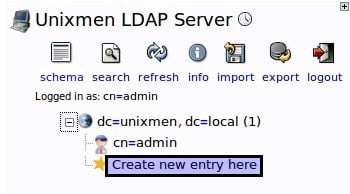
Click on the “+” sign near the line “dc=unixmen” and click “Create new entry here” link.
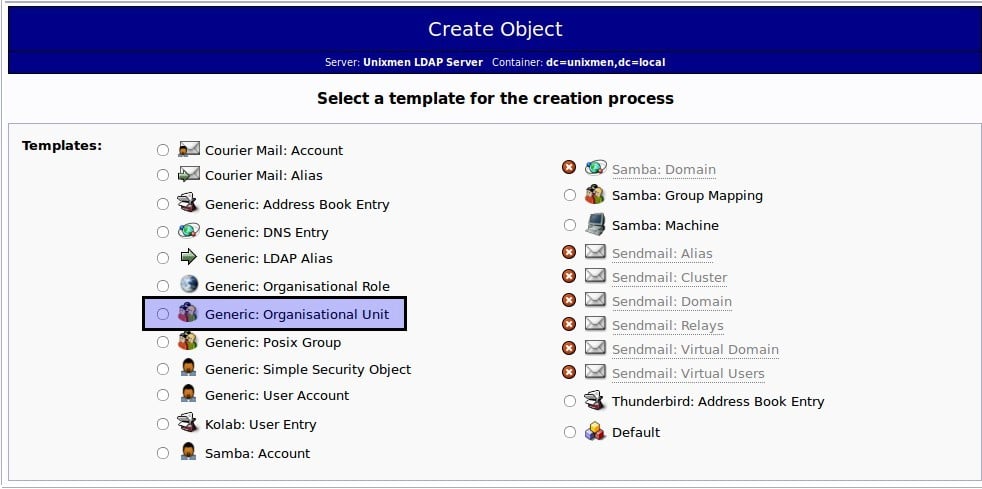
Scroll down and Select “Generic-Organizational Unit”.
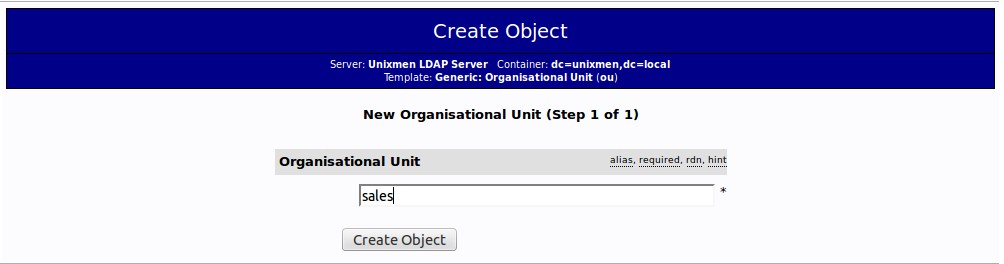
Enter the name of the Organizational unit (Ex.sales) and Click “Create Object”.
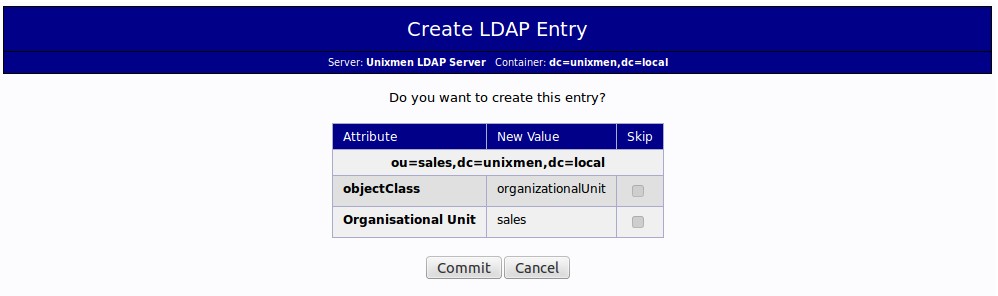
Finally, click “Commit”.
You can find the newly created OU in main LDAP section on the left.
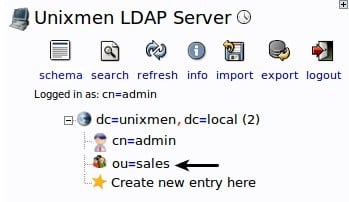
2. Create Group:
Click on the sales OU on the left pane and click on “Create a child entry” link.
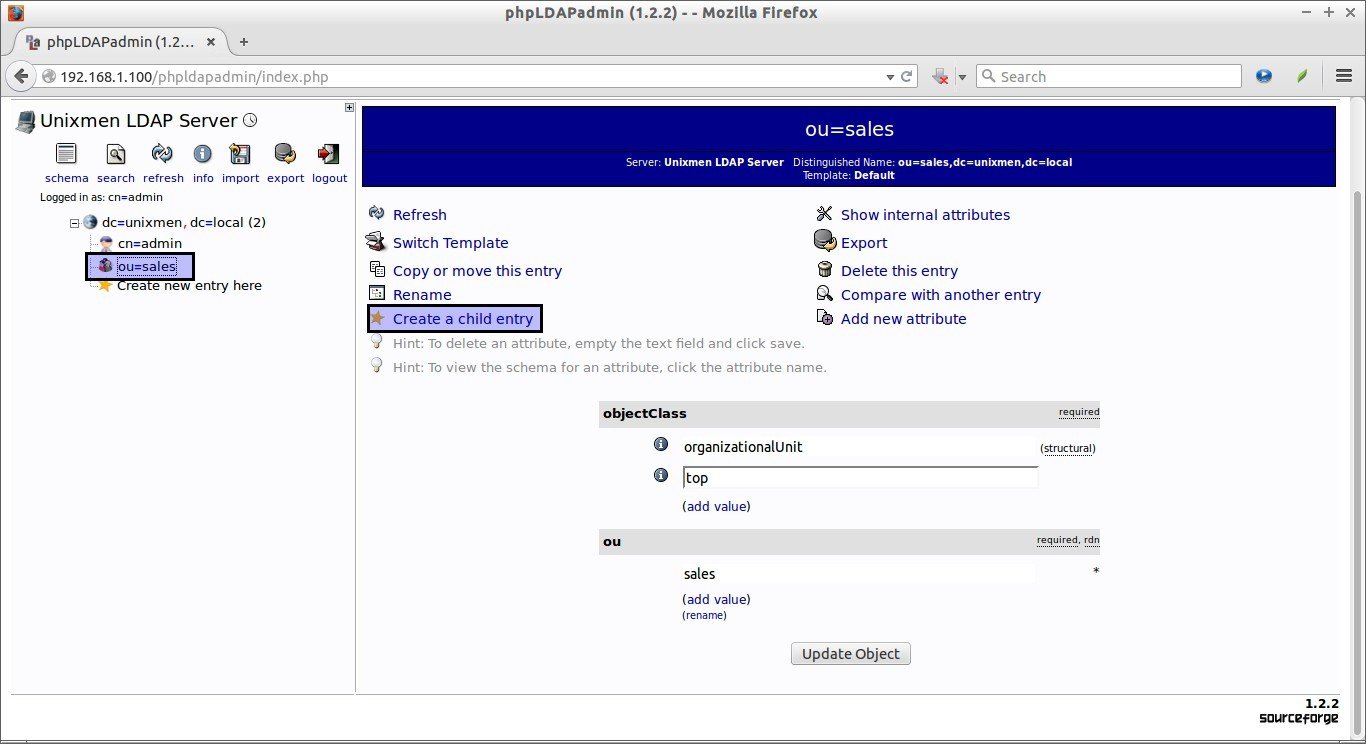
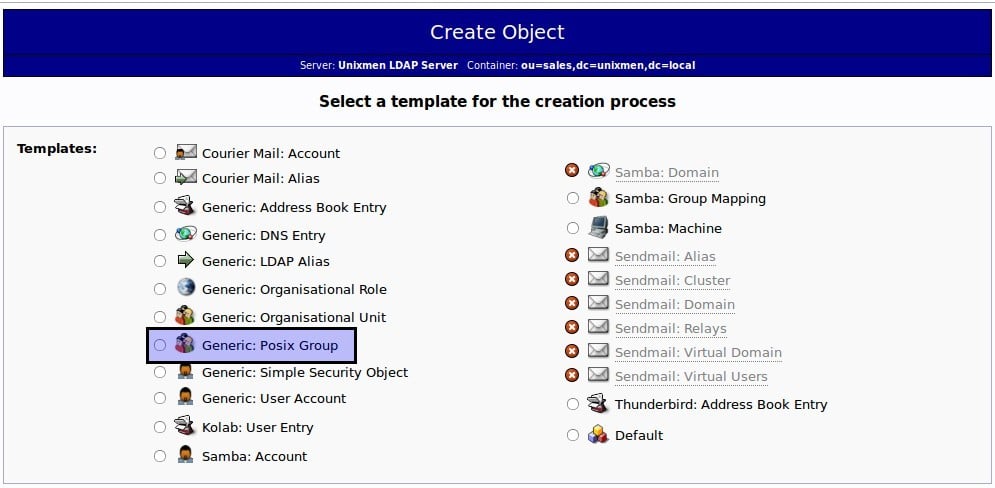
In the next window, Select “Generic: Posix Group”.
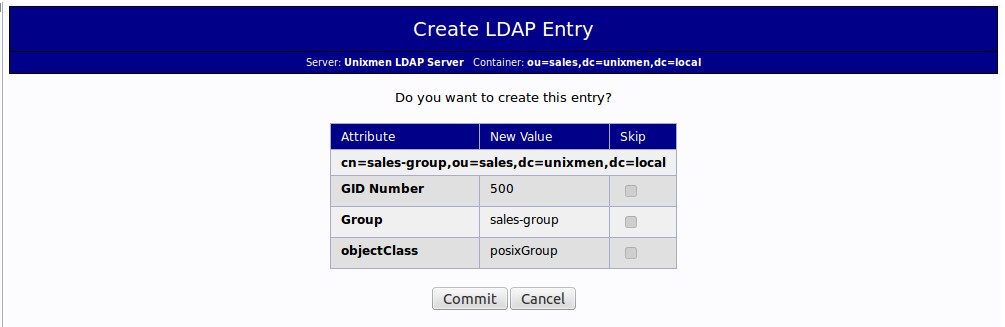
Enter the name of the group and click Create Object button. For example, here i enter the group name as “sales-group”.
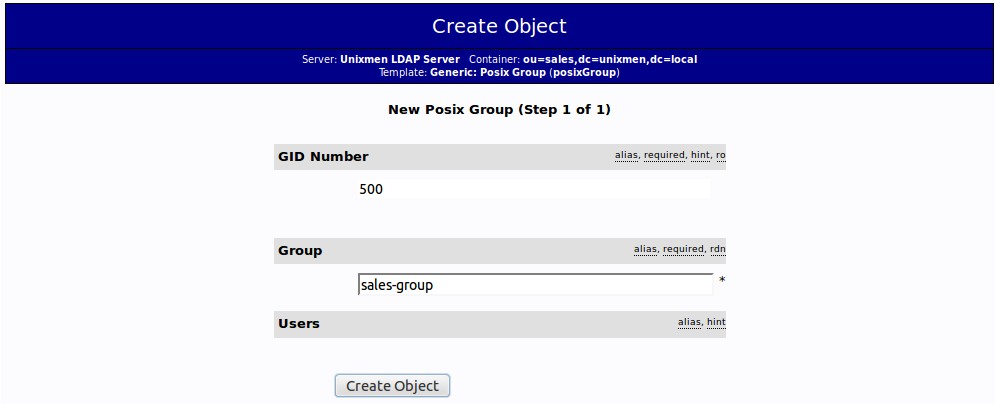
Click Commit to save changes.
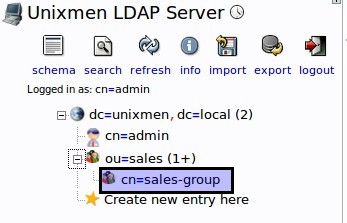
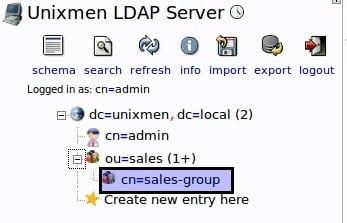
Now you can see that the newly created group called “sales-group” under the sales OU.
3. Create User:
Now, let us create a new user under sales-group.
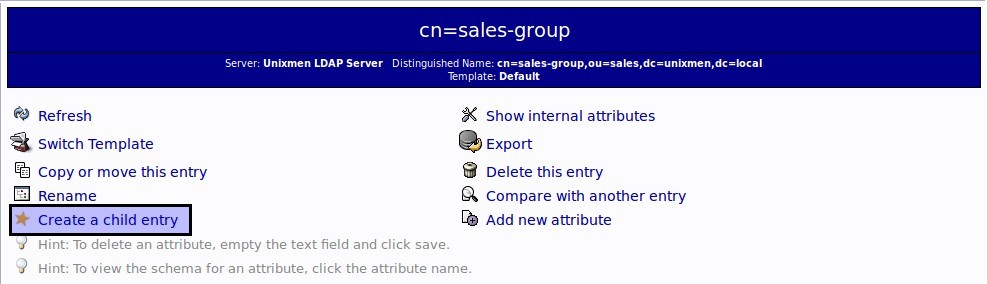
Click on the sales-group on the left.
Select Create a child entry link button.
In the next window, Select “Generic: User Account”.
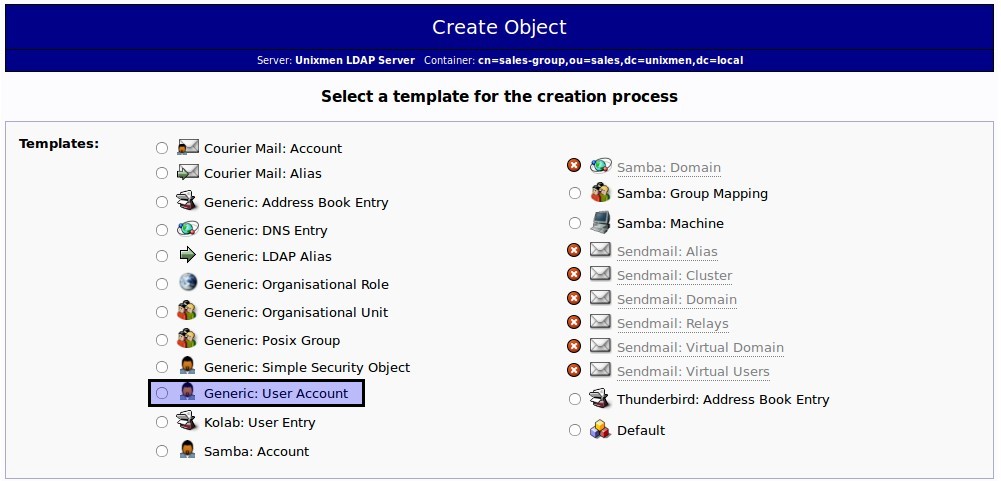
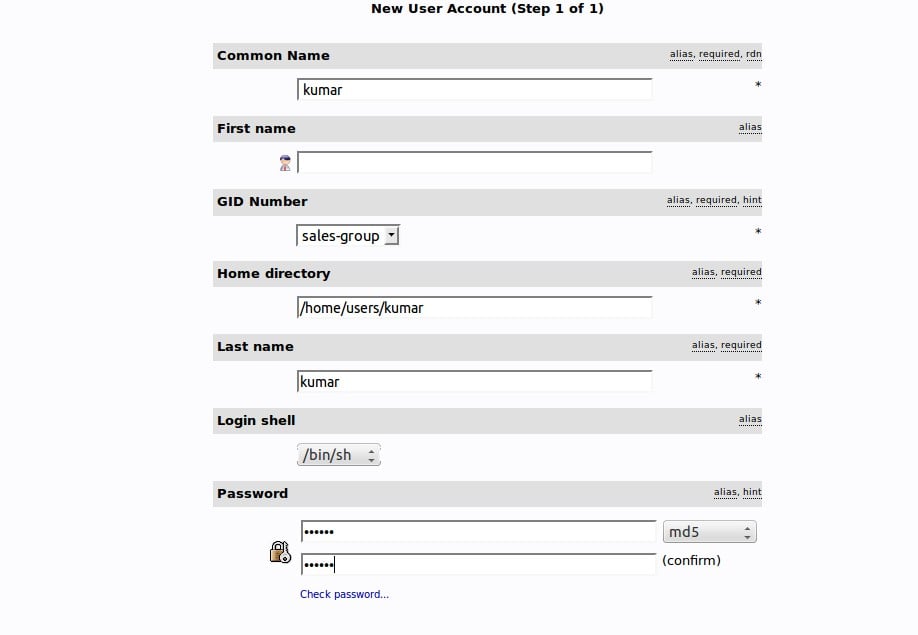
Enter the user details such as common name, GID number, last name, Login shell, user password and user id etc., as shown in the below screen shot and click Create object. For example. here I am going to create a user called “kumar”.
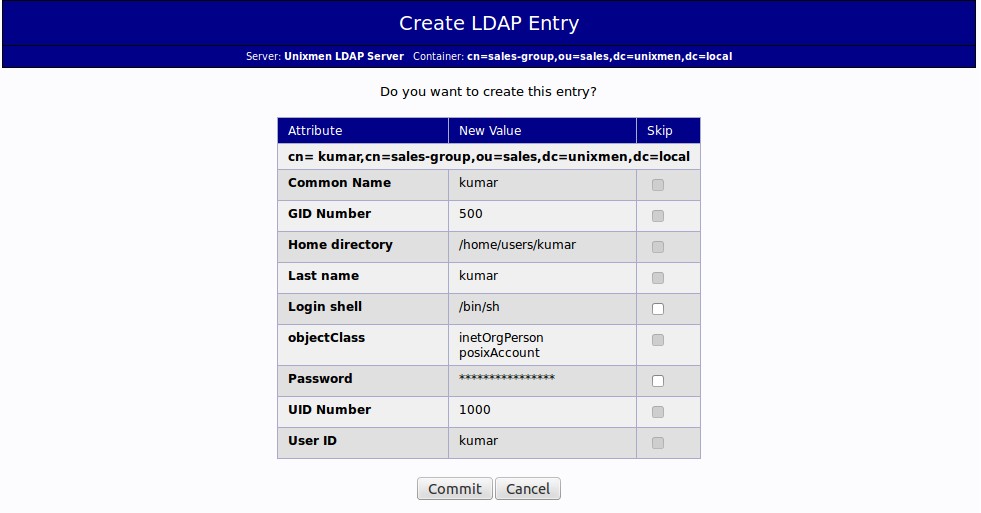
And then Click “Commit” to save the changes.
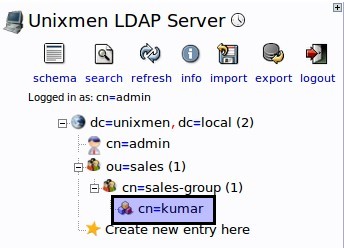
Now the newly created user “kumar” will be found under “sales-group” object.
Also, you can verify the newly created objects are really existing with command:
ldapsearch -x
Sample output:
# extended LDIF
#
# LDAPv3
# base <dc=unixmen,dc=local> (default) with scope subtree
# filter: (objectclass=*)
# requesting: ALL
#

# unixmen.local
dn: dc=unixmen,dc=local
objectClass: top
objectClass: dcObject
objectClass: organization
o: unixmen
dc: unixmen

# admin, unixmen.local
dn: cn=admin,dc=unixmen,dc=local
objectClass: simpleSecurityObject
objectClass: organizationalRole
cn: admin
description: LDAP administrator

# sales, unixmen.local
dn: ou=sales,dc=unixmen,dc=local
objectClass: organizationalUnit
objectClass: top
ou: sales

# sales-group, sales, unixmen.local
dn: cn=sales-group,ou=sales,dc=unixmen,dc=local
gidNumber: 500
cn: sales-group
objectClass: posixGroup
objectClass: top

# kumar, sales-group, sales, unixmen.local
dn: cn=kumar,cn=sales-group,ou=sales,dc=unixmen,dc=local
cn:: IGt1bWFy
gidNumber: 500
homeDirectory: /home/users/kumar
sn: kumar
loginShell: /bin/sh
objectClass: inetOrgPerson
objectClass: posixAccount
objectClass: top
uidNumber: 1000
uid: kumar

# search result
search: 2
result: 0 Success

# numResponses: 6
# numEntries: 5
As you see in the above output, the new objects, namely ‘sales’, ‘sales-group’, and ‘kumar’ has been successfully created under the main LDAP domain. Similarly, you can create as many as objects you wanted.
Installing and configuring OpenLDAP in Debian and Ubuntu and derivatives is really easy and fun. Even a novice users can easily setup a working LDAP server within an hour.
Now OpenLDAP Server is ready to use.
I have successfully installed and configured LDAP server, what now? Please refer next article How To Configure Linux Clients To Authenticate Using OpenLDAP.
Good luck!


