
When doing a standard Linux installation on a Vmware virtual machine, the installation process typically allocates all of the available virtual disk space to the Linux file system and swap partitions.
The size of the virtual disk can easily be increased using the Vmware utility (Vmware Workstation or Vsphere), but as neither the partition table or the file systems themselves are modified by Vmware utility, the guest system does not see the new virtual disk size.
This article explains how to add disk space and memory RAM to VMware VM.
Increase Disk Space in Linux VMware VM
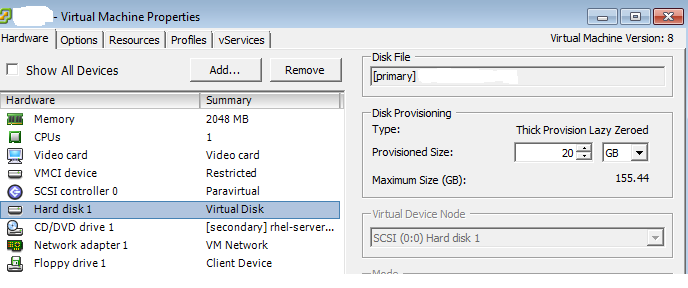
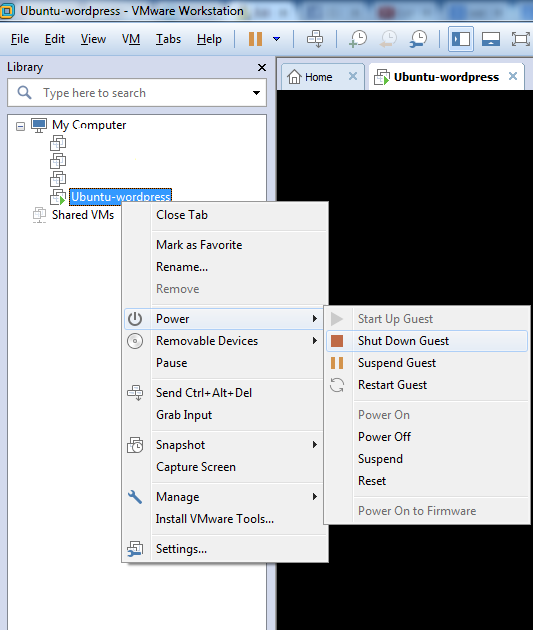
Before Increasing the disk size you need to shutdown your VM. After that you can change the disk sapce by editing the settings of the VM (right click > Settings).
The Vmware utility (Vmware Workstation or Vsphere) provides a dialog to change the size of the Vmware virtual disk.
Select the new storage size by entering the value in the dialog. The virtual disk will be resized to the new value. When increasing the size, the data on the disk is preserved.
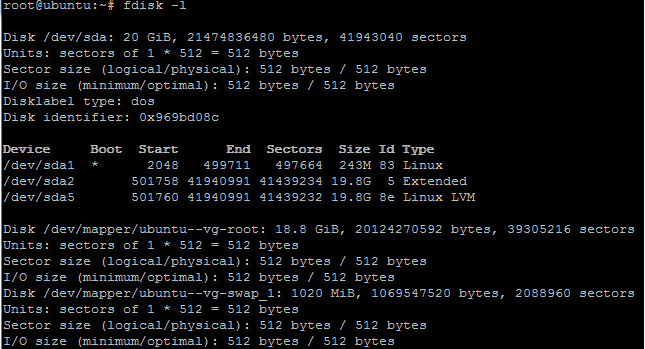
Increasing the size of the VM disk size does not change the filesystem on that disk. You need to connect to the command line of the Linux VM via the console or putty session and log in as root.
Find the device where the unpartitioned space using this command:
fdisk -l
Create a new partition that takes up the remaining space and is of filesystem type 8e (LVM):
fdisk /dev/sda

Now enter ‘n‘, to create a new partition and choose “p” to create a new primary partition. Please note, your system can only have 4 primary partitions on this disk! If you’ve already reached this limit, create an extended partition.
 n (new)
 p (primary)
 3 (partition number, since 1st and 2nd partition already exists)
 select default first available cylinder to the default last cylinder.
 t (type)
 3 (partition number)
 8e (set type to LVM)
 p (view the new partitions layout)
 w (write out the new partitions layout to disk)
reboot the system so the new partition is recognized by the system.
reboot
The new partition layout is now:
Disk /dev/sda: 53.6 GB, 53687091200 bytes
 255 heads, 63 sectors/track, 6527 cylinders
 Units = cylinders of 16065 * 512 = 8225280 bytes

Device Boot      Start         End      Blocks   Id  System
 /dev/sda1   *           1          13      104391   83  Linux
 /dev/sda2              14        2610    20860402+  8e  Linux LVM
 /dev/sda3            2611        6527    31463302+  8e  Linux LV
Now, create the physical volume as a basis for your LVM.
pvcreate /dev/sda3
Add the new Physical Volume to the Volume Group as additional free space:
vgextend VolGroup00 /dev/sda3
To find out how your Volume Group is called use this command.
vgdisplay
--- Volume group ---
 VG Name               VolGroup00
 System ID
 Format                lvm2
 Metadata Areas        2
 Metadata Sequence No  4
 VG Access             read/write
 VG Status             resizable
 MAX LV                0
 Cur LV                2
 Open LV               2
 Max PV                0
 Cur PV                2
 Act PV                2
 VG Size               49.88 GB
 PE Size               32.00 MB
 Total PE              1596
 Alloc PE / Size       636 / 19.88 GB
 Free  PE / Size       960 / 30.00 GB
 VG UUID               0JB6GV-gFJW-onuN-7Xq1-OKim-n5gM-EVPUKB
Have the Logical Volume (within the Volume Group) overtake the remaining free space of the Volume Group:
lvextend -l +100%FREE /dev/VolGroup00/LogVol00
vgdisplay
--- Volume group ---
 VG Name               VolGroup00
 System ID
 Format                lvm2
 Metadata Areas        2
 Metadata Sequence No  5
 VG Access             read/write
 VG Status             resizable
 MAX LV                0
 Cur LV                2
 Open LV               2
 Max PV                0
 Cur PV                2
 Act PV                2
 VG Size               49.88 GB
 PE Size               32.00 MB
 Total PE              1596
 Alloc PE / Size       1596 / 49.88 GB
  Free  PE / Size       0 / 0
 VG UUID               0JB6GV-gFJW-onuN-7Xq1-OKim-n5gM-EVPUKB
Trigger online resizing of the live and mounted filesystem so the new disk space can be utilized immediately:
resize2fs -p /dev/mapper/VolGroup00-LogVol00
Now, you can check the disk space using this command
df -h
Filesystem            Size  Used Avail Use% Mounted on
 /dev/mapper/VolGroup00-LogVol00 45G  3.2G   40G   8% /
 /dev/sda1              99M   19M   76M  20% /boot
 tmpfs                1014M     0 1014M   0% /dev/shm
Increase RAM VMware VM
To increase the memory (RAM) assigned to a virtual machine, you need to edit the VM‘s setting to increase the memory while the VM is shutdown. You cannot edit the VM’s memory configuration while the VM is suspended or powered on.
Follow the instructions to add memory to the VM.
Shutdown the VM.
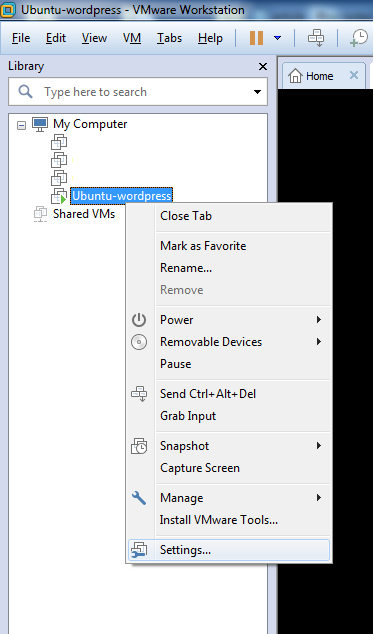
Go to the VM menu and select Settings
Select Memory on the Hardware tab
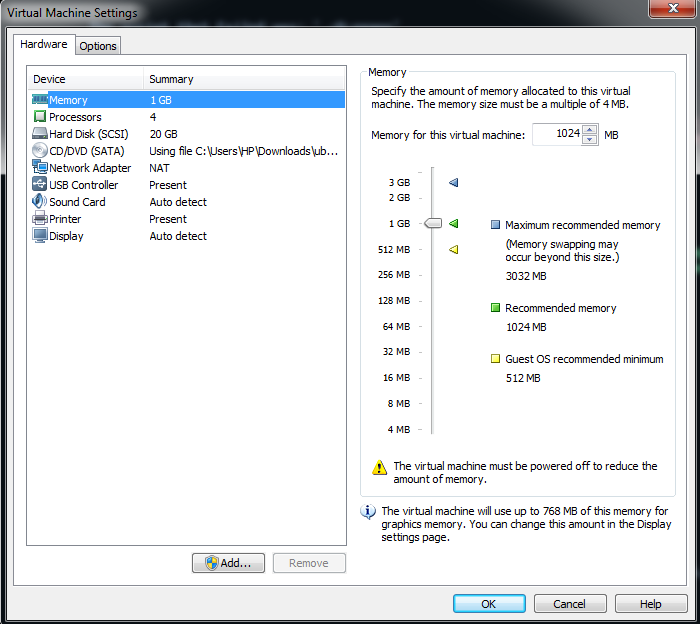
Adjust the slider or enter the amount of memory to assign to the virtual machine. Click OK
Now you have add additional resource to the VM to also increase performance of your virtual environment.


