
This guide explains how to join an Ubuntu Desktop machine into a Microsoft Active Directory Domain. This solution uses the realmd and the sssd service to achieve this task. Other solutions for the same task, are samba + winbind, and the Likewise tool, which provides a GUI along with the command line utilities. The reason I choose realmd + sssd, is because this solution is better suited for complicated Active Directory infrastructures and provides more customization options.
The following instructions have been tested on Ubuntu Desktop 14.04 but they will most likely work on later versions as well.
About realmd and sssd
The realmd service is developed by the freedesktop.org project as an abstraction layer on other authentication backends like winbind and sssd. The sssd service is developed by RedHat Inc and is one of the components of their FreeIPA suite. It can effectively replace winbind in several scenarios.
Assumptions
In this example, we will assume that our Active Directory domain is dom.example.int and we have two Domain Controllers in our infrastructure: dc1.dom.example.int and dc2.dom.example.int. Also let’s name the Ubuntu Machine TESTARENA.
Prerequisites
Install an Ubuntu Desktop 14.04 (32 or 64 bit) on a physical computer or a Virtual Machine and apply all updates. Don’t forget to set the TESTARENA hostname during the installation.
Make sure your Ubuntu Desktop machine has access to the Active Directory domain and the Domain Controllers:
dig -t SRV _ldap._tcp.dom.example.int | grep -A2 "ANSWER SECTION"
;; ANSWER SECTION:
_ldap._tcp.dom.example.int. 170 IN SRV 0 100 389 dc1.dom.example.int.
_ldap._tcp.dom.example.int. 170 IN SRV 0 100 389 dc2.dom.example.int.
We can see from the output above that there are indeed, two domain controllers, in our Active Directory Domain.
Ping the Domain Controllers, to ensure they are accessible:
fping dc1.dom.example.int dc2.dom.example.int
dc1.dom.example.int is alive
dc2.dom.example.int is alive
As you can see in the output, both domain controllers are accessible from our Ubuntu machine.
Install all necessary packages
sudo apt-get -y install realmd sssd sssd-tools samba-common krb5-user packagekit samba-common-bin samba-libs adcli ntp
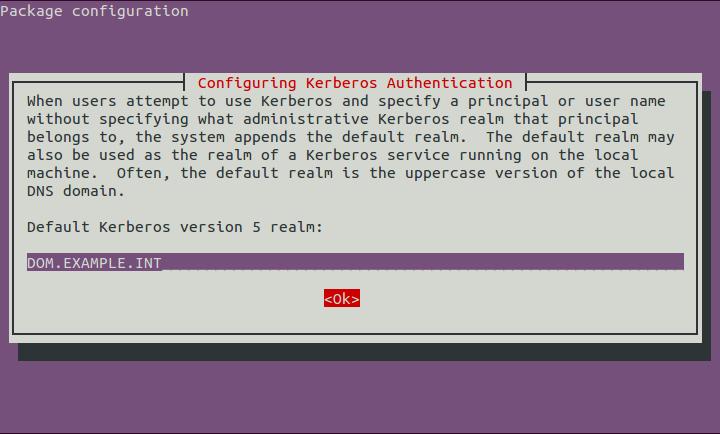
The Package Management subsystem will ask to to set your Default Kerberos version 5 realm. Type “DOM.EXAMPLE.INT”, select “ΟΚ” and press “Enter” when you see the following screen:
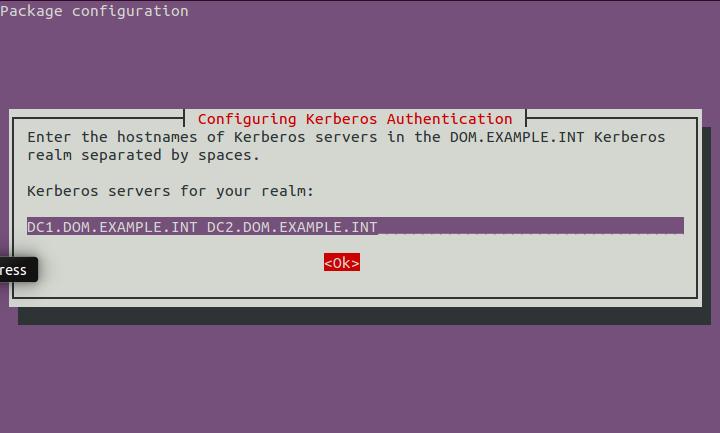
Next we will need to define our Domain Controllers as Kerberos Servers. Type “DC1.DOM.EXAMPLE.INT DC2.DOM.EXAMPLE.INT” (space separated), select “OK” and “Enter”:
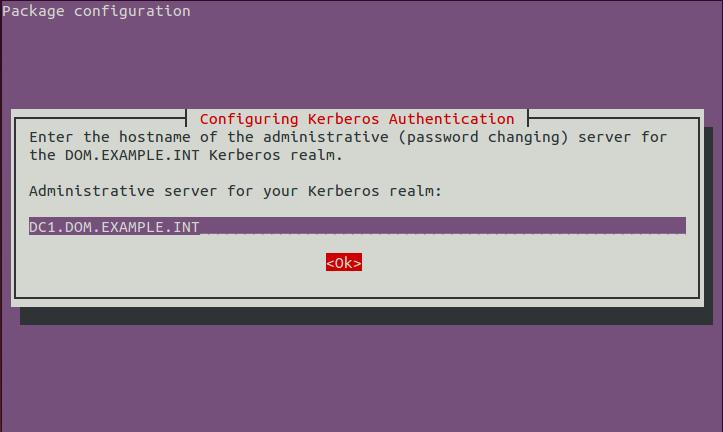
Then set the Administrative Kerberos Server. Type “DC1.DOM.EXAMPLE.INT”, select “OK” and “Enter”:
Setup your ntp service to point to our domain timeservers
In a healthy Active Directory environment all systems must be in time synchronization with the domain controllers. The domain controllers in an Active Directory domain, also behave as ntp servers.
First edit the /etc/ntp.conf file. Comment out the preset timeservers and add our Domain Controllers instead:
...
#server 0.ubuntu.pool.ntp.org
#server 1.ubuntu.pool.ntp.org
#server 2.ubuntu.pool.ntp.org
#server 3.ubuntu.pool.ntp.org
server dc1.dom.example.int
server dc2.dom.example.int
# Use Ubuntu's ntp server as a fallback.
#server ntp.ubuntu.com
...
Then restart your ntp service:
sudo service ntp restart
Setting up realmd
Create a new /etc/realmd.conf file with the following settings:
[users]
default-home = /home/%D/%U
default-shell = /bin/bash
[active-directory]
default-client = sssd
os-name = Ubuntu Desktop Linux
os-version = 14.04
[service]
automatic-install = no
[dom.example.int]
fully-qualified-names = no
automatic-id-mapping = yes
user-principal = yes
manage-system = no
Explanation of the various options:
- default-home: set the default homedir for each Active Directory User. In our example it will
be something like /home/dom.example.int/domainuser. - default-shell: the default shell used by the users. bash is usually the preferred default shell.
- default-client: we are using sssd in our scenario. winbind is also a possible option.
- os-name: the operating system name as it will appear in our Active Directory.
- os-version: the operating system version as it will appear in our Active Directory.
- automatic-install: we want to prevent realmd to try to install its dependencies.
- fully-qualified-names: this will allow users to use just their username instead of the combination of domain and username. For example we can use the username domainuser instead of DOM\domainuser or domainuser@dom.example.int. Note, however, that this could cause conflicts with local users, if they have the same username as a domain user.
- automatic-id-mapping: this option will auto-generate the user and group ids (UID, GID) for newly created users, if set to yes.
- user-principal: this will set the necessary attributes for the Ubuntu machine when it joins the domain.
- manage-system: if you don’t want policies from the Active Directory environment to be applied on this machine, set this option to no.
Join the Ubuntu machime on the AD domain
Activate a new Kerberos ticket:
sudo kinit administrator@DOM.EXAMPLE.INT
Password for administrator@DOM.EXAMPLE.INT:
You will not see any output while you type the password. That’s normal. You can replace the administrator user with any other domain administrator or any user with domain join rights.
Add the Ubuntu machine in the domain:
sudo realm --verbose join dom.example.com \
--user-principal=TESTARENA/administrator@DOM.EXAMPLE.INT --unattended
Setting up sssd
When we use realmd to join the machine in the domain, it also creates the configuration of sssd in the /etc/sssd/sssd/conf file. Unfortunately realmd does not get everything right so we need to tweak the sssd configuration a bit.
Modify the access_provider = simple option in the /etc/sssd/sssd.conf file, as follows:
access_provider = ad
Restart the sssd service:
sudo service sssd restart
Setup homedir auto-creation for new users
Add the pam_mkhomedir pam module, as the last module in the /etc/pam.d/common-session file:
...
session required pam_unix.so
session optional pam_winbind.so
session optional pam_sss.so
session optional pam_systemd.so
session required pam_mkhomedir.so skel=/etc/skel/ umask=0077
# end of pam-auth-update config
Check Active Directory users name resolution
Now let’s check if we can resolve the active directory users:
id domainuser
uid=54202865(domainuser) gid=54200513 groups=54200513
Setting up LightDM
LightDM provides the Ubuntu graphical login. Now we need to disable guest login (a very good practice in enterprise environments) and enable manual login (to let domain users to login). These steps are not unnecessary for headless machines (on a CLI-only Ubuntu Server for example).
We need to create the /etc/lightdm/lightdm.conf. This file does not usually exist on a fresh Ubuntu Desktop 14.04 installation, but you may want to keep a backup if it does.
Now put these lines in /etc/lightdm/lightdm.conf:
[SeatDefaults]
allow-guest=false
greeter-show-manual-login=true
Final Check
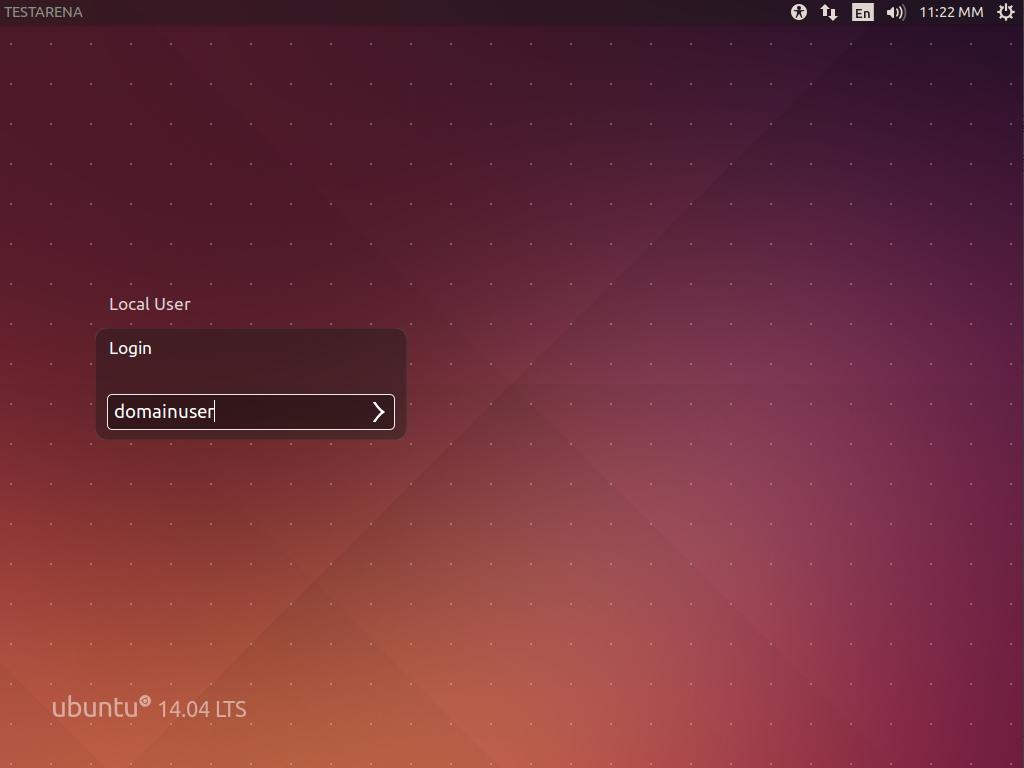
Restart the machine and try to Login using the Ubuntu graphical login. Use the “Login” option and enter your domain credentials:
In case it does not work as expected, check the following log files for errors:
- /var/log/auth
- /var/log/syslog
- /var/log/sssd/*
References:
About the author:
The article is written by Theodotos Andreou, an active member of the Ubuntucy community and a founding member of the upcoming Cyprus FOSS community.


