
Zabbix is an enterprise-class open source distributed monitoring solution that can be used to monitor and track performance and availability of network servers, devices and other IT resources. It supports distributed and WEB monitoring, auto-discovery, and more.
I tested this how-to On Ubuntu 16.10, although it should work on other Ubuntu distributions or Debian derivatives. For the testing purpose, I will use the following two machines.
Zabbix Server System:
- Operating system : Ubuntu 16.04 64bit edition LTS
- Server IP Address : 192.168.28.138/24
- Hostname : ubuntu.unixmen.com
Zabbix Client System:
- Operating system : Ubuntu 16.04 LTS
- IP Address : 192.168.28.137/24
- Hostname : ubuntu2.unixmen.com
First let us start from server side.
Prerequisites
Before installing Zabbix, we should have install and configure LAMP stack on server. To install and configure LAMP server On Ubuntu or Debian refer the following links.
Install Zabbix On Ubuntu 16.04 server
After installing LAMP stack, let us add the Zabbix repository to our Ubuntu
Zabbix is available in Ubuntu default repositories, however it might be bit outdated. So let us install most recent version from the official Zabbix repositories. At the time of writing this tutorial, the latest version was Zabbix 3.
Or you can download and add the repository as shown below.
For Debian Servers
wget http://repo.zabbix.com/zabbix/3.0/debian/pool/main/z/zabbix-release/zabbix-release_3.0-1+jessie_all.deb
For my Ubuntu Servers :
root@ubuntu:~# wget http://repo.zabbix.com/zabbix/3.0/ubuntu/pool/main/z/zabbix-release/zabbix-release_3.0-1+trusty_all.deb
--2016-03-03 06:21:03--  http://repo.zabbix.com/zabbix/3.0/ubuntu/pool/main/z/zabbix-release/zabbix-release_3.0-1+trusty_all.deb
Connecting to 10.133.80.35:8080... connected.
Proxy request sent, awaiting response... 200 OK
Length: 2694 (2.6K) [application/x-debian-package]
Saving to: ‘zabbix-release_3.0-1+trusty_all.deb’
zabbix-release_3.0-1+trusty_all.deb     100%[============================================================================>]   2.63K  --.-KB/s    in 0s
2016-03-03 06:21:03 (85.9 MB/s) - ‘zabbix-release_3.0-1+trusty_all.deb’ saved [2694/2694]
root@ubuntu:~#
root@ubuntu:~# dpkg -i zabbix-release_3.0-1+trusty_all.deb
Selecting previously unselected package zabbix-release.
(Reading database ... 87004 files and directories currently installed.)
Preparing to unpack zabbix-release_3.0-1+trusty_all.deb ...
Unpacking zabbix-release (3.0-1+trusty) ...
Setting up zabbix-release (3.0-1+trusty) ...
root@ubuntu:~#
Now update package lists and Zabbix server using commands:
sudo apt-get update
sudo apt-get install zabbix-server-mysql zabbix-frontend-php
The following additional packages will be installed:
  fontconfig-config fonts-dejavu-core fping libaio1 libapache2-mod-php5 libcgi-fast-perl libcgi-pm-perl libdbd-mysql-perl libdbi-perl libencode-locale-perl
  libfcgi-perl libfontconfig1 libgd3 libhtml-parser-perl libhtml-tagset-perl libhtml-template-perl libhttp-date-perl libhttp-message-perl libiksemel3
  libio-html-perl libjbig0 libjpeg-turbo8 libjpeg8 libltdl7 liblwp-mediatypes-perl libmysqlclient18 libodbc1 libopenipmi0 libsensors4 libsnmp-base
  libsnmp30 libssh2-1 libterm-readkey-perl libtiff5 libtimedate-perl liburi-perl libvpx3 libxpm4 mysql-client mysql-client-5.6 mysql-client-core-5.6
  mysql-common mysql-server mysql-server-5.6 mysql-server-core-5.6 php5 php5-cli php5-common php5-gd php5-json php5-ldap php5-mysql php5-readline snmpd
  ttf-dejavu-core
Suggested packages:
  php-pear libclone-perl libmldbm-perl libnet-daemon-perl libsql-statement-perl libgd-tools libdata-dump-perl libipc-sharedcache-perl libmyodbc
  odbc-postgresql tdsodbc unixodbc-bin lm-sensors snmp-mibs-downloader libwww-perl mailx tinyca php5-user-cache snmptrapd
The following NEW packages will be installed:
  fontconfig-config fonts-dejavu-core fping libaio1 libapache2-mod-php5 libcgi-fast-perl libcgi-pm-perl libdbd-mysql-perl libdbi-perl libencode-locale-perl
  libfcgi-perl libfontconfig1 libgd3 libhtml-parser-perl libhtml-tagset-perl libhtml-template-perl libhttp-date-perl libhttp-message-perl libiksemel3
  libio-html-perl libjbig0 libjpeg-turbo8 libjpeg8 libltdl7 liblwp-mediatypes-perl libmysqlclient18 libodbc1 libopenipmi0 libsensors4 libsnmp-base
  libsnmp30 libssh2-1 libterm-readkey-perl libtiff5 libtimedate-perl liburi-perl libvpx3 libxpm4 mysql-client mysql-client-5.6 mysql-client-core-5.6
  mysql-common mysql-server mysql-server-5.6 mysql-server-core-5.6 php5 php5-cli php5-common php5-gd php5-json php5-ldap php5-mysql php5-readline snmpd
  ttf-dejavu-core zabbix-frontend-php zabbix-server-mysql
0 upgraded, 57 newly installed, 0 to remove and 4 not upgraded.
Need to get 34.5 MB of archives.
After this operation, 226 MB of additional disk space will be used.
Do you want to continue? [Y/n]
During installation, you’ll be asked to answer couple of questions regarding database configuration.
Select Yes and press to start the installation.
Insert the mysql root pasword :

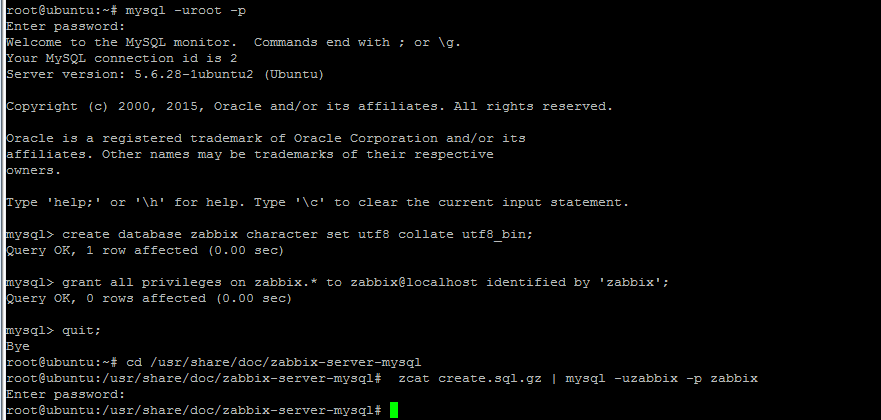
Login to mysql and create Zabbix database
root@ubuntu:~# mysql -uroot -p
Enter password:
Welcome to the MySQL monitor.  Commands end with ; or \g.
Your MySQL connection id is 2
Server version: 5.6.28-1ubuntu2 (Ubuntu)
Copyright (c) 2000, 2015, Oracle and/or its affiliates. All rights reserved.
Oracle is a registered trademark of Oracle Corporation and/or its
affiliates. Other names may be trademarks of their respective
owners.
Type 'help;' or '\h' for help. Type '\c' to clear the current input statement.
mysql>
Create Zabbix database
mysql -uroot -p
mysql> create database zabbix character set utf8 collate utf8_bin;
mysql> grant all privileges on zabbix.* to zabbix@localhost identified by 'zabbix';
mysql> quit;
 cd /usr/share/doc/zabbix-server-mysql
 zcat create.sql.gz | mysql -uzabbix -p zabbix
Configure Zabbix server configuration
 vi /etc/zabbix/zabbix_server.conf

DBHost=localhost
DBName=zabbix
DBUser=zabbix
DBPassword=zabbix
Start Zabbix Server
service zabbix-server restart
You can chaneg Timzone from this file /etc/zabbix/apache.conf
vi /etc/zabbix/apache.conf
find
#php_value date.timezone Europe/Riga
uncoment and change it to your need like
php_value date.timezone Europe/Amsterdam
save and exit
It is mandatory, to adjust the correct time zone for you. Save and close the file.
Edit php.ini file,
sudo nano /etc/php5/apache2/php.ini
Find the following line and modify it from:
;always_populate_raw_post_data = -1
to (just take the quotes off):
always_populate_raw_post_data = -1
Save and close the file.
Restart apache2 service to apply the changes and check the status .
sudo systemctl restart apache2
root@ubuntu:~# systemctl  restart   apache2
root@ubuntu:~# systemctl status  apache2
● apache2.service - LSB: Apache2 web server
   Loaded: loaded (/etc/init.d/apache2; bad; vendor preset: enabled)
   Active: active (running) since Thu 2016-03-03 07:20:01 PST; 2s ago
     Docs: man:systemd-sysv-generator(8)
  Process: 10118 ExecStop=/etc/init.d/apache2 stop (code=exited, status=0/SUCCESS)
  Process: 10144 ExecStart=/etc/init.d/apache2 start (code=exited, status=0/SUCCESS)
    Tasks: 6 (limit: 512)
   CGroup: /system.slice/apache2.service
           ├─10162 /usr/sbin/apache2 -k start
           ├─10165 /usr/sbin/apache2 -k start
           ├─10166 /usr/sbin/apache2 -k start
           ├─10167 /usr/sbin/apache2 -k start
           ├─10168 /usr/sbin/apache2 -k start
           └─10169 /usr/sbin/apache2 -k start

Mar 03 07:20:00 ubuntu.unixmen.com systemd[1]: Stopped LSB: Apache2 web server.
Mar 03 07:20:00 ubuntu.unixmen.com systemd[1]: Starting LSB: Apache2 web server...
Mar 03 07:20:00 ubuntu.unixmen.com apache2[10144]:  * Starting web server apache2
Mar 03 07:20:00 ubuntu.unixmen.com apache2[10144]: AH00557: apache2: apr_sockaddr_info_get() failed for ubuntu.unixmen.com
Mar 03 07:20:00 ubuntu.unixmen.com apache2[10144]: AH00558: apache2: Could not reliably determine the server's fully qualified domain name, using 127.0.0.1.
Mar 03 07:20:01 ubuntu.unixmen.com apache2[10144]:  *
Mar 03 07:20:01 ubuntu.unixmen.com systemd[1]: Started LSB: Apache2 web server.
lines 1-22/22 (END)
Access Zabbix Web Console
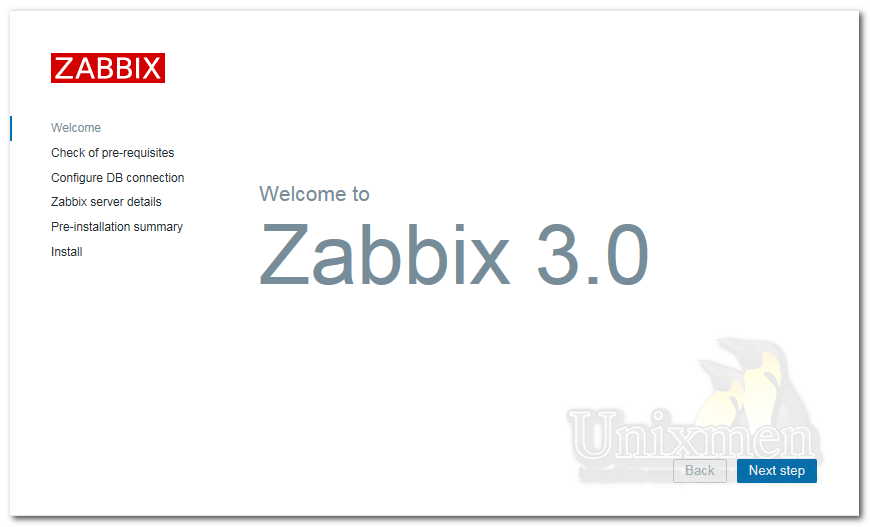
Open web browser and access the zabbix web console with URL: http://ip-address/zabbix or http://domain-name/zabbix.
Click Next to continue:
It will check all prerequisites. If everything OK, click Next to continue.

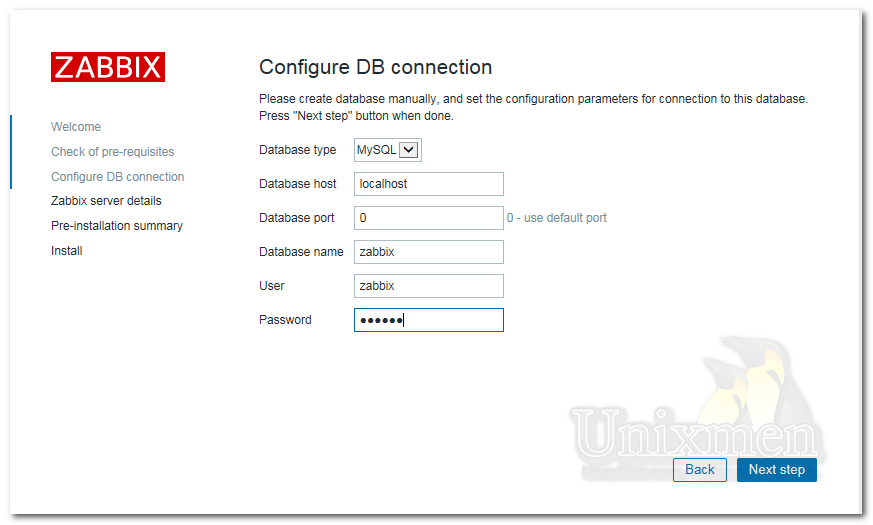
Next enter the mysql administrative password and click Test connection. The database called ‘zabbix’ will be created automatically during the installation. If it says Ok, click Next to continue.
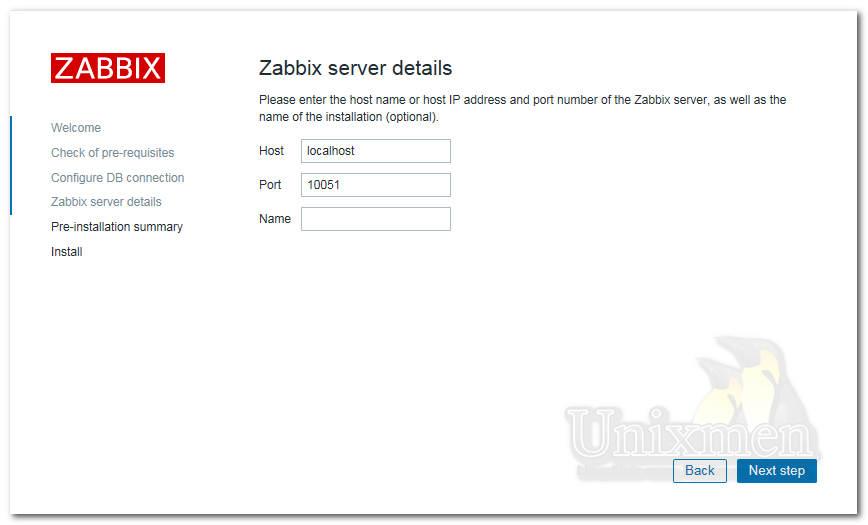
Click next:
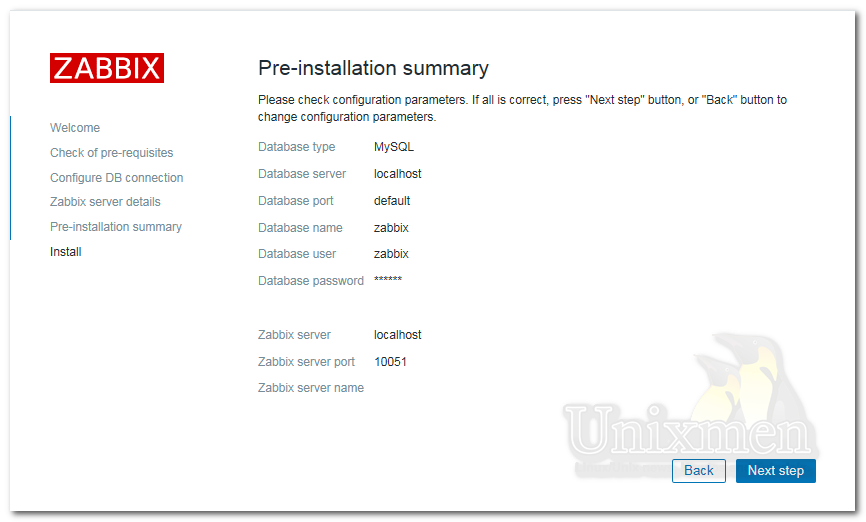
Check configuration parameters once again and click Next to continue if all correct. If you want to change anything, just hit Previous button and do the changes.
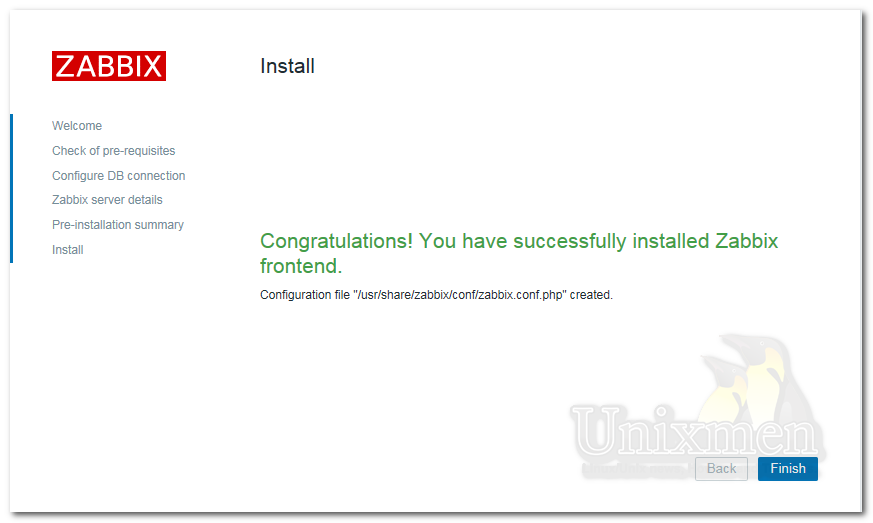
Click Finish to complete the installation.
Now you’ll be asked to enter the username and password. The default username/password is admin/zabbix.

Congratulations! You’ve completed the zabbix server and front-end installation successfully.
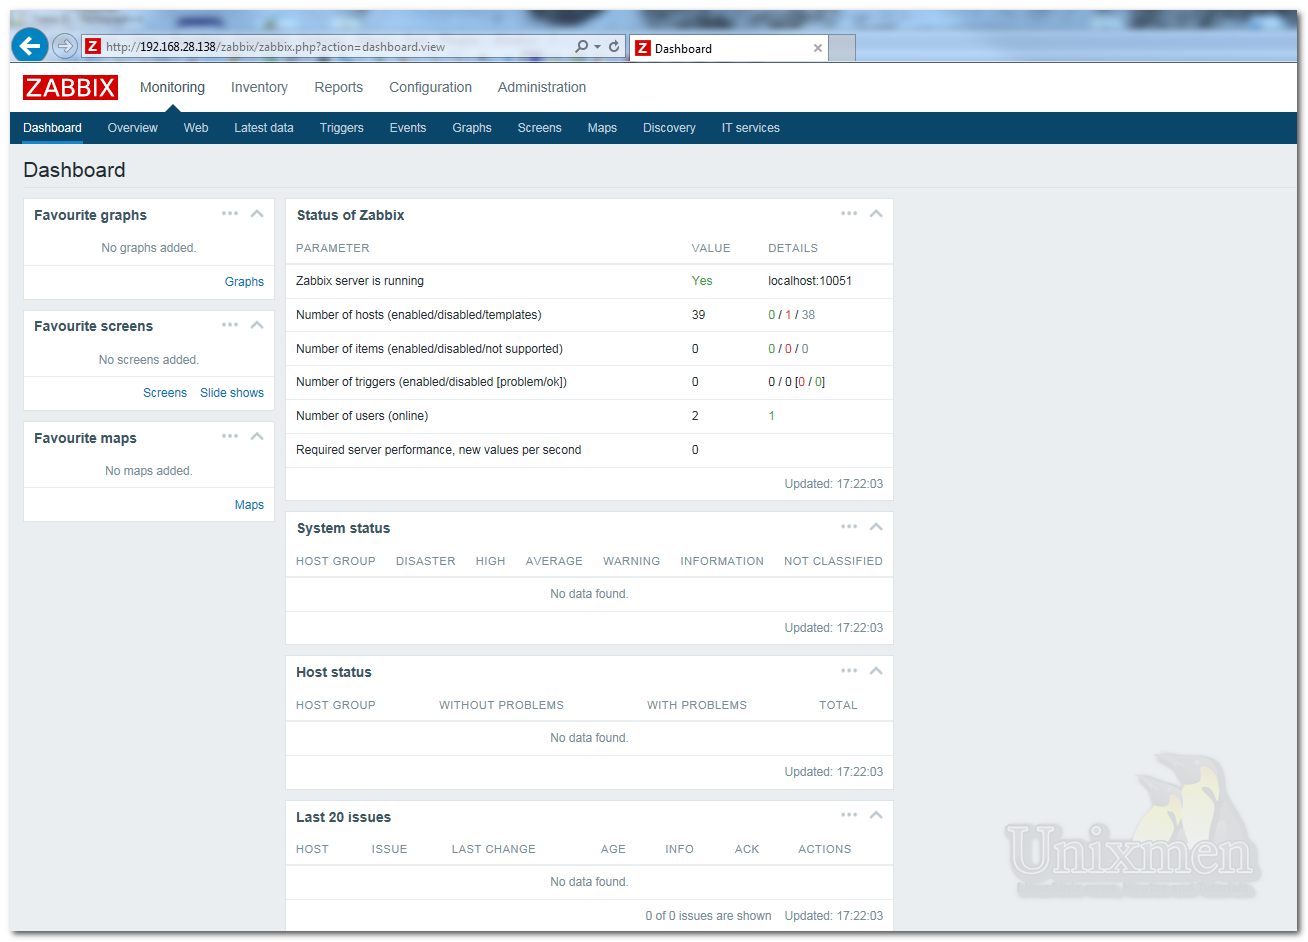
Here it is how my zabbix server Dashboard looks like.
Install zabbix-agent On zabbix server
zabbix agent is used to send the reports to the server. Let us install this package on our server with following command:
sudo apt-get install zabbix-agent
At the server side you don’t have to configure agent, default values will work just fine.
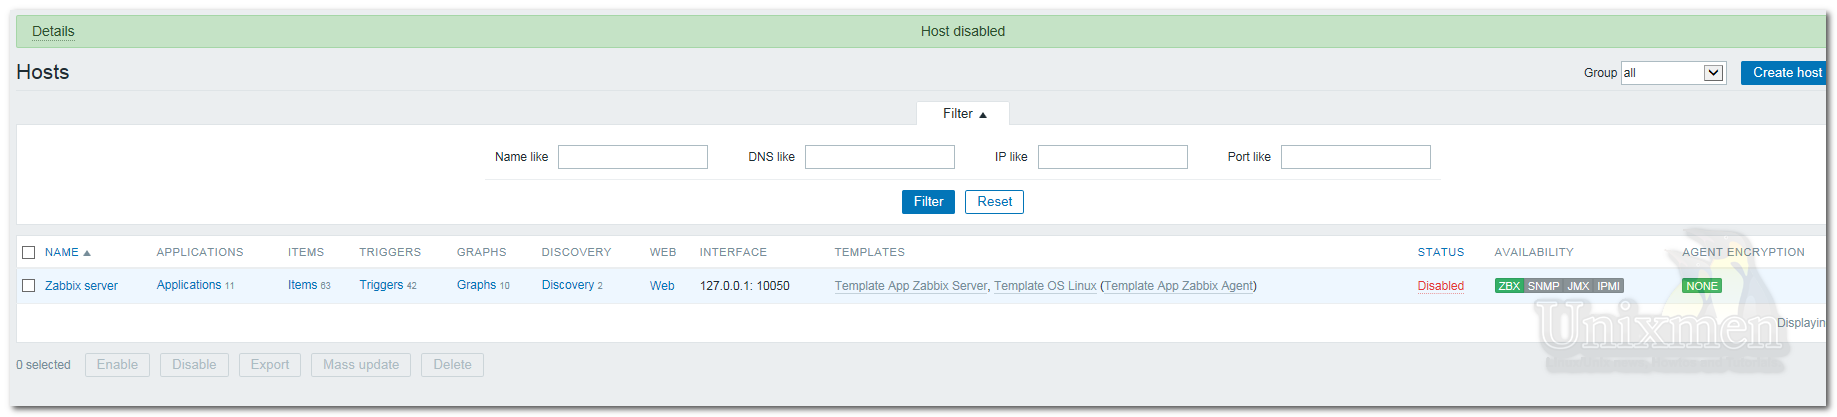
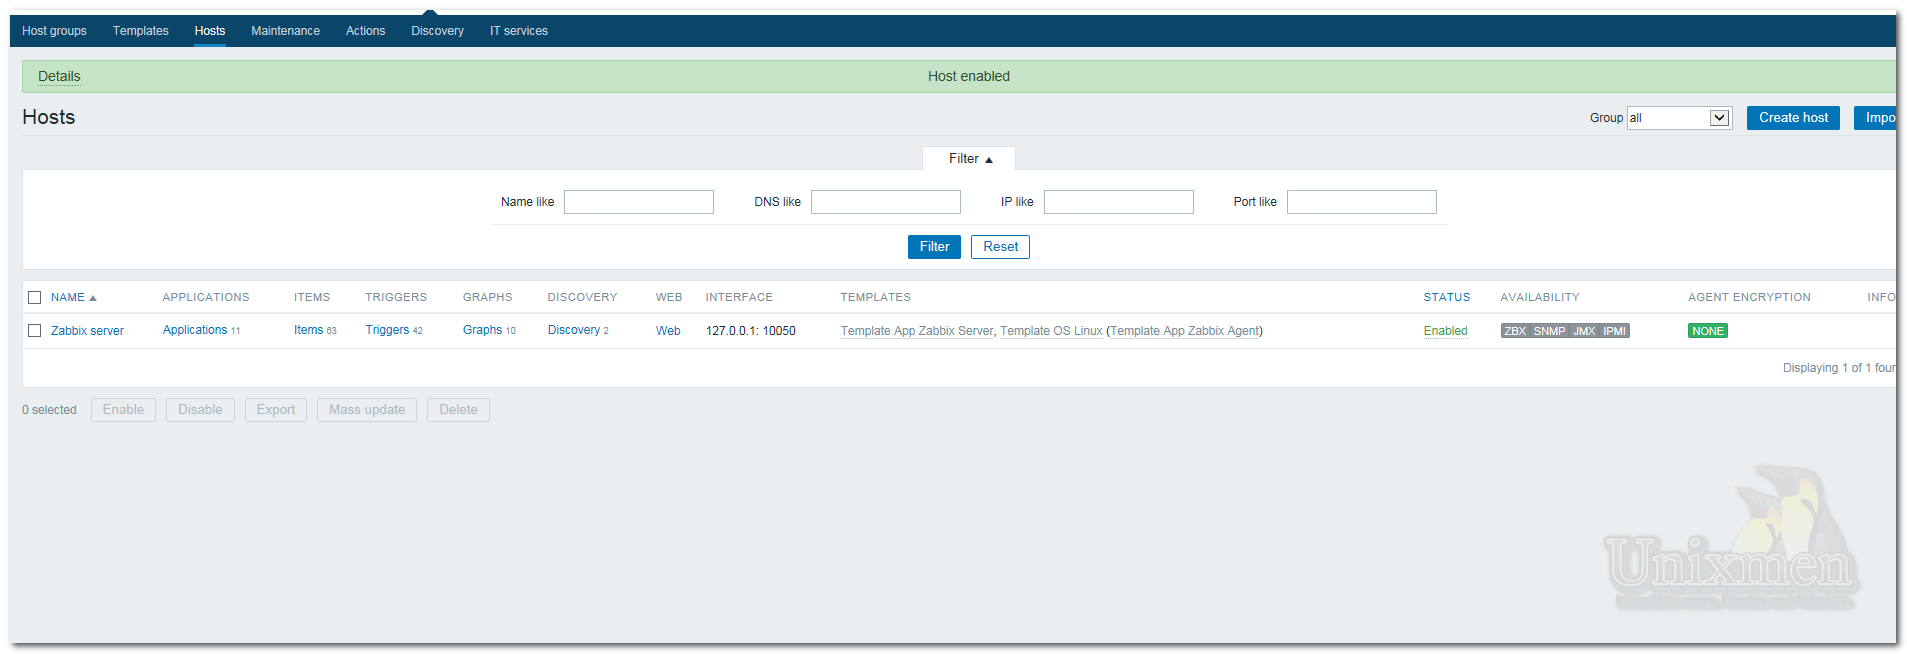
Now go to the Dashboard and navigate to Configuration tab on the tab menu bar. Click on the Hosts tab. You’ll see that the zabbix server has been listed there.
Initially, the zabbix server will not monitor itself. You have to enable it manually to monitor itself.
Wait for few minutes and you’ll see the zabbix server status will be changed to Enabled.
Zabbix Client Side Configuration
Install zabbix-agent package in your client system:
sudo apt-get install zabbix-agent
Next edit file /etc/zabbix/zabbix_agentd.conf,
sudo vi /etc/zabbix/zabbix_agentd.conf
Add the server ip address and client hostname.
[...]
Server=192.168.28.138
[...]
Hostname=ubuntu2.unixmen.com
[...]
Where,
- 192.168.28.138 Ubuntu 16.04 server’s IP address (Zabbix server).
- Ubuntu2.unixmen.com – Ubuntu 16.04 hostname (Zabbix client hostname).
Now restart zabbix-agent service with command:
sudo service zabbix-agent restart
Add Monitoring host – Method 1
Next go to the zabbix server’s Dashboard.
Navigate to Configuration -> Hosts and click on your Zabbix server name.
Click the Clone button at the bottom. Refer the following screenshot.
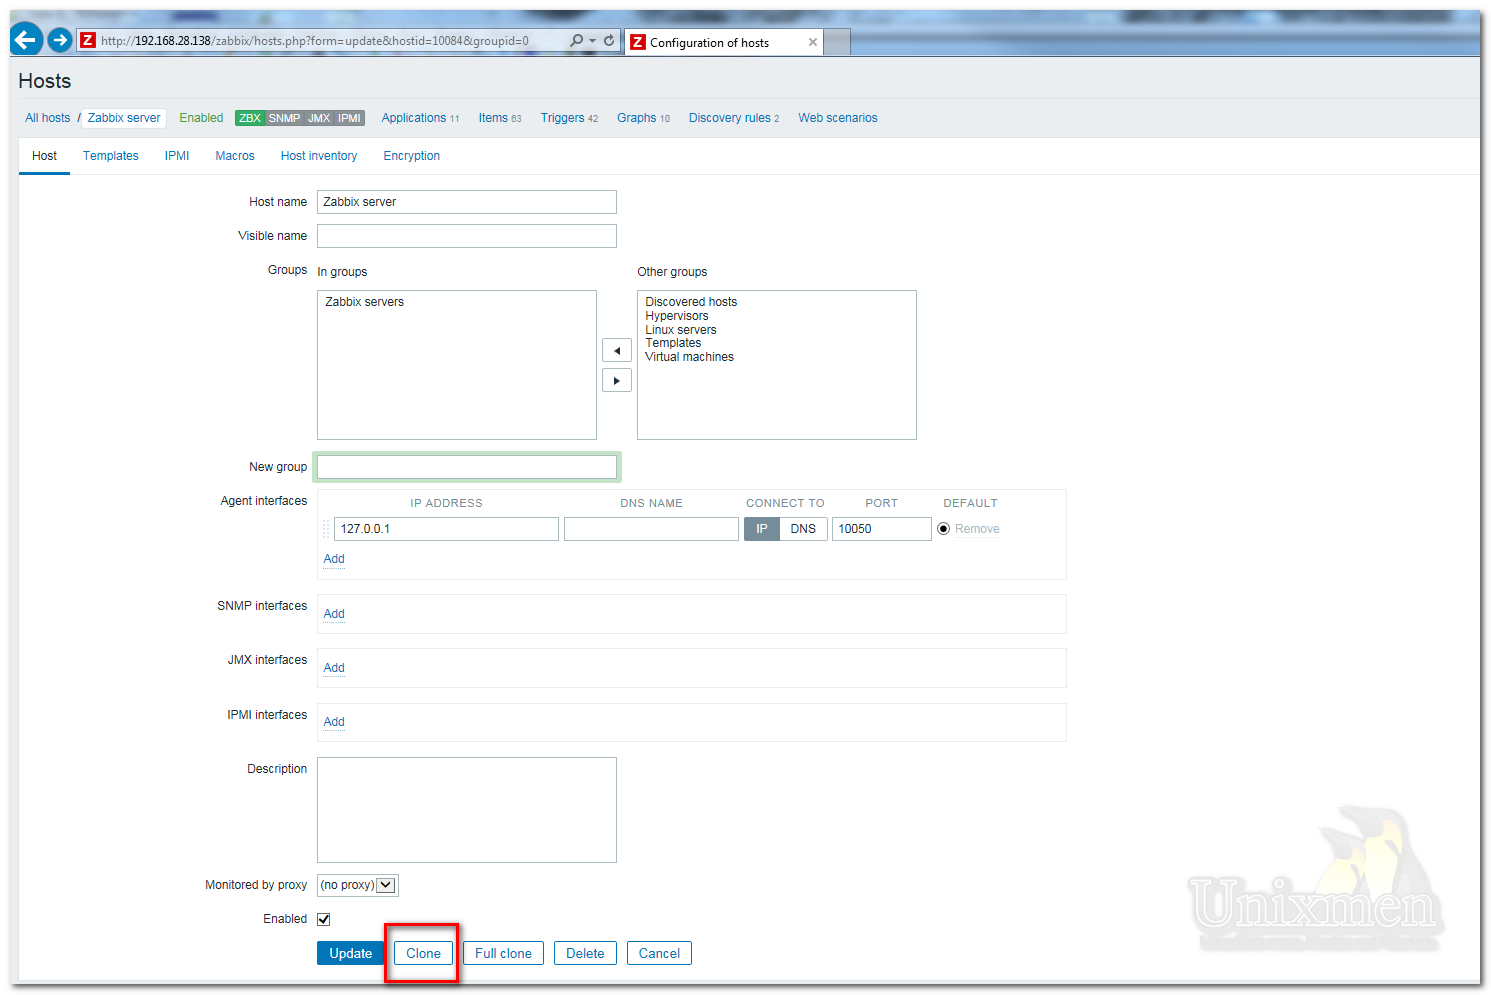
Enter the client hostname, select the group type, and enter IP address etc. Finally click Add. Don’t forget to check the box that says: Enabled above the Add button.

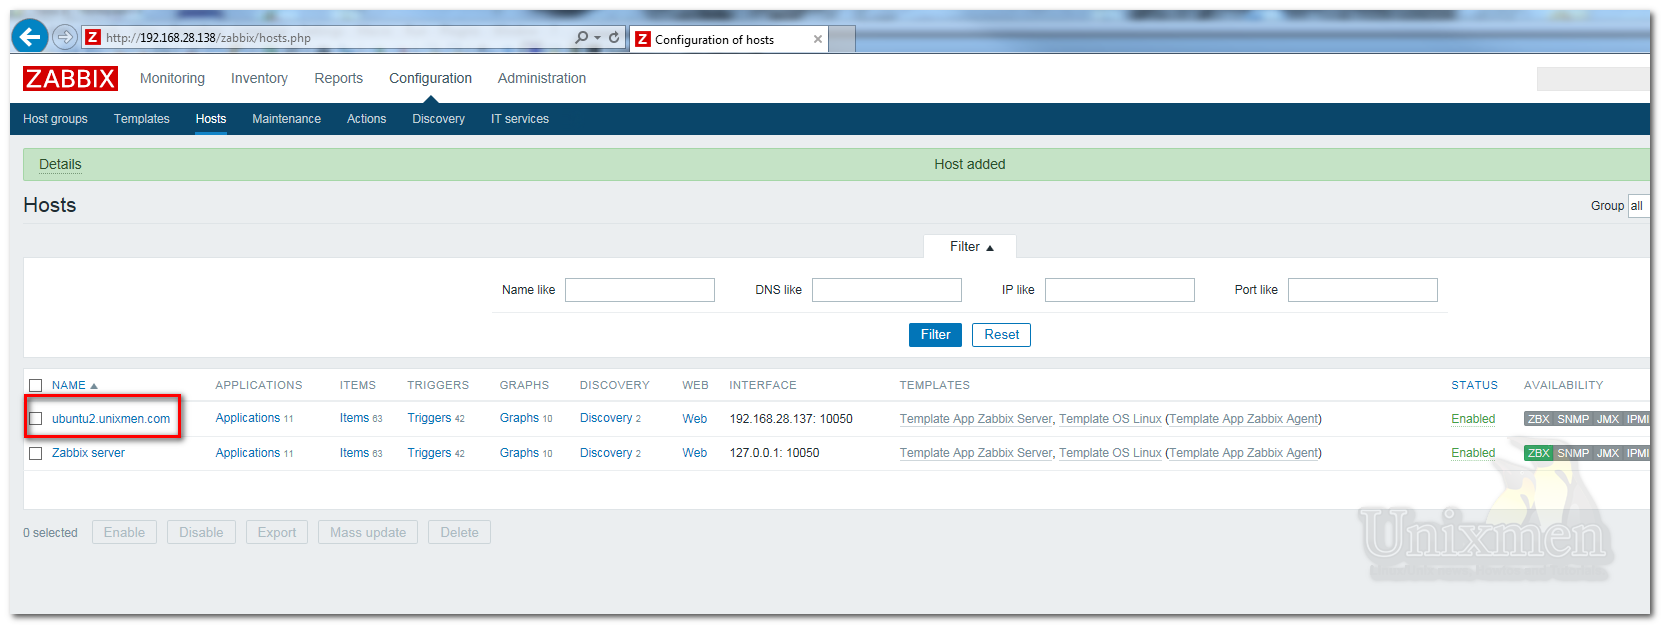
Now you’ll see that the client is added to monitoring list.
Add Monitoring Host – Method 2
From the Dashboard, go to Configuration -> Hosts. Click on Create host on the right side.
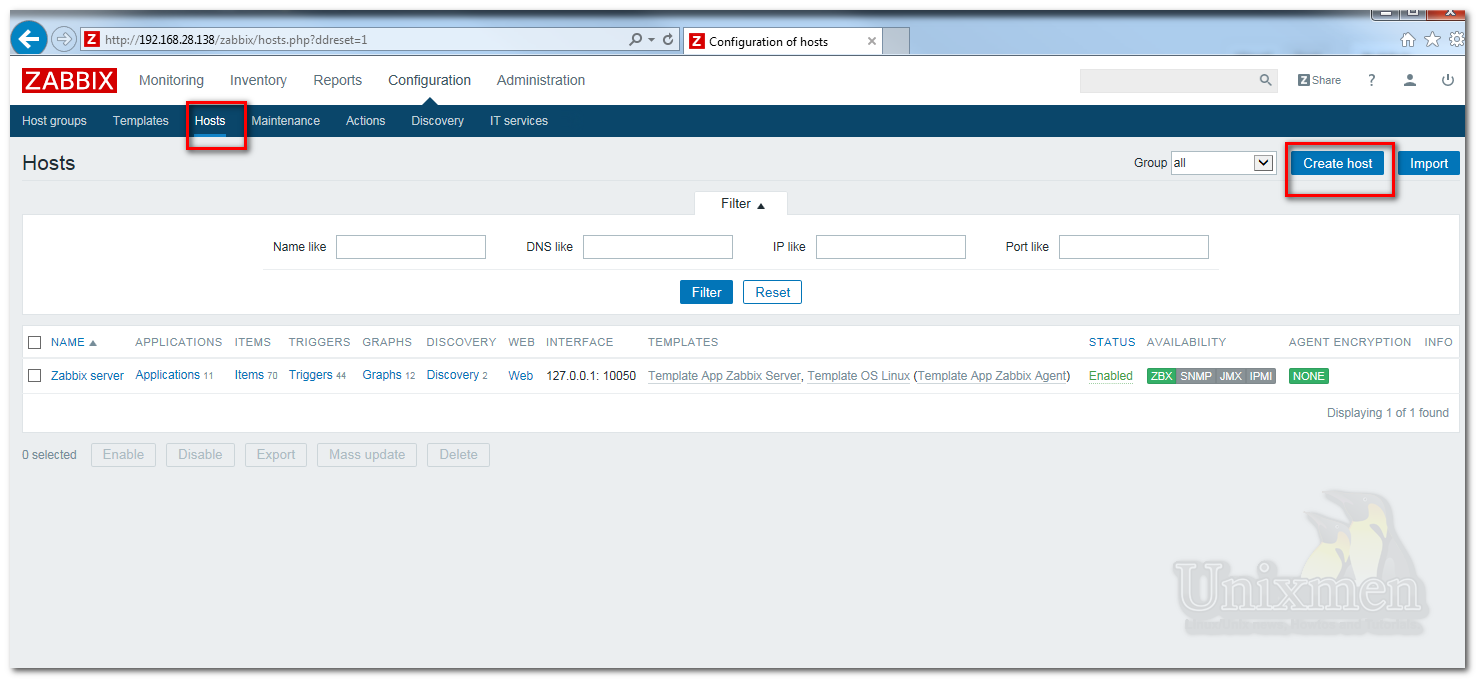
Enter hostname, select Groups and enter IP address as shown below and click Add.
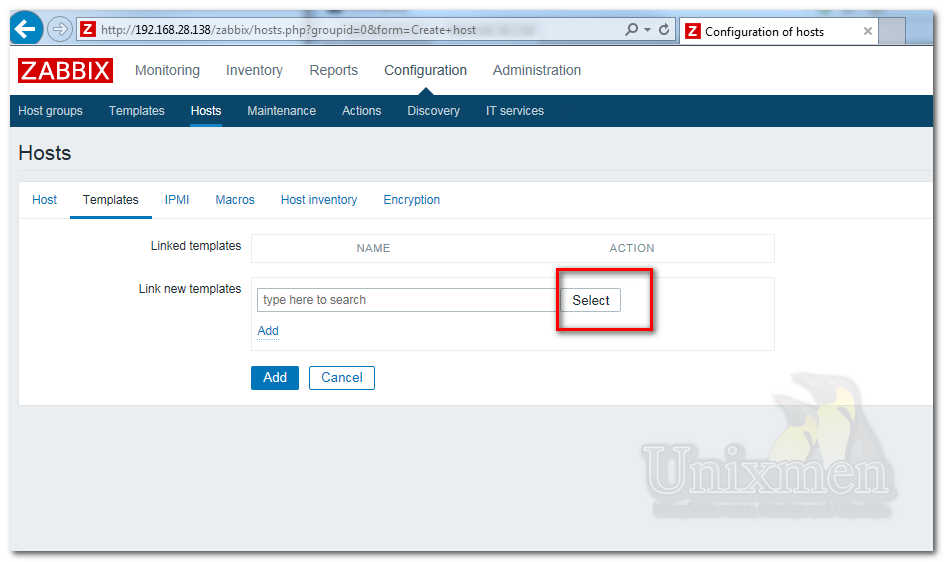
Next go to Templates section and click Select button to choose template depending upon the type of your Host.
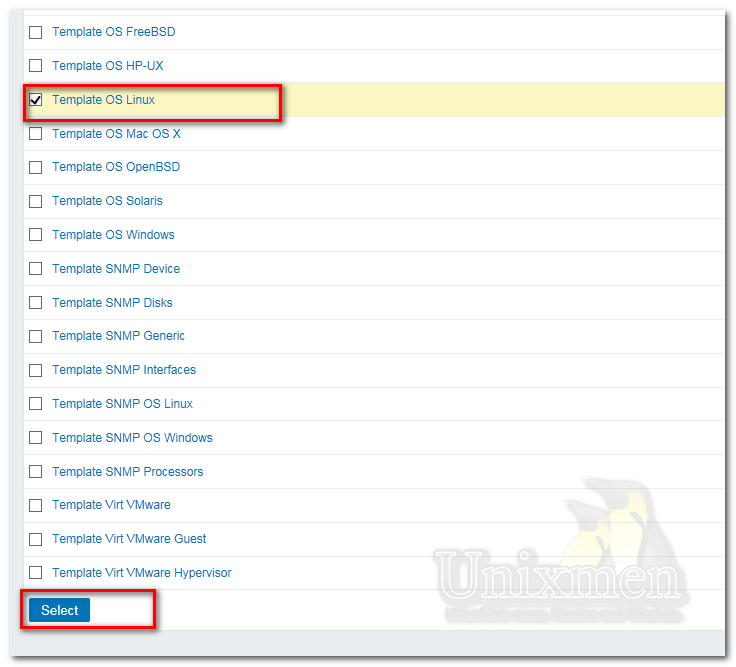
Hence my Zabbix client is Ubuntu desktop, So I have selected Template OS Linux. Then click Select.
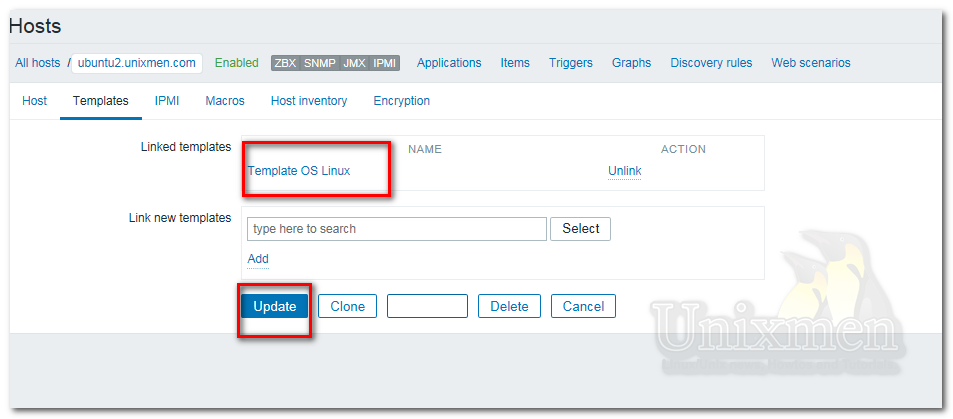
After selecting the templates of your choice, click Add button followed by Update button.
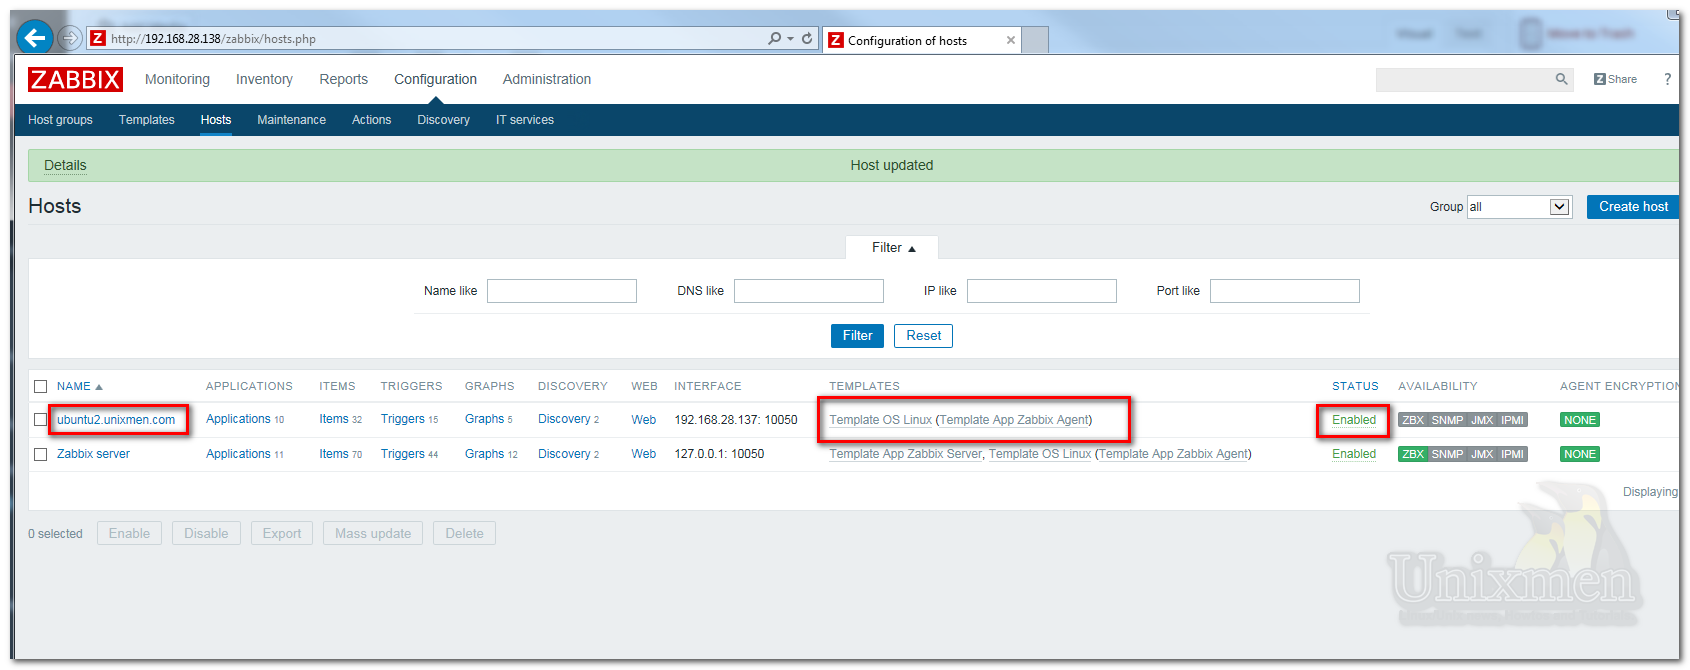
Now the client will be added in the Hosts list.
That’s it. Happy monitoring!!
Links:


