
OpenTSDB (Time Series DataBase) is a set of tool which runs from both command line and web interface and lets you perform complex operations on time series data. It is used to save and retrieve very high amounts of time series data without any compromise on security or performance. It uses Hadoop File System and Hbase on the backend. It works on top of Hbase to cater the modern day needs of faster computing. It is used as a medium to communicate with HBase. It works with both single and multi node deployments of HBase. In order to install and use OpenTSDB, Hbase cluster should already be setup. Let’s go ahead with the installation and configuration of OpenTSDB.
Preparing Your Linux System for OpenTSDB
Before we attempt to install OpenTSDB, let’s prepare our Linux system first for this. Make sure that hostname of your Linux system is properly configured. On CentOS 7 system, you can use “hostnamectl” utility to set system’s hostname.
[cc][root@localhost ~]# hostnamectl set-hostname tsdb [/cc]
Verify that system’s hostname has been setup correctly by using the following command.
[cc] [root@localhost ~]# hostname [/cc]
Also make sure that your system’s package are on the latest releases.
[cc]yum update[/cc]
Pre-requisites for OpenTSDB
Here are the pre-requisites for the installation of OpenTSDB, please ensure that following requirements are met before attempt OpenTSDB installation.
1. Java
2. Git
3. Development Tools
Installing Java
In order to install JAVA on your CentOS Linux system, run following command:
[cc] yum install java-1.7.0-openjdk java-1.7.0-openjdk-devel [/cc]
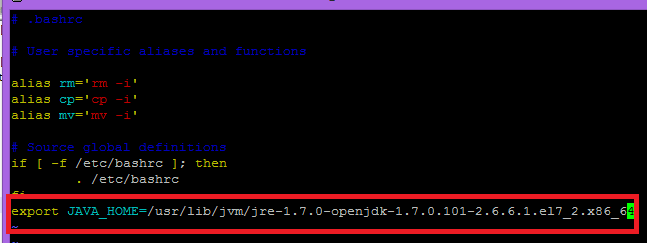
It should take a sweet amount of time depending on your internet connection’s speed. As soon as the installation is complete, we need to set JAVA_HOME variable path. In order to find out JAVA_HOME path for your system, go to the “/usr/lib/jvm/” and find out the name for java executable here. Following command should help you achieve this.
[cc] ls -la /usr/lib/jvm/ [/cc]

So from above screen, JAVA_HOME variable value for my system is:
[cc] export JAVA_HOME=/usr/lib/jvm/jre-1.7.0-openjdk-1.7.0.101-2.6.6.1.el7_2.x86_64 [/cc]
Above command will set JAVA_HOME temporarily for current session only. Add this path to “.bashrc” file so that it may be set permanently.
[cc]vim .bashrc[/cc]
That’s it, we are done with Java installation and configuration now. Run following command to verify that JAVA_HOME variable has been setup correctly and JAVA version is atleast 1.7.
[cc] java -version [/cc]
[cc] echo $JAVA_HOME [/cc]
Installing Git
Git is also needed by OpenTSDB, run following Yum command to install it on CentOS system. If you are using Ubuntu, you need to use APT-GET to install Git.
[cc] yum install git [/cc]
Installing Development Tools
It requirs many Developement Tools to be present on your Linux system, you can install required packages individually too but that might take some time so lets just get over this requirement by simply installing “Development Tools”.
[cc]yum groupinstall ‘Development Tools[/cc]
There you go, all pre-requisites have been fulfilled now. Let’s go ahead with actual installation of OpenTSDB.
Installing OpenTSDB
We are all set to install openTSDB now, move to the location where you want to install openTSDB, we choose to install it in /opt partition.
[cc] cd /opt [/cc]
Use “git clone” utility to clone the online repository for OpenTSDB to your local system.
[cc] git clone git://github.com/OpenTSDB/opentsdb.git [/cc]

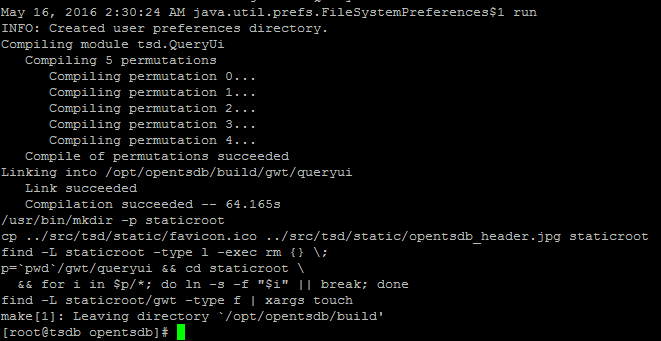
Now go into the cloned directory and start the installation process by invoking the build.sh file.
[cc] cd opentsdb [/cc]
[cc]./build.sh [/cc]
This command should finish quickly, here is how the successful completion of build process should look alike.
Now move into the “build” directory located inside “opentsdb” folder, and complete the installation process by running “make install” script.
[cc] cd /opt/opentsdb/build [/cc]
[cc] make install [/cc]
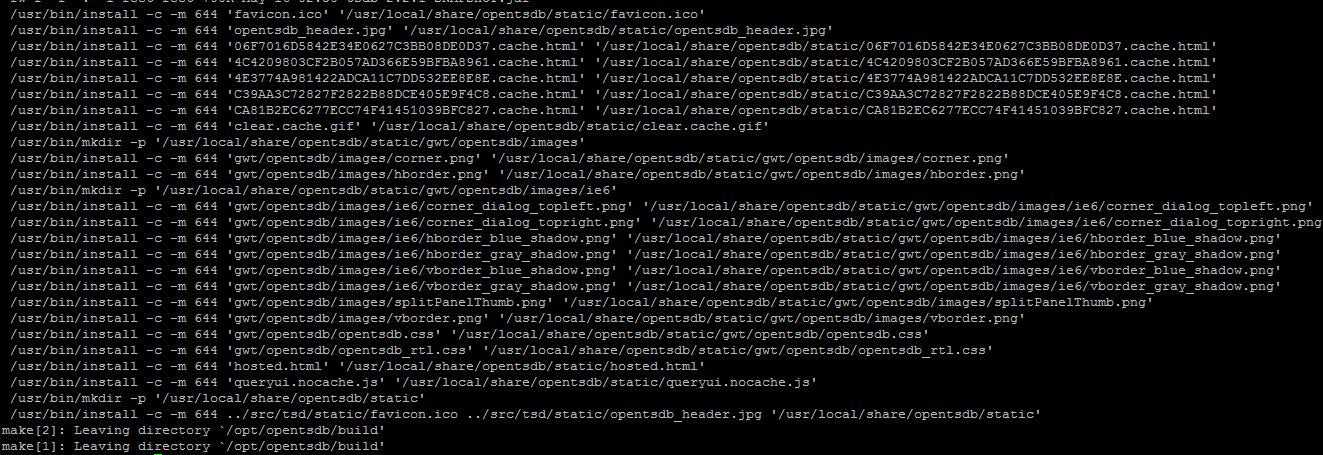
That’s it, congratulations! OpenTSDB has been installed on your system now. Use “whereis” command to find out the path for its binary executable.
[cc][root@tsdb /]# whereis tsdb
tsdb: /usr/local/bin/tsdb [/cc]
Configuring OpenTSDB with HBase Cluster
So far we have successfully installed OpenTSDB, now we need to configure it to use the existing HBase cluster. For this purpose, we need to edit its configuration file “opentsdb.conf” and provide values for following three parameters:
- tsd.http.cachedir
- tsd.http.staticroot
- tsd.storage.hbase.zk_quorum
Please note that this configuration file is located inside “src” directory, so in our case, the complete path to this file is: “/opt/opentsdb/src/opentsdb.conf”. Edit this file using your favorite text editor like Vi/Vim and update the above mentioned parameters.
“tsd.http.cachedir” value should be the path where it should store the temporary cache files, we used “/tmp” for this. “tsd.http.staticroot” is the path to the OpenTSDB static GUI files, in our case its “/opt/opentsdb/build/staticroot “, and finally the most important setting; “tsd.storage.hbase.zk_quorum” should point to your ZooKeeper instance, if you are running Zookeeper on the same system OpenTSDB is being configured, then use “localhost” as value here, otherwise specify “your remote Zookeeper server IP:2181” i.e. “192.168.1.1:2181” etc.
Okay, we are almost done, we need to add tables for OpenTSDB in the database now, run following command (replace HBASE_HOME with your actual path for HBASE installation). It will create four tables that are required by OpenTSDB operations.
[cc] env COMPRESSION=NONE HBASE_HOME=/home/hadoop/hbase/hbase-0.98.19-hadoop2 ./src/create_table.sh [/cc]
Additional Note: For the single node installation (where opentsdb and hbase are running on same machine), above command should work perfect, but if you are running OpenTSDB and HBase on seperate machines, run this command on host running HBASE daemon, and make sure to first clone OpenTSDB there so that “create_table.sh” script should exist.
OpenTSB has been installed and configured now. It’s time to launch its daemon process, run following command to run its daemon process (Make sure you are inside “opentsdb” directory when you run this command).
[cc] ./build/tsdb tsd [/cc]
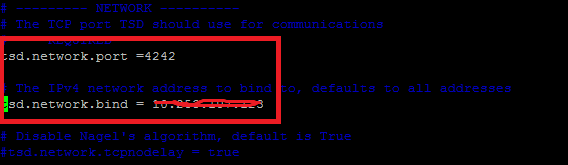
Hurray! OpenTSDB is running now, you can verify it by using the following command:
[cc] netstat -lpn | grep 4242 [/cc]
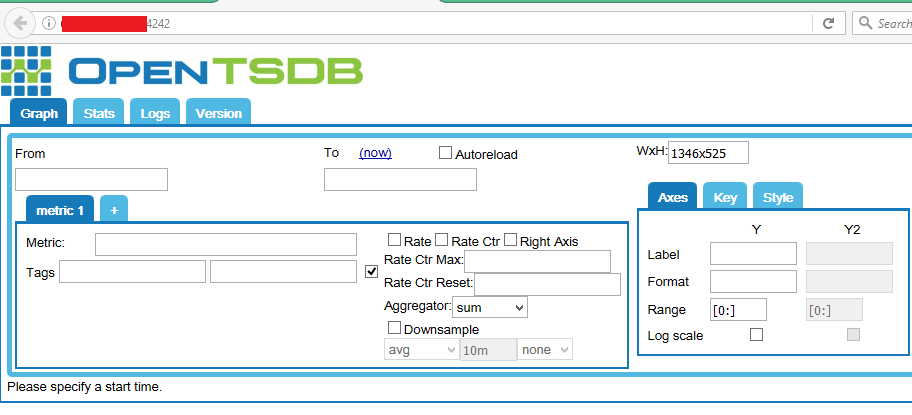
By default, its binding is set to localhost, so you can use http://localhost:4242 in browser to load its web interface, but it is always preferred to bind it to an IP address which is accessible externally, so you may access it from anywhere you want. For this purpose, edit its configuration file “/opt/opentsdb/src/opentsdb.conf” and specify IP address as “tsd.network.bind” parameter there.
Save the file and re-run the startup script to start the OpenTSDB daemon on this new IP. Launch your system’s web browser and use this IP alongwith 4242 port to load the web interface for OpenTSDB.
 Conclusion
OpenTSDB and HBase works hands in hands, its vital to use OpenTSB for successfully retrieval and storage of Time Series Data. It’s installation and configuration process is little bit tricky, but once done you should feel yourself at great ease for exploring Big data. Hope you find this article useful, do let us know via comments and share this article on social networks; because sharing is caring!


