
About Kolab Groupware Solution
Kolab Groupware Solution is free, open source, secure, scalable and reliable groupware server. It offers Email, Directory or LDAP server, Contacts, events and appointments etc. It comes with a default configuration and default components, but everything is modular and can easily be changed.
Kolab comes in two different editions:
- Kolab Community edition
- Kolab Enterprise edition
As the name implies, Community edition is maintained by group of community volunteers in their free time, whereas Enterprise edition is the full-fledged edition which is maintained by Kolab systems. The enterprise edition is professionally supported for up to 5 years and you’ll receive regular updates.
For more details about Kolab Enterprise edition, visit this link.
You can either host and run your own collaboration server using Community or Enterprise editions. Or, you can directly purchase a hosted service at MyKolab.com and run your groupware server immediately.
Concerning about Kolab features, we can list the following:
- Email ;
- Contacts ;
- Calendars ;
- Files, Tasks, Notes ;
- Cloud ready and highly customizable ;
- Multi-platform desktop clients ;
- and more
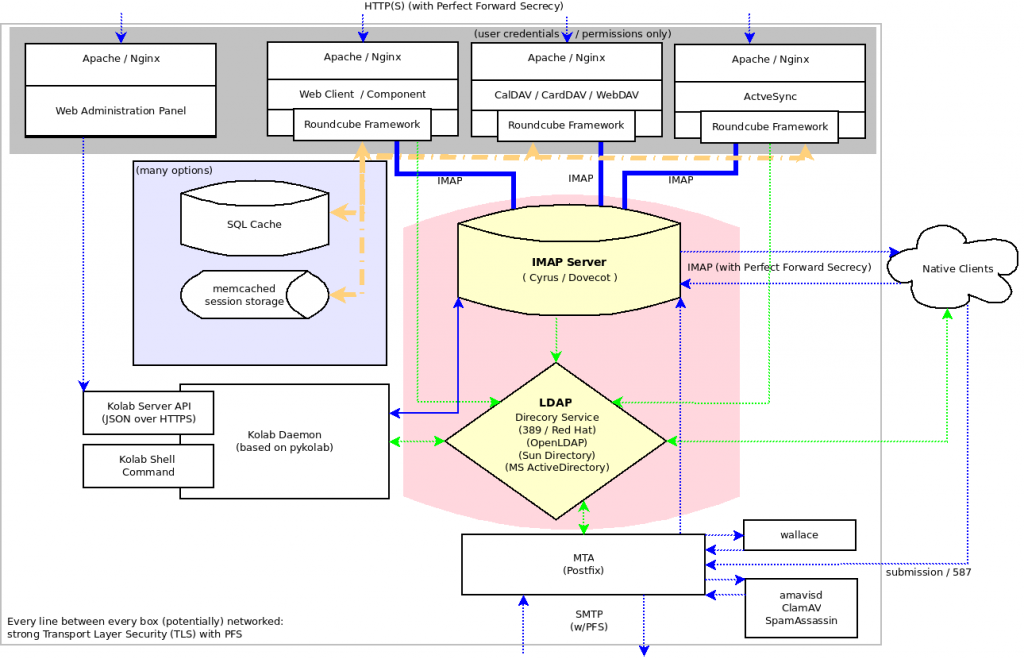
Technically, Kolab consists of many components.
- kolab-wap – Kolab Web Administration Panel
- pykolab – Kolab Python Utilities
- Kolab ActiveSync Server – Kolab Backend for Mobile Synchronization
- roundcubemail-plugins-kolab – Kolab Plugins for Roundcube
- libkolab – Advanced Kolab Object Handling Library
- libkolabxml – Kolab XML Format Schema Definitions Library
- libcalendaring – Advanced Calendaring Routines handling library
Here is the Kolab groupware component overview.
I hope you now you got the basic idea about what is Kolab and what it does actually. Now, we’ll see how to install it.
Install Kolab On Ubuntu
Kolab can be installed on all modern Linux operating systems such as Debian, Ubuntu, CentOS, RHEL, and SUSE/OpenSUSE.
In this tutorial, let us see how to install Kolab groupware in Ubuntu 14.04 LTS server.
Switch to the root user using command:
sudo su
Search for Kolab GPG key using command:
gpg --search devel@lists.kolab.org
Sample output:
As you see below, there is one key available. So, just enter “1” to get the key.
 gpg: searching for "devel@lists.kolab.org" from hkp server keys.gnupg.net
 (1) Kolab Development Coordination Mailing List <devel@lists.kolab.org>
 2048 bit RSA key 446D5A45, created: 2014-08-20
 Keys 1-1 of 1 for "devel@lists.kolab.org". Enter number(s), N)ext, or Q)uit > 1
 gpg: requesting key 446D5A45 from hkp server keys.gnupg.net
 gpg: /root/.gnupg/trustdb.gpg: trustdb created
 gpg: key 446D5A45: public key "Kolab Development Coordination Mailing List <devel@lists.kolab.org>" imported
 gpg: no ultimately trusted keys found
 gpg: Total number processed: 1
 gpg: imported: 1 (RSA: 1)
Now, import the key using command:
gpg --export --armor devel@lists.kolab.org | apt-key add -
Update the source list:
apt-get update
Install Kolab collaboration suite using command:
apt-get install kolab
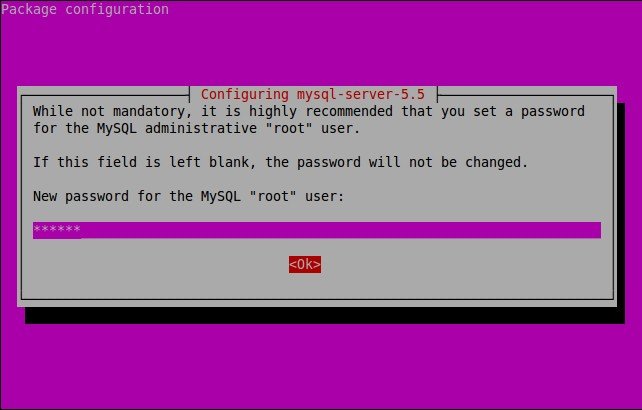
During installation, you’ll be asked to setup the MySQL root user password.
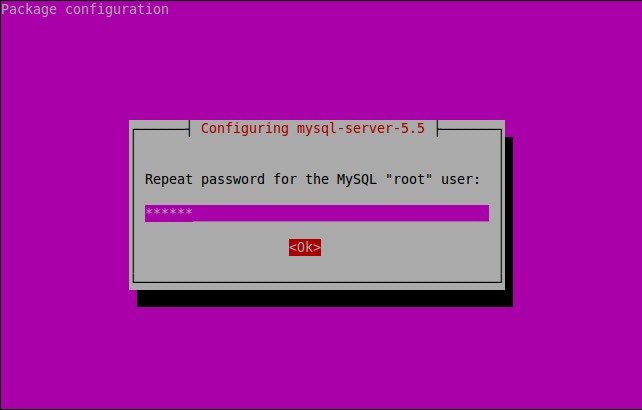
Re-enter the password:
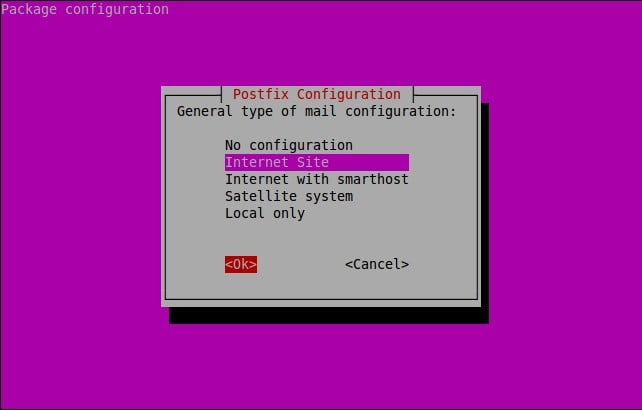
Next, we need to configure the Postfix mail server. Click Ok to continue.
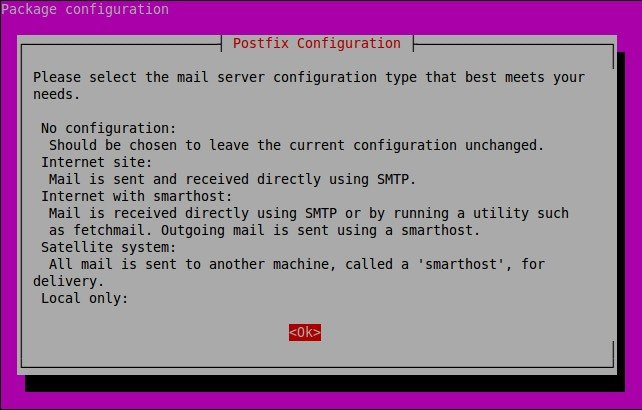
Select the type of postfix mail configuration. I go with defaults.
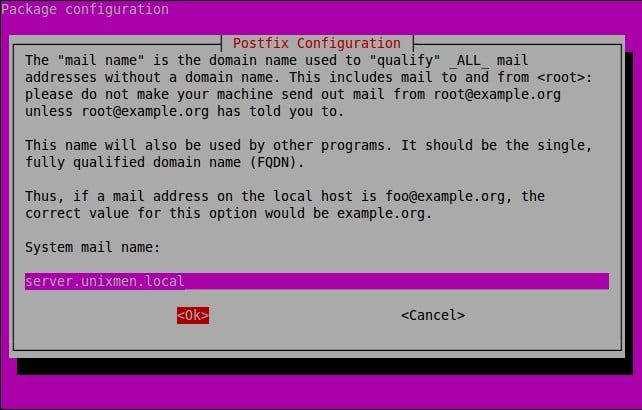
Enter your System FQDN:
That’s it. Kolab groupware has been installed.
To install Kolab on other Linux distributions, refer the following links.
- Installation on CentOS
- Installation on Debian
- Installation on Fedora
- Installation on openSUSE
- Installation on Red Hat Enterprise Linux
- Installation on SUSE Linux Enterprise Server
- Installation on Univention Corporate Server
After installing Kolab on your Linux distribution of your choice, it is time to continue to setup Kolab.
Setup Kolab
Run the following command to set up Kolab Groupware:
setup-kolab
The installer will ask you series of questions. Answer them accordingly.
First, specify the LDAP admin password:
Please supply a password for the LDAP administrator user 'admin', used to login
to the graphical console of 389 Directory server.

Administrator password [jkhByPCV_cPXohZ]: ## Enter password
Confirm Administrator password: ## Re-enter password
Specify a password for the LDAP Directory Manager user:
Please supply a password for the LDAP Directory Manager user, which is the
administrator user you will be using to at least initially log in to the Web
Admin, and that Kolab uses to perform administrative tasks.

Directory Manager password [PHvk0gnEqvKdRKf]: ## Enter password
Confirm Directory Manager password: ## Re-enter password
Choose the system user and group. In my case, I left the default values.
Please choose the system user and group the service should use to run under.
These should be existing, unprivileged, local system POSIX accounts with no
shell.

User [dirsrv]: ## Press Enter
Group [dirsrv]: ## Press Enter
Confirm this is the appropriate domain name space:
This setup procedure plans to set up Kolab Groupware for the following domain
name space. This domain name is obtained from the reverse DNS entry on your
network interface. Please confirm this is the appropriate domain name space.

unixmen.local [Y/n]: y ## Type Y and press enter
Confirm the root dn:
The standard root dn we composed for you follows. Please confirm this is the root
dn you wish to use.

dc=unixmen,dc=local [Y/n]: y ## Type Y and press enter
Please be patient. The installer is going to set up the 389 Directory Server. This may take a little while (during which period there is no output and no progress indication).
After a while, specify a Cyrus Administrator password. This password is used by Kolab to execute administrative tasks in Cyrus IMAP.
Please supply a Cyrus Administrator password. This password is used by Kolab to
execute administrative tasks in Cyrus IMAP. You may also need the password
yourself to troubleshoot Cyrus IMAP and/or perform other administrative tasks
against Cyrus IMAP directly.

Cyrus Administrator password [EzP686XNm3cH7A8]: ## Enter password
Confirm Cyrus Administrator password: ## Re-enter password
Specify Kolab Service account password. This account is used by various services such as Postfix, and Roundcube.
Please supply a Kolab Service account password. This account is used by various
services such as Postfix, and Roundcube, as anonymous binds to the LDAP server
will not be allowed.

Kolab Service password [oqD_X55ICo5GBU6]: ## Enter password
Confirm Kolab Service password: ## Re-enter password
Next, specify what MySQL server are we setting up. As we already setup MySQL server in the Kolab installation part, let us choose the option: Choice 1 (Existing MySQL server).
What MySQL server are we setting up?
 - 1: Existing MySQL server (with root password already set).
 - 2: New MySQL server (needs to be initialized).
 Choice: 1 ## Type 1 and Press Enter
Enter the MySQL root user password:
Please supply the root password for MySQL, so we can set up user accounts for
other components that use MySQL.
MySQL root password: ## Enter MySQL root user password
Specify password for the MySQL user ‘kolab’:
Please supply a password for the MySQL user 'kolab'. This password will be used
by Kolab services, such as the Web Administration Panel.

MySQL kolab password [_kdGDH6sfMrBEEy]: ## Enter password
Confirm MySQL kolab password: ## Re-enter password
Specify your Timezone:
Please supply the timezone PHP should be using. You have to use a Continent or
Country / City locality name like 'Europe/Berlin', but not just 'CEST'.

Timezone ID [UTC]: Asia/Kolkata
Specify a password for the MySQL user ’roundcube’:
Please supply a password for the MySQL user 'roundcube'. This password will be
used by the Roundcube webmail interface.

MySQL roundcube password [QtwYeWy73PpEIJY]: ## Enter password
Confirm MySQL roundcube password: ## Re-enter password
That’s it. Kolab has been successfully configured.
Kolab web mail client is available under the /roundcubemail/ location on your web- server (./var/www/html/ in Ubuntu).
Also, the additional locations for applications installed include:
- chwala: /chwala/
- iRony: /iRony/
- kolab-freebusy: /freebusy/
- kolab-webadmin: /kolab-webadmin/
- roundcubemail: /roundcubemail/
Now, it’s time to access Kolab administration console and create some sample users.
Access Kolab Administration console
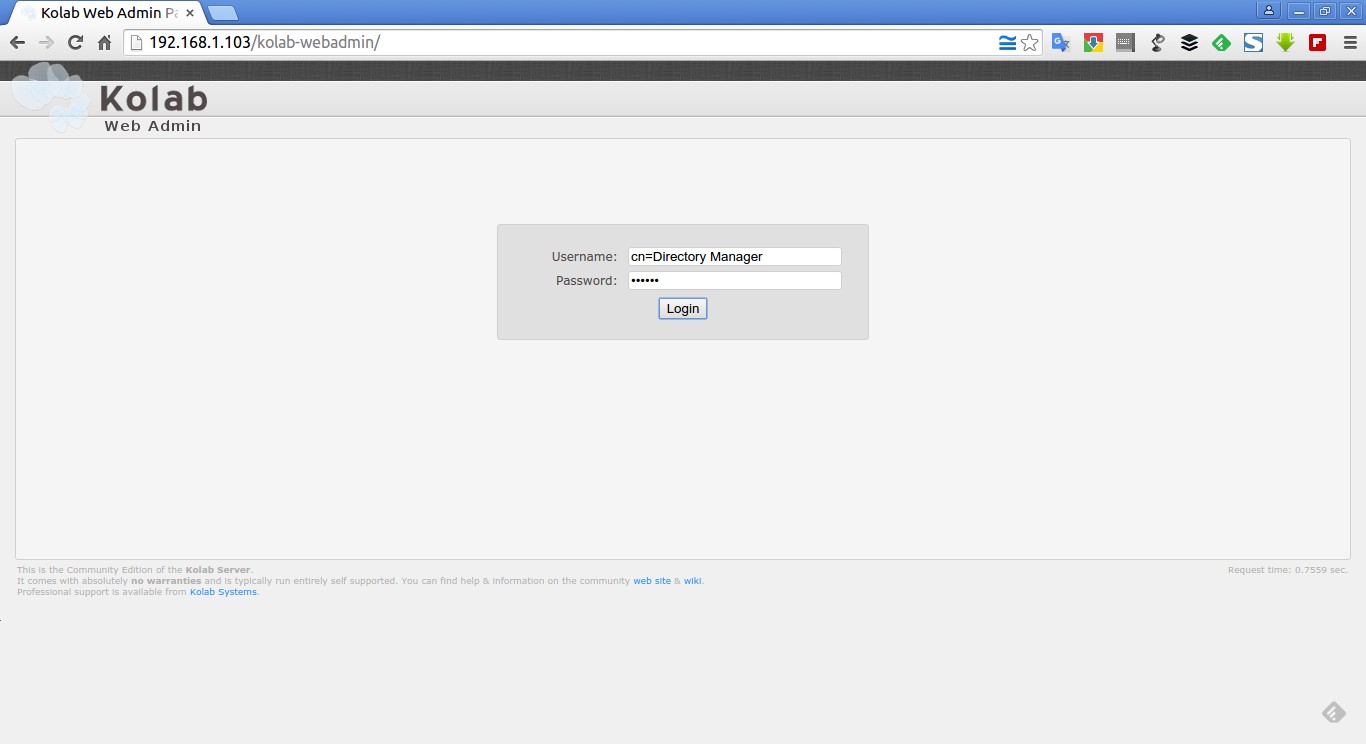
Navigate to Kolab admin console using URL: http://ip-address/kolab-webadmin or http://domain-name/kolab-webadmin.
The following page should appear.
Login using the username cn=Directory Manager and the corresponding password you supplied during the setup process.
Here it is how my Kolab administration console looks.
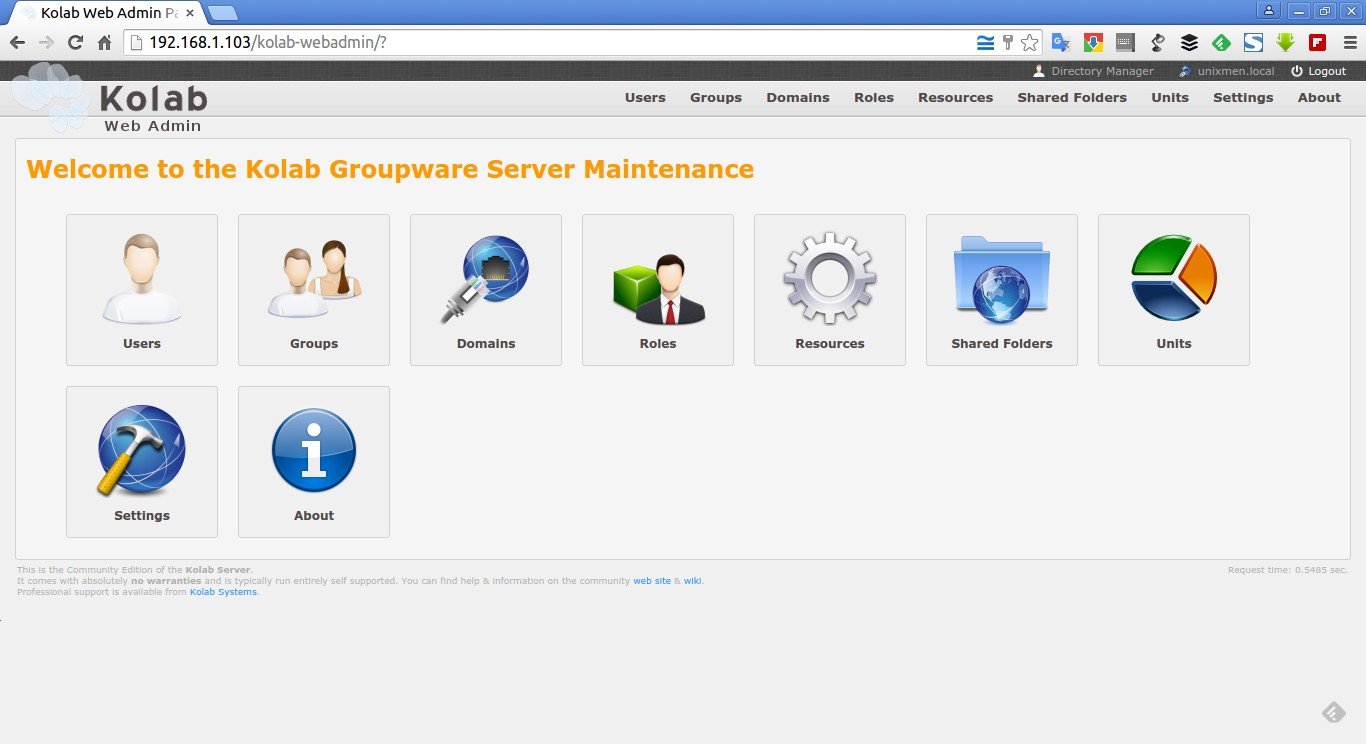
From here, you can create/edit/delete users, groups, domains, shared folders and roles etc.
That’s all for now. In our next tutorial, let us see how to create users, domains, and roles etc. Also, we will discuss how to send/receive mails via web browser and Kolab desktop clients and many more features of Kolab.
Reference links:
Cheers!


