When dealing with just one or two servers, managing software packages and services is usually quite a breeze. The scenario plays out differently when faced with the configuration of 100 or 500 servers or devices. As a systems administrator, you have to think of a better approach to handle this situation. Ansible is a free and opensource configuration management and application deployment software tool that is designed to streamline software provisioning and configuration of a huge number of servers. In this guide, you will learn how to install and configure Ansible on Ubuntu 20.04.
Ansible makes it easier for operation teams including network and server administrators to configure and deploy servers and other network devices from a central point. It’s a perfect automation tool that makes your work easier and saves a lot of time and energy. Of course, there are other automation tools such as Puppet and Chef. But Ansible takes the day due to its ease of installation and the fact that it does not require any special software. Ansible is agentless, unlike chef and puppet. It leverages the SSH protocol and uses YAML files to specify the configuration details.
Without much further ado, let’s dive in.
Prerequisites & Lab setup
For an accurate demonstration of how Ansible works, we are going to have the following setup:
- Ansible control node – 173.82.16.48 – Ubuntu 20.04
The Control node is the Linux system that contains the YAML configuration files and is used to connect and manage the Ansible host over the SSH protocol. In this guide, the control node will be Ubuntu 20.04 system.
2. Ansible host – 173.82.106.22 – Ubuntu 20.04
This is any Linux system that is controlled by the Ansible control node. Services and processes will be automated on this system. As with the control node, we will still use a Ubuntu system as an Ansible host.
Step 1: Configure the Ansible Control node.
To start off, we need to set up the Ansible control node. Firstly, log in and create a regular user that we will use to perform administrative privileges using the syntax:
$ adduser username
Provide the preferred password among other attributes if necessary. In the snippet below, I have provided the password and full name only.
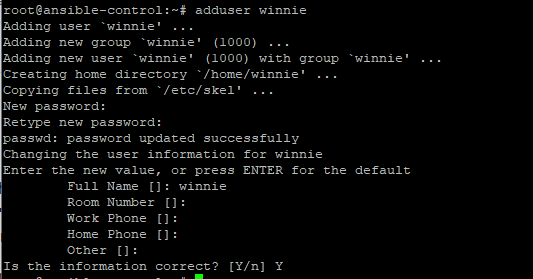
Thereafter, grant the user administrative privileges using the sudo command as shown.
$ usermod -aG sudo username

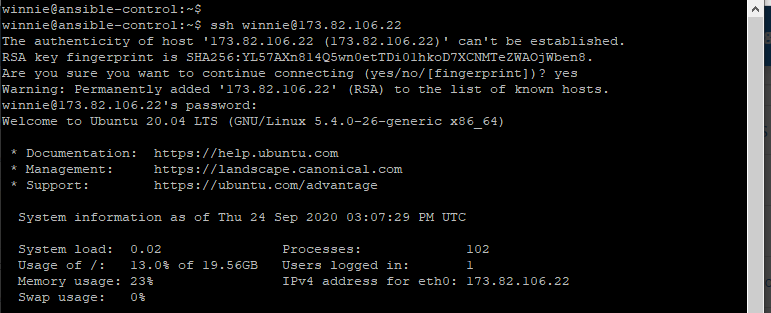
Next, log in to the remote Ansible node via SSH:
$ ssh winnie@173.82.106.22
Type ‘Yes‘ and press ‘ENTER‘ to continue. Then provide the user’s password and hit ‘ENTER‘ again.
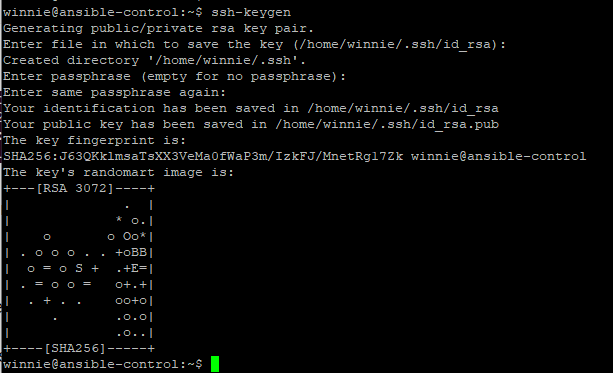
For Ansible to work seamlessly and manage remote hosts without a hitch, We need to configure passwordless SSH login to the remote host. To achieve this, switch to the sudo user and generate SSH key pair as shown:
$ ssh-keygen
Next, copy the public key to the remote Ansible host using the ssh-copy-id command as shown
$ ssh-copy-id winnie@173.82.106.22
When prompted to continue connecting, type ‘Yes‘ and hit the ‘ENTER‘ button.
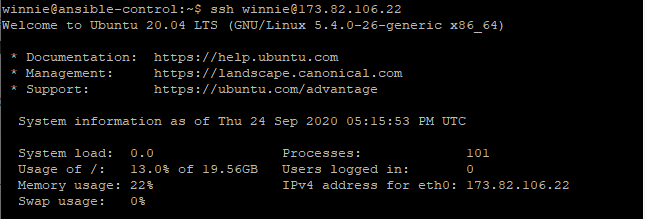
Now try logging in via SSH to confirm passwordless SSH authentication.
$ ssh winnie@173.82.106.22
This time, you will not be prompted for the user password. We can now proceed to install and configure Ansible.
Step 2: Install and configure Ansible
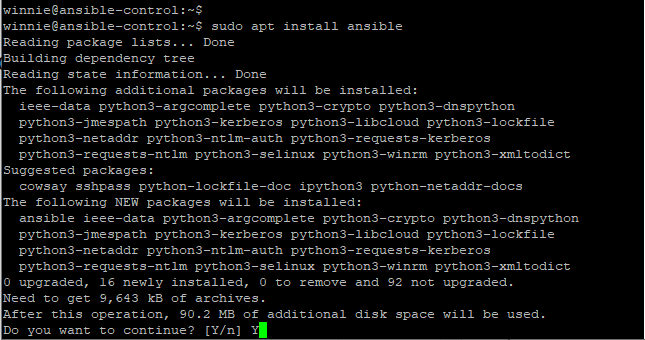
Having finalized with the initial Ansible control node configuration, let’s now install and configure Ansible on Ubuntu. First off, update the package lists as shown:
$ sudo apt update
Thereafter, install Ansible using the command
$ sudo apt install ansible
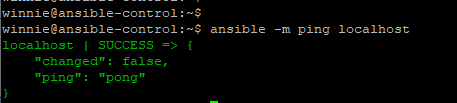
To check if Ansible is working on the control node, run the command:
$ ansible -m ping all
Ansible controller sends a ping message to localhost system and gets a ‘pong‘ reply.
Step 3: Configure the Ansible Inventory
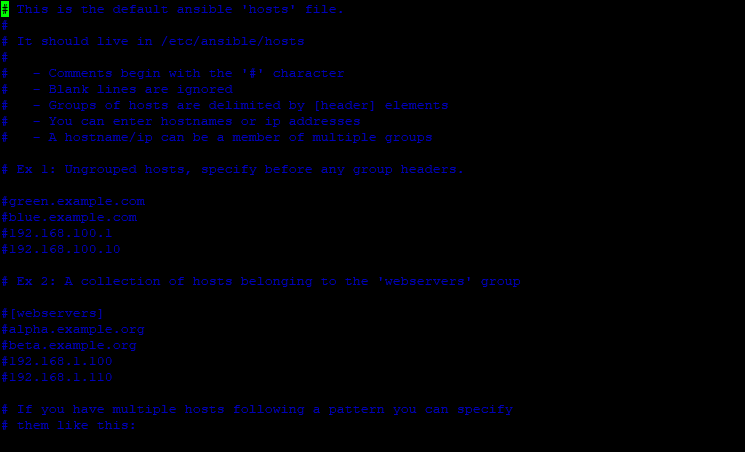
An inventory file in Ansible terminology refers to a file that contains information about managed hosts. This is where you define the hosts you are going to configure using the playbook YAML files. You can specify remote hosts according to their hostnames and IP address and organize them into groups. Additionally, you can define variables that will ultimately affect how playbooks are executed.
By default, the Ansible inventory file is located in the /etc/ansible/hosts file. This is a glance of the file.
We are going to specify the remote node by its IP address and group it under the [servers] group as shown.
[servers]

173.82.106.22
Be sure to replace the IP address with your node’s IP address. Save and quit the configuration file.
To display your hosts’ list, invoke the command:
$ ansible-inventory --list -y
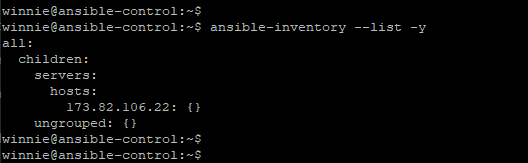
Great! From the snippet, we can confirm that we have successfully added our remote Ansible host to the inventory file. There’s no limit to the number of hosts you can include. Feel free to add as many hosts as possible.
Step 4: Test the connection from Ansible Control node
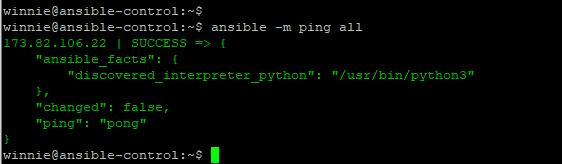
After successfully defining the host(s) in the configuration, its time to test the connection to the Ansible remote host. Run the following command to establish connectivity to all the hosts.
$ ansible -m ping all
Once again, Ansible sends a ping message and you receive a ‘pong‘ response and this gives you the green light to run additional commands and configure the server using Playbook files.
You can now begin running ad-hoc commands. For example, to check uptime, execute the command:
$ ansible -a "uptime" all

Conclusion
This wraps up this guide on how to install and configure Ansible on Ubuntu 20.04. Feel free to give us a shout and contribute in the comment section.


