
Most modern Linux flavors such as Ubuntu and Mint come with out of the box support for several hardware components such as graphic drivers, and WiFi adapters. After installation, it’s usually quite a breeze using your WiFi connection as the system automatically installs the required WiFi driver. This is also true even when you are just running a live installation to test out the operating system before installing it on your hard drive. However, in some few cases, problems may occur and your WiFi functionality may not kick in as expected. Additional steps are required to setup Wifi on your system. In this tutorial, we will show you how you can get wifi on Linux Mint 19. Without much further ado, let us dive in.
How to resolve wireless connection issues on Mint 19
If you are pulling out your hair with frustration because you cannot get your WiFi connection to kick in, fret not. In this guide, we have outlined a number of solutions that you can apply to fix the issue. We recommend that you give each of these solutions a try until your WiFi problem goes away.
- Confirm that your Wireless adapter is properly installed.
- Update your Linux Mint kernel.
- Manually install WiFi Drivers.
- Use a USB Wi-Fi adapter.
Now, let’s take a look at each in turn.
1) Confirm that the WiFI adapter driver is properly installed
Ideally, this should be your starting point when troubleshooting your WiFi connection woes. To get started, connect your system to the internet using an ethernet cable / LAN cable.
Next, click on the menu button and select ‘Administration‘ > ‘Device manager‘
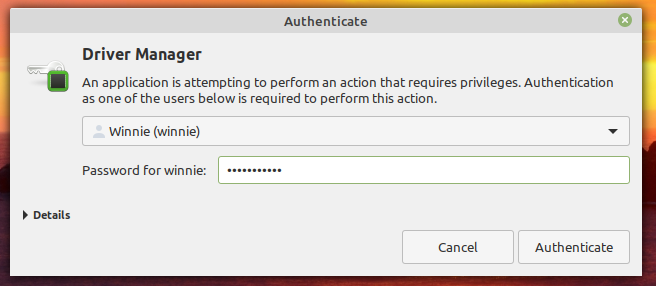
An authentication pop-up will appear on the screen requesting for your password. To authenticate, simply type in your password and click on the ‘Authenticate‘ button.
Wait for the cache update to complete. It may take quite a while but some patience will do.

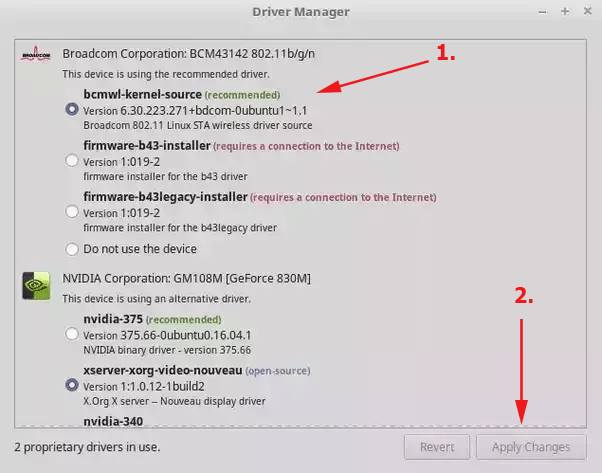
This ushers you to the driver Manager window where all the drivers are listed as shown below. Since our interest is in the WiFi drivers, ensure that your WiFi driver appears on the list and is selected. In our case, we are using a PC with Broadcom wireless adapter and the corresponding wireless driver vendor is Broadcom. Yours may be different. For example, in our case, we have RealTek wireless drivers instead of Broadcom.
Click on the radio button adjacent to the WiFi driver and click on ‘Apply changes‘.
Once you are done, exit the driver manager window and restart your system. Upon login, click on the Network symbol at the bottom of the screen and enable the wireless network. Then select the wireless network that you want to connect to from the list of wireless devices.
If this worked for you, well and good, but if it didn’t proceed to the next solution.
2. Update Linux Mint kernel
Another solution that has proven to fix missing WiFi drivers is updating your system’s kernel. As you may already know, the kernel is the core of the Linux system and it interfaces the Operating systems with the hardware components.
Updating the kernel comes with multiple advantages. The latest kernel improves your system’s stability, fortifies your system’s security by applying fixes to pre-existing security flaws and updates the system’s drivers to their latest versions. Additionally, the latest kernel ships with additional drivers for your system’s hardware.
If your Mint system cannot detect the Wifi adapter, updating the kernel comes highly recommended. But first, to check what kernel version you are using, run:
$ uname -r

To update the kernel, run the commands:
$ sudo apt update -y && sudo apt upgrade -y
$ sudo apt dist-upgrade
Once the upgrade is over, reboot your system and once again verify the kernel version:
$ uname -r

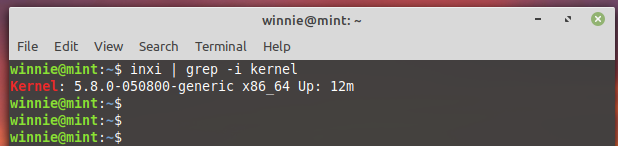
Additionally, you can use the inxi command-line tool as shown
$ inxi | grep -i kernel
With the latest kernel installed, proceed and check whether you can use the Wi-Fi functionality to connect to any wireless network.
3. Manually installing drivers to get WiFi on Linux Mint
Another solution to this problem is to manually install WiFi drivers. Again, connect your PC to the internet using a LAN cable. For systems with RealTek adapters, begin by cloning the git repository as shown:
$ git clone https://github.com/abperiasamy/rtl8812AU_8821AU_linux.git
Then navigate into the cloned directory.
$ cd rtl8812AU_8821AU_linux
Compile from source.
$ make
$ sudo make install
Finally, reboot for the changes to take effect.
$ sudo reboot
For Broadcom wireless drivers, first update the system as shown before:
$ sudo apt update -y && sudo apt upgrade
Thereafter, install the Broadcom drivers as shown:
$ sudo apt-get install b43-fwcutter firmware-b43-installer
Next, reboot your system and try connecting to nearby wireless networks. The above fix should solve your WiFi problems.
4. Use a USB WiFi adapter
If all attempts to get WiFi on Linux Mint are futile, you still have one bullet left – and that is using an external WiFi adapter. This is usually a USB adapter that can be no longer than your thumb. Some, however, do have an antenna but will still work the same by providing WiFi functionality.
Simply plug in the USB Wi-FI adapter and the kernel will search for WLAN drivers that will work with the adapter. In my case, I’m using a TP-Link USB WiFi adapter
Next, click on the Network icon on the taskbar as shown.
On the pull-up menu, enable the wireless functionality by turning on the toggle.

Next, click on the ‘Network Settings’ options just below. This opens the window shown below with a list of available wireless networks.
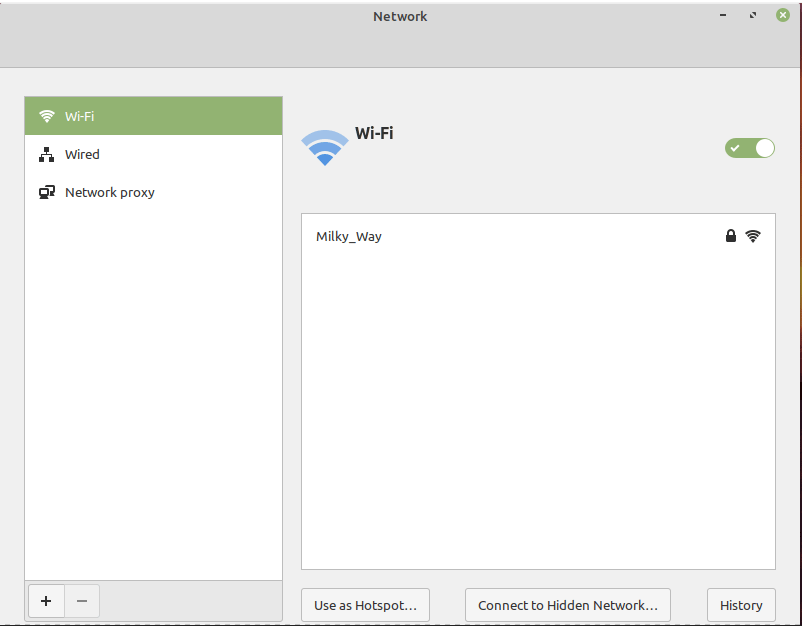
I have my home wireless network called ‘Milky Way‘. To connect to it, I’ll click on it and provide the password for authentication.
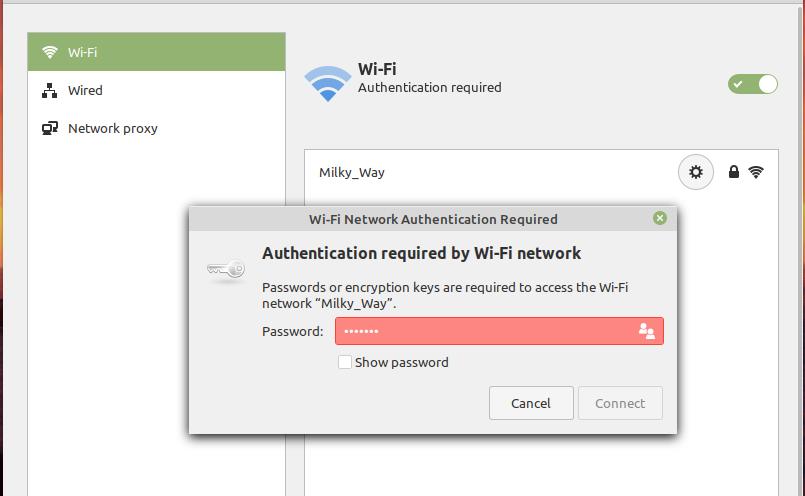
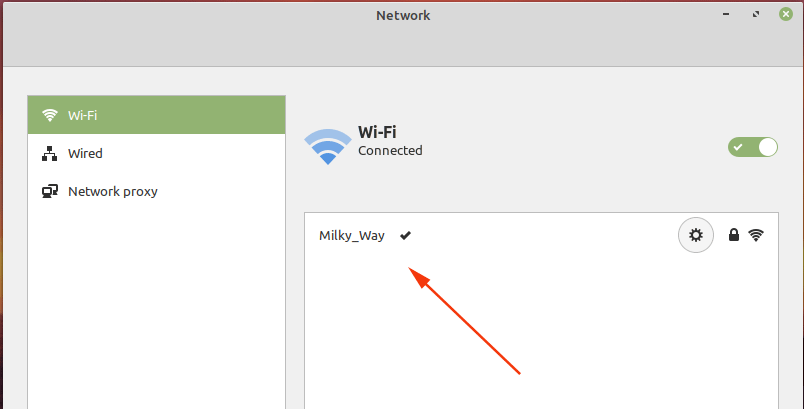
Click on the ‘Connect‘ button to establish a connection to your wireless connection as shown below.
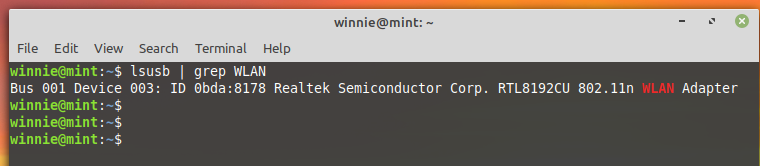
You can confirm that the driver has been installed by running the command:
$ lsusb | grep WLAN
Conclusion
This concludes this topic on How to setup WiFi drivers on your Linux Mint system. You’ll rarely encounter this issue with Linux Mint 19 due to major kernel improvements which support a broad array of WiFi adapters. It’s recommended however to install the latest Mint – Linux Mint 20 codenamed Ulyana. It packs with all the major improvements and enhancements that guarantee you superb user experience.


