Introduction to Rocket.Chat
We have already talked about Rocket.Chat, a private messaging system like Slack and Mattermost, and how to install and configure it on a “local” server.
However, many infrastructures are based on Amazon Web Services, which offers a suite of cloud computing services. In particular the Amazon Elastic Compute Cloud, or Amazon EC2.
This series of tutorials explain how to deploy Rocket.Chat on Amazon Web Services (AWS), using Ubuntu 14.04 LTS as AMI.
Getting started
In AWS Services, go to EC2 > Instances > Launch Instance. There, select Ubuntu Server 14.04 LTS AMI.
For Instance Type, choose t2.micro. The T2 instances are useful, in particular, for websites and web applications, build servers, micro services, or test and staging environments.
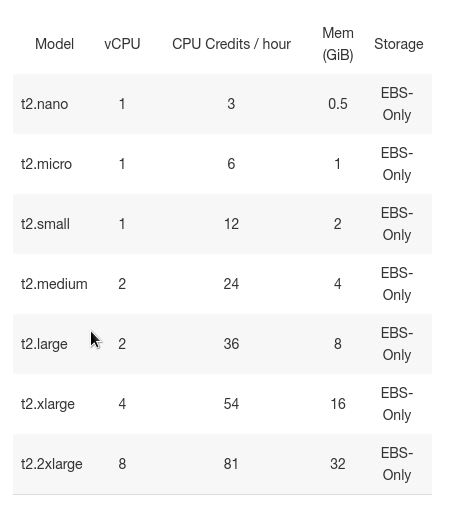
For Rocket.Chat, t2.micro seems a good choice.
Next, adjust the storage size, or add a second encrypted volume, and click on Next. In ‘Tag Instance’ add a Value to the Name Key and go on.
Next, it’s necessary to configure a security group. Right now, be sure to allow traffic to the server on port 80 until the SSL certificate is created. After that step, it’s possible to remove the group. Click on Launch, then create a new key pairs and launch a new instance.
Allocate an IP
In AWS Services, go to EC2 and the to ElasticIP. Here, allocate a new address and associate the instance launched in the previous steps.
In the details, it’s important to take note of the Public DNS value, because it will be needed later. This should be in the format ec2-00-111-22-33.us-west-2.compute.amazonaws.com.
Configure DNS using AWS Route 53
In AWS Services, you should always go to Route 53. Amazon Route 53 is a highly available and scalable cloud DNS web service, designed to provide a reliable and cost effective way to route end users to Internet applications. It is IPv6 compliant.
Using Amazon Route 53 Traffic Flow’s visual editor, it’s possible to manage how end-users are routed to application’s endpoints, whether in a single region or distributed. Amazon Route 53 also offers a domain name registration service.
Create a new Hosted Zone, entering a domain name and choosing Public Hosted Zone. Click on Create.
After selecting this new zone, create a record set and select as type CNAME. Then, enter the Public DNS name from the previous step to the value field and click on Create.
Get a SSL certificate
In 2017 it’s necessary to use HTTPS connections, and Chrome is still signalling services which don’t allow it. So, it’s important to get an SSL certificate.
For this task we will use Let’s Encrypt.
On the instance, clone the letsencrypt repository:
# git clone https://github.com/letsencrypt/letsencrypt /opt/letsencrypt
Next, check on port 80:
# netstat -na | grep ':80.*LISTEN'
If any processes are listening, kill them all.
Next, to get the certificate, go to /opt/letsencrypt and run the standalone plugin, with the following commands:
# cd /opt/letsencrypt
# ./letsencrypt-auto certonly --standalone --email "email_address_here" -d "mydomain.com"
During this passage, letsencrypt will listen on port 80.
When this is finished, it’s possible to remove the previously created security group.
Now, it’s possible to check for certificate and keys. In particular, directory /etc/letsencrypt/archive should contain the following files:
- cert.pem
- chain.pem
- fullchain.pem
- privkey.pem
fullchain.pem is the admin’s certificate file, while privkey.pem is his certificate key file.
Conclusions
With the previous steps, the first half of the journey is complete. It’s important to execute all steps carefully, because this is the basis on which Rocket.Chat will be deployed on an AWS Instance.


