A brief introduction to RHCSA tutorial
Welcome back, this is the fifth tutorial of RHCSA examination preparation tutorial series, we have published four articles of this series and hope you have liked them. This is the fifth article in continuation of RHCSA series, you can access following links to have a look at recent articles:
2. http://unixmen.com/learn-man-vim-editor-file-globbing-rhcsa/
3. http://unixmen.com/learn-file-management-commnad-line-required-rhcsa/
In this tutorial, we will discuss linking in Linux file system, linking provide access to files which are located somewhere in System (consider is as file shortcuts in Microsoft Windows), user and group management, managing permission for users and groups.
What are Inode and Links in Linux?
As we know that in NIX operating systems everything is a file, either they are some directories or some specific file, is considered to be a file. When we think about some file in Linux, it is actually a block containing some data, operating system recognizes this data with metadata, each file on these block is identified with some unique numeric value which is called as inode. Each inode stores every information about the file such as device id, user id, group id, time stamps etc. but it does not contain any information about the file name. When you call for some file in the operating system, the operating system does not recognize this file by the name which is assigned by you but with recognize it with inode value which is uniquely assigned to that particular file by the system. The inode structure is a table which keeps track of each and every index of the file name and concerned inode number assigned. It is important to note that this hard link relation is unidirectional only, which means that the hard link is always aware of its inode number but inode does not recognize name of file which is connected via hard link. Any inode can even have more than one hard link. Inode will be aware that there are 2 links connected but cannot identify what are the names of these connected files .
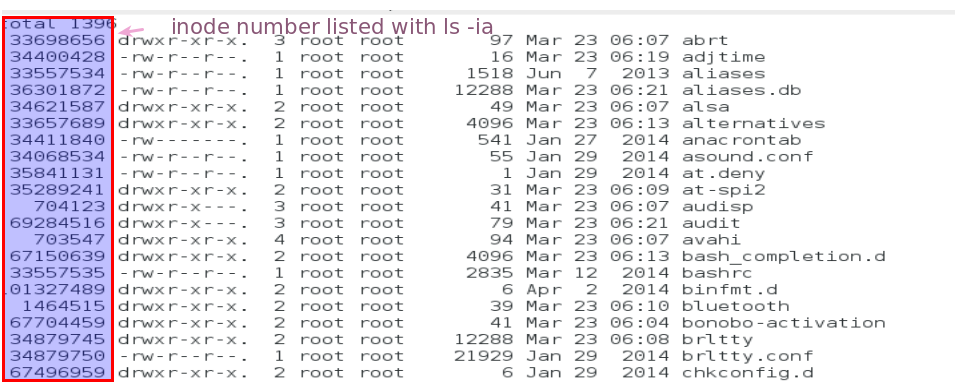
Inode number for any file can find with the following command:
$ cd /etc
$ ls -ia
What are the hard link and soft link in Linux?
When you create some new file using a hard link with the specified command line, the you are just cloning inode number and it will not change the hard link file and the original file will share same inode number.
Let us have a look, Create some new file
$ touch unixmen
Create hard link with following command.
$ ln unixmen hardlink
$ ls –ia
You can note that hardlink files are listed with a highlight blue color, both files have same inode number. But when you refer for some soft link, there is a basic difference hard link and soft link. Hard link refer directly to the inode number, but soft link refer to hard link only and does not have any relation with that inode. If hard link file get deleted soft link file will loose its reference and no data will be shown. Let us have a look. Use ln with -s option to create a soft link.
$ ln -s harlink softlink
List files after creating soft links, you can notice that softlink is presented in light blue color and distinctly visible.
It is easy to recognize hard link file as they are shown in blue highlight.
Remove one hard link file.
$ rm hardlink
Have a look again, you can notice that soft link is gone.
User management in Linux
Why is a user needed in Linux?
When we think about a server we can assume lots of services running simultaneously for specified purposes, every process is associated with some user, access permission of processes restricted by user so that they will be having access to some defined area of the system only e.g. If you wants to run some web services and you enable them to run with root, some of hacker or intruder can get access to your root account via web server, so we need to run web services with some restriction. To list information about current logged in user:
$ id
To know that what user is currently logged in, give following command
$ whoami
To list all of the process currently running on the system
$ ps aux
Here you can notice that some processes are running as root but some are running as some different user which means such processes are allowed to access a specific are of the system.
You can identify how many users are currently logged in, with following command:
$ who
What are characteristics of User in Linux?
There are some characteristics associated with any Linux users which that particular user must possess:
- Username: User cannot exist without its name; the user must have some specific name.
- User Password: There are two types of users in Linux one are humans and another is system users, human users are of course those which will be used by some person, such user accounts must be secured with a strong password. System users do not need any password. The password is stored in /etc/shadow file in RHEL. !! Symbol means that user is disabled.
- Home Directory: It is required to specify that where some user can store their data on to the system, by default all local system users will have their home directories under /home.
- UID: This unique identification id associated with a user, UID of root is 1.
- GID: By default every user is a member of group with same name of a user, which makes a user more secure so that non-group member cannot access data of any specific user. Group related information is stored in /etc/groups file. There are total of 6400 number of id available so you can create a huge number of users.
- Default shell: The shell where user will login, by default in Red Hat Linux it /bin/bash.
How to create a user in Linux?
It is important to note that you must of have root permissions to create a new user as an ordinary user you do not have permissions to create some new user. Log in as root and create user, but first explore what command line options we can utilize as minimum to create a new user.
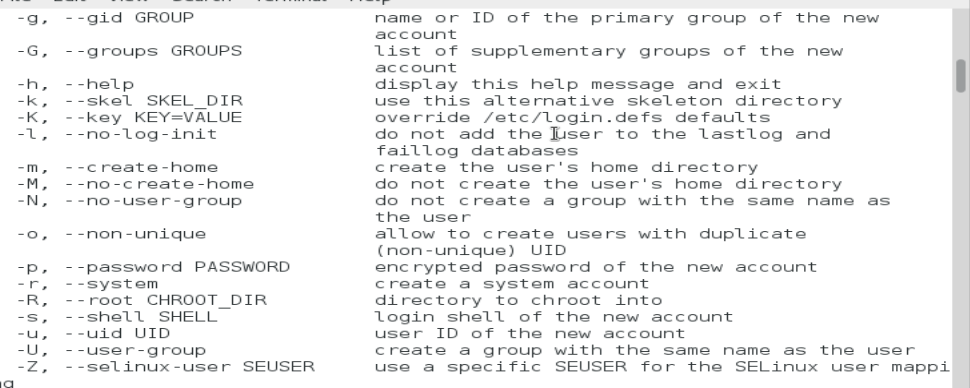
# useradd --help
All options are listed and well explained.
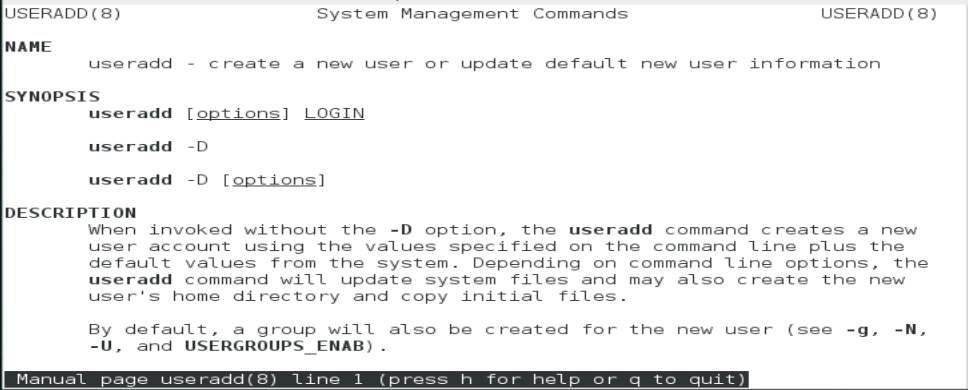
Or
# man useradd
You can use different options to create a user, e.g. in below example -c option enable to add some comment, -e option will define expiry date of user account, -s option define default shell environment used by the user, and ‘rajneesh’ is the name of user.
Create a new user
# useradd –c rhcsa practical –e YYYY-MM-DD –s /bin/bash rajneesh
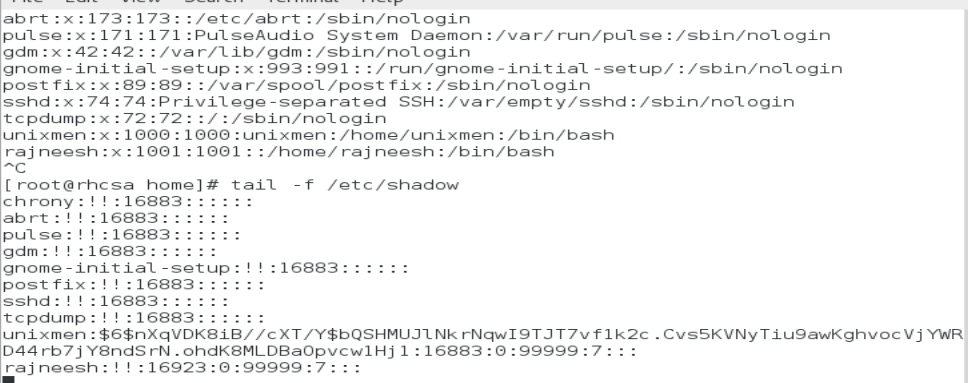
Have a look in /etc/passwd
# tail –f -n2 /etc/passwd
Notice home directory, GCOS or comment field, default log in shell of user, UID and GID associated with user.
Have a look in /etc/shadow file
# tail -f /etc/shadow
You can notice that ‘!!’ sign is there for user ‘rajneesh‘, which means user is not activated yet because we have not defined any password for user.
Create password for user
# passwd rajneesh
Again have a look of /etc/shadow and see the difference.
Login to that newly created user.
# su rajneesh
It will not ask any password from root, login this ‘rajneesh’ user from some another ordinary user.Let us have a look in /home directory, you will see that a new folder associated with ‘rajneesh’ user is created, where all data of ‘rajneesh’ user will be stored by default.
Group management in Linux
When you create a user, it becomes a member of a group of automatically which has name similar to username, user is by default member of that group and this group is called private group. Imagine of some different organizations having different department like accounts, sales, admin departments etc, these department will be having some user under that department, users of one department can not have or have restricted access to data of other departments, to mange such type of scenario we need to create different groups and add members to them according to their roles.
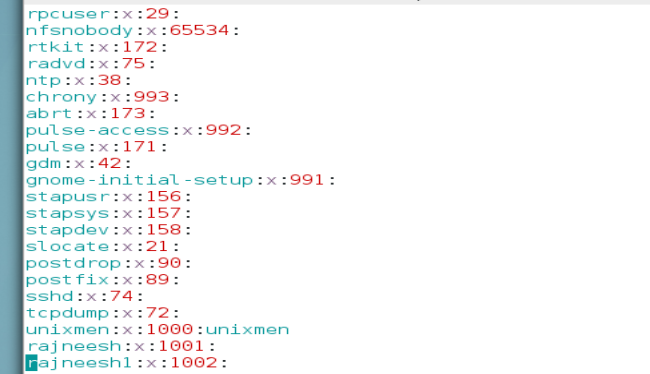
File which contains information about groups is /etc/group
$ vim /etc/group
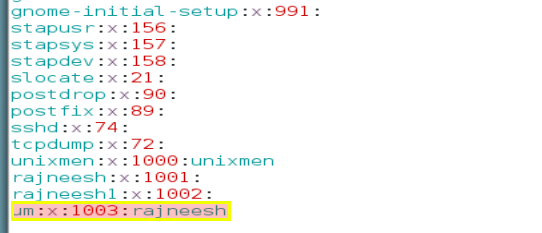
Create a group using groupadd command, um is grou-name
# groupadd um
You can add members to that group by directly adding them to /etc/group file by simply typing name of user next to :, have a look:
Switch to user rajneesh and check id, user ‘rajneesh’ is a member of that ‘um’ group.

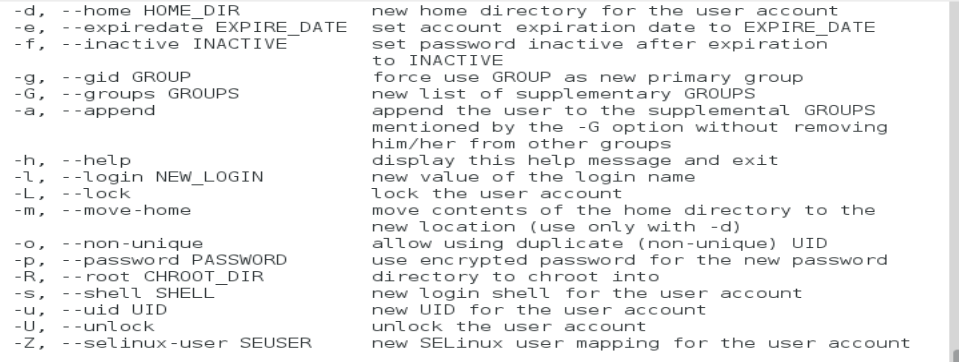
$ usermod --help
Add rajneesh1 user to um group
# usermod -aG um rajneesh1
User rajneesh1 is member of group um now, check id.
This was a detailed introduction to Linux user and group management, hard and soft links. In next article we will learn about password management for users, key files for user management and a detailed introduction to secure shell.
Conclusion
Each file is recognized by its unique numeric value which is know as inode, hard links share same inode but soft links will have different inode number but it will be not associated directly to inode. Each and every process need some user to be associated with, for security purpose process have restricted access to resources, users can be system users or user which we create to login, each and every user is by default a member of private group but we can add these users to some another groups.


