
Mkisofs is a utility that creates an ISO 9660 image from files on disk. It is effectively a pre-mastering program to generate an ISO9660/JOLIET/HFS hybrid filesystem capable of generating the System Use Sharing Protocol records (SUSP) specified by the Rock Ridge Interchange Protocol. This is used to further describe the files in the iso9660 filesystem to a unix host, and provides information such as longer filenames, uid/gid, posix permissions, symbolic links, block and character devices. mkisofs takes a snapshot of a directory tree and generates a binary image that corresponds to an ISO9660 or HFS filesystem when it is written to a block device. Each specified pathspec describes the path of a directory tree to be copied into the ISO9660 filesystem; if multiple paths are specified, the files in all the paths are merged to form the image.
Now we will show you that how you can use this awesome command line utility to modify, edit and repack your ISO files in Linux.
Installing mkisofs
In order to install ‘mkisofs’ on your Linux server you can use below command to install it on your Debials or RHEL servers.
On Ubuntu:
[cc]# apt-get install mkisofs [/cc]
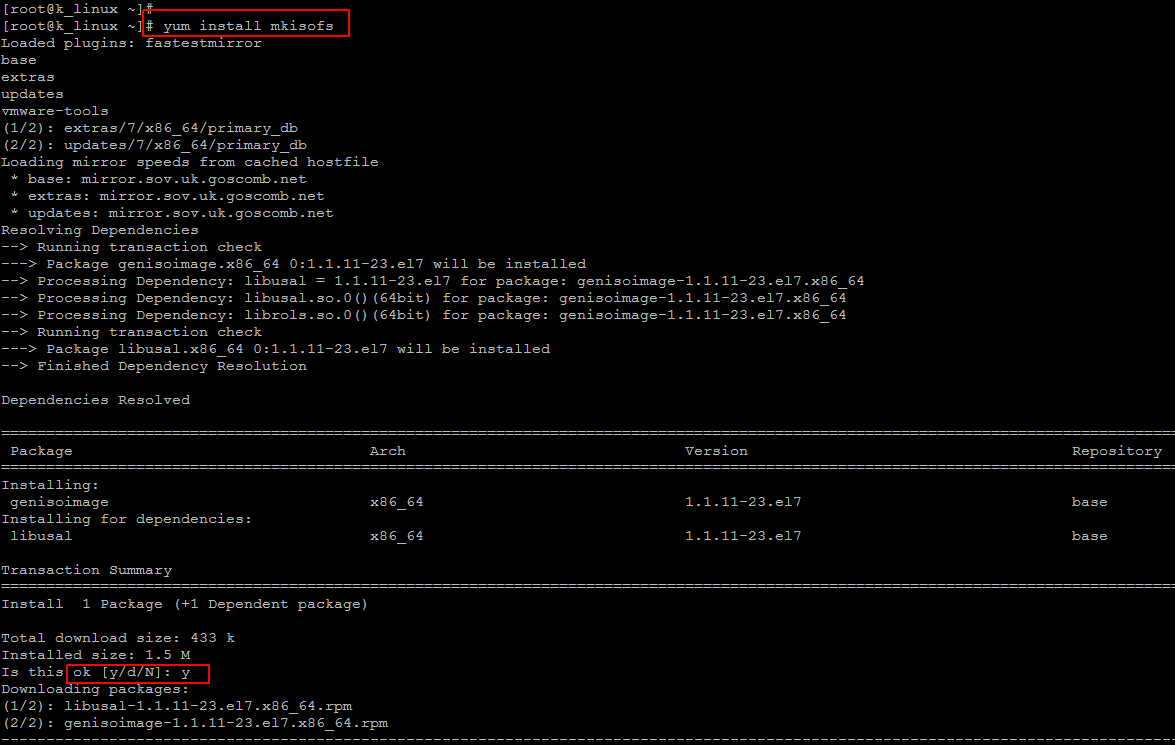
On CentOS:
[cc]# yum install mkisofs[/cc]
Using above command will install the ‘genisoimage’ and its required dependencies as shown in the image below.
Modify/Edit ISO image
By modifying the ISO image we can automatically partition the hard drives, install Linux, installed several add-on packages, created user accounts, and setup the networking.
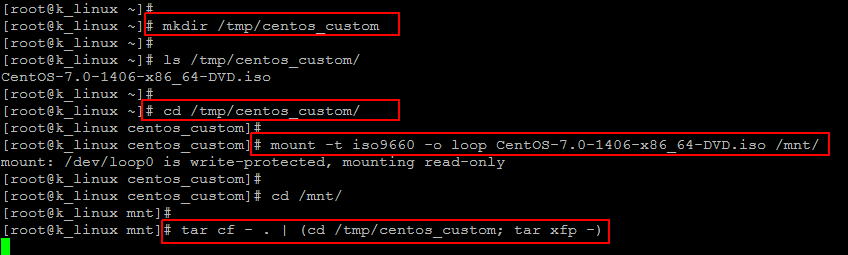
First of all create a directory that will contain the modified image using below command.
[cc]# mkdir /tmp/centos_custom [/cc]
In order to access and modify the contents of an ISO file, you can mount it as a device. Linux will treat it as a separate file system, and allow you to browse the files as you would normally browse the directory structure of your hard drive. The fastest way to mount an ISO image is via the command line.
Let’s Run the command below to mount the source ISO image locally to work on it.
[cc] # cd /tmp/centos_custom/ [/cc]
[cc] # mount -t iso9660 -o loop CentOS-7.0-1406-x86_64-DVD.iso /mnt/[/cc]
Since the ISO is read-only we will need to copy the contents into another directory that we can modify and add what we want. Let’s extract the source ISO files into ‘/mnt’ directory using below commands and wait for while to complete the copy process.
[cc]# cd /mnt [/cc]
[cc]# tar cf – . | (cd /tmp/centos_custom; tar xfp -) [/cc]
Now you can place your custom files to the ISO tree. The ks.cfg file is what the install routine will use while loading the OS. If your custom config file was named like ‘ks-dev.cfg’, then when you boot off the CD, you will type something like the following command.
boot: linux text ks=cdrom:/ks-dev.cfg
Next, if you have additional packages that you want to install, you can copy them into the custom image directory. This way they will be included in the image when we create the new ISO. You can then put a postinstall script in place to install and configure those packages automatically at install time. As long as you do not exceed the capacity of a CD or DVD, then you can add as much as you want.
Repackage new ISO file
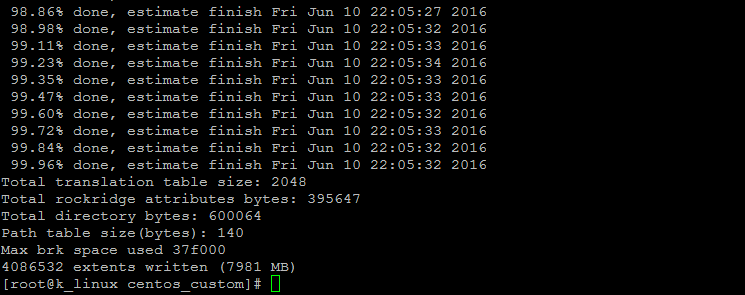
Once all of your modifications are complete, you just need to put it all together and create a new ISO image. After that run below command.
[cc]# /tmp/centos_custom[/cc]
[cc]# mkisofs -o CentOS-7.0-1406-x86_64-DVD.iso -b isolinux/isolinux.bin -c isolinux/boot.cat -no-emul-boot -boot-load-size 4 -boot-info-table -J -R -V “CentOS 7.0 Custom ISO” . [/cc]
This will takes a while to complete the process, after that you get the following completion notice containg the summary of used space and number of transaction.
You can use ‘mkisofs’ to create ISO images from any folder on your computer by using the follwoing command in your command line terminal.
[cc]# mkisofs -o kash.iso /home/kash/k_iso [/cc]
The ‘-o’ switch lets you choose the name for your image like we used ‘kash.iso’, then specify the location where you want to store your iso image.
Once you’ve created an ISO image using command line tools, you can simply make it into a CD or DVD with your favorite burning application.
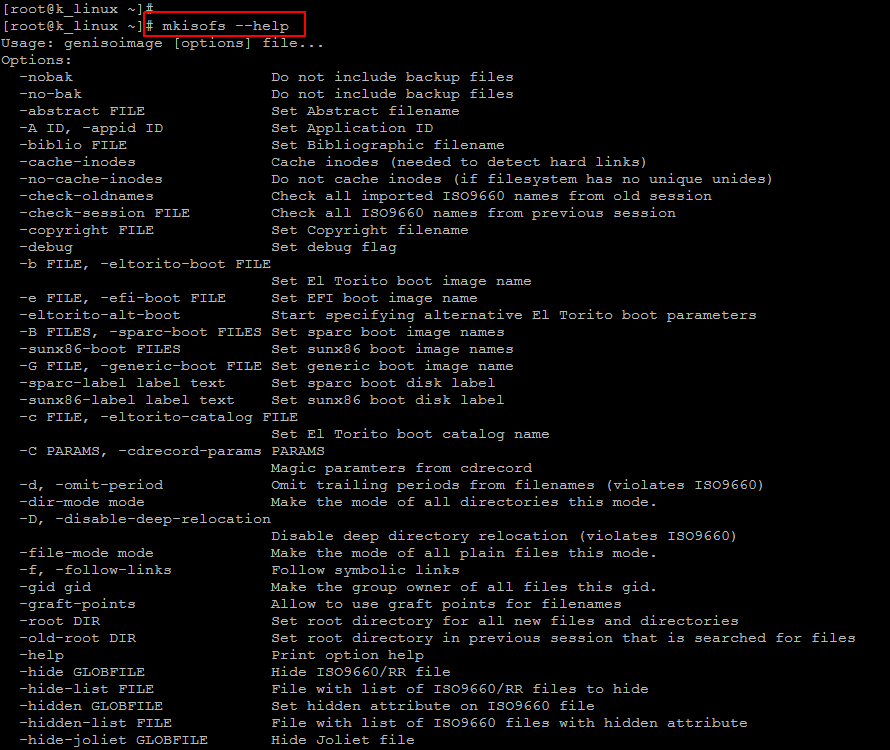
This ‘mkisofs’utility has a ton of option, you can get the list of its all available options using below command.
[cc]# mkisofs –help[/cc]
Conclusion
In this session we showed the commands which could be used to Modify,Edit or create an ISO9660 image with your custom scripts or packages in it. You can also use this to create your new home directory and send that image file to a share on a Windows computer for CD creation. Let’s get started with mkisofs and explore it more features to play with iso files. I hope you find this article much helpful, let’s share it with your friends and do not forget to share your comments and thoughts on it.


