
In first part of this tutorial we talked about configuration of our DVB card, now we going to see how we can scan the Channels and watch them with Kodi.

In this part of tutorial we going to install Kodi and TVheadend which is a backend for working with DVB cards.
So first for installing Kodi enter following commands in Terminal:
sudo apt-get install python-software-properties pkg-config
sudo apt-get install software-properties-common
sudo add-apt-repository ppa:team-xbmc/ppa
sudo apt-get update
Now we should install TVheadend, we have three option for TVheadend which are stable, unstable and beta release in this tutorial we are going to install stable release for not finding problems in future, with following command in Terminal first add GPG key to your source:
curl http://apt.tvheadend.org/repo.gpg.key | sudo apt-key add -
Now add TVheadend PPA to your sources list with this command in Terminal:
sudo apt-add-repository http://apt.tvheadend.org/stable
Update your system:
sudo apt-get update
By following command in Terminal install TVheadend stable release:
sudo apt install tvheadend
In the duration of installing TVheadend you will enter a username and a password which are really important for going to TVheadend configuration so keep your username and password.
Open your browser and go to this address:
127.0.0.1:9981
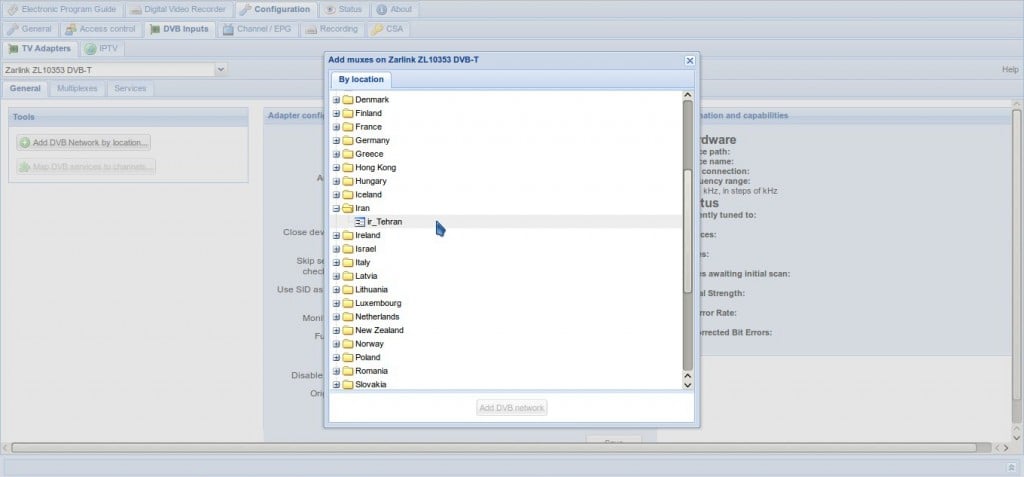
After going to this address you need to enter your username and password so what ever they are enter them and come to TVheadend configuration tab and go to TV adapters:
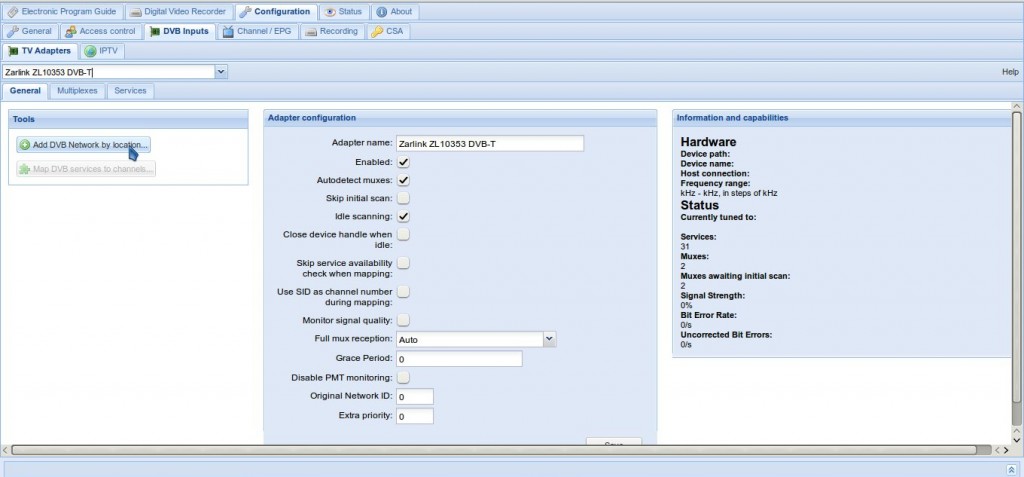
Here you should be able to see the informations of your DVB card, in next step you should click on the “Add DVB Network by location” to see the list of countries channels now choose your country and click on “Add DVB network” just like the following pictures:

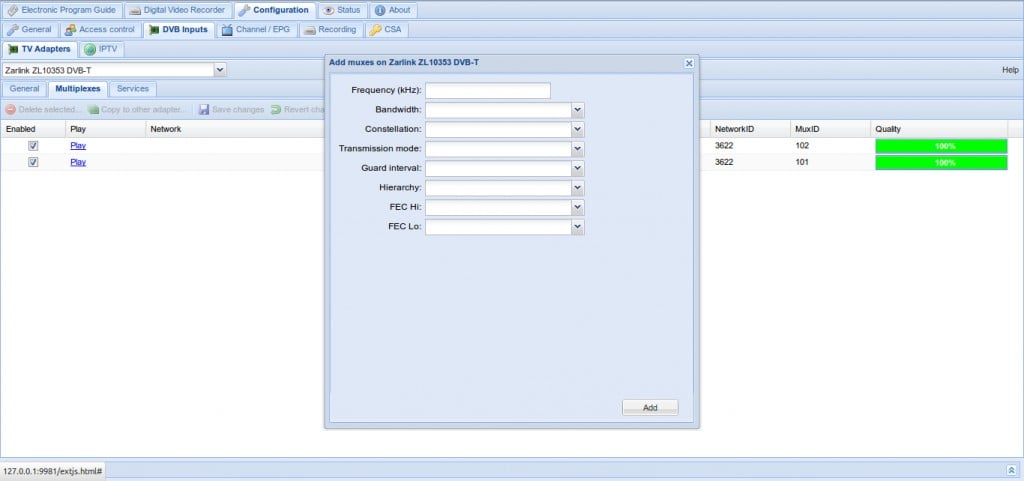
Next step is going to “Multiplexes” tab in TVheadend, in this page you can see default frequences of the programm, if the frequence that you need is not in the page you can manually add it by using “Add mux(es) manually” button, then enter things which are needed:
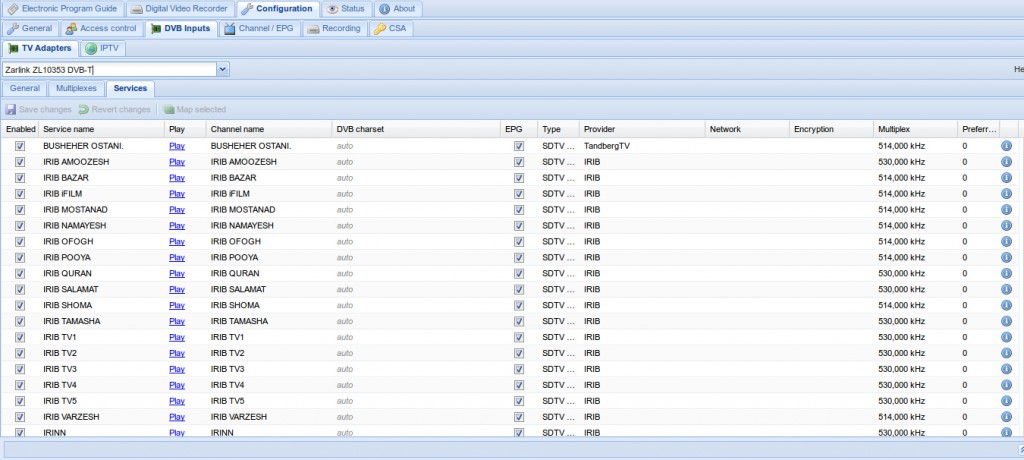
In “services” tab you can see list of channels:
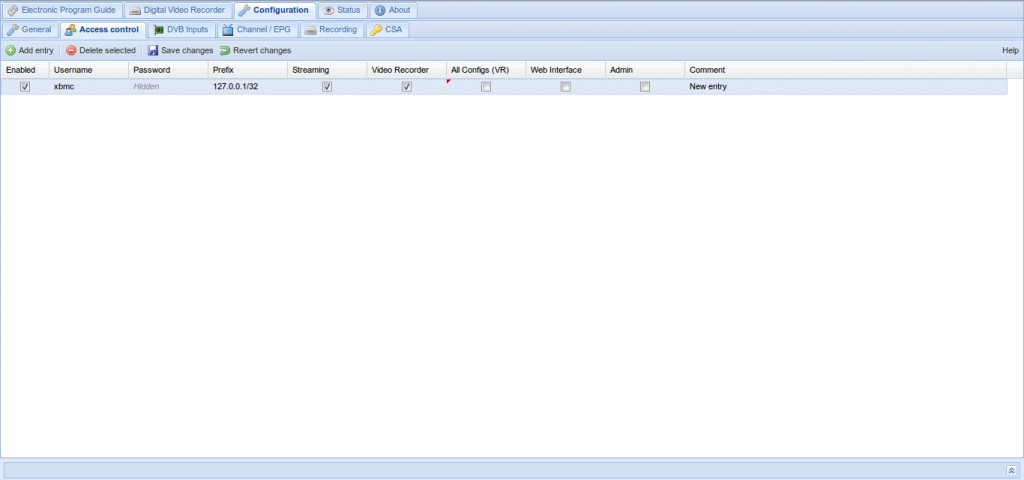
Now for connecting TVheadend to Kodi click on “Add Entry” button then add the needed inputs like following picture:
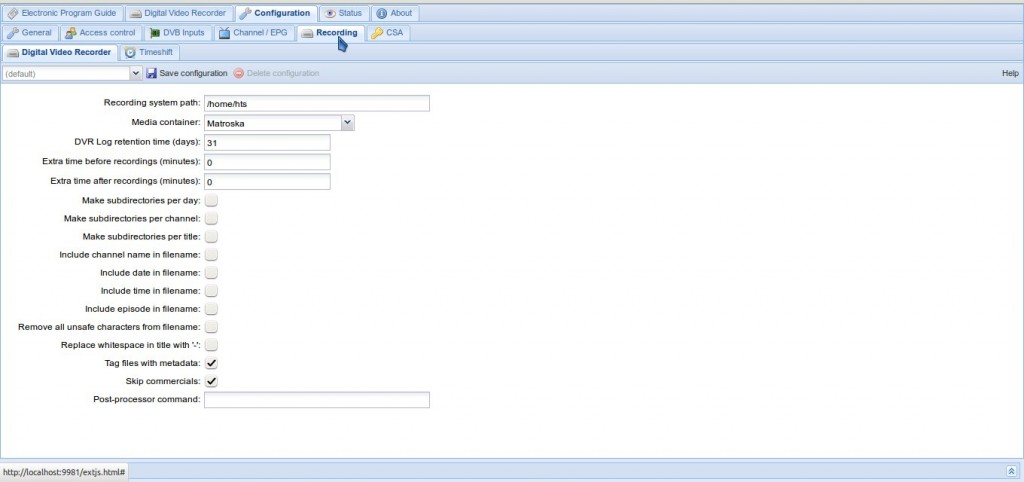
 In “Recording” tab in “Didital Video Recorder” you can choose the details about captureing channels:
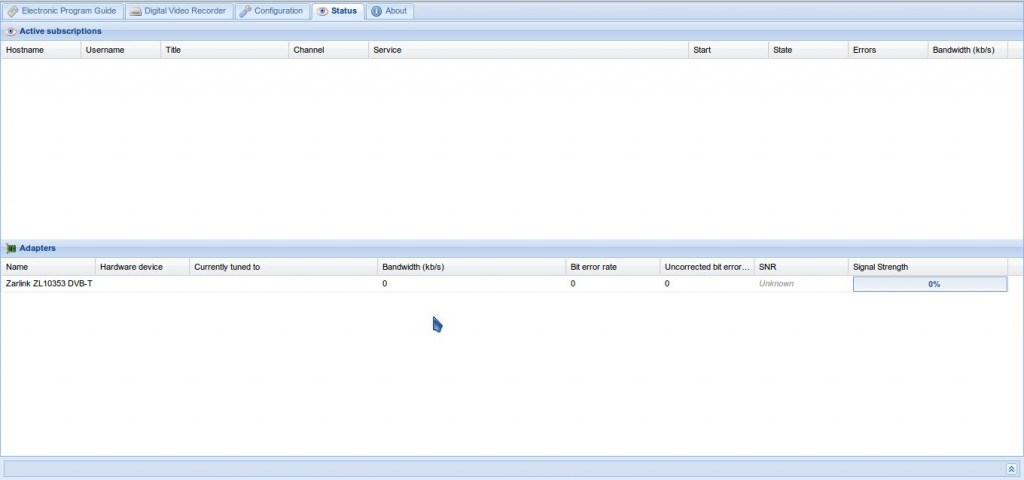
In “Status” tab you can see the frequences signal and etc:
Installing xbmc-pvr-tvheadend-hts:
Download this package and put it in $HOME, now enter following commands in Terminal to install it:
unzip xbmc-pvr-tvheadend-hts_1.9.31-15trusty_amd64.deb.zip
sudo dpkg -i xbmc-pvr-tvheadend-hts_1.9.31-15trusty_amd64.deb
Connecting TVheadend to Kodi:
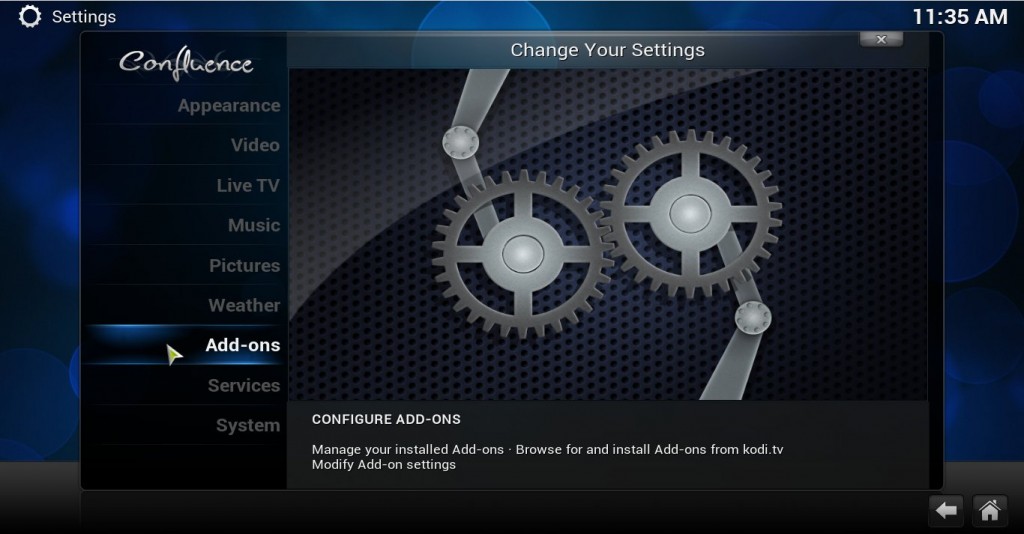
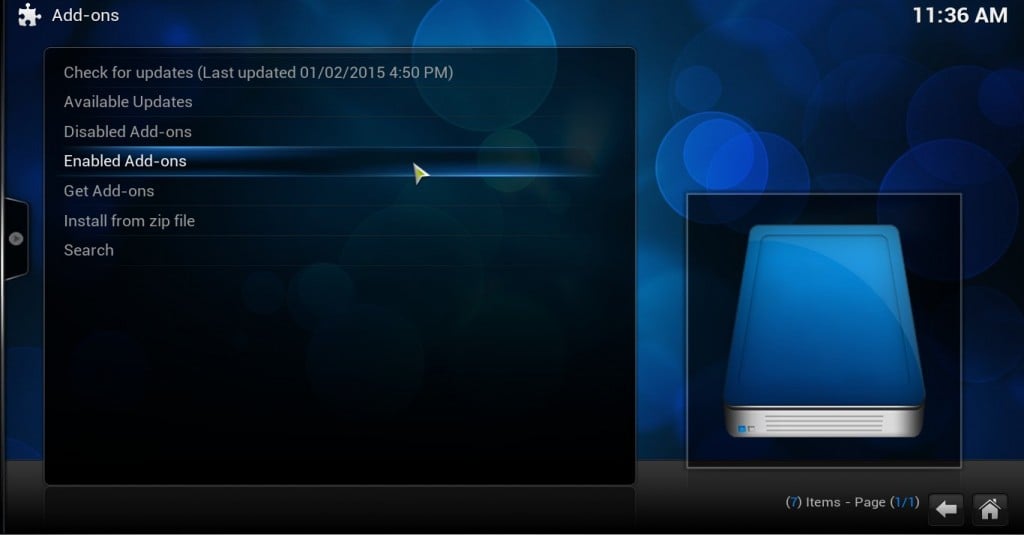
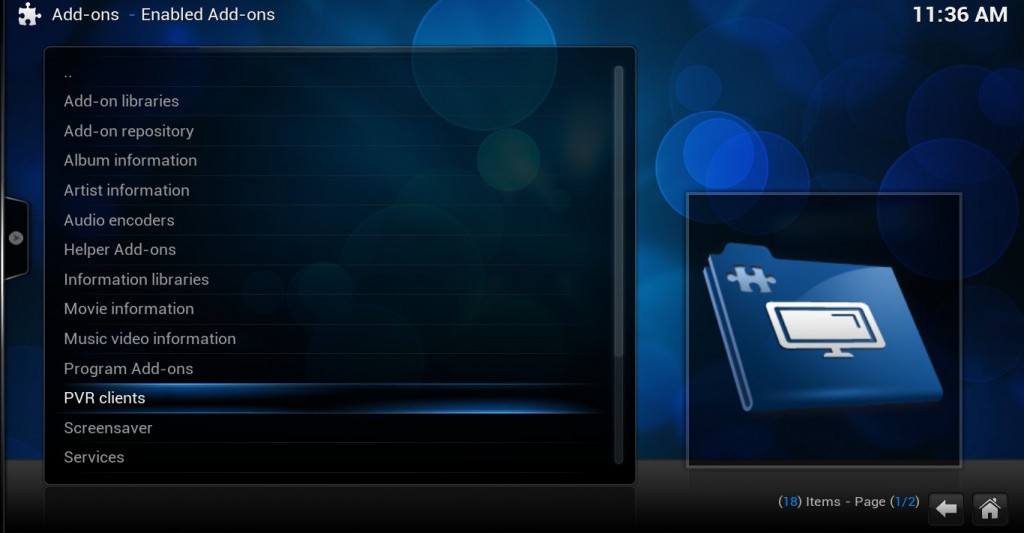
Go to “Add-ones” part in Kodi media center settings and then choose “Enabled Add-ons” and finally choose “PVR clients”:
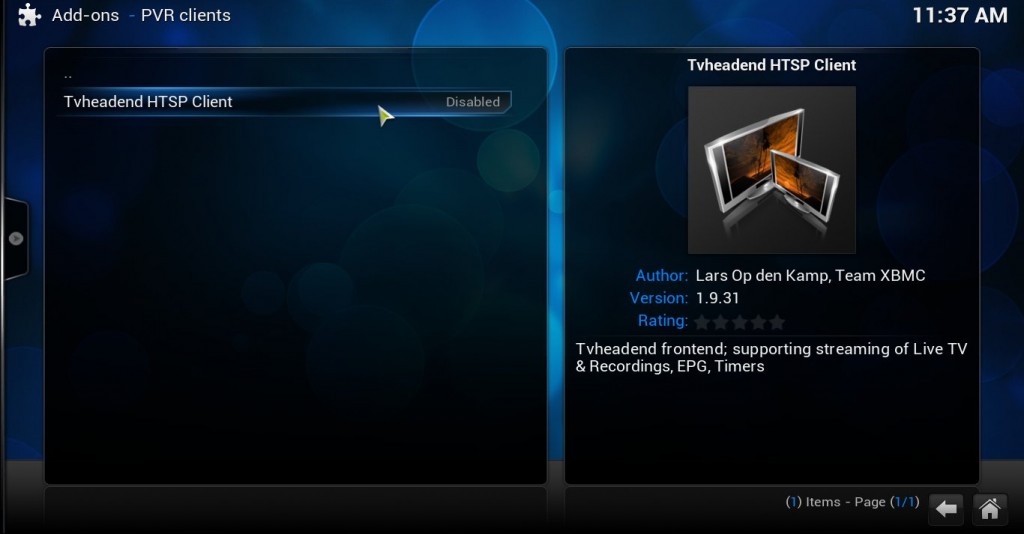
If you did all the steps till now correctly you should be able to see “Tvheadend HTSP Client” now click on it to go to “Add-on information”:
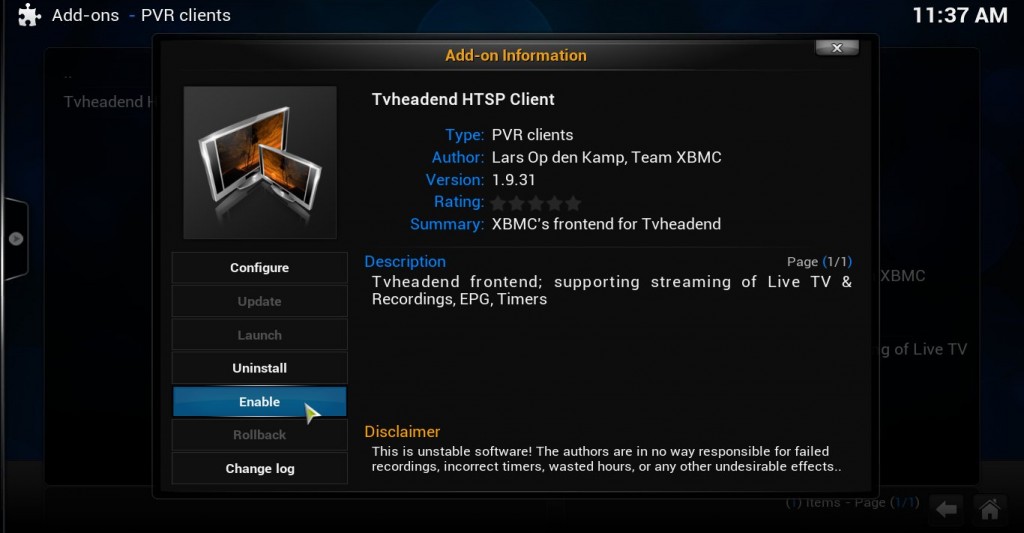
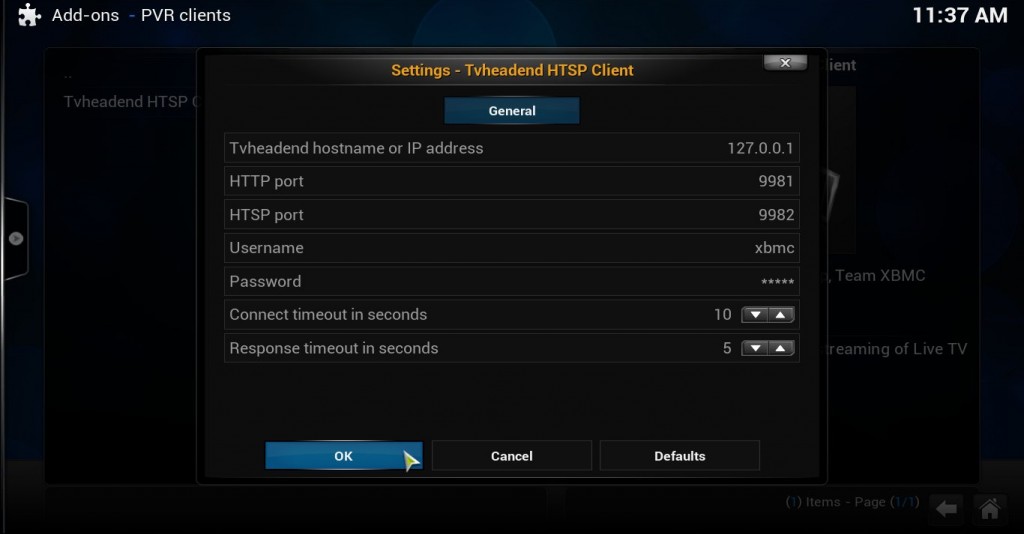
Now you should enable this add-one and go to “Configure” part and enter you TVheadend username and password:
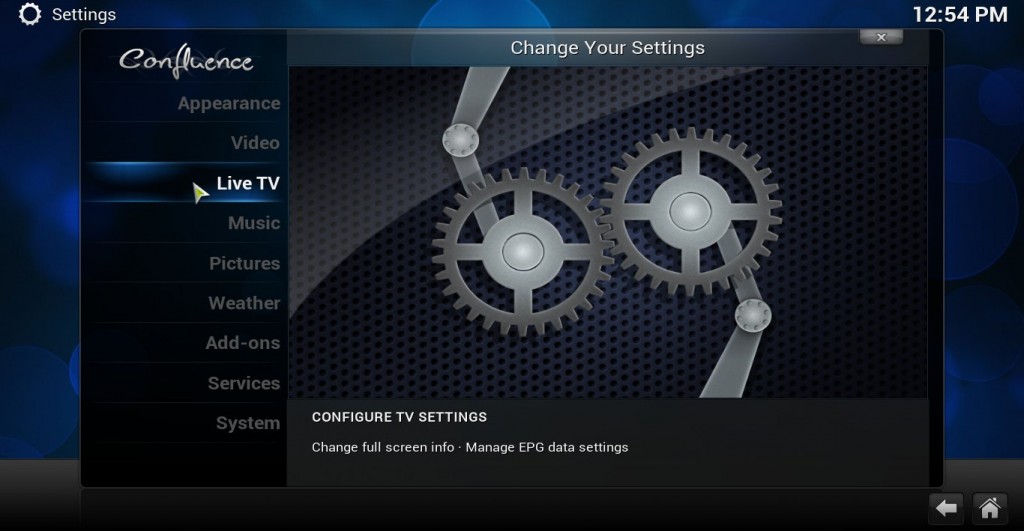
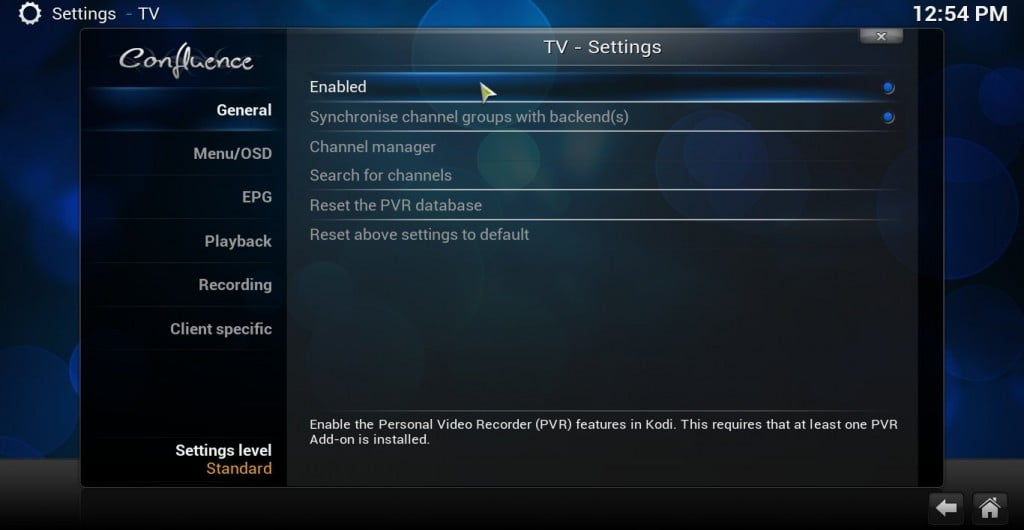
If you did every thing correctly till now you should have TVheadend settings now so go there and from “Live TV” enable the first choice to have “Live TV” service on your kodi:
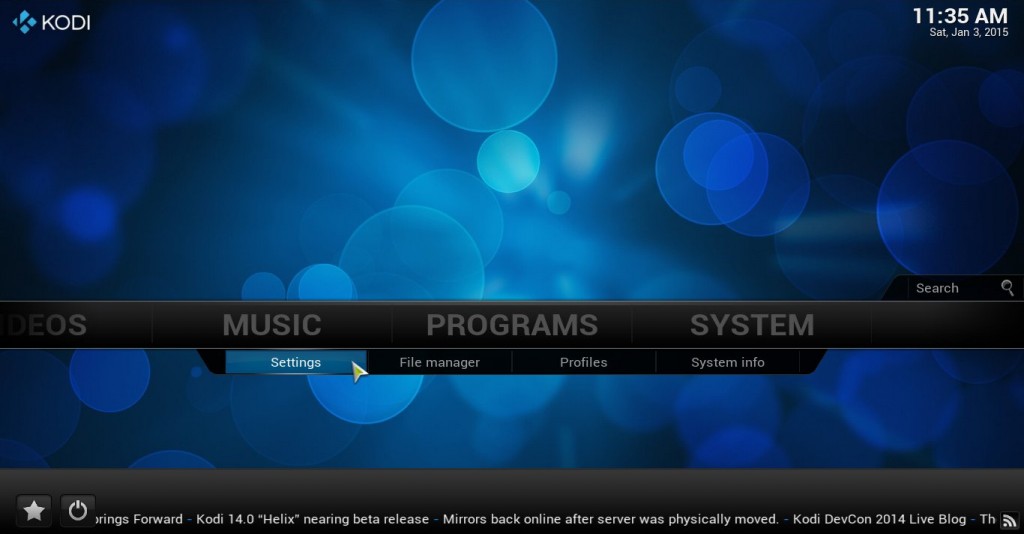
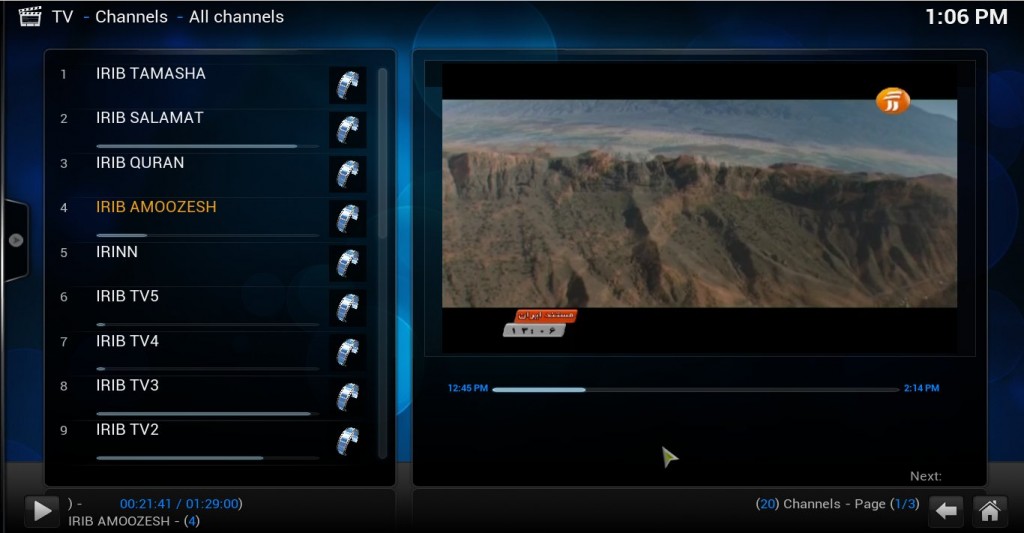
No go to Kodi Home page and from Live TV choose a channel and start watching TV:


