
Introduction
For those who don’t know, MultiSystem is a small, Open Source freeware to create a multiboot usb drives from Linux systems. Using this utility, we can create any number of bootable Linux distributions in a USB drive. All you need is an Internet connection(at the time of MultiSystem installation only), and a sufficient size of a USB drive depending upon the number of distributions you want to include in that USB drive.
Install MultiSystem On Ubuntu 14.10/14.04
Manual Installation:
Download MultiSystem script, and extract it anywhere of your choice. Go to the extracted location, and run the script as shown below.
sudo ./install-depot-multisystem.sh
Installation Using PPA:
Alternatively, you can install MultiSystem more easily using PPA as shown below.
sudo apt-add-repository 'deb http://liveusb.info/multisystem/depot all main'
wget -q -O - http://liveusb.info/multisystem/depot/multisystem.asc | sudo apt-key add -
sudo apt-get update
sudo apt-get install multisystem
After installation, It will automatically open. Just click Close button to exit.
Post Installation
Once installed, plug-in your USB key, and launch MultiSystem either from Unity Dash or Menu.
At first time, the MultiSystem interface will look like below.
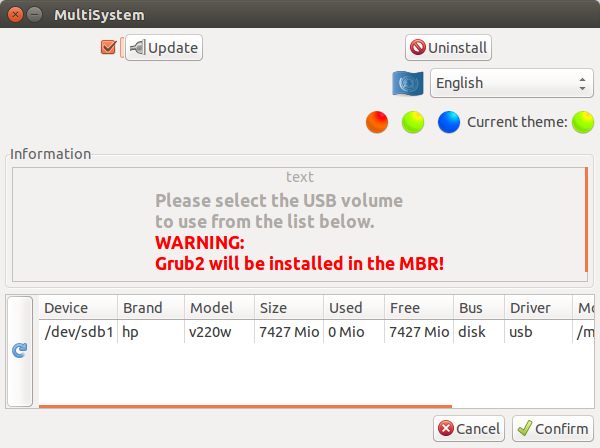
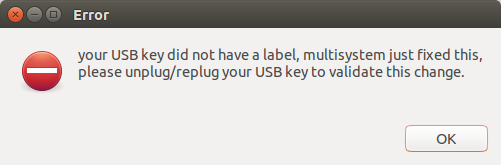
Select the USB drive, and click Confirm button. You may get the following error dialog box. Don’t worry, It says our USB drive has no label. Click Ok to set label by MultiSystem itself.
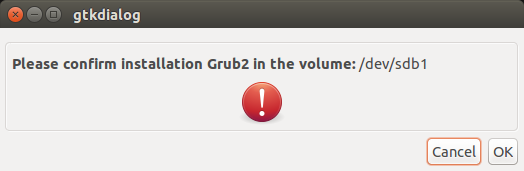
Then, unplug/replug the USB key, and launch MultiSystem again. Select the USB key, and click Confirm again. Now, you’ll be asked to confirm Grub2 installation in your USB key. Click Ok to continue.
Finally, you’ll be pleased with MultiSystem interface. Now’ it’s time to create multiboot usb key.
Usage
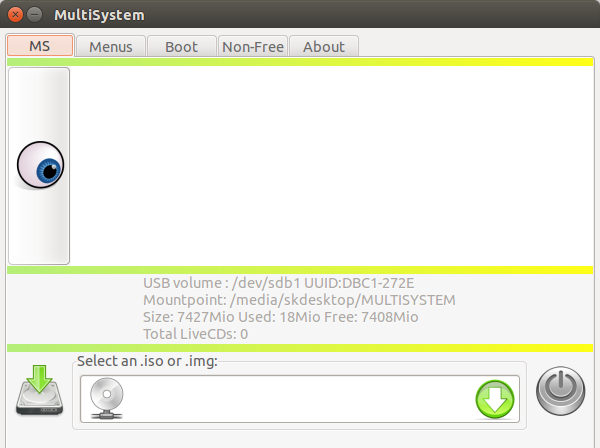
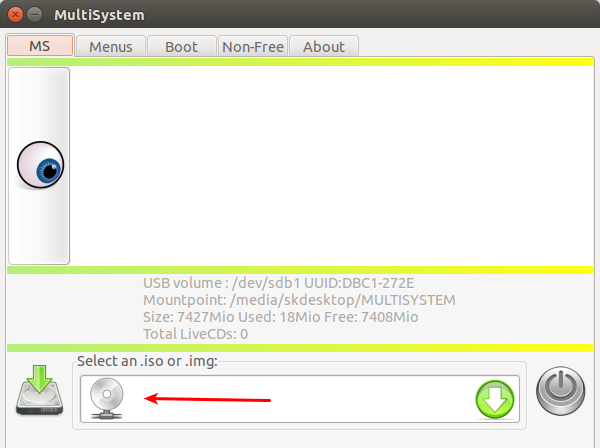
MultiSystem is very simple to use. Drag the ISO of your choice into the MultiSystem window. If it doesn’t work, click on the cd icon on the bottom and select the ISO’s.
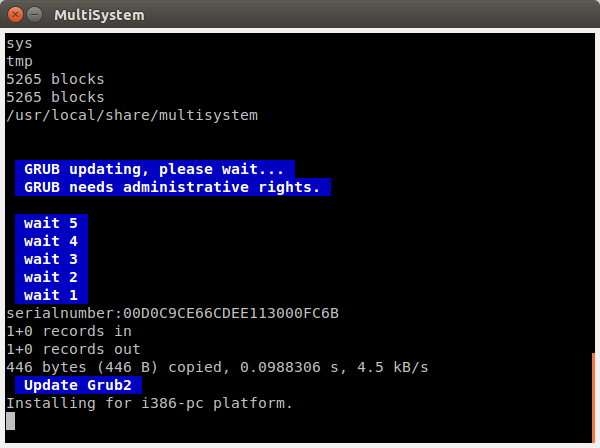
Now, MultiSystem will copy the files from the ISO, and make the USB key as bootable.
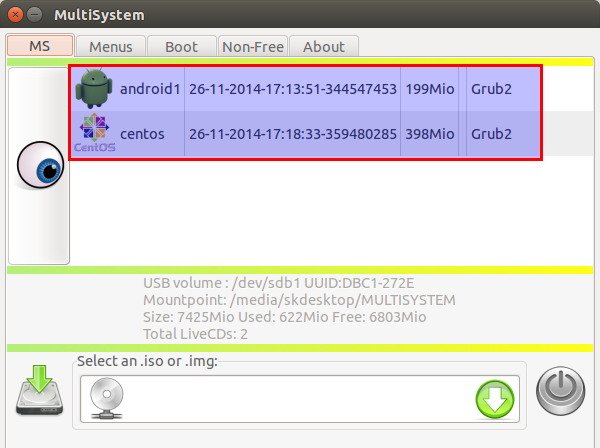
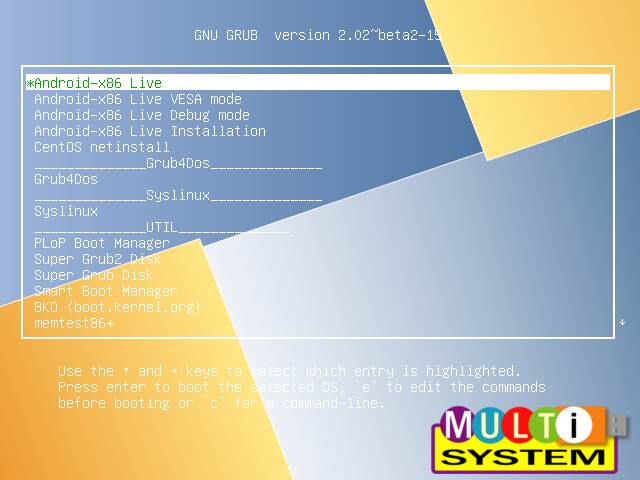
Likewise, you can add as many distributions as you want in your USB key. In my case, I have added two Linux distributions: CentOS 6.5 and Android.
After adding all ISO’s, you will now see the list of bootable distributions in the MultiSystem main window.
That’s it. Our multiboot USB key is ready to use. Reboot your system, and set the first boot device as USB in your Bios. Select the distribution you want to install, and start installing the OS from the multiboot USB key.
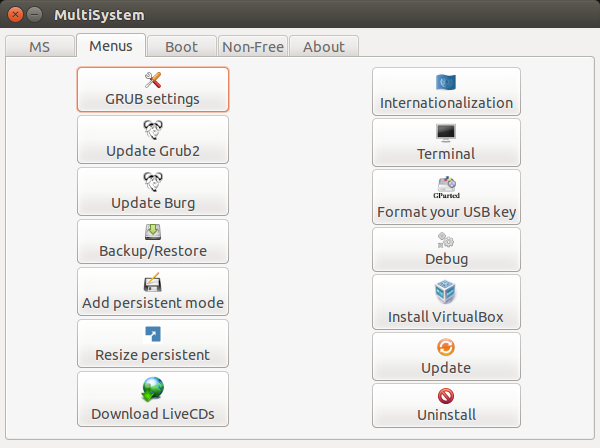
Additionally, MultiSystem includes some extra options such as:
- Grub Settings;
- Grub & Burg bootloaders Update;
- Download Live Cds;
- VirtualBox installation;
- Format USB key;
- and many.
To view the list of additional options, navigate to the Menus tab of the MultiSystem.
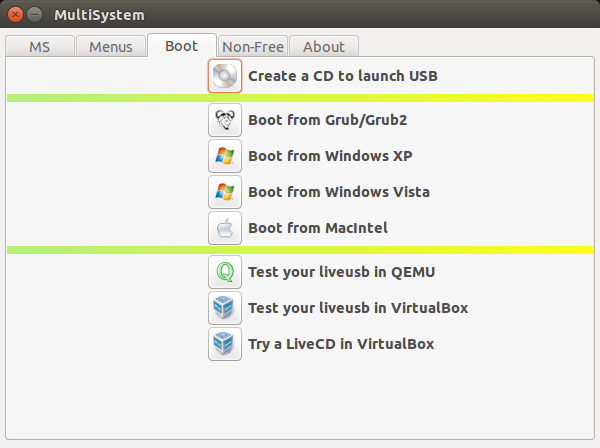
Also, you can test the multiboot USB key within your Ubuntu desktop itself using QEMU or Oracle VirtualBox.
MultiSystem tool is one of the best and useful tool ever I have tested. This tool will definitely useful for those who wants to install multiple different operating systems on their systems. You don’t have to carry your CD/DVD pouch wherever you go. Just buy a 16GB 0r 32GB USB, and dumb all Operating systems you want to install in it. and install OS like a boss.
And, the good news for Windows OS users is it supports some Windows os too. I tested Windows 7, and it’s working!
Enjoy!


