Concourse Continuous Integration System
Concourse CI is a simple and scalable continuous integration system with an end goal of providing a system with as few distinct moving parts as possible. When transitioning from a CI system to another there are many risks, mainly due to the great number of variables that could accidentally change manually clicking around in the new system’s UI.
To reduce this risk, Concourse CI uses a declarative syntax. With it it’s possible to model any pipeline, from simple (unit, integration, deploy, ship) to complex (tests on multiple infrastructures, etc.).
In this tutorial we will see how to install Concourse CI on an Ubuntu 16.04 server, using PostgreSQL in the backend.
Getting Started – Install PostgreSQL
First of all, install PostgreSQL on the server. Concourse CI will use it to store its pipeline data. Execute the following command:
#apt-get install postgresql postgresql-contrib
Next, create a PostgreSQL user which will manage the Concourse data within the database. To do this, execute:
$ sudo -u postgres createuser concourseusr
By default, Concourse looks for (and attempts to connect to) a database named
.
Create a new database:
$ sudo -u postgres createdb --owner=concourse atc
Install Concourse Continuous Integration
Download compiled executables for Linux. In the
directory, execute the following command:
# curl -LO https://github.com/concourse/concourse/releases/download/v3.3.2/concourse_linux_amd64
Next, always in
, download the latest available
command line client:
# curl -LO https://github.com/concourse/concourse/releases/download/v3.3.2/fly_linux_amd64
Move both files to
, renaming them, by executing the command:
# mv concourse* /usr/local/bin/concourse
# mv fly* /usr/local/bin/fly
Check if everything went fine by looking at both versions:
$ concourse --version
$ fly --version
They should be 3.3.2 at the time we write.
Concourse CI Configuration
Create a configuration directory:
# mkdir /etc/concourse
Generate Encryption Keys
All the related components which compose Concourse CI need to communicate securely with one another, in particular, the TSA and the worker. To be sure that this happens, we need to create three sets of keys:
- Keys for the worker
- keys for the TSA
- session signing keys to sign tokens
These keys will be used automatically when component starts, so it is important to not use a password to lock keys. Executing the following commands, we will generate required keys:
# ssh-keygen -t rsa -q -N '' -f /etc/concourse/worker_key
# ssh-keygen -t rsa -q -N '' -f /etc/concourse/tsa_key
# ssh-keygen -t rsa -q -N '' -f /etc/concourse/session_key
The TSA decides which workers are authorized to connect to the system, so, authorize the worker’s public key. In our case, just execute the command:
# cp /etc/concourse/worker_key.pub /etc/concourse/authorized_worker_keys
Environment Configuration
Concourse executable does not read any configuration file, but this does not mean that it cannot be configured, of course. In fact, it takes its values from environment variables passed at the beginning of the process.
Create a new file for the
process configuration:
# $EDITOR /etc/concourse/web_env
In that file, paste the following content:
CONCOURSE_SESSION_SIGNING_KEY=/etc/concourse/session_key
CONCOURSE_TSA_HOST_KEY=/etc/concourse/tsa_key
CONCOURSE_TSA_AUTHORIZED_KEYS=/etc/concourse/authorized_worker_keys
CONCOURSE_POSTGRES_SOCKET=/var/run/postgresql

# Match your environment
CONCOURSE_BASIC_AUTH_USERNAME=your_usr_name
CONCOURSE_BASIC_AUTH_PASSWORD=strong_pwd
CONCOURSE_EXTERNAL_URL=http://server_IP:8080
Save, close and create a new file for the
:
# $EDITOR /etc/concourse/worker_env
There, paste the following content:
CONCOURSE_WORK_DIR=/var/lib/concourse
CONCOURSE_TSA_WORKER_PRIVATE_KEY=/etc/concourse/worker_key
CONCOURSE_TSA_PUBLIC_KEY=/etc/concourse/tsa_key.pub
CONCOURSE_TSA_HOST=127.0.0.1
Adjust the permissions of the environment files:
# chmod 600 /etc/concourse/w*_env
Create a User
Create a new user to run the
process. This user should match the PostgreSQL username created earlier, so execute:
# adduser --system --group concourseusr
Give this user ownership over Concourse CI configuration directory:
chown -R concourse:concourse /etc/concourse
Create Systemd Unit Files
Create a
file within the
directory:
# $EDITOR /etc/systemd/system/concourse-web.service
Paste the following content:
[Unit]
Description=Concourse CI web process (ATC and TSA)
After=postgresql.service

[Service]
User=concourse
Restart=on-failure
EnvironmentFile=/etc/concourse/web_env
ExecStart=/usr/local/bin/concourse web

[Install]
WantedBy=multi-user.target
Save and close. Create a file for the
process:
# $EDITOR /etc/systemd/system/concourse-worker.service
In this file, paste:
[Unit] Description=Concourse CI worker process After=concourse-web.service [Service] User=root Restart=on-failure EnvironmentFile=/etc/concourse/worker_env ExecStart=/usr/local/bin/concourse worker[Install]
WantedBy=multi-user.target
Configure UFW
The Concourse
process listens for connections on port 8080, so open access to that port by executing the following
command:
# ufw allow 8080
For the
part, we need to allow forwarding access, so:
# ufw default allow routed
Start Services
At this point, start both services:
# systemctl start concourse-worker concourse-web
Enable them to start at server boot time:
# systemctl enable concourse-worker concourse-web
Conclusion
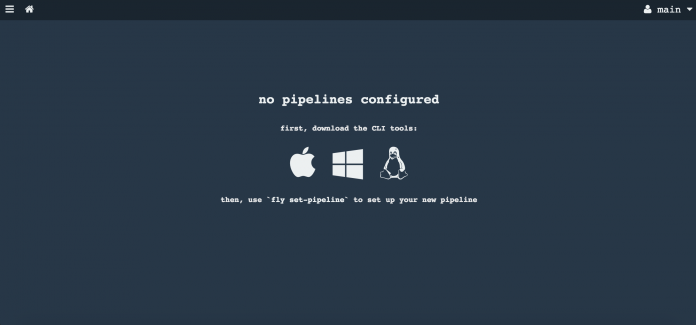
From now on, the server is ready to execute all the continuous integration features provided by Concourse CI on an Ubuntu 16.04 system. Enjoy!


