BambooInvoice is free open-source web based invoicing software that can be used for small businesses and individuals. It is meant to be installed on a web-server, but can easily be installed on your home system. BambooInvoice is developed by a Programmer Derek Allard and is built using PHP5.
BambooInvoice is easy to use and it is built on the excellent CodeIgniter project using modern coding standards. BambooInvoice sits on your server. Its your data. You never need to trust your invoicing data to anyone else, and you can get it out of the system
easily. BambooInvoice is released under the GPL
Prerequisites
In this tutorial i will show you how to install BambooInvoice with LAMP server. If you haven’t installed LAMP sever, just use any one of the following link to setup LAMP server.
– Install LAMP (Apache, MariaDB, PHP) Server On CentOS 6.4.
or
– Install LAMP (Apache, MySQL, PHP) Server On CentOS 6.4.
Create Database and User for BambooInvoice
For instance, here i am going to create a database called “bamboodb” and database user called “bamboouser” with password “centos” for ProcessWire. You can define database and user as per your liking.
# mysql -u root -p
Enter password:
Welcome to the MariaDB monitor.  Commands end with ; or \g.
Your MariaDB connection id is 3
Server version: 5.5.31-MariaDB MariaDB Server

Copyright (c) 2000, 2013, Oracle, Monty Program Ab and others.

Type 'help;' or '\h' for help. Type '\c' to clear the current input statement.

MariaDB [(none)]> create database bamboodb;
Query OK, 1 row affected (0.02 sec)

MariaDB [(none)]> GRANT ALL ON bamboodb.* TO bamboouser@localhost IDENTIFIED BY 'centos';
Query OK, 0 rows affected (0.01 sec)

MariaDB [(none)]> flush privileges;
Query OK, 0 rows affected (0.00 sec)

MariaDB [(none)]> exit
Bye
Firewall Settings
Allow the apache default port “80″ through iptables/router. Edit file /etc/sysconfig/iptables,
# vi /etc/sysconfig/iptables
Add the following lines.
-A INPUT -p tcp -m state --state NEW --dport 80 -j ACCEPT
Now restart the iptables service.
# /etc/init.d/iptables restart
Restart the system to take effect the saved changes.
Getting BambooInvoice
Download the latest version from the BambooInvoice website.
# wget http://bambooinvoice.org/img/bambooinvoice_089.zip
Extract it with command:
# unzip bambooinvoice_089.zip
Copy the extracted folder to your web root.
# mv bambooinvoice/ /var/www/html/bambooinvoice
Set BambooInvoice Base URL
Open config.php file.
# cd /var/www/html/bambooinvoice/
# nano bamboo_system_files/application/config/config.php
Set the base URL path.
Here is my base url path. You can use either domain name or ip address.
$config['base_url'] = 'http://192.168.1.201/bambooinvoice/';
Set MySQL database details
Open database.php file.
# nano bamboo_system_files/application/config/database.php
Enter the mysql database name, database user and password.
$active_group = 'default';
$db['default']['hostname'] = 'localhost';
$db['default']['username'] = 'bamboouser';
$db['default']['password'] = 'centos';
$db['default']['database'] = 'bamboodb';
$db['default']['dbdriver'] = 'mysql';
$db['default']['dbprefix'] = 'bamboo_';
$db['default']['active_r'] = TRUE;
$db['default']['pconnect'] = FALSE;
$db['default']['db_debug'] = TRUE;
$db['default']['cache_on'] = FALSE;
$db['default']['cachedir'] = '';
Set Timezone
Open php.ini file.
# nano /etc/php.ini
Find the following lines and set your time zone.
[Date]
; Defines the default timezone used by the date functions
; http://www.php.net/manual/en/datetime.configuration.php#ini.date.timezone
date.timezone = Asia/Calcutta
Save and close the file. Restart apache service to take effect the saved changes.
# service httpd restart
Set Permissions
Set write permissions to the following folders as shown below.
# chmod -R 777 invoices_temp/ img/
Begin Installation
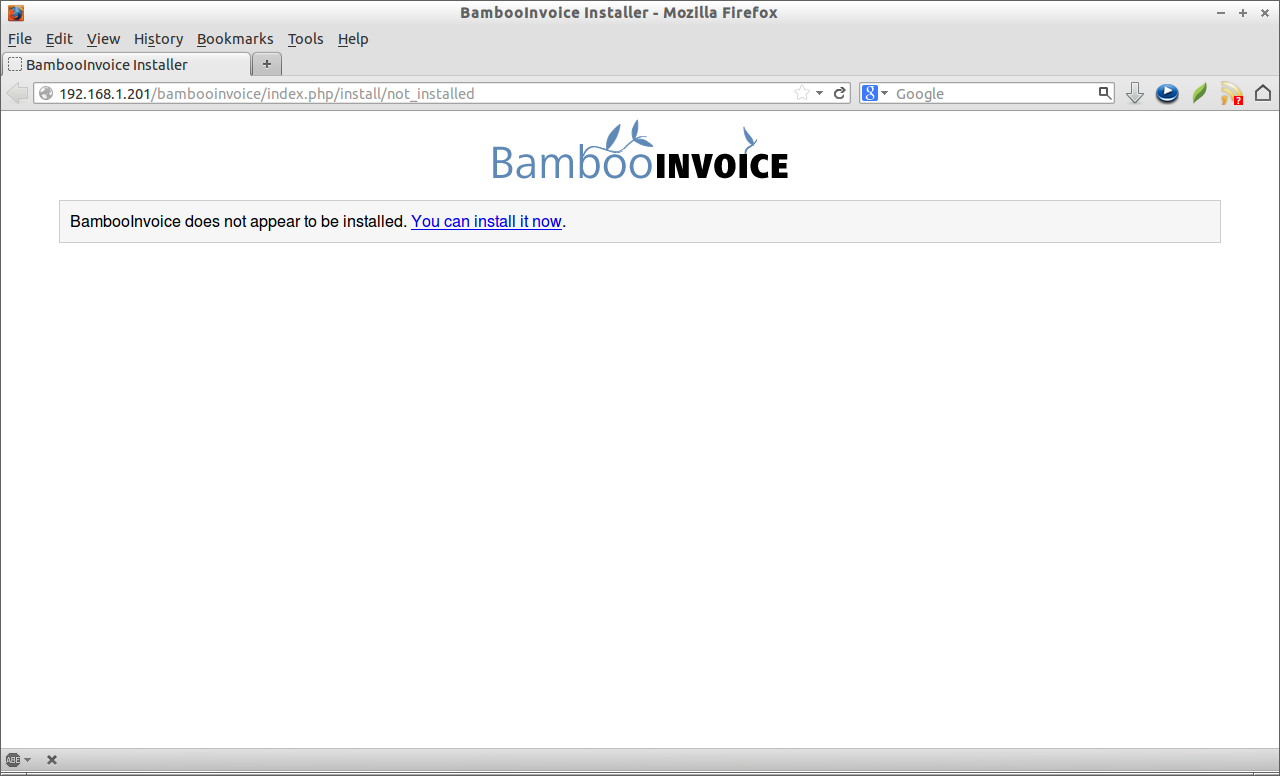
Open your browser and type “http://ip-address/bambooinvoice” or “http://domain-name/bambooinvoice”. You will see the following screen. Click on the “You can install it now” link.
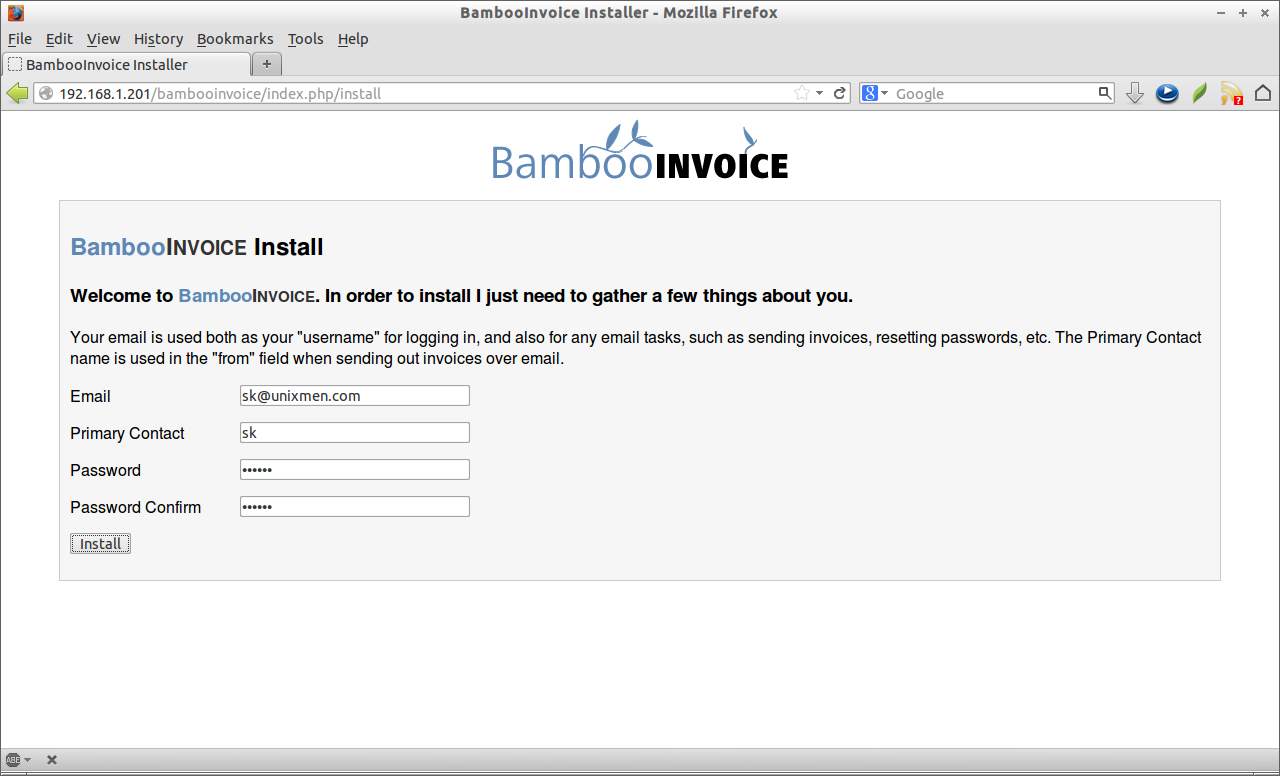
 You you will be asked to enter your email id, primary contact and password. Your email is used both as your “username” for logging in, and also for any email tasks, such as sending invoices, resetting passwords, etc. The Primary Contact name is used in the “from” field when sending out invoices over email.
 Now BambooInvoice has been installed successfully.
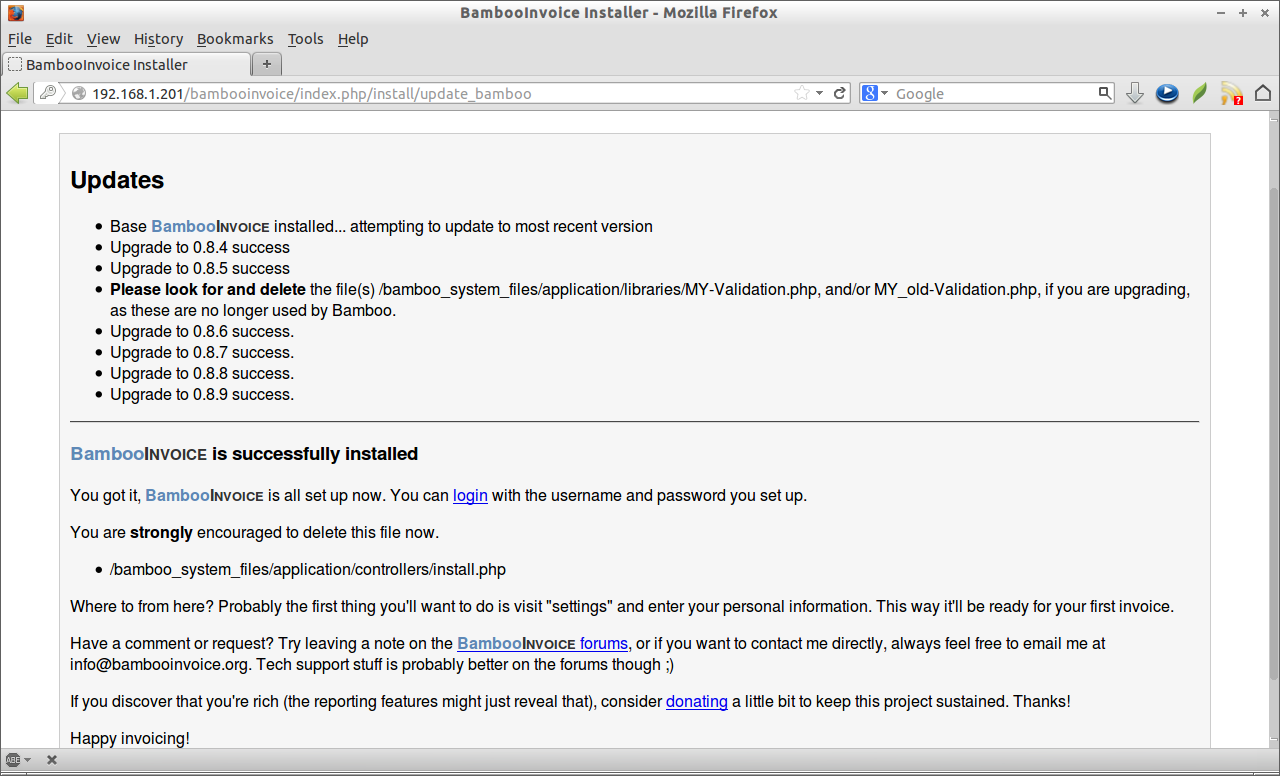 Before going further, i strongly suggest you to delete the install.php file.
# rm /var/www/html/bambooinvoice/bamboo_system_files/application/controllers/install.php
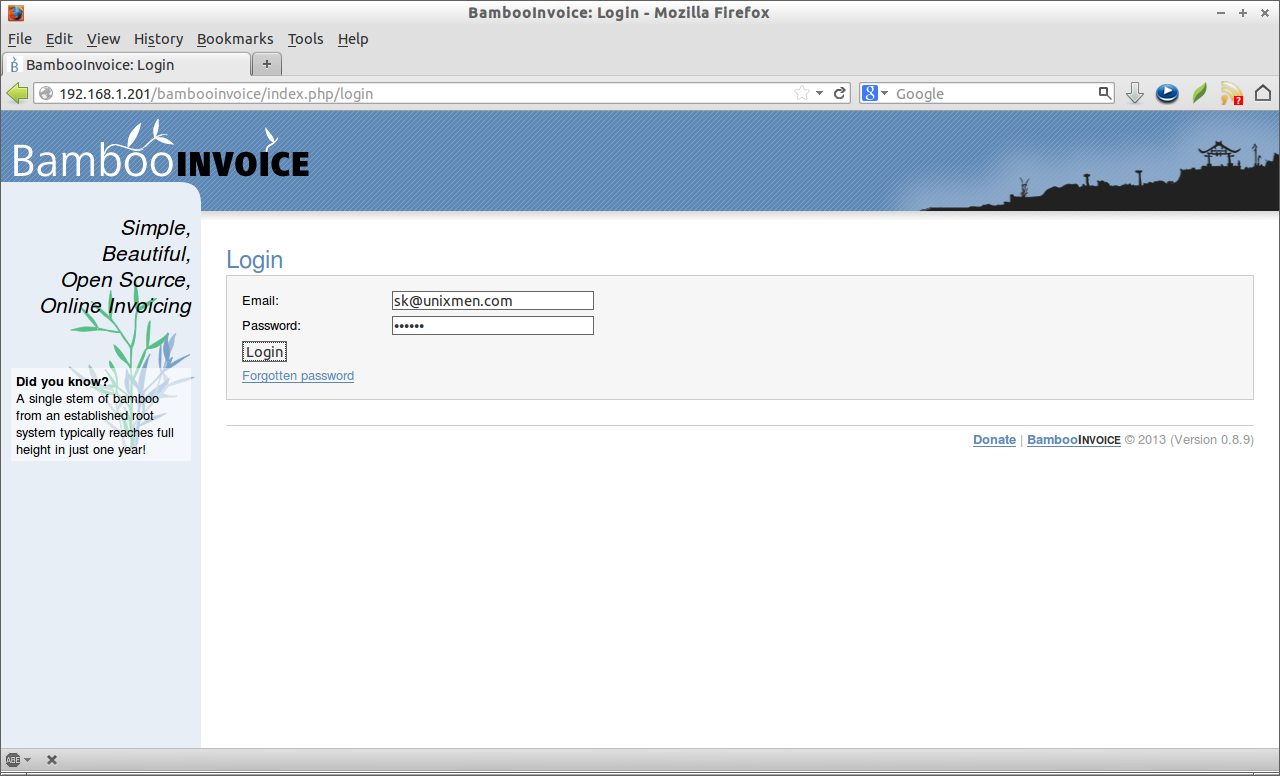
Click on the login link to go to the administrative portal. Use the mail id that you’ve entered during installation as username and the password you’ve created before.
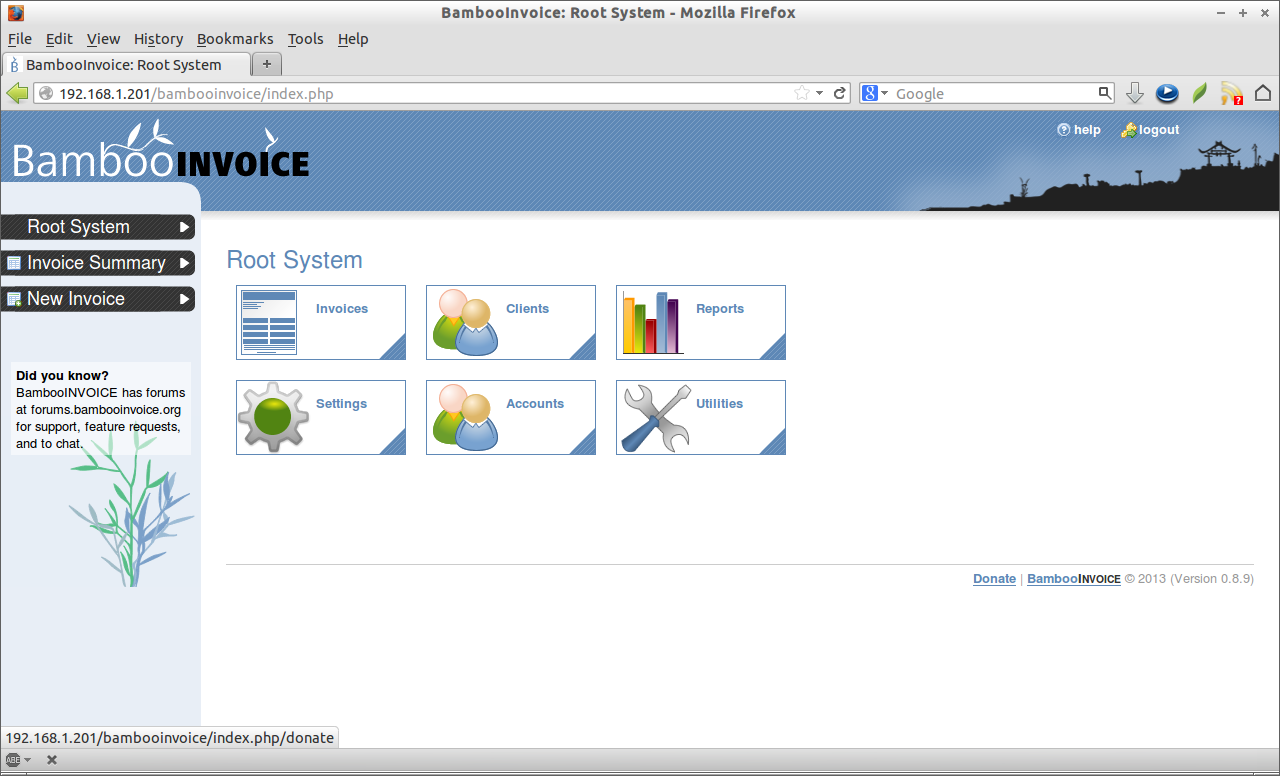
 This is how your BambooInvoice adminsitrative portal looks.
 Personalize BambooInvoice
Click on the Settings icon and update your company details in the Accounts settings section. Click Save settings.
 Click on the Invoice settings and enter your desired currency type, symbol, Days until invoice due etc. Click Save settings.
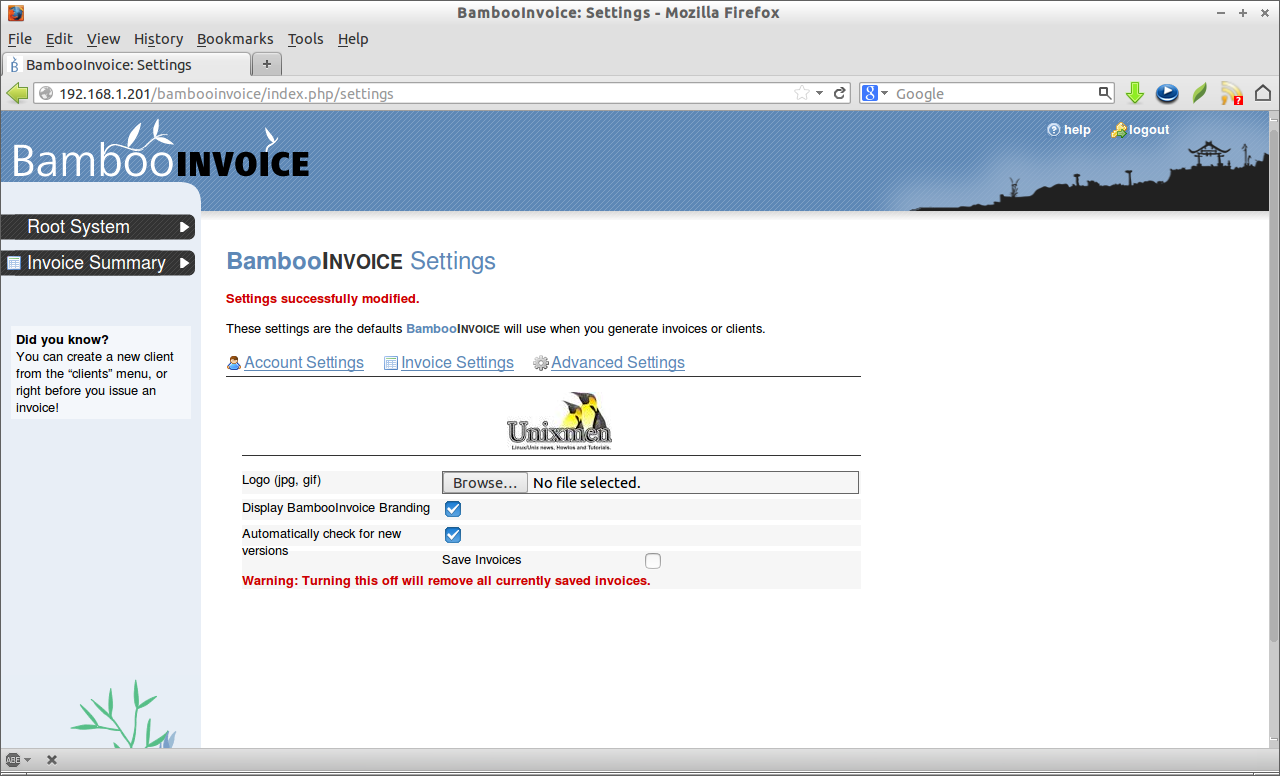
 Go to Advanced settings and upload your company logo.
 Now you’ve entered your company information. Now it’s time to create some clients.
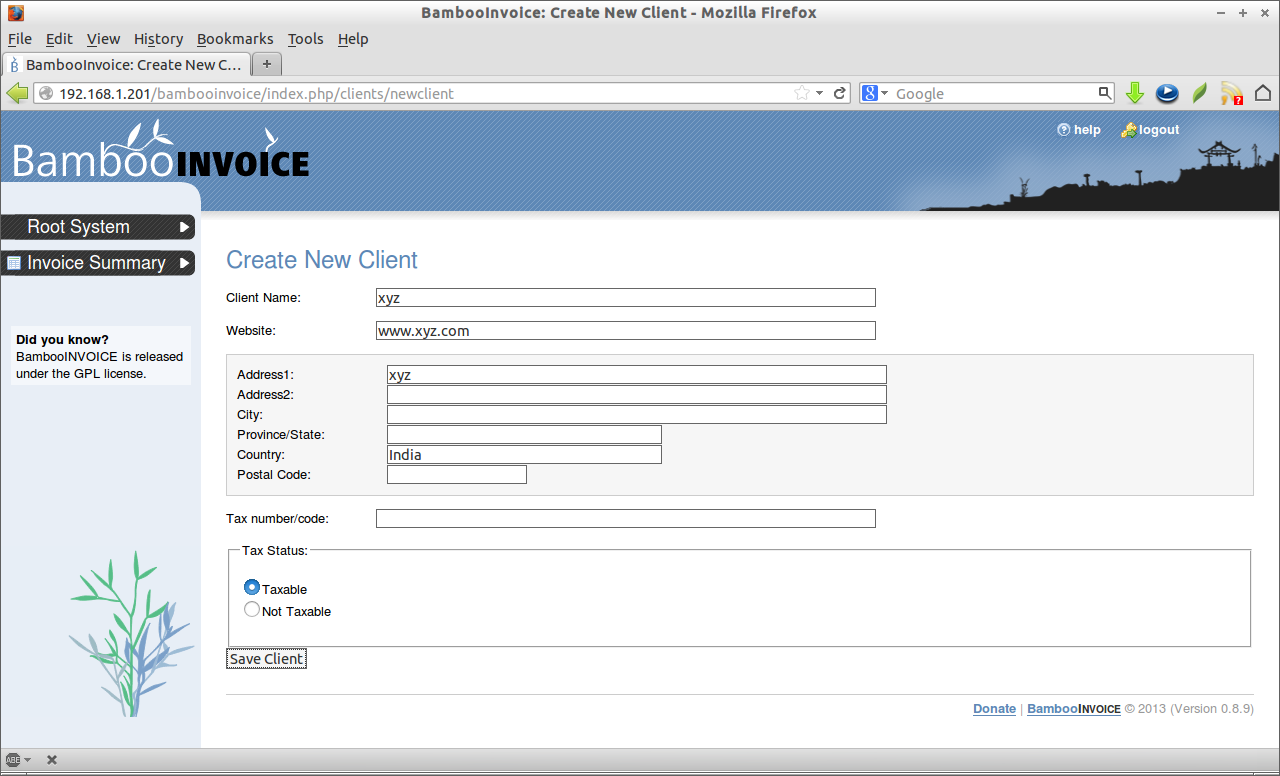
Create Clients
In the Root window, click on the Clients -> Create new client. Enter the client details and click Save client.
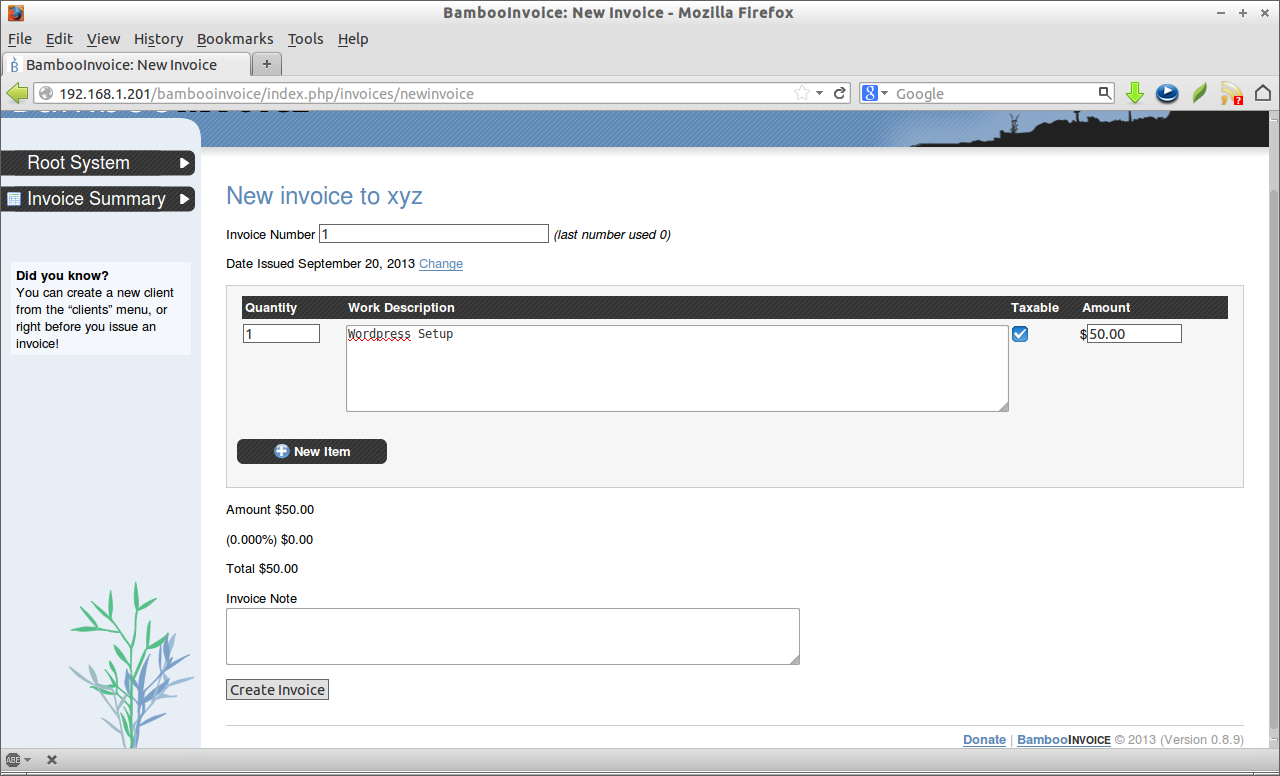
 Create New Invoice
Click on the New Invoice link found in the left pane. Select the client from the client drop-down link. Enter the details and click Create Invoice.
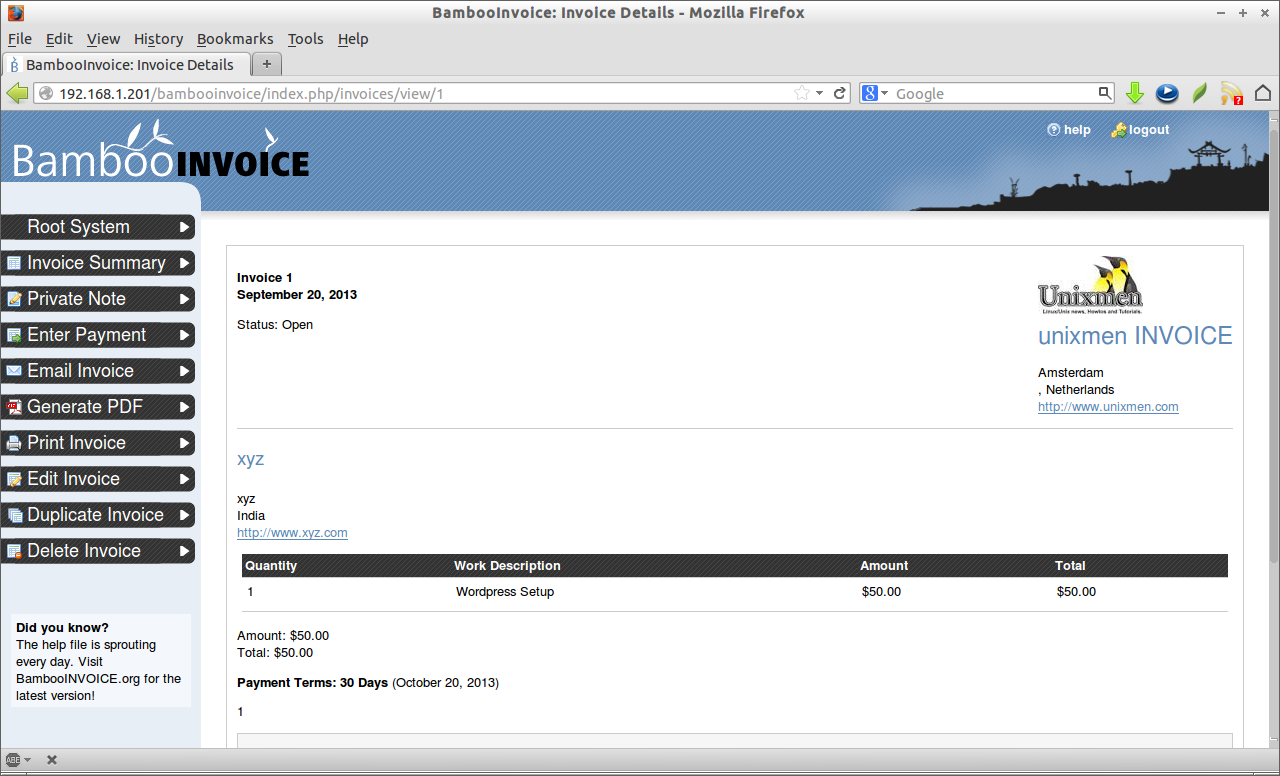
 The sample invoice will look like below.
 That’s it. Now your online invoicing software is ready. Happy Invoicing!!


