In this article we will integrate OpenVPN to Domain Controller. But channel between client and server will be crypt with certificate.
The network configuration will be as follows:

About key generation you can read from Setup And Configure OpenVPN Server On CentOS 6.5 article. OpenVPN installed server is FreeBSD9.2 x64. Client desktop is Windows7 x64. Also Domain Controller will be neighbor with our OpenVPN server in internal network. Domain controller is Windows 2008 server.
DC credentials as follows:
DC: mercurial.lan
OU: mercurial
Group: mercurial
Test user: jamal
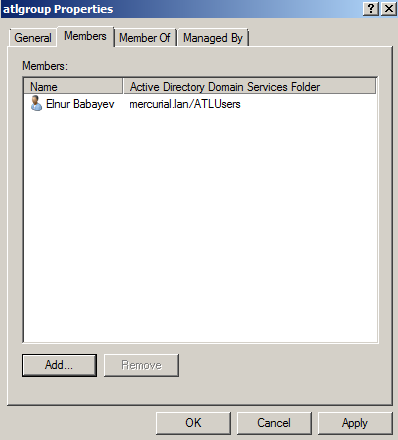
In our domain controller we already created group with name mercurial. And user jamal is member of mercurial group(We will use this user for connect). For test purpose we already created user elnur in Users group(This user must not connect to OpenVPN sevrer).

Start to work:
- First one install required packets to our server:
root@siteA: # cd /usr/ports/security/openvpn-auth-ldap/
root@siteA: # make config # Choose modules

root@siteA: # make -DBATCH install # install
- After install Auth-LDAP packet to our server this will add /usr/local/lib/openvpn-auth-ldap.so plugin to the server. This plugin helps us to connect Domain Controller. Create /usr/local/etc/openvpn/ad-auth.conf configuration file and add lines below to this file:
plugin /usr/local/lib/openvpn-auth-ldap.so “/usr/local/etc/openvpn/openvpn-auth-ldap.conf”
proto udp
port 1194
dev tun
server 192.168.200.0 255.255.255.0
ca /usr/local/etc/openvpn/ca.crt
cert /usr/local/etc/openvpn/openvpnserver.crt
key /usr/local/etc/openvpn/openvpnserver.key
client-cert-not-required
dh /usr/local/etc/openvpn/dh2048.pem
tls-auth /usr/local/etc/openvpn/ta.key 0
persist-key
persist-tun
keepalive 10 60
push “route 10.198.0.0 255.255.0.0”
topology subnet
user nobody
group nobody
daemon
log-append /var/log/openvpn.log
verb 5
For connect to Domain Controller the content of /usr/local/etc/openvpn/openvpn-auth-ldap.conf configuration file will be as follows:
<LDAP>
URL ldap://10.198.1.200
BindDN Administrator@mercurial.lan
Password B123456789b
Timeout 15
</LDAP>
<Authorization>
BaseDN “DC=mercurial,DC=lan”
SearchFilter “(&(sAMAccountName=%u)(memberOf=CN=mercurial,OU=mercurial,DC=mercurial,DC=lan))”
</Authorization>
Note: Do not forget add IP of domain controller to your /etc/resolv.conf file in OpenVPN server. Otherwise Domain name on /usr/local/etc/openvpn/openvpn-auth-ldap.conf file will not be resolved.
nameserver 10.198.1.200
- Start the OpenVPN server:
root@siteA:/usr/local/etc/openvpn # openvpn –config ad-auth.conf
- And now create the client configuration file on Windows7 machine. Create file with name ad-udp-client.ovpn and add to the C:\Program Files\OpenVPN\config The content of ad-udp-client.ovpn file will be as follows:
client
auth-user-pass
proto udp
remote openvpnserver.example.com
port 1194
dev tun
nobind
ca “c:/program files/openvpn/config/ca.crt”
tls-auth “c:/program files/openvpn/config/ta.key” 1
ns-cert-type server
verb 5
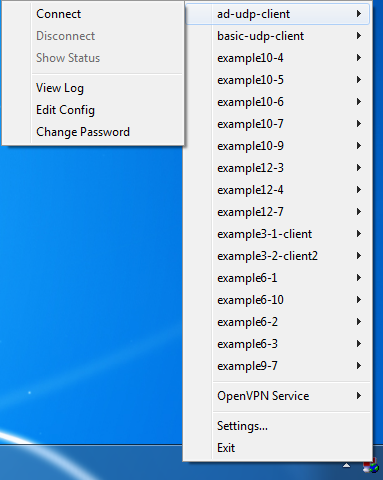
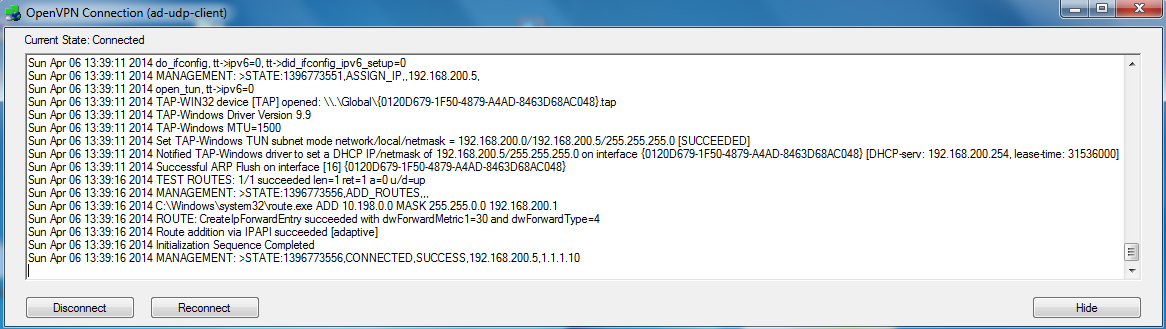
- Connect from Windows client:
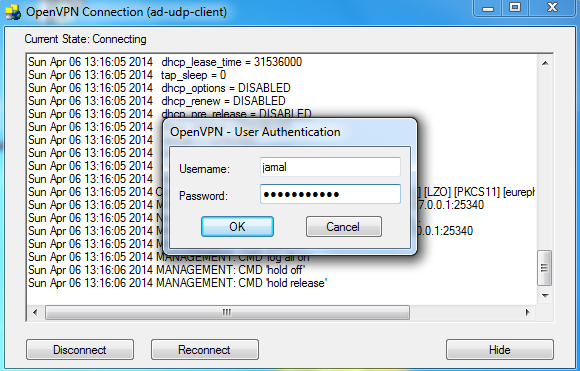
State of openvpn client must be as follows:
- In OpenVPN server /var/log/openvpn.log log file we must see the following lines:
Sun Apr 6 13:17:43 2014 us=626543 2.2.2.10:53829 PLUGIN_CALL: POST /usr/local/lib/openvpn-auth-ldap.so/PLUGIN_AUTH_USER_PASS_VERIFY status=0
Sun Apr 6 13:17:43 2014 us=626715 2.2.2.10:53829 TLS: Username/Password authentication succeeded for username ‘jamal’
Sun Apr 6 13:17:43 2014 us=627135 2.2.2.10:53829 Data Channel Encrypt: Cipher ‘BF-CBC’ initialized with 128 bit key
Sun Apr 6 13:17:43 2014 us=627163 2.2.2.10:53829 Data Channel Encrypt: Using 160 bit message hash ‘SHA1’ for HMAC authentication
Sun Apr 6 13:17:43 2014 us=627235 2.2.2.10:53829 Data Channel Decrypt: Cipher ‘BF-CBC’ initialized with 128 bit key
Sun Apr 6 13:17:43 2014 us=627282 2.2.2.10:53829 Data Channel Decrypt: Using 160 bit message hash ‘SHA1’ for HMAC authentication
If you want to add OpenVPN server to StartUP just add the following lines to the /etc/rc.conf file:
openvpn_enable=”YES”
openvpn_if=”tun”
openvpn_configfile=”/usr/local/etc/openvpn/ad-auth.conf “
openvpn_dir=”/usr/local/etc/openvpn”


