
Openfire – Jabber/XMPP is a server written in JAVA. This is free software and is also official support. Management has a WEB panel and it works on 9090 (http) and 9091 (https) ports.It supports Plugins(extensions), SSL/TLS, can connect to the database(Oracle, MSSQL, PostgreSQL, DB2, Sybase ASE, MySQL or internal database HSQLDB) via JDBC, can connect LDAP groups and filter by groups, has the ability of user’s registration based on to different sources and supporting different languages. Most of the management is done via the web interface. The official website is http://www.igniterealtime.org/.
Features:
- Manage through web
- More plugins
- Supports SSL/TLS
- Save users’ messages and work with databases
- LDAP support
- User’s registration on external databases
- Independed platform, clean JAVA
- Full integration with Spark
Supported client programs:
- Miranda IM
- QIP Infium
- Spark
- Trillian Pro
- Gaim
- Pandion
- Psi
- Exodus
- Pidgin
- Kopete
- Jitsi
Add SRV records in your DNS server as follows:
openfire IN A 94.20.81.149
_jabber._tcp.jabber.unixmen.com. IN SRV 0 0 5269 jabber.unixmen.com.
_xmpp-client._tcp.jabber.unixmen.com. IN SRV 0 0 5222 jabber.unixmen.com.
_xmpp-server._tcp.jabber.unixmen.com. IN SRV 0 0 5269 jabber.unixmen.com.
Before all configuration we will create MySQL database, user and password because we will use this in next configurations:
mysql -uroot -p
mysql> CREATE DATABASE openfire;
mysql> GRANT ALL PRIVILEGES ON openfire.* TO openfire@localhost IDENTIFIED BY ‘0penfire0bepassword’;
mysql> FLUSH PRIVILEGES;
Before the installation absolutely update the ports.
cd /usr/ports/net-im/openfire – Go to the port folder
make config – choose the modules
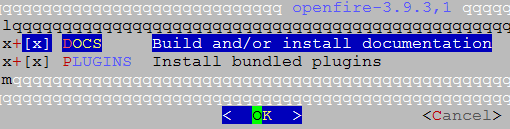
make install – install
echo ‘openfire_enable=”YES”‘ >> /etc/rc.conf – Add to the startup
/usr/local/etc/rc.d/openfire start – Start the daemon
sockstat -l | grep openfire – Check for listen
openfire java 56187 26 tcp4 *:9090 *:*
openfire java 56187 29 stream (not connected)
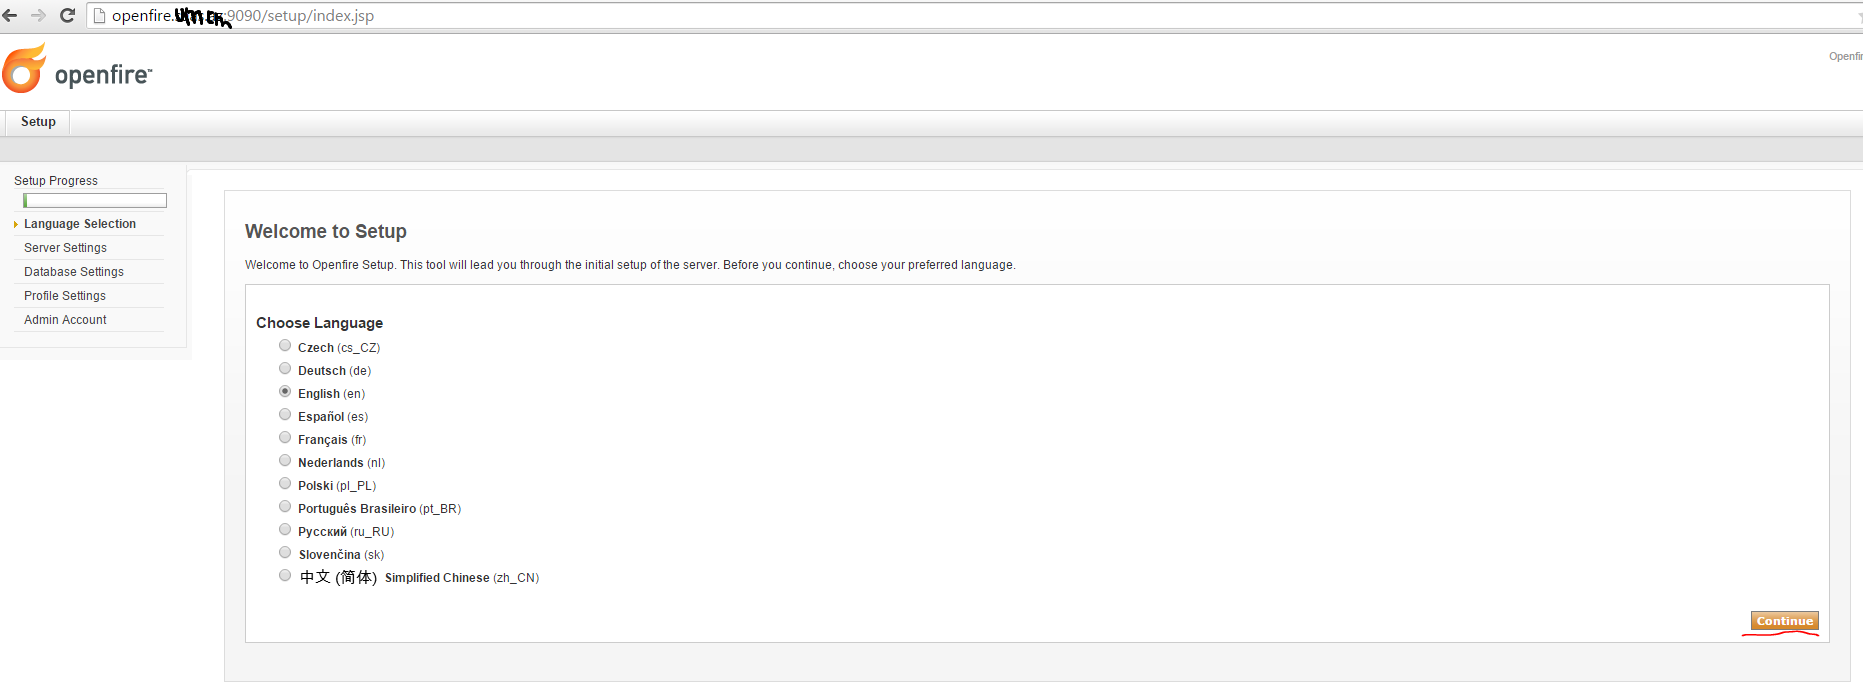
Then go to the http://openfire.unixmen.com:9090 page. You will get the following page (select English and click the continue button):
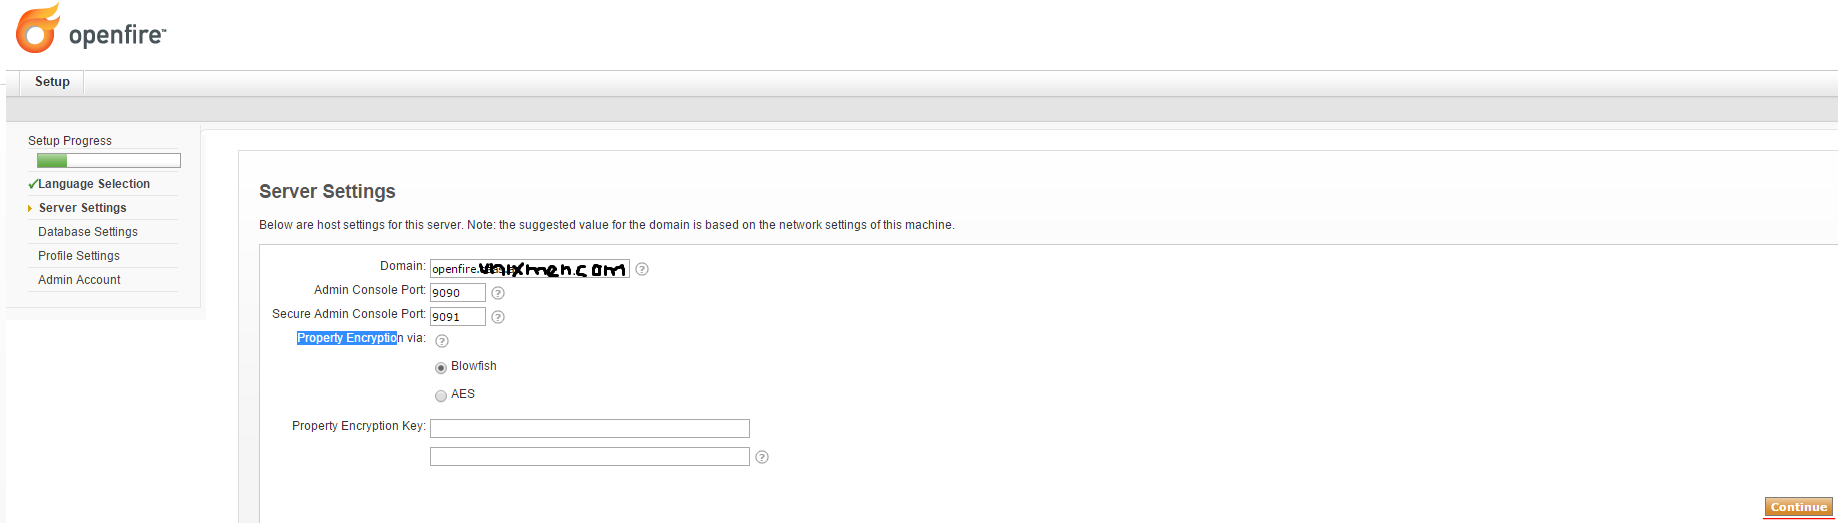
Write domain name and click the Continue button:
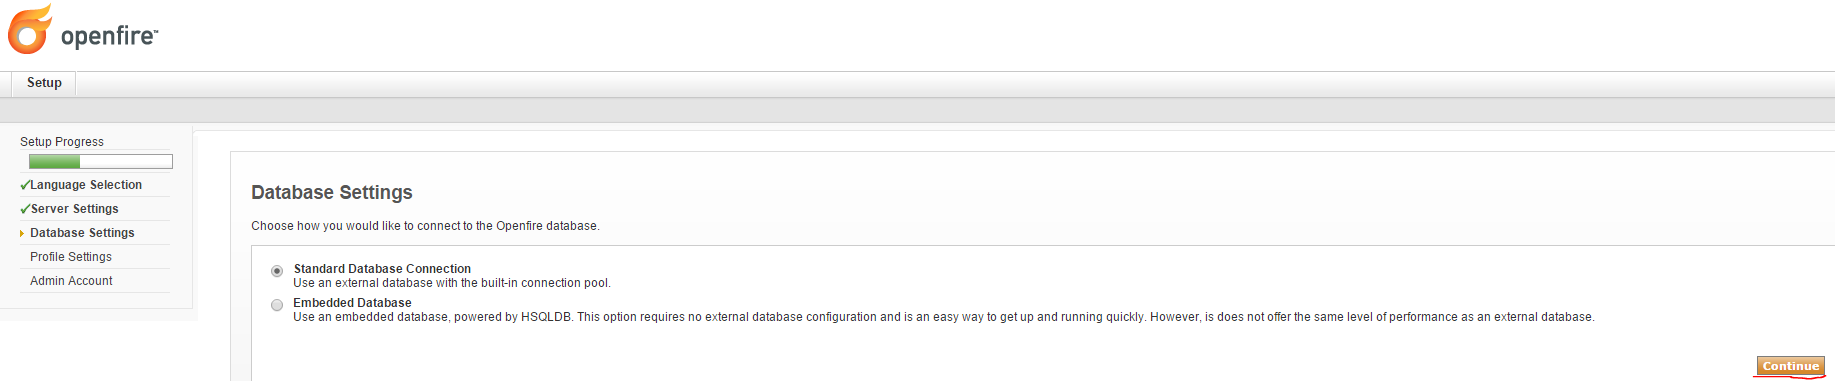
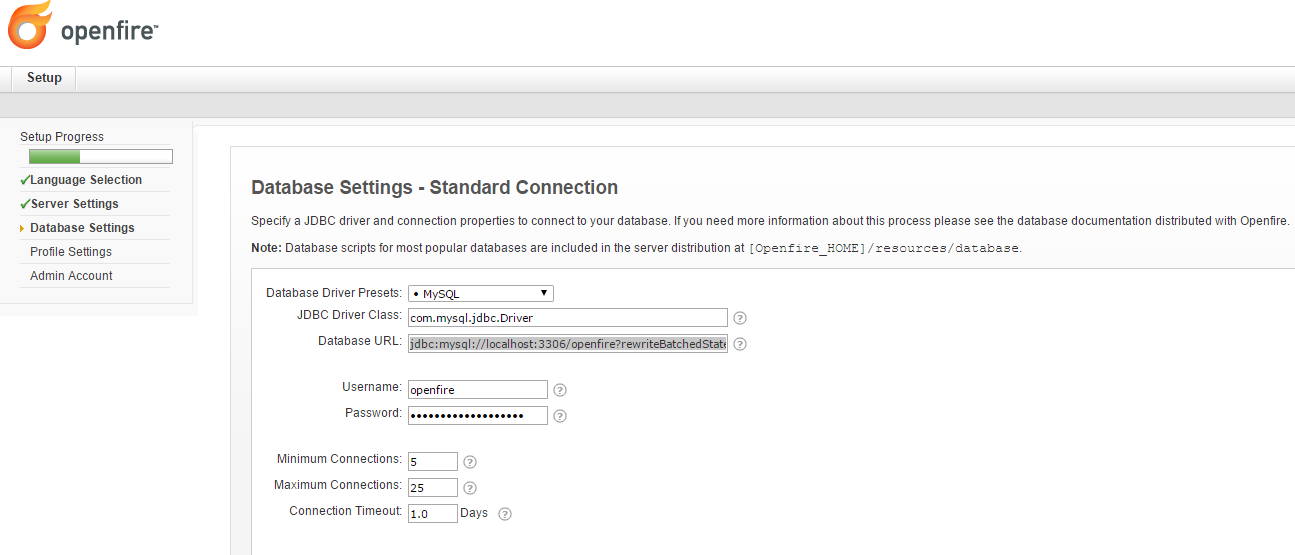
To select different type of database select the Standart Database Connection and click the Continue button:
The selection MySQL database. Write username, password and database URL as the following syntax and click the Continue button: jdbc:mysql://localhost:3306/openfire?rewriteBatchedStatements=true:
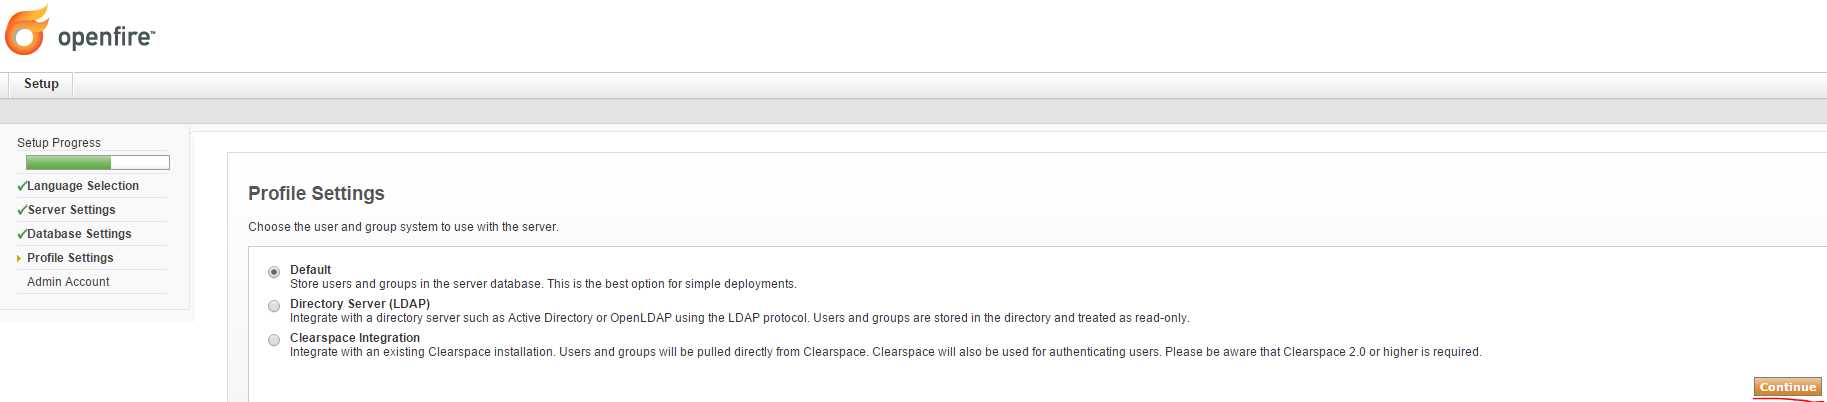
Select Default and click Continue button:
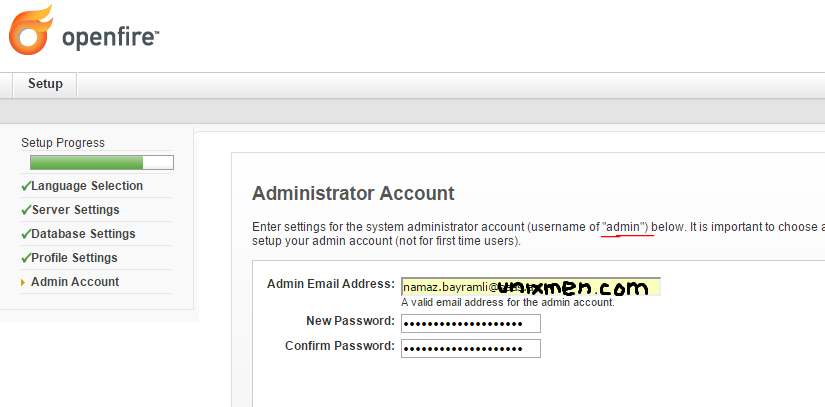
In the opened page add the email for administrator account, type password twice and click the continue button. Administrator login name will be admin:
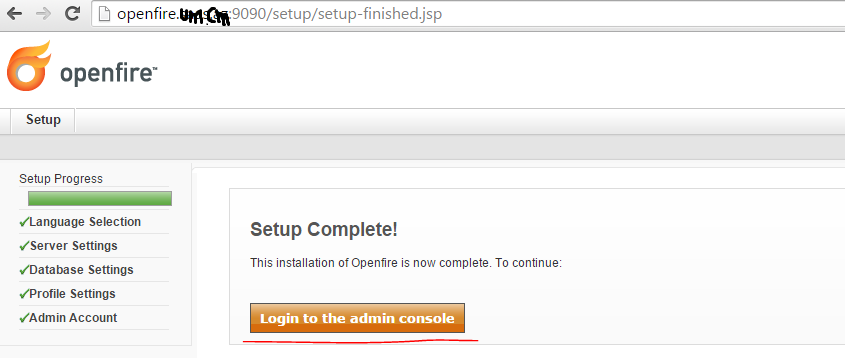
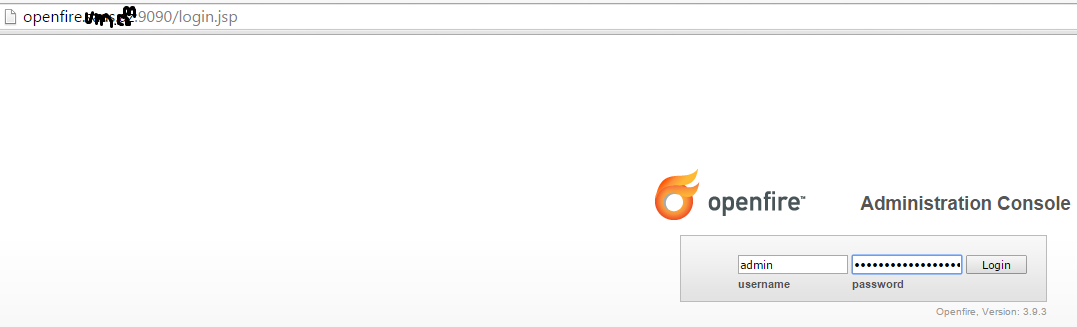
Last configuration page will be as below. Go to the Login to the admin console for login:
Write admin user name and password for this user:
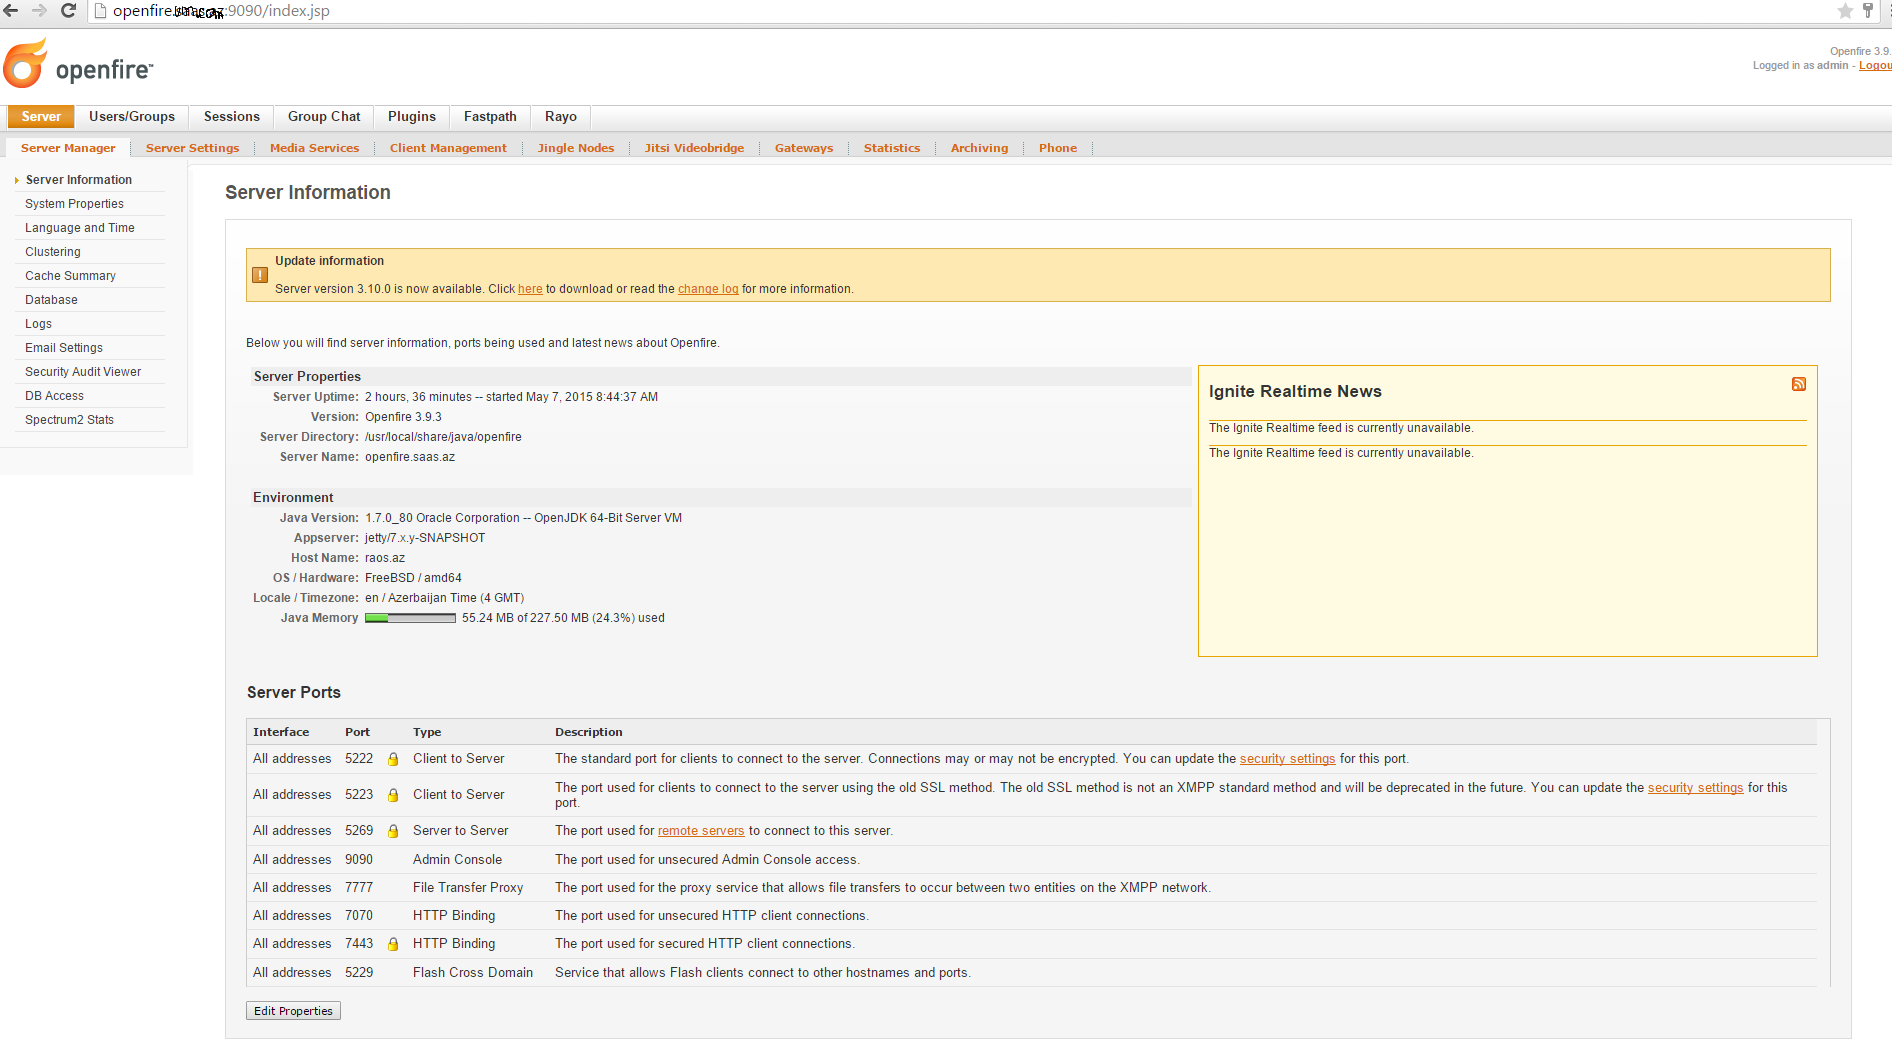
At the end the opened page will be as below:
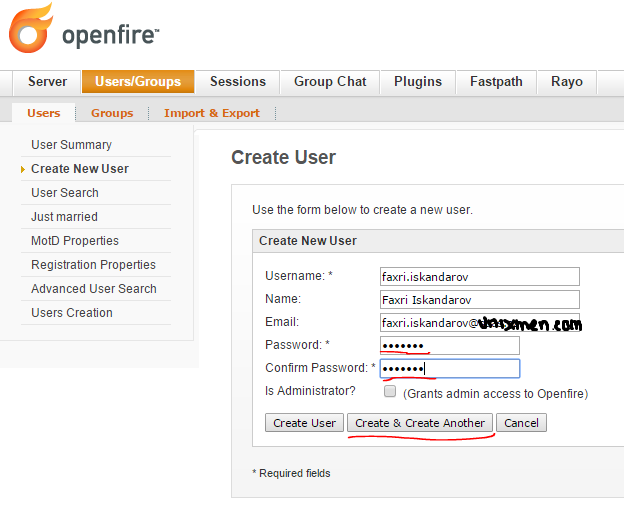
Create some users as the following template:
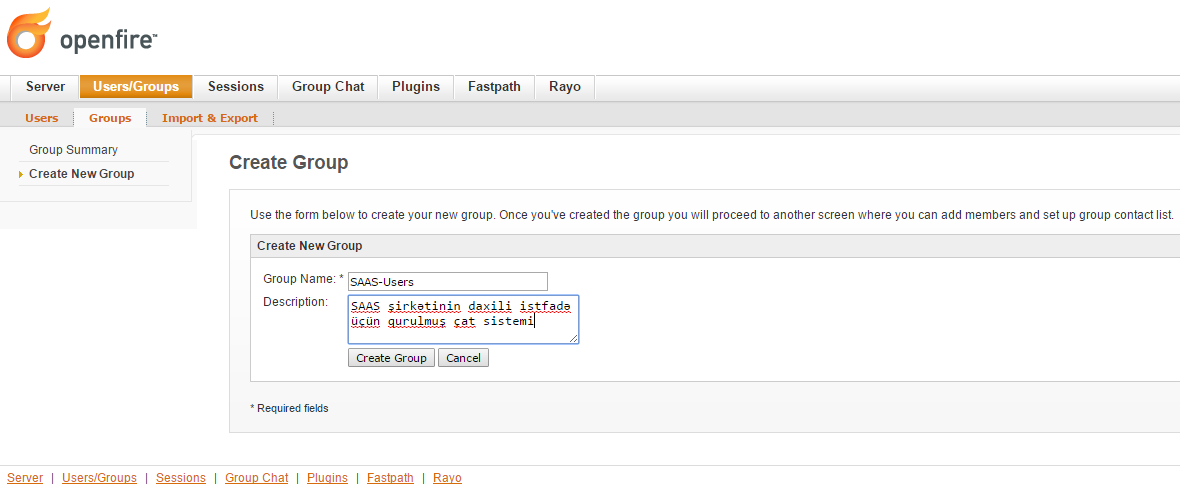
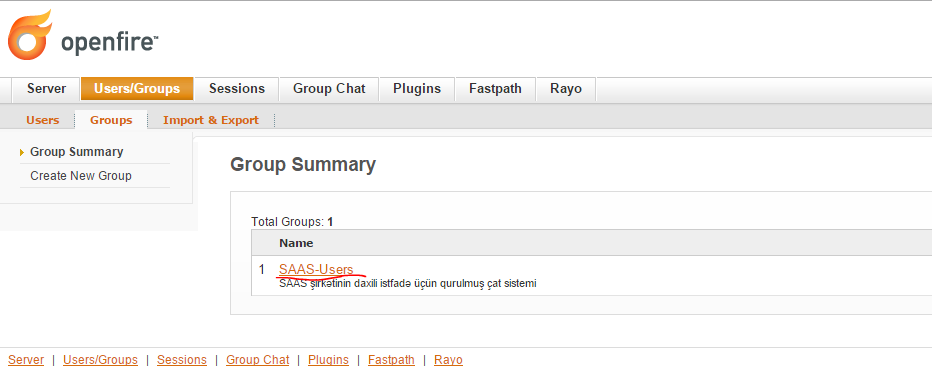
Add group:
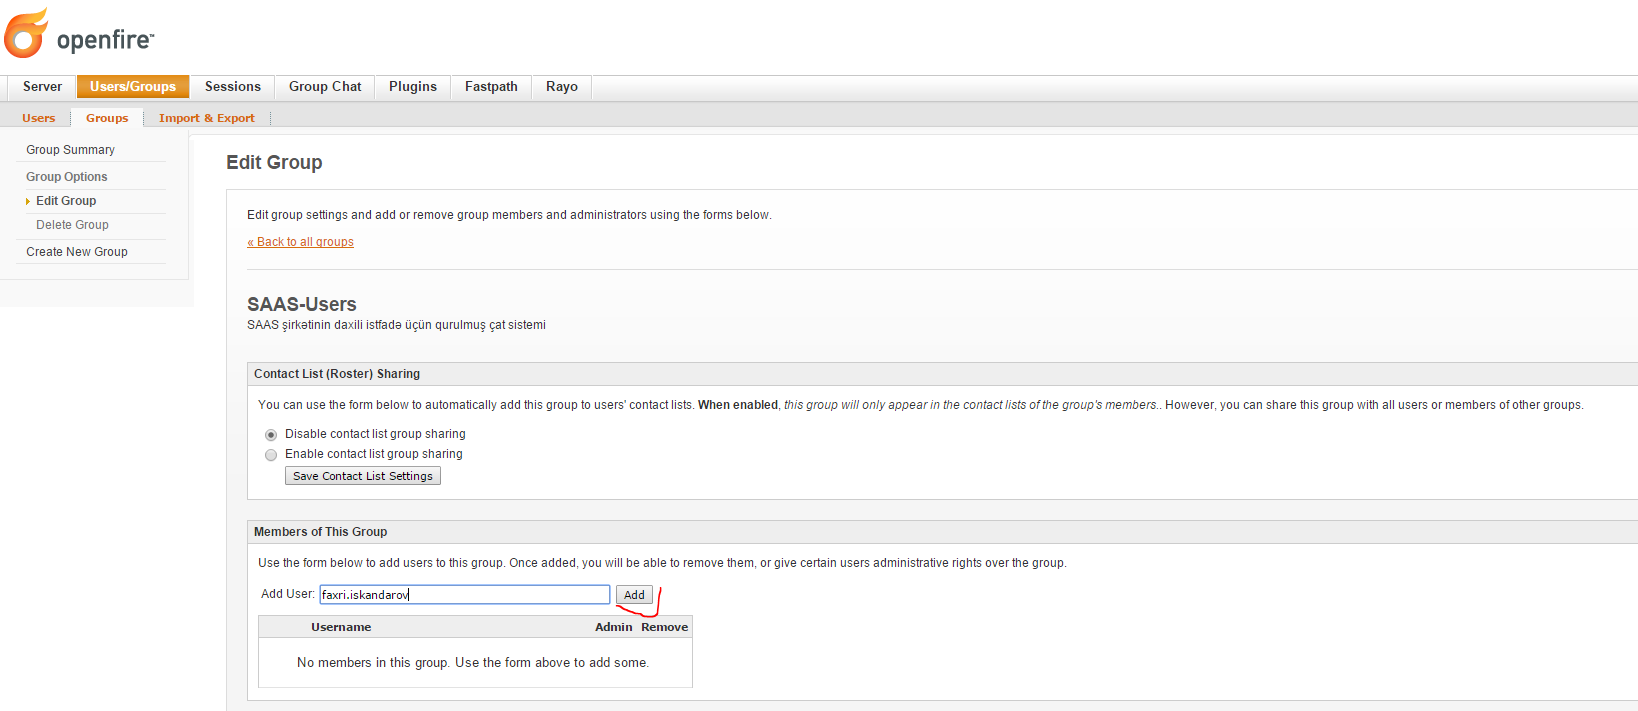
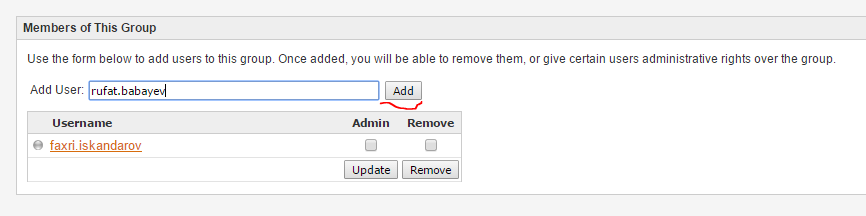
Then go to this group and add created users to this group:
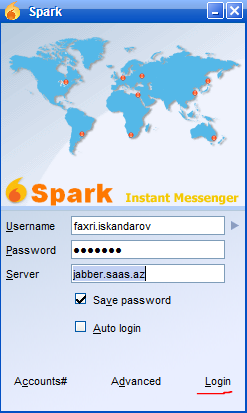
Now configuration for client program. Download Spark client program from http://www.igniterealtime.org/downloads/download-landing.jsp?file=spark/spark_2_7_0.exe link and install.
As the following screen configuring user faxri.iskandarov:
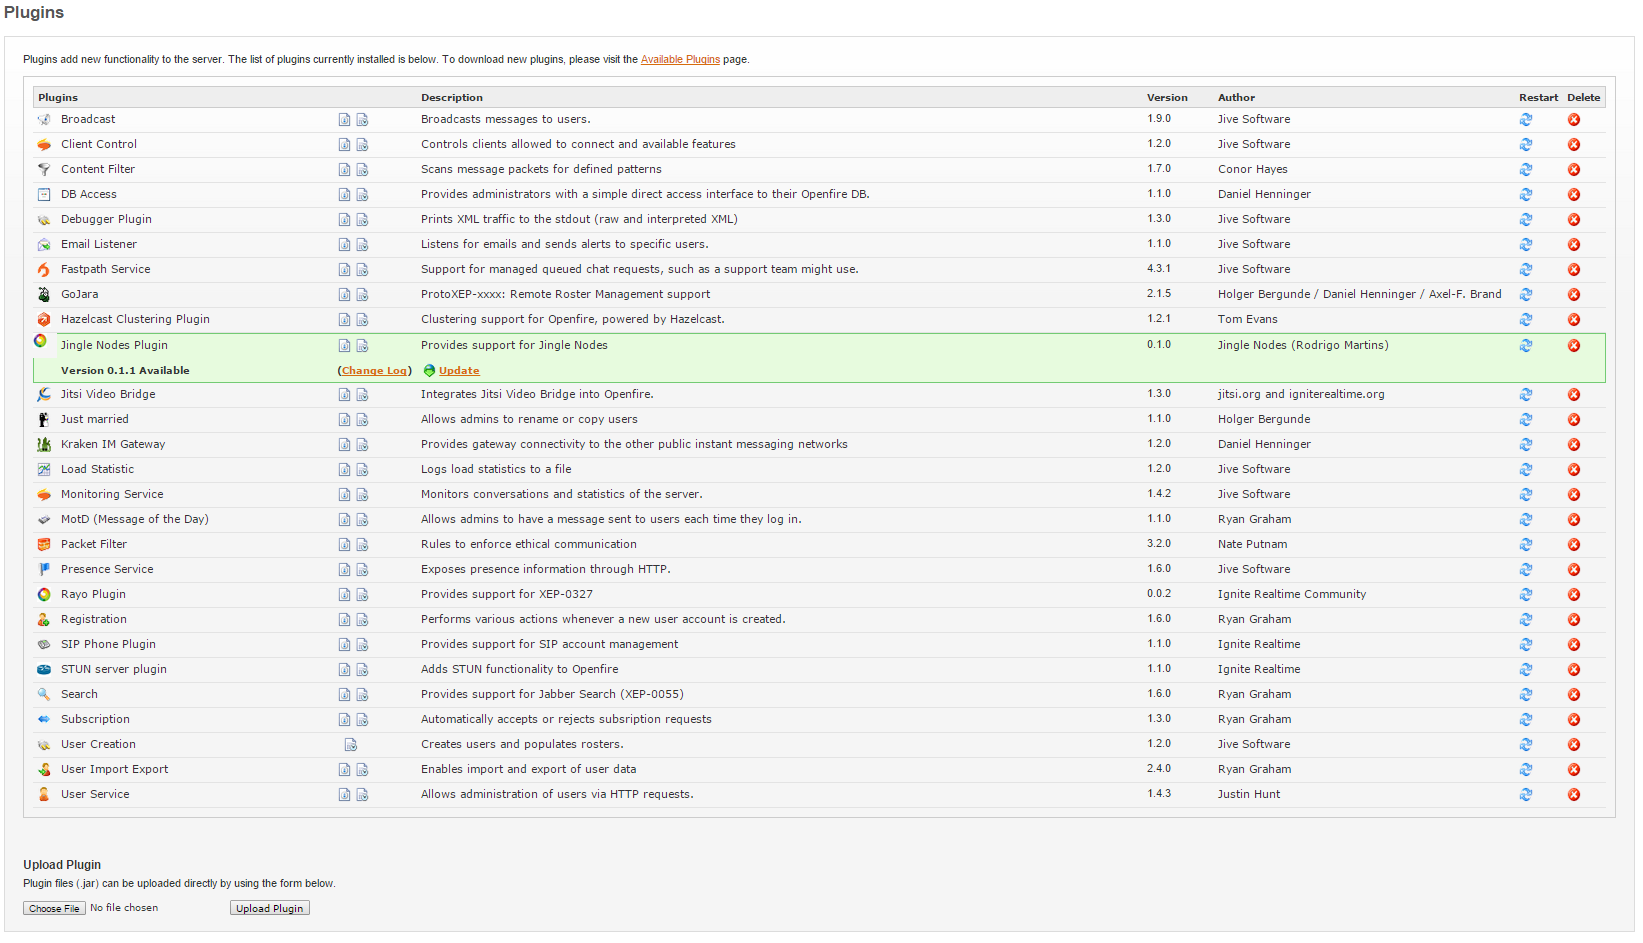
Check monitoring service plugin (Must be installed):
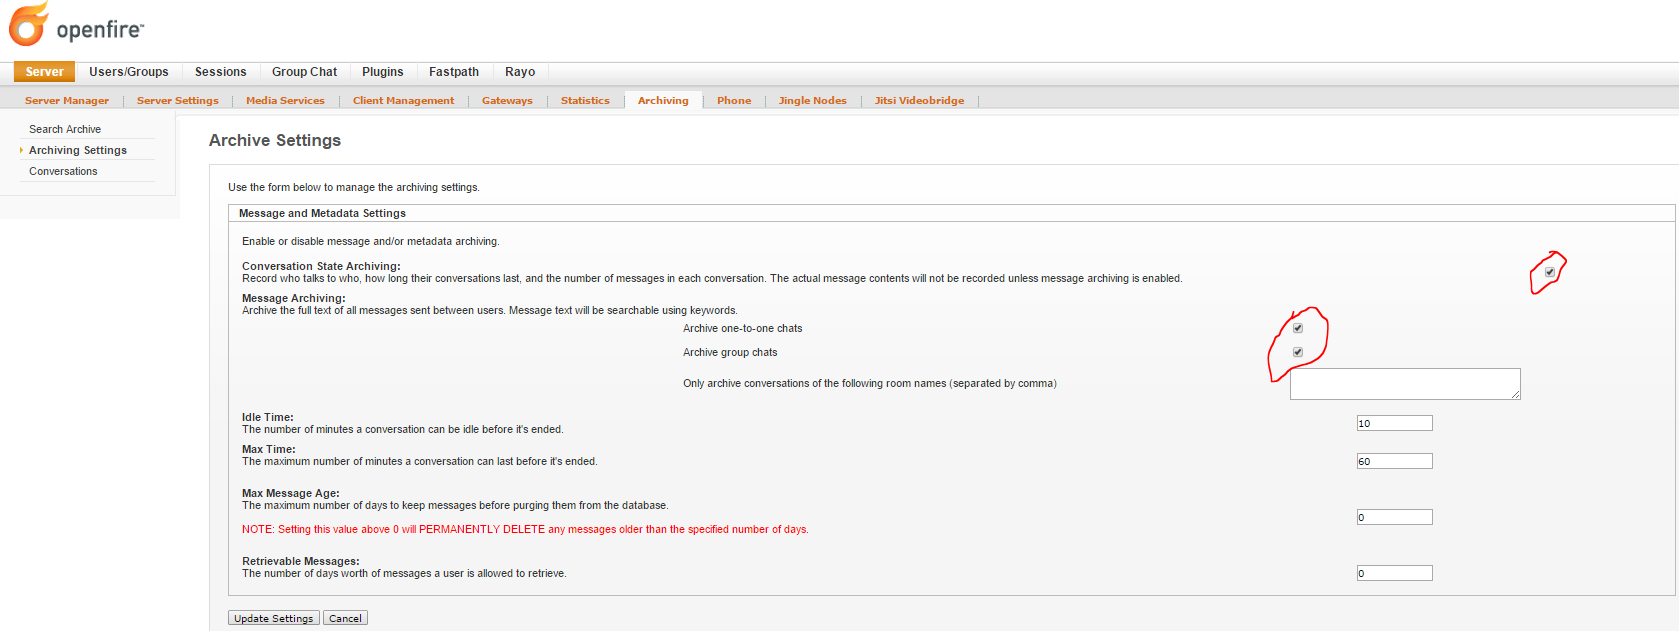
Then go to the Server -> Archiving -> Archiving Settings section and select logging between our XMPP clients (as the following screen):
Even you are able to get meetings through web. For this go to the http://openfire.unixmen.com:7070/jitsi/apps/ofmeet link. This channel will not be crypted. For crypted channel go to the http://openfire.unixmen.com:7443/jitsi/apps/ofmeet link.
Note: If you are using Jitsi client program you don’t need any plugin for call and any SIP number. Because Jitsi client can call with audio/video over XMPP like as Microsoft Lync and you can share your desktop like as Skype. You can download jitsi client program via https://jitsi.org/Main/Download official page. We will configure jitsi program at next sections.
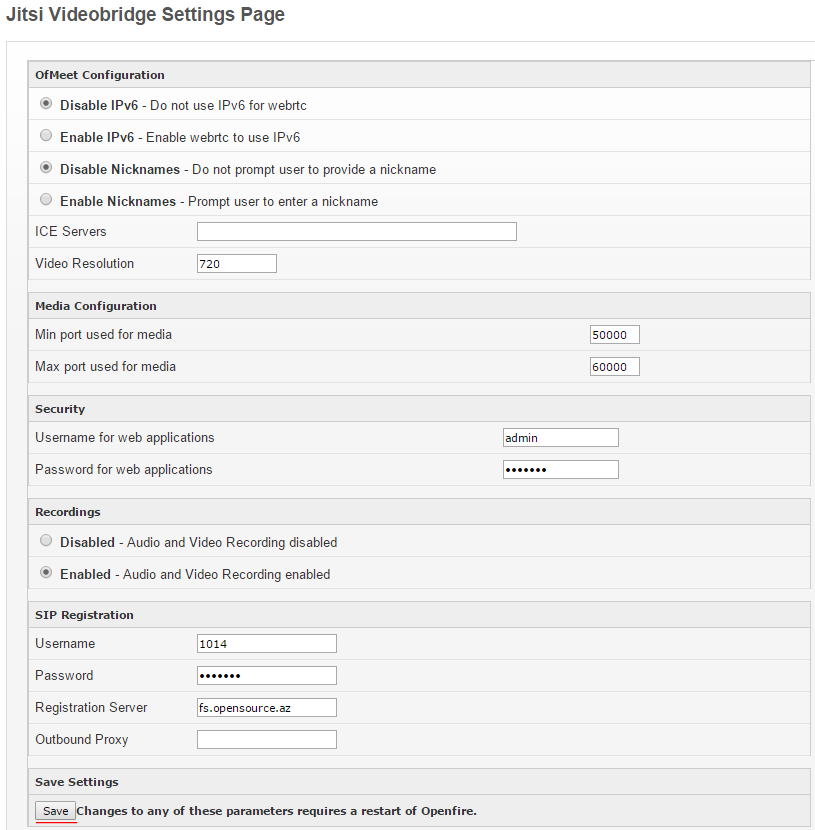
In general plugin configurations under the Server tab. Also go to the Server -> Jitsi Videobridge section. Add the SIP username, password and SIP registration server and click save button:
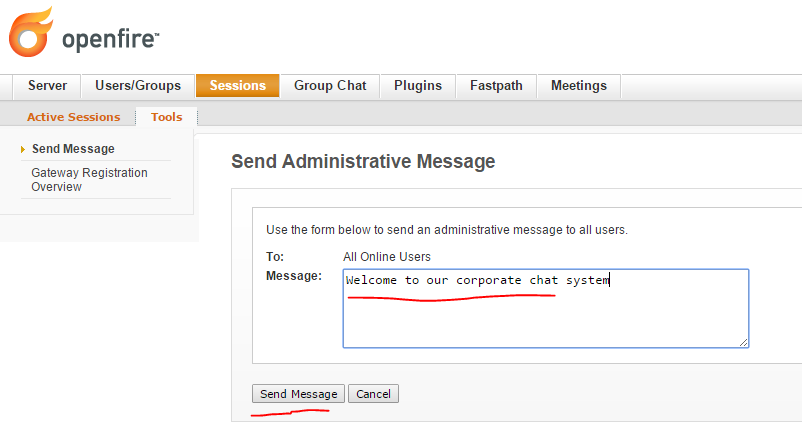
In the Sessions -> Tools -> Send Message section you can send broadcast message to all users. As the following screen:
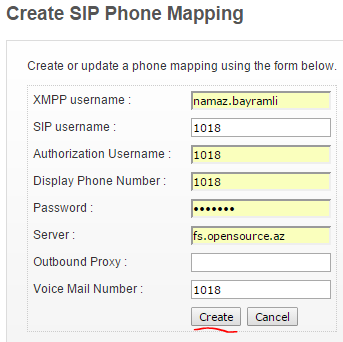
If we want to set SIP number for each user, before this we must add XMPP users to our system and then go to the Server -> Phone -> Add new Phone Mapping section and create SIP users(SIP and XMMP on the same server). For example we will add SIP number for existing namaz.bayramli XMPP user.
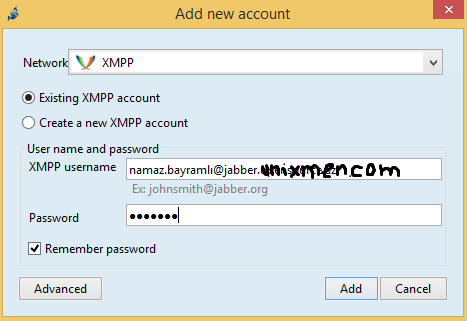
Then download Jitsi XMPP/SIP client program to your Windows machine and configure as follows (The official page: https://jitsi.org/Main/Download :
File -> Add new account –> XMPP -> XMPP Username – Password -> Add
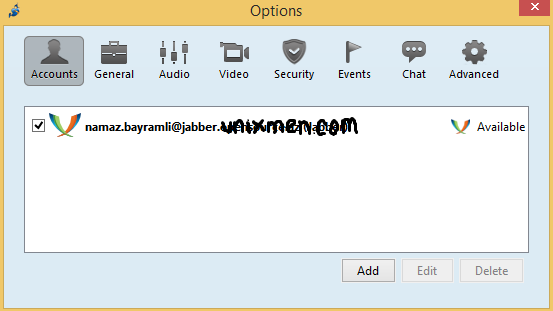
As you see XMPP user namaz.bayramli is ready:
Then click File -> Add contact and add the credentials as the screen, click Add button (Of course, user exists in our system):
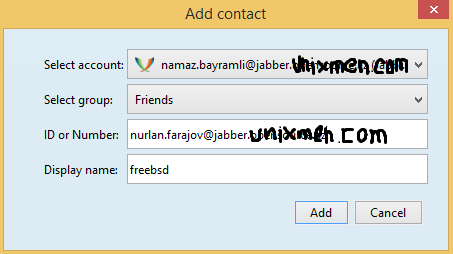
The previous configuration we did for nurlan.farajov@jabber.unixmen.com and added to his user list namaz.bayramli@jabber.unixmen.com. At the end call from one client to another with audio/video and share your desktop:
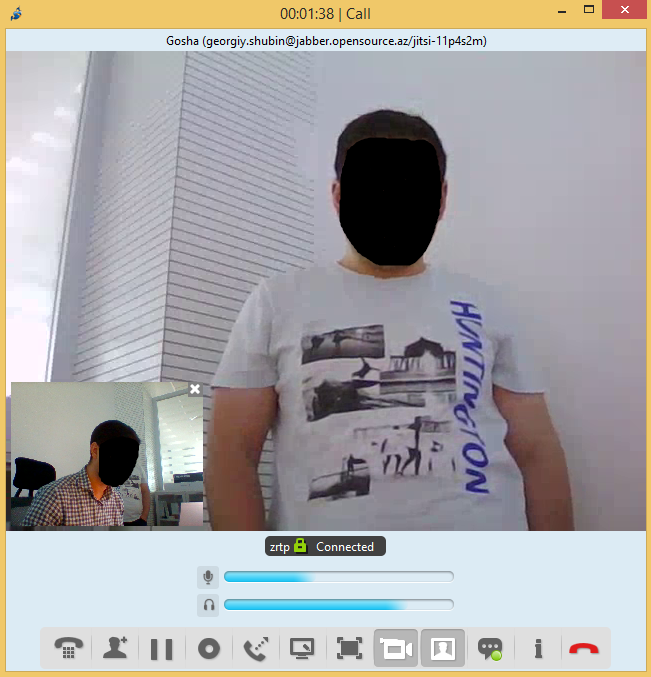
This is desktop sharing:
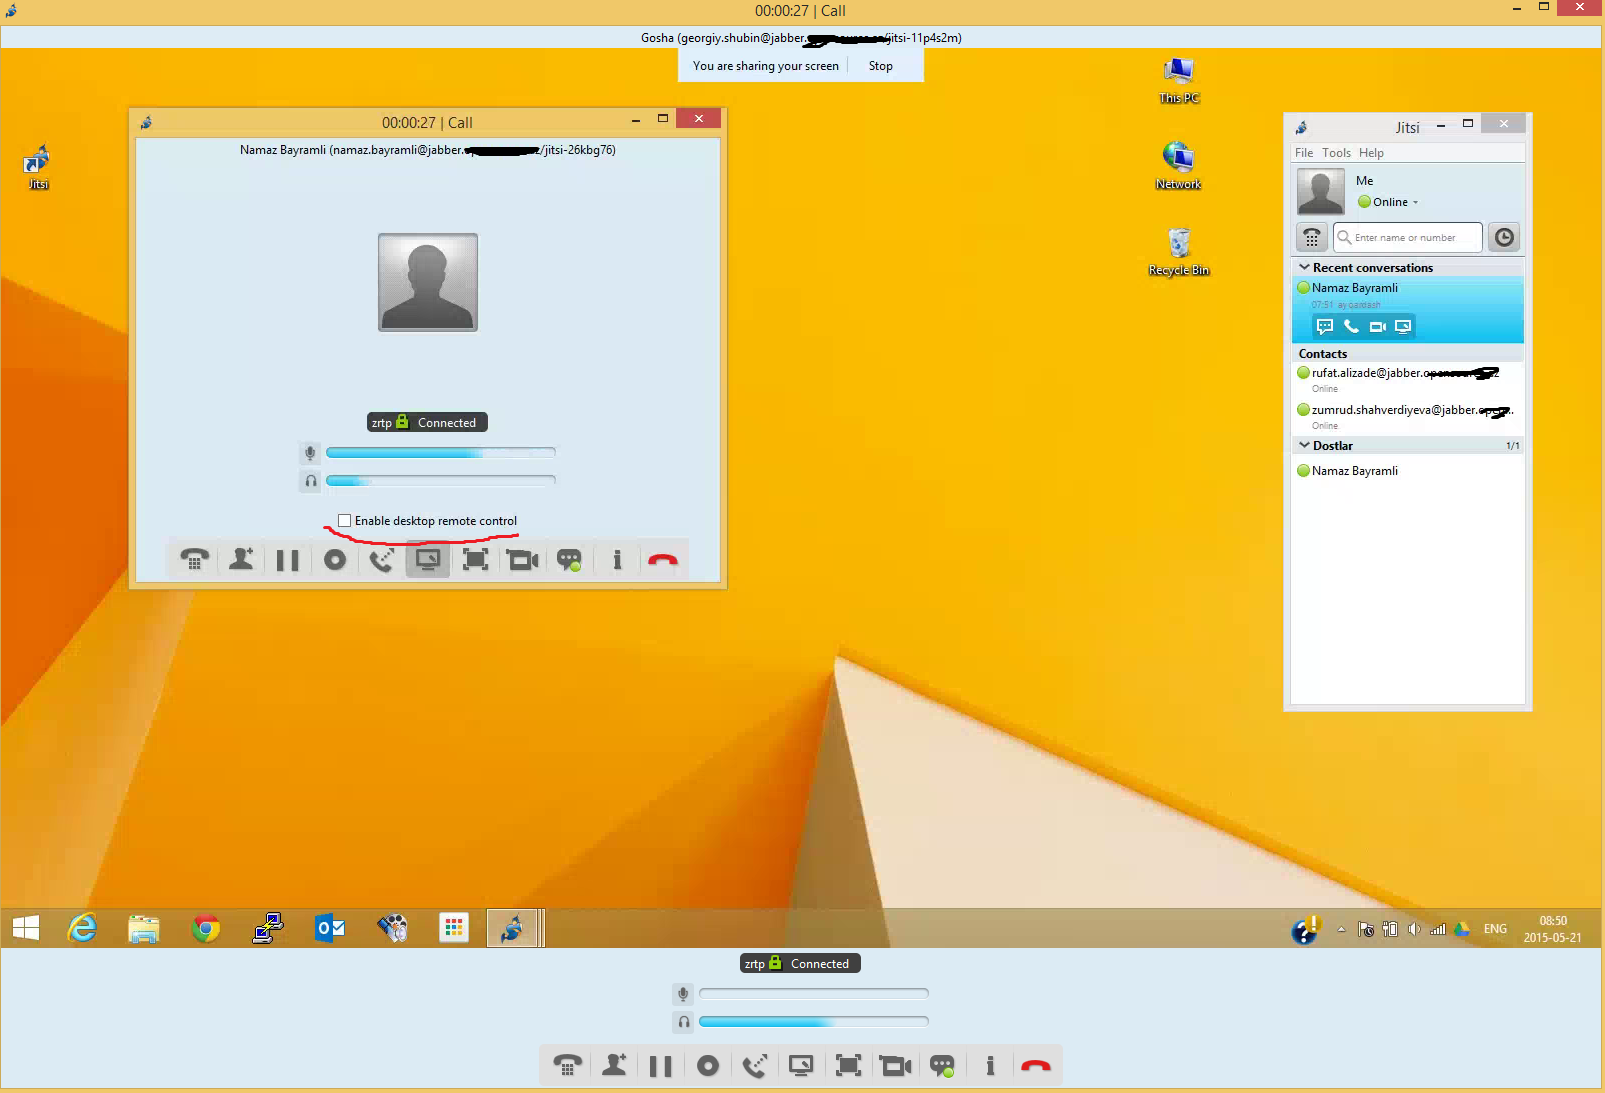
And if you want to control other point from jitsi client, just select “Enable desktop remote control” checkbox. After that you can control other point as teamviewer.
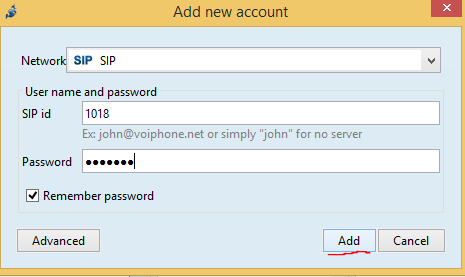
For example if you want to use SIP configuration together XMPP, choose again Tools -> Options -> Add -> SIP and write SIP username and password (As the follows page). Just change domain name to yours:
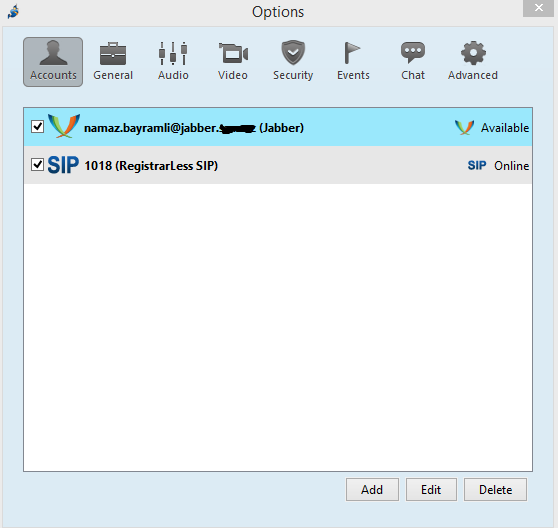
As you see XMPP and SIP accounts is together:


