
OpenFire – Formerly known as Wildfire server and Jive Messenger XMPP server(Extendible Messaging and Presence Protocol). Formerly known as the jabber protocol. Is written in Java.
Management has a WEB interface. Administrators can connect from any location and create/delete users, create and communicate conference rooms.
In this article we will install OpenFire 3.10.2 to FreeBSD 10.1 x64 server and configure witch PostgreSQL database. Also we will use users database from corporate Domain Controller. Before installation and configuration be sure FreeBSD ports are already updated.
Install OpenFire from ports:
root@dolibarr:~ # cd /usr/ports/net-im/openfire
root@dolibarr:/usr/ports/net-im/openfire # make config
root@dolibarr:/usr/ports/net-im/openfire # make -DBATCH install
Install PostgreSQL database from ports:
root@frfs:~ # cd /usr/ports/databases/postgresql94-server/
root@frfs:/usr/ports/databases/postgresql94-server # make config
root@frfs:/usr/ports/databases/postgresql94-server # make -DBATCH install
Add OpenFIRE and PostgreSQL to StartUP:
root@frfs:~ # echo ‘postgresql_enable=”YES”‘ >> /etc/rc.conf
root@frfs:~ # echo ‘openfire_enable=”YES”‘ >> /etc/rc.conf
Initialize PostgreSQL:
root@frfs:~ # /usr/local/etc/rc.d/postgresql initdb
Delete comment in /usr/local/pgsql/data/postgresql.conf file from the following line:
listen_addresses = ‘localhost’
In the /usr/local/pgsql/data/pg_hba.conf file change host all all 127.0.0.1/32 trust line as follows:
host all all 127.0.0.1/32 md5
Start the PostgreSQL and OpenFIRE daemons:
root@frfs:~ # /usr/local/etc/rc.d/postgresql start
root@frfs:~ # /usr/local/etc/rc.d/openfire start
Set the password for pgsql user:
root@frfs:~ # passwd pgsql
Changing local password for pgsql
New Password: password
Retype New Password: repeat_password
Login as pgsql and create user, pass and database for openfire connection:
root@frfs:~ # su pgsql
$ createuser -sdrP openfire
Enter password for new role: password
Enter it again: repeat_password
$ createdb openfire –owner=openfire
Exit from console:
$ exit
Restart the PostgreSQL daemon:
root@frfs:~ # service postgresql restart
Ready! Open any web browser and go to the http://server_IP:9090/ link. You will see page as follows(Select English and click Continue button):
In opened page write domain name as chat.unximen.com, write password for encryption key and click Continue button:
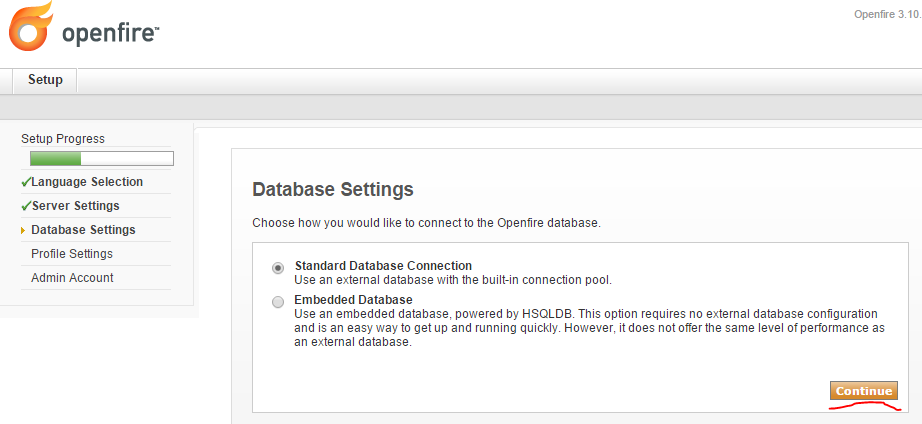
Select Standart Database Connection and click Continue button:
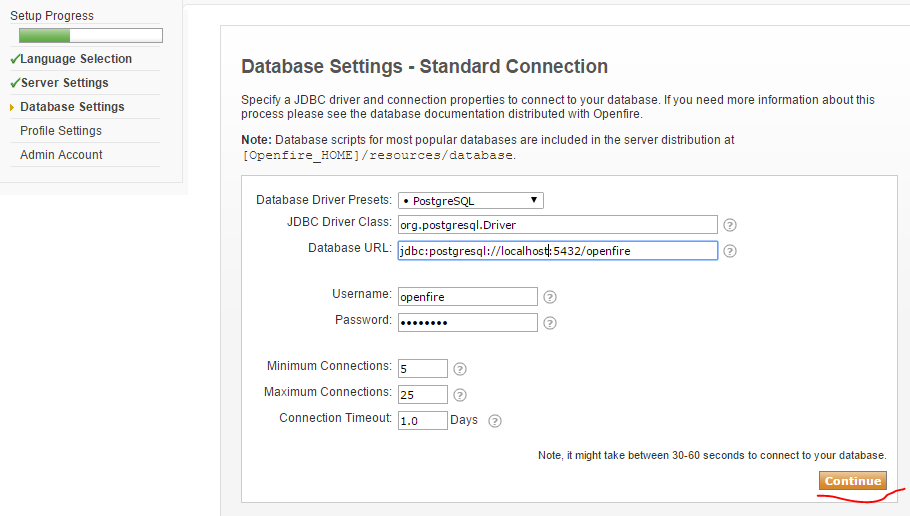
For connect to database select type PostgreSQL, write database URL, username and password as follows. Then click Continue button:
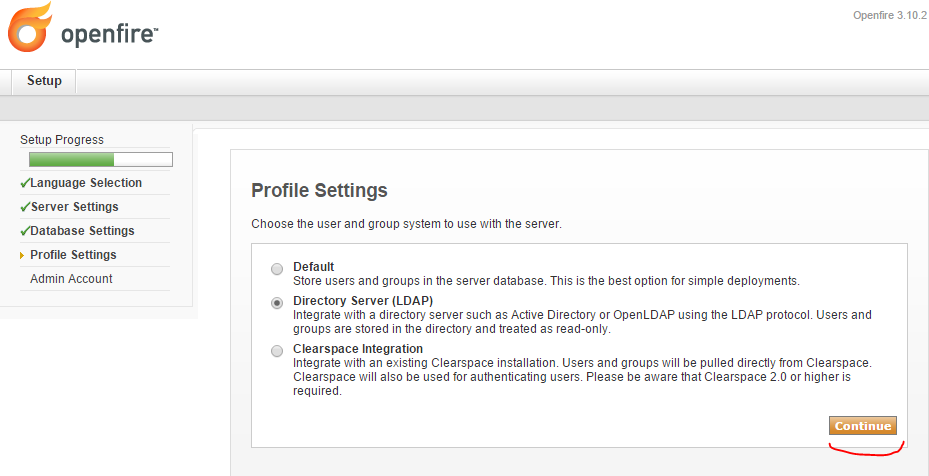
As user database select LDAP(Active Dircetory), and click Continue button:
To connect to Active Directory, write Distinguished Name for domain.lan and Distinguished Name for Administrator account with his password. Don’t forget choose LDAP port 3268 and click Test Settings button:
DC name: domain.lan
Group name for filter: CN=openfireUsers,OU=OpSO Groups,DC=domain,DC=lan
Domain Administrator: CN=Administrator,CN=Users,DC=domain,DC=lan

Success result will be as follows:

After Status: Success! click Save & Continue button:
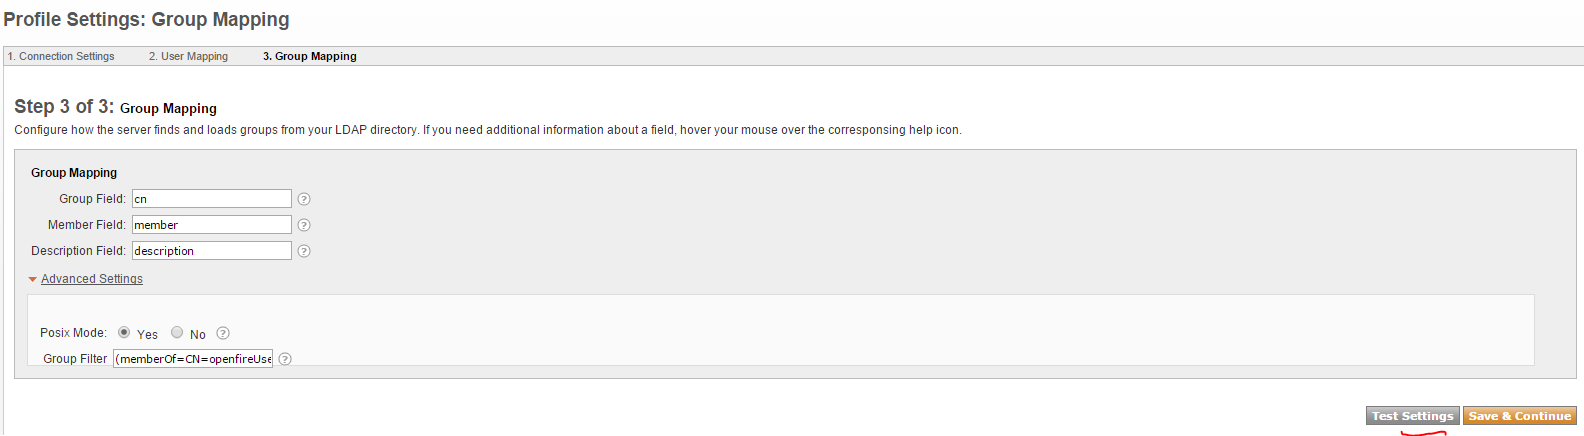
For group filter click Advanced Settings and write filter syntax for openfireUsers group. This means only users from openfireUsers group can login to our OpenFire server(click Test Settings button):
(memberOf=CN=openfireUsers,OU=OpSO Groups,DC=domain,DC=lan)
If you will see result as follows this means everything is working:

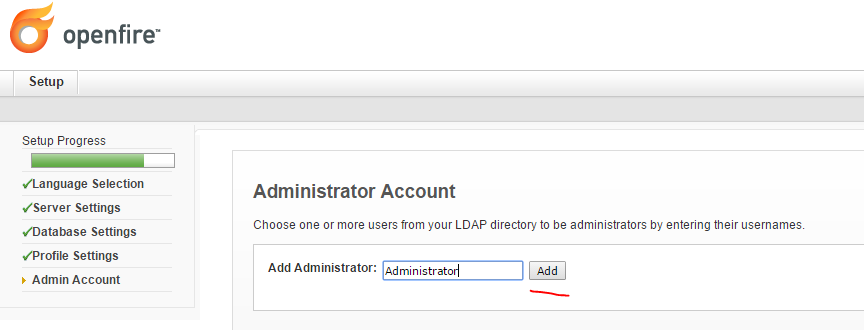
Click to Save & Continue button for continue. Select OpenFire web administrator account from our Active Directory(You can select multiple):
Açılacaq şəkildə Administrator LDAP istifadəçi həsabı üçün test düyməsini sıxıb sınaqdan keçiririk:

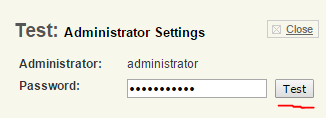
Enter the password for admin user and click test button:
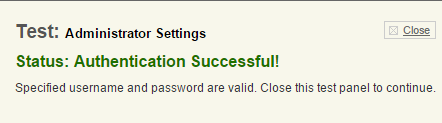
Success result will be as follows:
Then click Continue button.
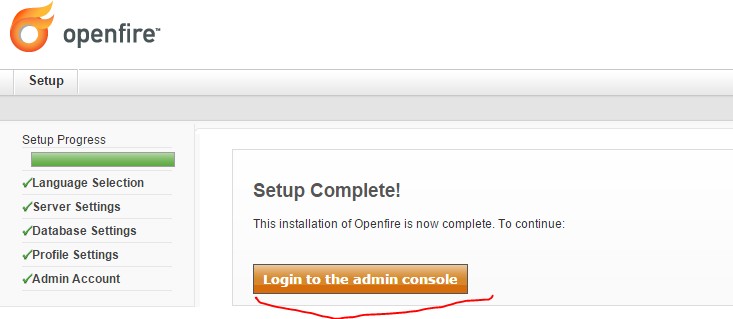
Installation is already finished, click Login to the admin console button.
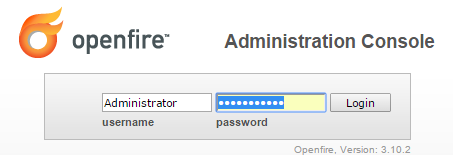
Enter selected account and his password and click login button(This account selected from DC).
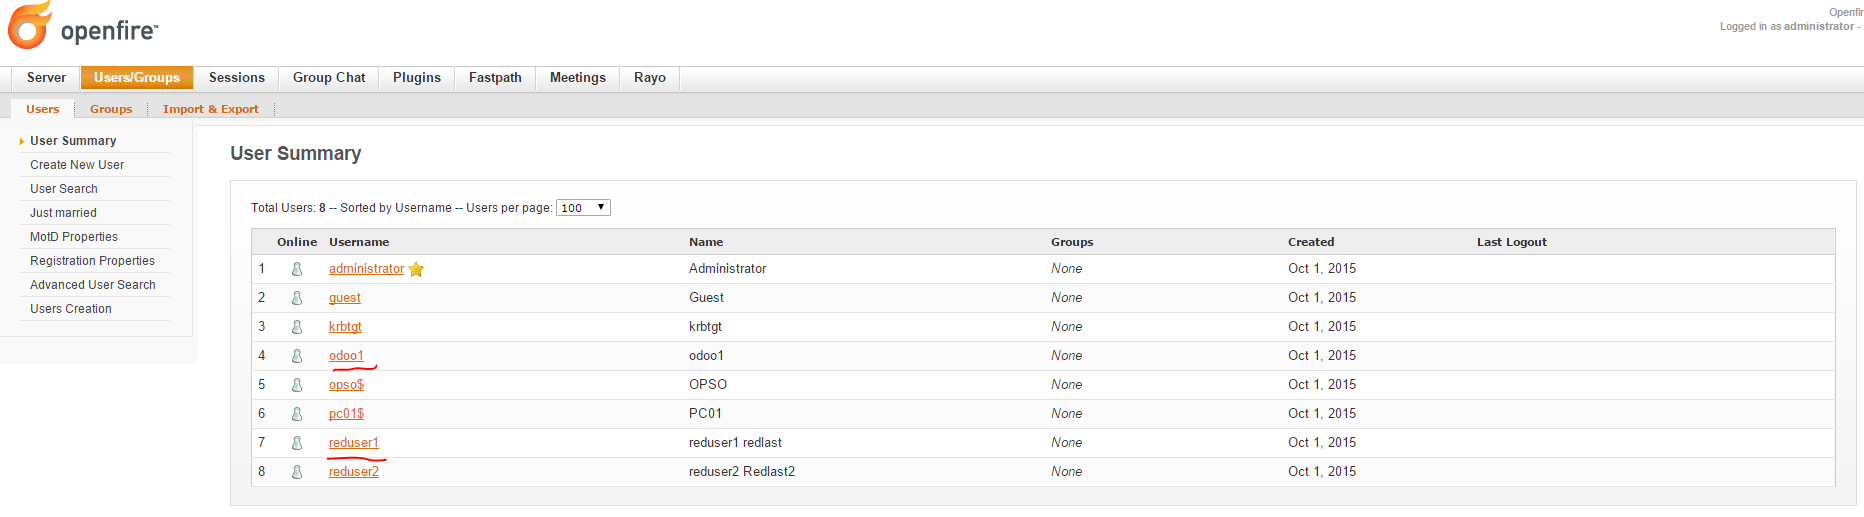
For test purpose if you select Users/Groups -> Users, under User Summary you will see the users from Active Directory:
For test between users read the article OpenFire Jitsi as Skype(desktop sharing) and Temviewer(remote control).


