
What is Cisco Packet tracer ?
Cisco Packet tracer is a powerful network simulator tool which used to trained while we do some Cisco certifications. It provides us good Interface view for every router’s, and networking devices which with many options same as using the physical machines we can use unlimited devices in a network. We can create multiple network in single project to get trained like a professionals. packet tracer will provide us with simulated application layer protocols such as HTTP, DNS, Routing with RIP, OSPF, EIGRP etc.
Now it has been released including ASA 5505 firewall with command line configurations. Packet tracer available commonly for Windows, but not for Linux distributions. Here we can download and get install Cisco package tracer.
Newly released version of Cisco packet tracer:
The next Cisco Packet Tracer version will be Cisco Packet Tracer 6.2 currently it’s under development.
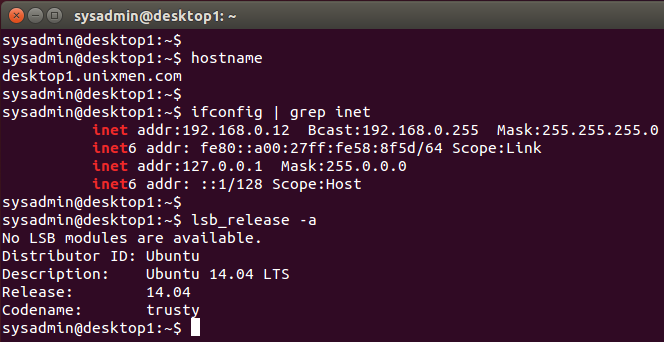
My Environment Setup:
Hostname : desktop1.unixmen.com
IP address : 192.168.0.167
Operating system : Ubuntu 14.04 LTS Desktop
The following commands will give the above details.
hostname
ifconfig | grep inet
lsb_release -a
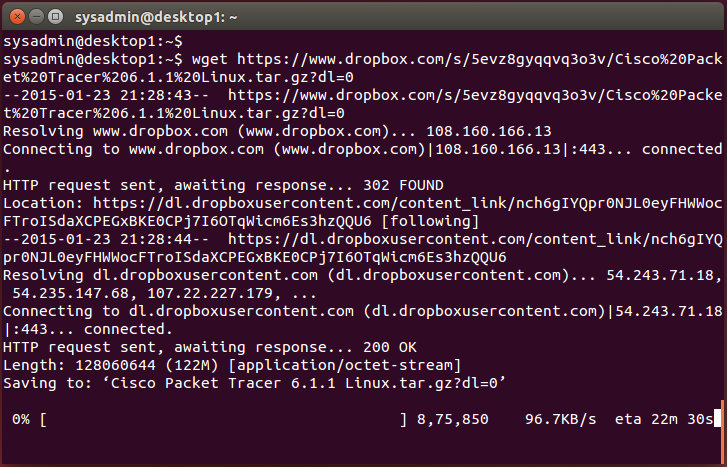
Step 1: First we need to download the Cisco Packet tracer.
To download Packet Tracer from official website we need to have a token, sign into Cisco NetSpace and select CCNA > Cisco Packet Tracer from the Offerings menu to start the download. If we don’t have a token you can get from below link which i have uploaded in Dropbox.
Official Website: https://www.netacad.com/
Many of them don’t have a token to download packet tracer. For that i have uploaded it in dropbox you can get packet tracer from below URL.
Download Cisco Packet Tracer 6.1.1
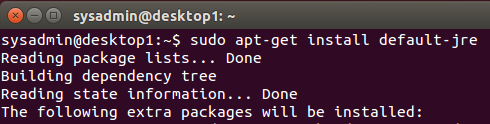
Step 2: Install Java:
To get install packet tracer we need to have install Java, To get install java we can use the default or add the PPA repository and update the package cache to get install java.
Install the default jre using
sudo apt-get install default-jre
(or)
Use the below step to get install Java Run-time and set the Environment.
Download Java from official website : Download Java
tar -zxvf jre-8u31-linux-x64.tar.gz
sudo mkdir -p /usr/lib/jvm
sudo mv -v jre1.8.0_31 /usr/lib/jvm/
cd /usr/lib/jvm/
sudo update-alternatives --install "/usr/bin/java" "java" "/usr/lib/jvm/jre1.8.0_31/bin/java" 1
sudo update-alternatives --set "java" "/usr/lib/jvm/jre1.8.0_31/bin/java"
Set the environment for java by editing the profile file and add the location. While we adding in profile file java will available for every user’s in our machine.
sudo vi /etc/profile
Add the following entries to the bottom of your /etc/profile file:
export JAVA_HOME=/usr/lib/jvm/jre1.8.0_31
export PATH=$PATH:/usr/java/jre1.8.0_31/bin
Run the below command to activate java path immediately.
. /etc/profile
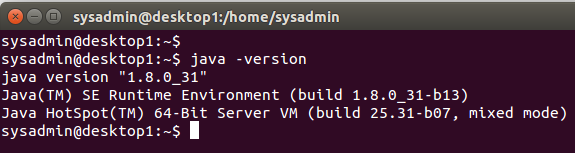
Check for the Java version and Environment:
echo $JAVA_HOME
java -version
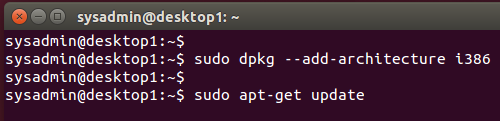
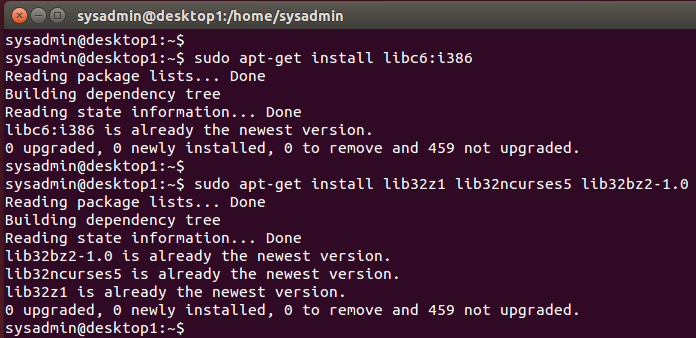
Step 3: Enable 32bit architecture support:
For Packet tracer we need some of 32bit packages. To get install 32bit packages we need to install some of dependencies using below commands.
sudo dpkg --add-architecture i386
sudo apt-get update
sudo apt-get install libc6:i386
sudo apt-get install lib32z1 lib32ncurses5 lib32bz2-1.0
sudo apt-get install libnss3-1d:i386 libqt4-qt3support:i386 libssl1.0.0:i386 libqtwebkit4:i386 libqt4-scripttools:i386
Step 4: Extract and install the package:
Extract the downloaded package using tar command.
mv Cisco\ Packet\ Tracer\ 6.1.1\ Linux.tar.gz\?dl\=0 Cisco_Packet_tracer.tar.gz
tar -zxvf Cisco_Packet_tracer.tar.gz

Navigate to the extracted directory:
cd PacketTracer611Student
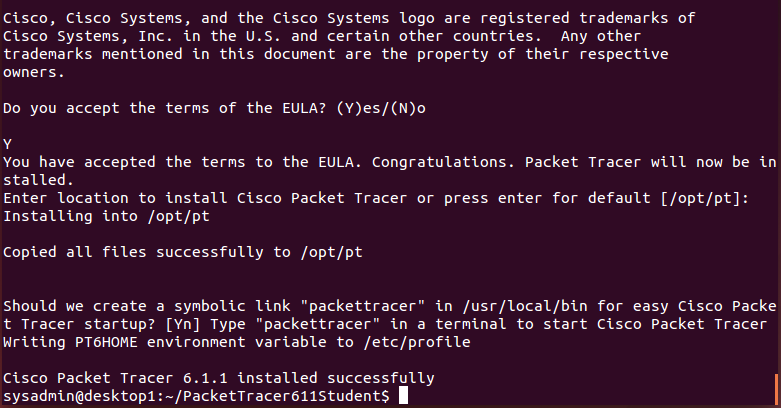
Now it’s time to start the installation , Installation is very simple and just take few seconds.
sudo ./install

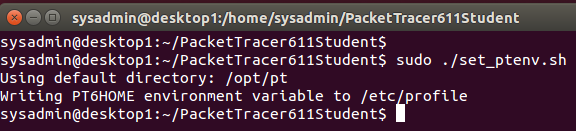
To working with Package tracer we need to set the environment for that Cisco have provided the environment script, We need to run the script using root user to set the environment variable.
sudo ./set_ptenv.sh
That’s it for installation step’s. next we need to create a Desktop Icon for Packet tracer.
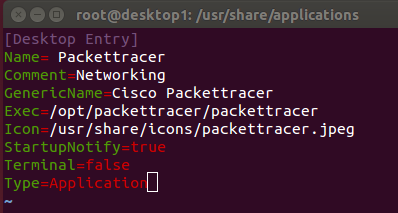
Create the Desktop Icon by creating desktop file under.
sudo su
cd /usr/share/applications
sudo vim packettracer.desktop

Append the Below content to the file using vim editor or your favourite one.
 [Desktop Entry]
 Name= Packettracer
 Comment=Networking
 GenericName=Cisco Packettracer
 Exec=/opt/packettracer/packettracer
 Icon=/usr/share/icons/packettracer.jpeg
 StartupNotify=true
 Terminal=false
 Type=Application
Save and quit using wq!
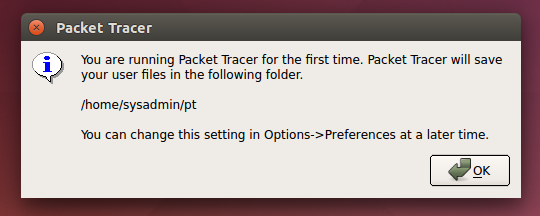
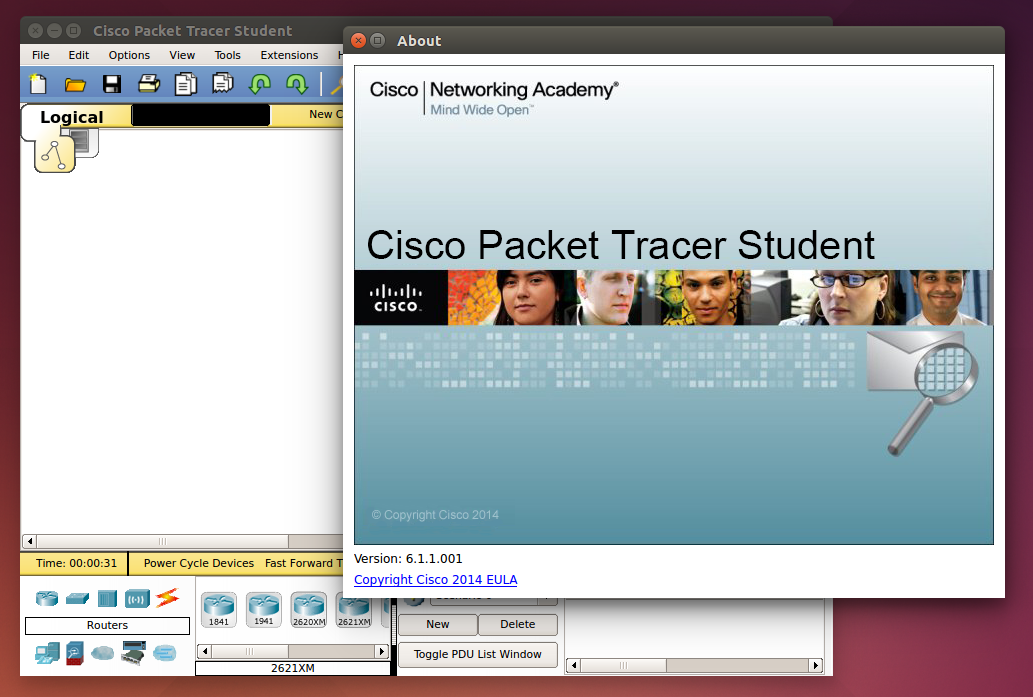
Step 5: Run the packet tracer
sudo packettracer
That’s it we have successfully installed the packet tracer in Linux, These above steps are suitable for every debian based Linux distributions.
Resources:
Home page: Netacad
Conclusion:
Here we have seen how to install packet tracer in Linux distribution, Hope you have find a way to get install your favorite Simulator in Linux.


