
Introduction
If you want to create your own website Free , Fast and Easy, Wordpress is the best solution for your needs.
WordPress is the most popular CMS (content management system) on the internet. It allows you to easily set up flexible blogs and websites on top of a MySQL backend with PHP processing. WordPress has seen incredible adoption and is a great choice for getting a website up and running quickly.
This tutorial explains the process of installing WordPress 4.0 on Ubuntu 14.10 in the form of a simple-to-follow guide.
Prerequisites
This guide is based on Ubuntu 14.10 server. Before you start install of WordPress, you need to to have LAMP server (Apache, PHP, and MySQL) configured on your website server.
sudo apt-get install apache2 mysql-server php5 libapache2-mod-php5 php5-gd php5-curl libssh2-php
While Apache, PHP, and MySQL have already been installed, you can start the installation.
Database and MySQL user creation for your website
You start the creation of your website by setting up the mysql user and database.
You need to have the password of the MySQL root user.
Log into MySQL:
mysql -u root -p
After successful authenticated, you need to create the database for the WordPress Website.
CREATE DATABASE wordpress;
The database Name is wordpress. You will need this information later.
Now, you should create the database administrator.
CREATE USER wordpressadmin@localhost IDENTIFIED BY 'wordpresspassword';
Next, you need to give this user permissions to administer the database you created.
GRANT ALL PRIVILEGES ON wordpress.* TO wordpressadmin@localhost;
You need to flush the privilege information to disk to activate the new MySQL user:
FLUSH PRIVILEGES;
exit
PHP and Apache Configuration
Next, you need to make some configuration in PHP Apache file.
Open the Apache PHP configuration file with sudo privileges in your text editor:
sudo nano /etc/php5/apache2/php.ini
Search for the expose_php directive and the allow_url_fopen directive and set them both to “Off”:
. . .
expose_php = Off
. . .
allow_url_fopen = Off
. . .
Save and close the file when you are finished.
Next, you need to enable rewrite functionality for your Apache server.
To enable mod_rewrite modules, type this command:
sudo a2enmod rewrite
This module will be enable the next after reboot of Apache service.
But before restarted the Apache service, you need to make some change in the virtual host file to allow the use of an .htaccess file.
So, open the virtual host file which contain the actual rewrite rules and will include by default in the WordPress installation.
sudo nano /etc/apache2/sites-enabled/000-default.conf
In this file, you must add a directory block that redirect into your web root.
Maybe you need also ServerName directive to point to your domain name and change the ServerAdmin directive to reflect a valid email address:
<VirtualHost *:80>
   ServerAdmin admin@your-domain.com
   DocumentRoot /var/www/html/
   ServerName your-domain.com
   ServerAlias www.your-domain.com
      <Directory /var/www/html/>
         Options Indexes FollowSymLinks MultiViews
         AllowOverride All
	 Order allow,deny
         allow from all
      </Directory>
   ErrorLog /var/log/apache2/your-domain.com-error_log
   CustomLog /var/log/apache2/your-domain.com-access_log common
</VirtualHost>
After finished this step, to enable the new configuration you need to restart your Apache server .
sudo service apache2 restart
Download and Install the WordPress Files
Now that our system is ready, we can start the installation of WordPress into our web root.
Back on your server, change to your tmp directory and use wget to download the project file using the link you copied:
cd /tmp
wget http://wordpress.org/latest.tar.gz
once the download is finished start the process by , extracting the application directory using this command:
tar xzvf wordpress*
Now, you need to copy the newly extracted directory structure into the web root directory of your server and it’s recommended to use the rsync utility to safely copy all of the files into the web root directory of your server. We are using the dot in this command to specify the current directory. This is necessary in order to copy some hidden files that we need:
cd wordpress*
sudo rsync -avz . /var/www/html
Now you can check that has been copied, into the web root directory.
cd /var/www/html
ls -lsa
Make the document root and the WordPress files and directories in it writable by the Apache service which is running as user ‘www-data’ and group ‘www-data’ by executing the following command:
chown www-data:www-data -R /var/www/html/
Configure WordPress
Edit WordPress config.php file,
cp /var/www/html/wp-config-sample.php /var/www/html/wp-config.php
vi /var/www/html/wp-config.php
Find and update the database name, database username, mysql root password as follows:
[...]
// ** MySQL settings - You can get this info from your web host ** //
/** The name of the database for WordPress */
define('DB_NAME', 'wordpress');
/** MySQL database username */
define('DB_USER', 'wordpressadmin');
/** MySQL database password */
define('DB_PASSWORD', 'wordpresspassword');
/** MySQL hostname */
define('DB_HOST', 'localhost');
[...]
Before we start the web configuration part, we need to restart Apache service.
service apache2 restart
Install WordPress
Now that you have your files in place and your software is configured, you can complete the installation through the web interface.
In your web browser, navigate to your server’s domain name or public IP address:
http://server_domain_name_or_IP
You will see the WordPress initial configuration page, where you will create an initial administrator account:
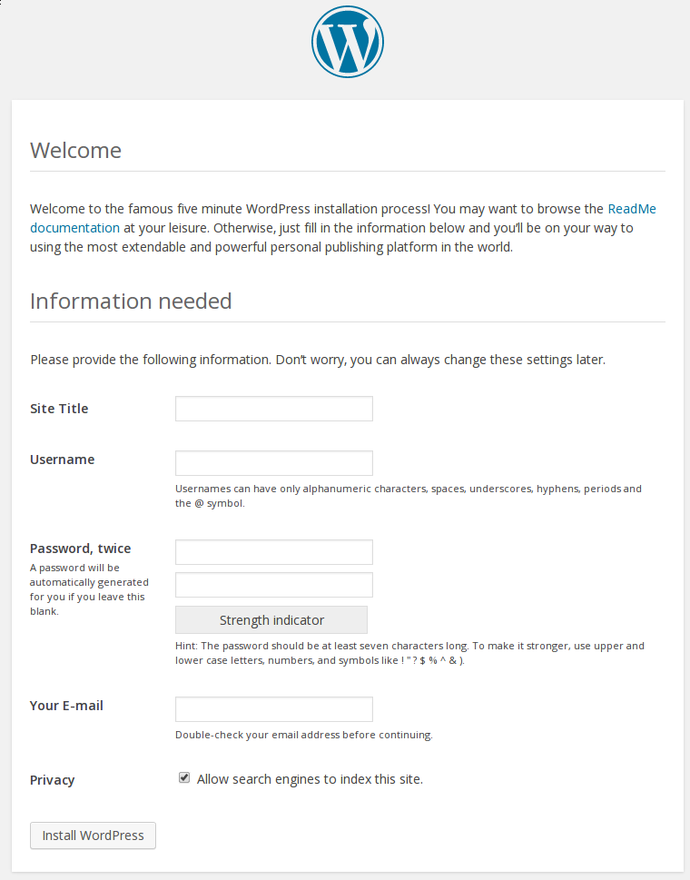
Fill out the information for the site and the administrative account you wish to make. When you are finished, click on the install button at the bottom.
WordPress will confirm the installation, and then ask you to log in with the account you just created:
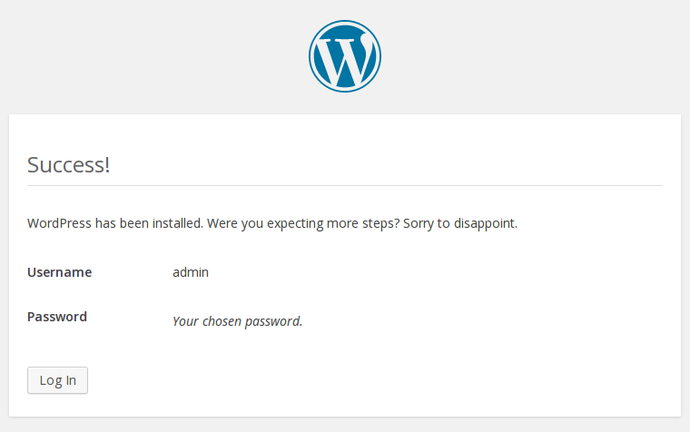
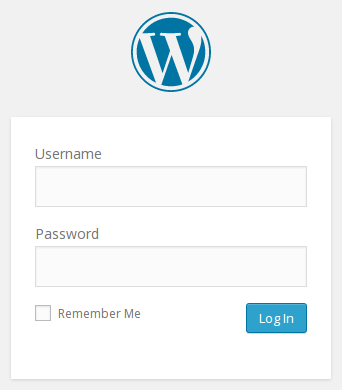
Hit the button at the bottom and then fill out your account information:
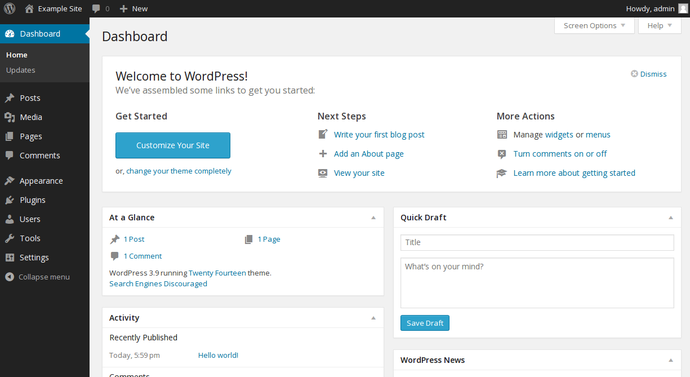
Congratulations, You have successfully completed the WordPress installation.
You can now visit your site by going to your domain name or ip address of your server.
That’s it.
Congratulations! You have created your own website on your Ubuntu 14.10!
Have you successfully installed WordPress, and created your first website? Ok, now what next? Check our following article to further secure your WordPress.
Cheers!


