
ProcessWire is an award winning Open Source Content Management System(CMS) and Content Management Framework written in PHP. ProcessWire has been developed by Ryan Cramer since 2003. From 2003 to 2007 it was developed under the name Dictator CMS. From 2007–2010 it was developed as ProcessWire 1.x, and from 2010 to now, it has been developed as ProcessWire 2.x.
In this tutorial let us build a basic website using ProcessWire On CentOS 6.4. This how-to was tested on CentOS 6.4, although it will work on many RPM based distro’s. My test box hostname and IP address are server.unixmen.com and 192.168.1.201/24.
Prerequisites
Your server should have installed with following prerequisites. For more details about the software requirements visit this page.
First you have to install and configure LAMP server. Visit any one of the following links to setup LAMP server.
– Install LAMP (Apache, MariaDB, PHP) Server On CentOS 6.4.
– Install LAMP (Apache, MySQL, PHP) Server On CentOS 6.4.
Now install the following prerequisites too.
# yum install php-mcrypt php-pdo php-cli php-mysql php-gd php-xml libtool-ltdl mhash mcrypt -y
Create Database and User for ProcessWire
For instance, here i am going to create a database called “processdb” and database user called “processuser” with password “centos” for ProcessWire. You can define database and user as per your liking.
# mysql -u root -p
Enter password:
Welcome to the MariaDB monitor.  Commands end with ; or \g.
Your MariaDB connection id is 3
Server version: 5.5.31-MariaDB MariaDB Server

Copyright (c) 2000, 2013, Oracle, Monty Program Ab and others.

Type 'help;' or '\h' for help. Type '\c' to clear the current input statement.

MariaDB [(none)]> create database processdb;
Query OK, 1 row affected (0.02 sec)

MariaDB [(none)]> GRANT ALL ON processdb.* TO processuser@localhost IDENTIFIED BY 'centos';
Query OK, 0 rows affected (0.01 sec)

MariaDB [(none)]> flush privileges;
Query OK, 0 rows affected (0.00 sec)

MariaDB [(none)]> exit
Bye
Firewall and SELinux Settings
Allow the apache default port “80″ through iptables/router. Edit file /etc/sysconfig/iptables,
# vi /etc/sysconfig/iptables
Add the following lines.
-A INPUT -p udp -m state --state NEW --dport 80 -j ACCEPT
-A INPUT -p tcp -m state --state NEW --dport 80 -j ACCEPT
Now restart the iptables service.
# /etc/init.d/iptables restart
I don’t want to mess up with SELinux, so here i disabled it.
Edit file /etc/selinux/config,
# vi /etc/selinux/config
Set the SELINUX value as “disabled”.
SELINUX=disabled
Restart the system to take effect the saved changes.
Getting ProcessWire
Download the latest version here. I downloaded and saved it in my current directory.
Extract it using command:
# unzip ProcessWire-master.zip
Move the extracted files to apache root folder.
# cp -fr ProcessWire-master/. /var/www/html/
Change to the /var/www/html/ directory. Rename the folder “site-default” to “site” and set read/write permissions for the following files/folders as shown below.
# cd /var/www/html/
# mv site-default/ site/
# chmod -R 777 site/assets/
# chmod -R 777 site/config.php
Rename the file “.htaccess.txt” to “.htaccess” in the processwire directory.
# mv htaccess.txt .htaccess
Begin Installation
Navigate to http://domain-name/ or http://ip-address/ from your browser. The following screen should appear. Click on Get Started link to continue.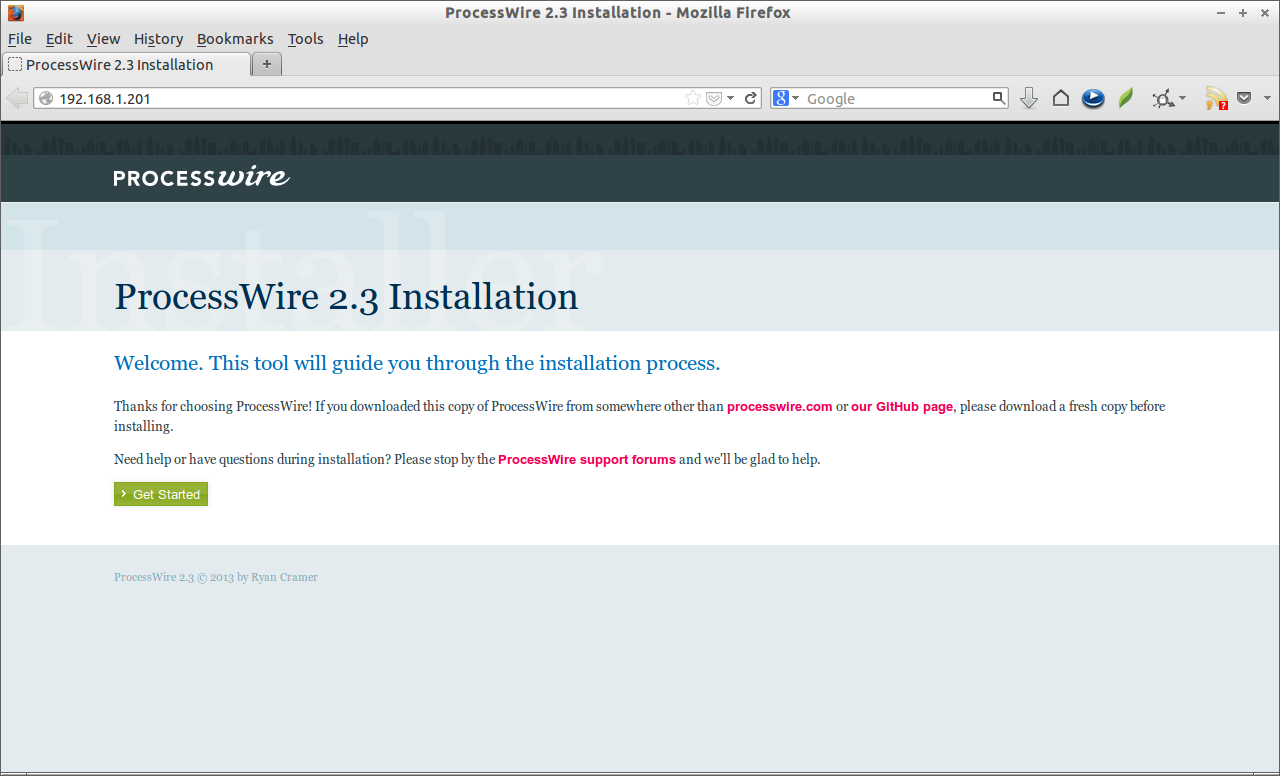 In the next window, the installer will do the compatibility check. If all seems OK, click on Continue to Next Step link. If not, make sure that you’ve installed all prerequisites and PHP modules.
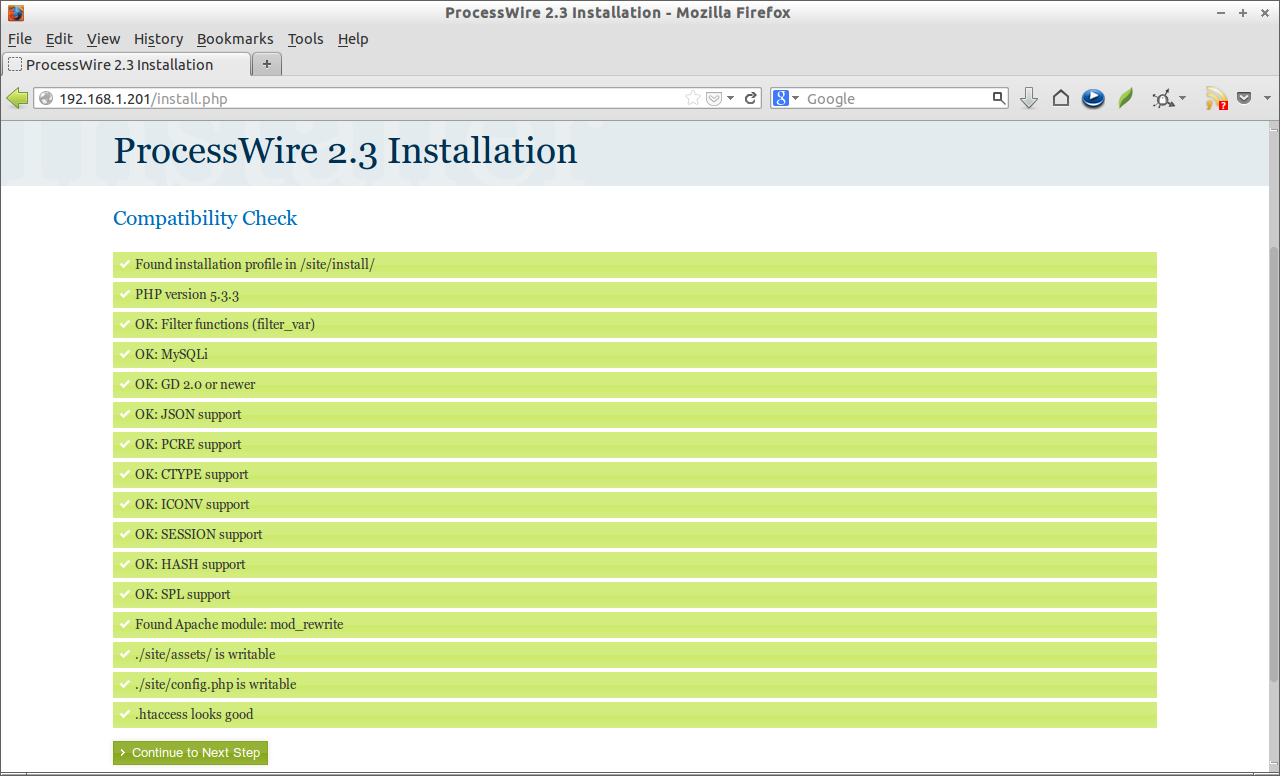 Enter the MySQL database, user and password. Click next.
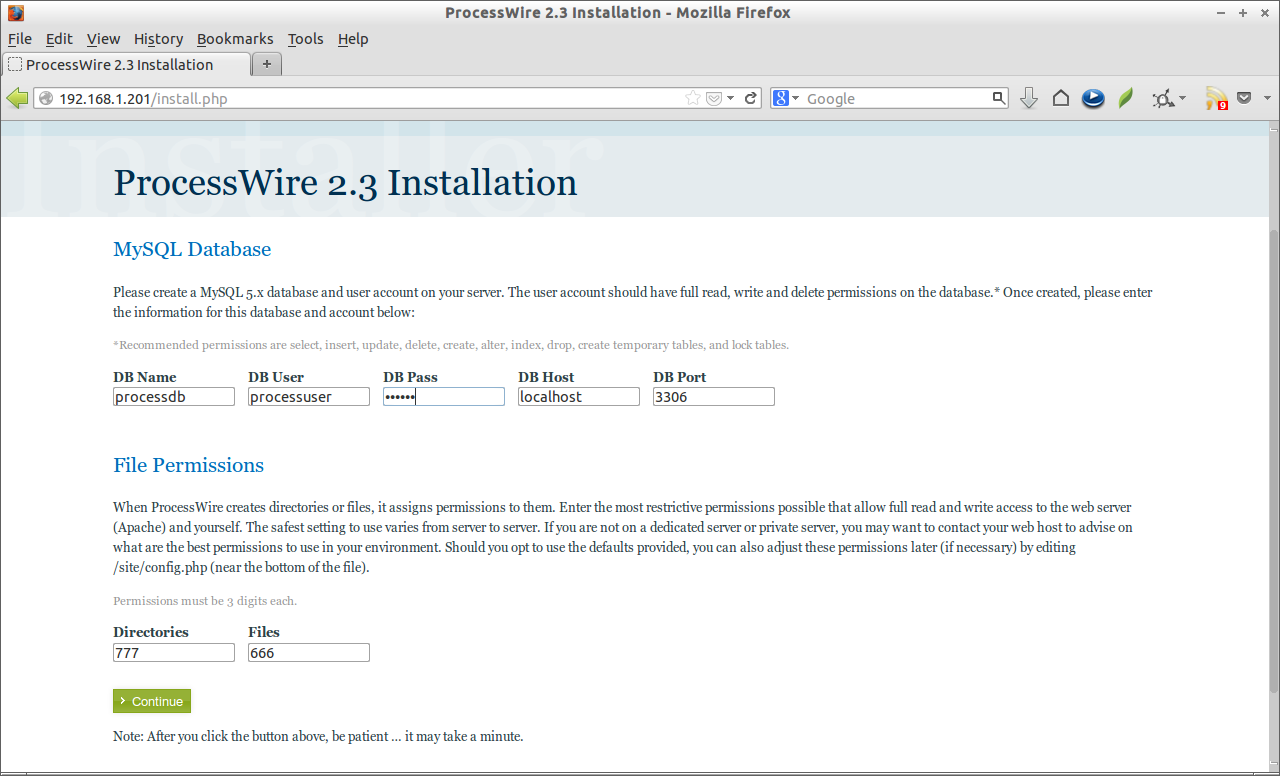 Now the database and user has been tested and saved successfully. Enter your admin user password and administration mail id. Click Create Account to continue.
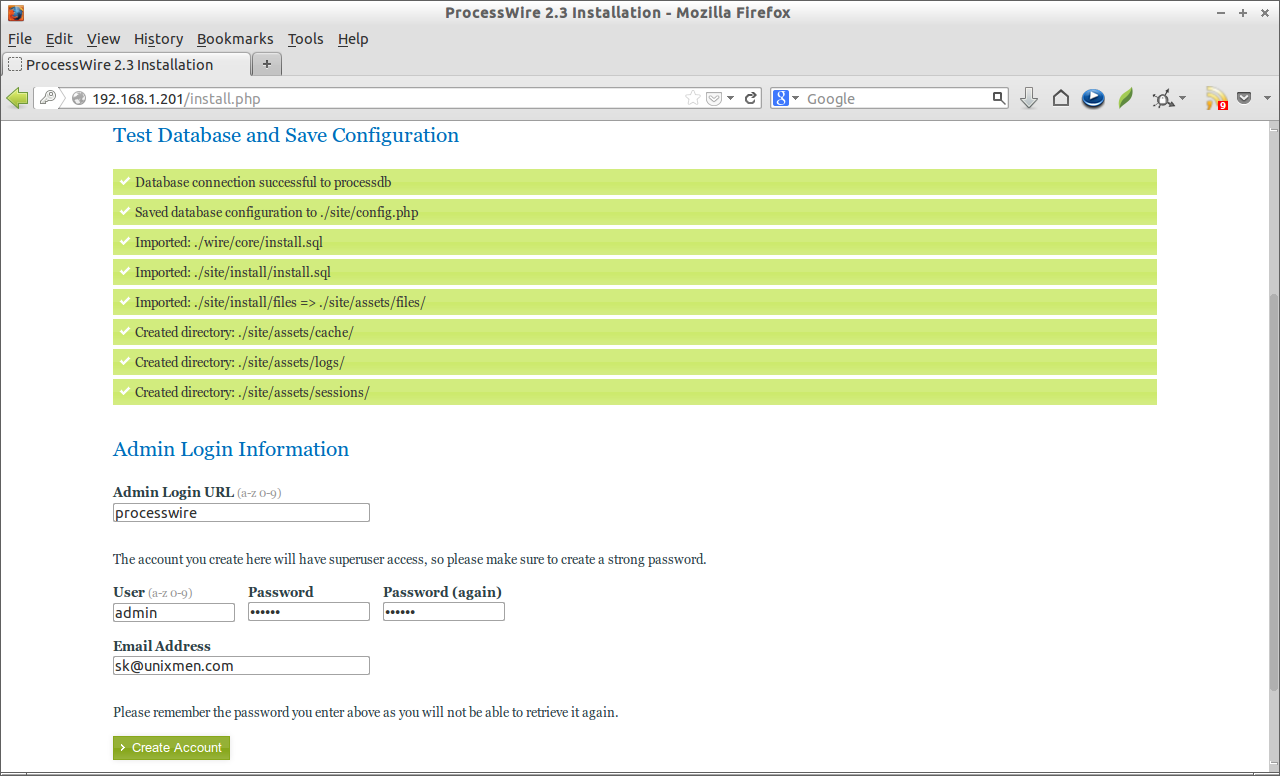 Finally ProcessWire admin account has been created and ProcessWire is ready to host your websites.
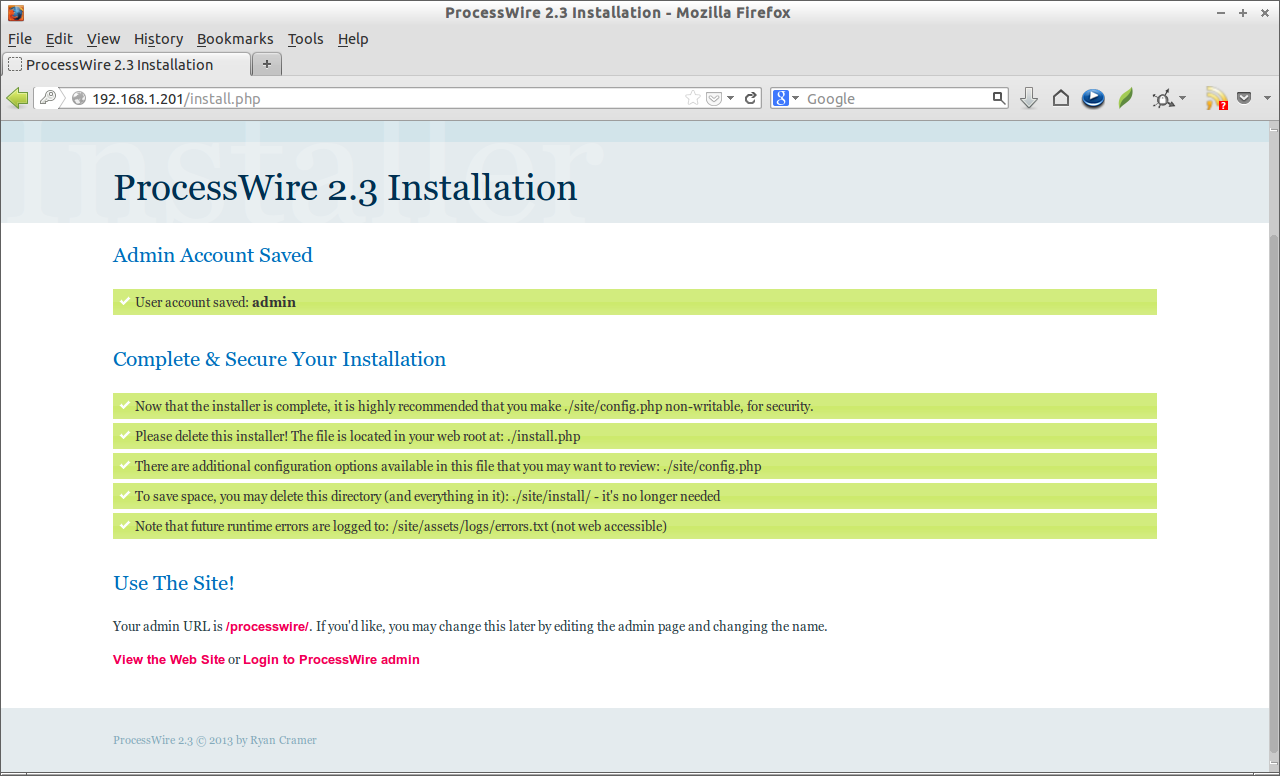 Now you will be able to access processwire admin console using URL http://domain-name/processwire/ and processwire example website using URL http://domain-name/processwire.
Post Installation
Change the permission of config.php file to secure processwire and remove “install” directory.
# chmod 444 /var/www/html/site/config.php
# rm -f /var/www/html/install.php
# rm -fr /var/www/html/site/install/
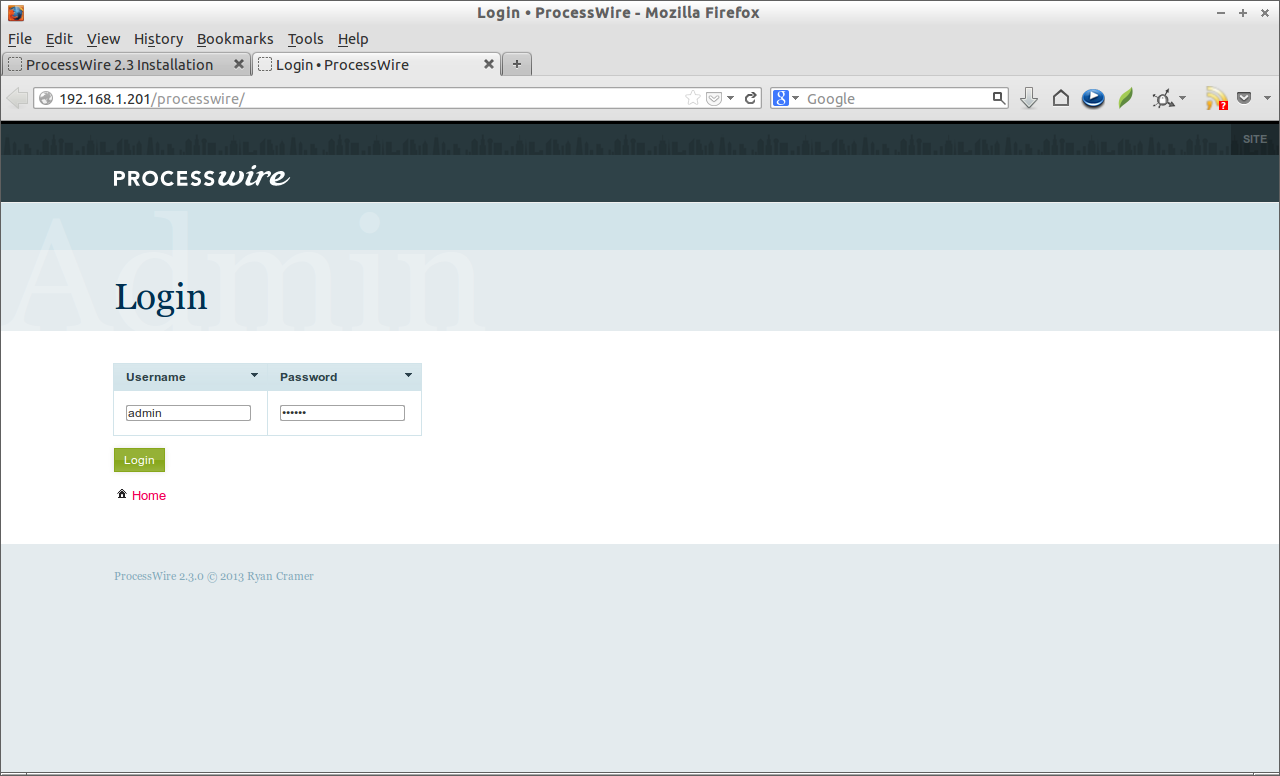
Access ProcessWire Admin Console
Navigate to http://domain-name/processwire or http://ip-address/processwire from your browser. Enter the username as “admin” and the password you have created during installation.
 This is how your admin console page looks.
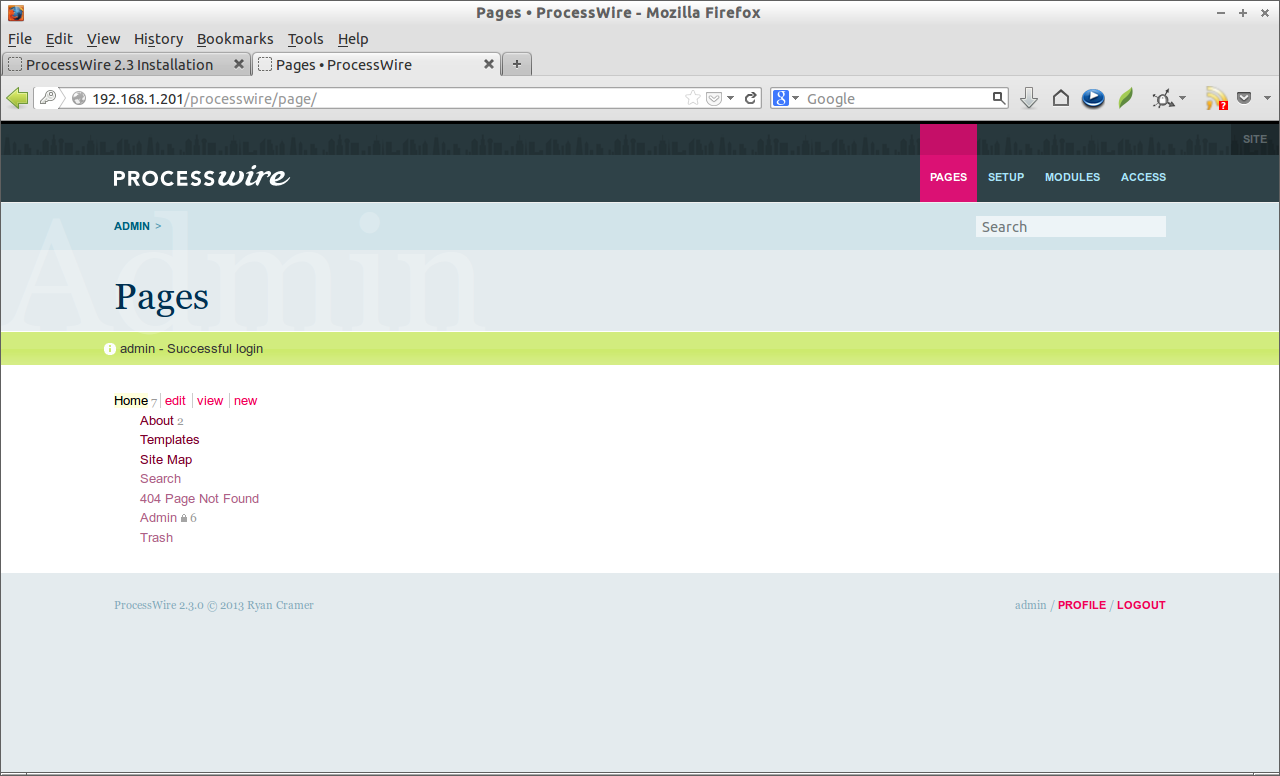 In the admin console page, you can create additional pages, install modules, setup templates, create/delete/manage users, set permissions to the users and so on.
Access ProcessWire Example Site
Navigate to http://domain-name/ or http://ip-address/ from your browser. The example site will look like below.
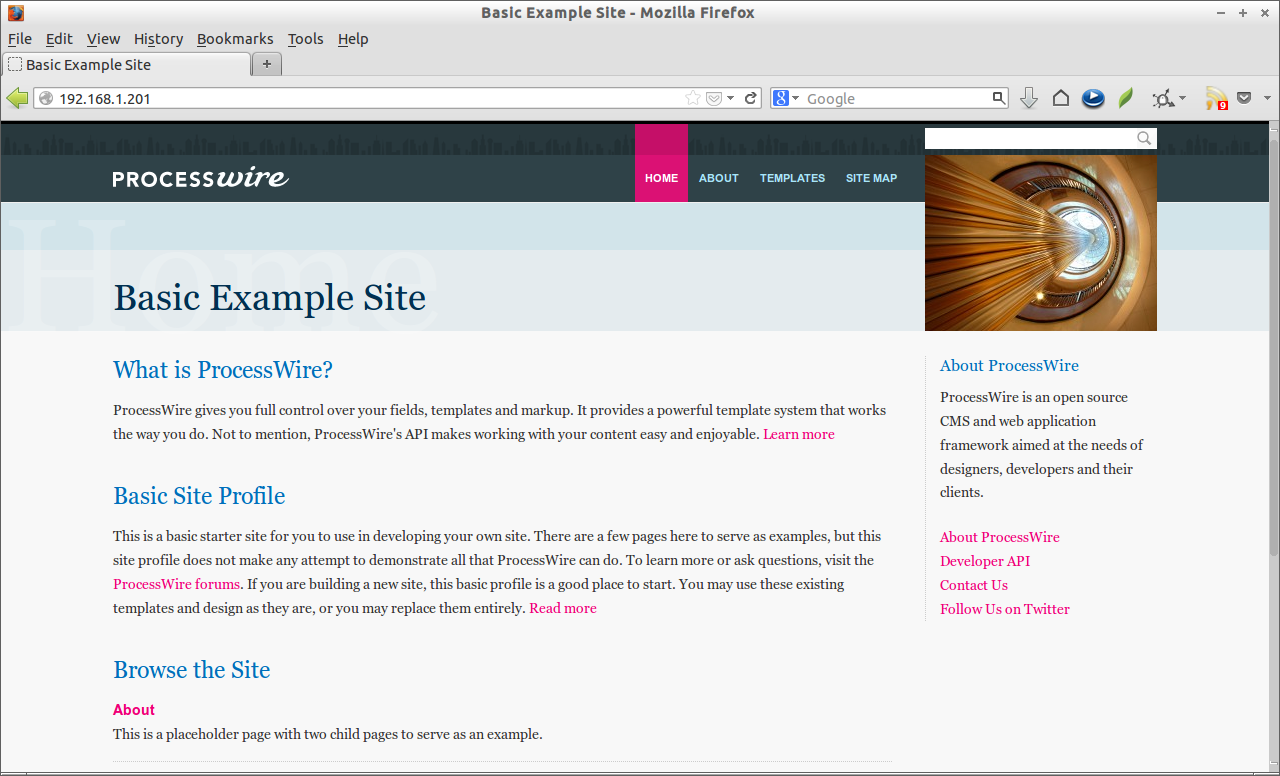 Now ProcessWire CMS is ready to use. Add contents and publish your website.


